
Introduction to Crispy Fried Pickles
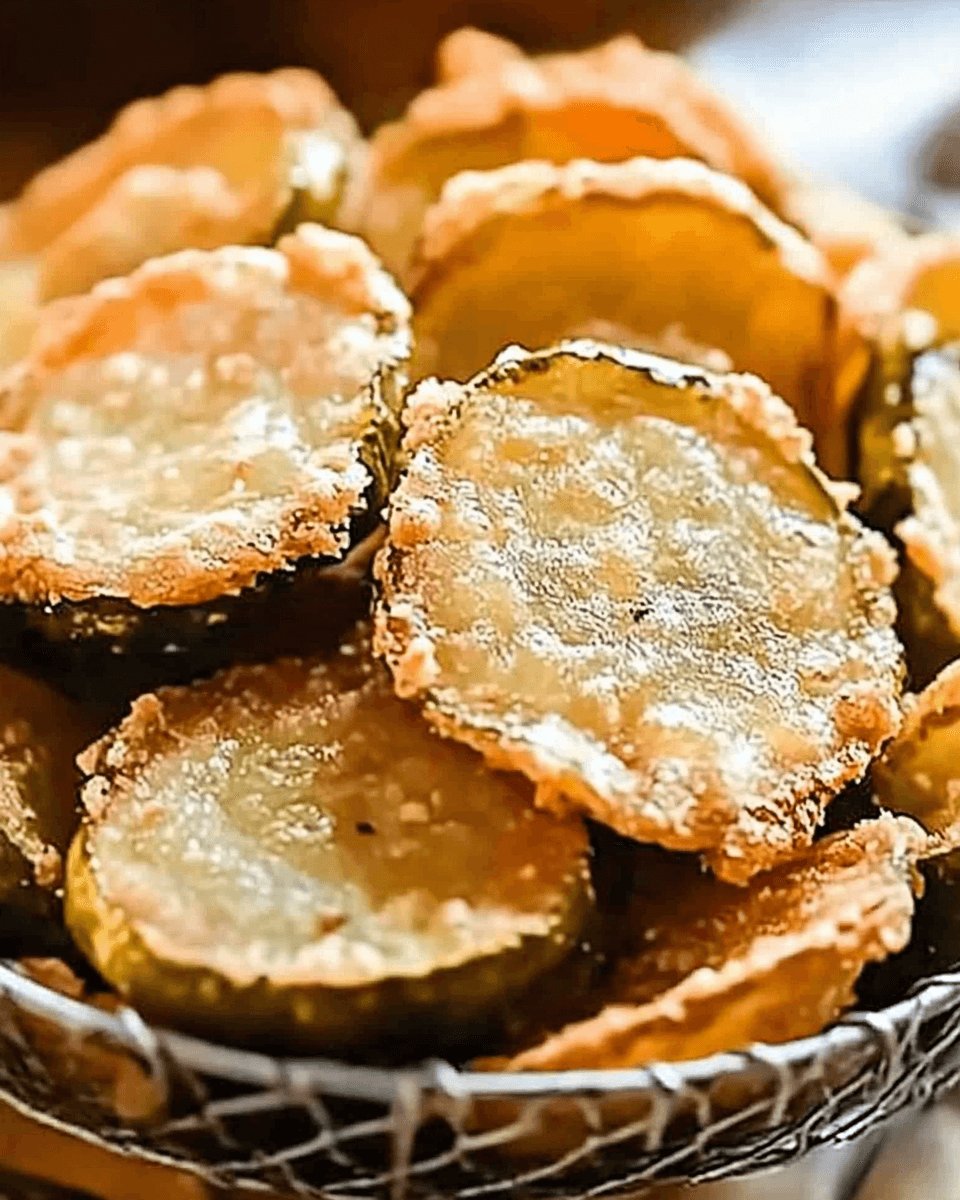
There’s something undeniably satisfying about a crunchy snack that brings back memories of summer picnics and backyard barbecues. Crispy Fried Pickles are just that—a delightful treat that’s perfect for any occasion. Whether you’re looking for a quick solution for a busy day or a dish to impress your friends during game night, these pickles deliver on flavor and fun. With their golden-brown crust and tangy bite, they’re sure to become a favorite in your home. Let’s dive into this easy recipe that will have everyone asking for seconds!
Why You’ll Love This Crispy Fried Pickles
These Crispy Fried Pickles are not just a snack; they’re a game-changer. They come together in just 25 minutes, making them perfect for those busy weeknights or spontaneous gatherings. The crunch of the panko breadcrumbs paired with the tangy pickles creates a flavor explosion that’s hard to resist. Plus, they’re versatile enough to serve as an appetizer or a side dish, ensuring everyone leaves the table happy!
Ingredients for Crispy Fried Pickles
Gathering the right ingredients is key to making the best Crispy Fried Pickles. Here’s what you’ll need:
- Dill pickle slices: The star of the show! Choose your favorite brand or make your own for a personal touch.
- All-purpose flour: This forms the first layer of the breading, giving the pickles a solid base to hold onto.
- Garlic powder: Adds a savory depth that complements the tanginess of the pickles.
- Onion powder: Enhances the flavor profile with a subtle sweetness.
- Paprika: For a hint of smokiness and a pop of color.
- Cayenne pepper: Optional, but it brings a nice kick if you like a bit of heat.
- Salt and black pepper: Essential for seasoning and balancing flavors.
- Eggs: These help the breading stick to the pickles, creating that perfect crunch.
- Buttermilk: Adds moisture and a slight tang, making the breading even more delicious.
- Breadcrumbs: Panko is preferred for its extra crunch, but regular breadcrumbs work too.
- Vegetable oil: For frying, choose a neutral oil with a high smoke point.
For those looking for alternatives, you can easily swap out the all-purpose flour and breadcrumbs for gluten-free options. If you want to spice things up, consider adding a teaspoon of your favorite hot sauce to the egg mixture. Exact measurements for these ingredients can be found at the bottom of the article, ready for printing!
How to Make Crispy Fried Pickles
Now that you have your ingredients ready, let’s get cooking! Making Crispy Fried Pickles is a straightforward process that will have your kitchen smelling amazing. Follow these simple steps, and you’ll be enjoying this crunchy delight in no time.
Prepare the Pickles
Start by draining the dill pickle slices. This step is crucial. Excess moisture can lead to soggy pickles, and nobody wants that! After draining, pat them dry with paper towels. This will help the breading stick better and ensure a crispy finish.
Create the Breading Mixture
In a shallow bowl, combine the all-purpose flour, garlic powder, onion powder, paprika, cayenne pepper, salt, and black pepper. Mix it well. This flavorful blend will give your pickles a delicious kick. Set this bowl aside for the next step.
Set Up the Dipping Stations
Now, let’s get organized! In another bowl, whisk together the eggs and buttermilk until smooth. This mixture will help the breading adhere to the pickles. In a third bowl, pour in the breadcrumbs. I recommend using panko for that extra crunch. You’re all set for the breading process!
Bread the Pickles
Take each pickle slice and dip it into the flour mixture first. Make sure it’s coated evenly. Then, move it to the egg mixture, letting any excess drip off. Finally, roll it in the breadcrumbs, pressing gently to ensure they stick. Repeat this for all the pickle slices. The more even the coating, the crunchier the result!
Heat the Oil
In a deep skillet or pot, heat about 2 inches of vegetable oil over medium-high heat. You want the oil to reach around 350°F. A good test is to drop a small piece of bread in; if it sizzles, you’re ready to fry. Be careful not to overcrowd the pan, as this can lower the oil temperature.
Fry the Pickles
Once the oil is hot, carefully add the breaded pickle slices in batches. Fry them for about 2-3 minutes on each side, or until they turn golden brown and crispy. Keep an eye on them; they can go from perfect to burnt quickly!
Drain and Serve
Using a slotted spoon, remove the fried pickles from the oil and place them on a paper towel-lined plate. This will help drain any excess oil. Serve them immediately with your favorite dipping sauce, like ranch or spicy mayo. Trust me, they won’t last long!
Tips for Success
- Make sure to dry the pickle slices thoroughly to achieve maximum crunch.
- Use a thermometer to check the oil temperature for perfect frying.
- Fry in small batches to maintain oil temperature and ensure even cooking.
- Experiment with different spices in the breading for unique flavors.
- Serve immediately for the best texture; they’re best enjoyed fresh!
Equipment Needed
- Deep skillet or pot: A heavy-bottomed pan works well if you don’t have a deep fryer.
- Slotted spoon: Essential for removing the pickles from hot oil.
- Bowls: Three shallow bowls for the breading process.
- Paper towels: For draining excess oil after frying.
Variations
- Spicy Fried Pickles: Add more cayenne pepper or a splash of hot sauce to the egg mixture for an extra kick.
- Cheesy Pickles: Mix grated Parmesan cheese into the breadcrumb mixture for a savory twist.
- Herbed Pickles: Incorporate dried herbs like dill or oregano into the flour mixture for added flavor.
- Gluten-Free Option: Substitute all-purpose flour and breadcrumbs with gluten-free alternatives for a deliciously crispy result.
- Sweet and Spicy: Use sweet pickle slices instead of dill for a unique flavor combination that balances sweetness with heat.
Serving Suggestions
- Dipping sauces: Pair your Crispy Fried Pickles with ranch dressing, spicy mayo, or a zesty remoulade for an extra flavor boost.
- Side dishes: Serve alongside crispy fries or a fresh coleslaw to balance the crunch.
- Presentation: Arrange on a platter with fresh herbs for a pop of color and a gourmet touch.
FAQs about Crispy Fried Pickles
Can I make Crispy Fried Pickles ahead of time?
While these pickles are best enjoyed fresh, you can prepare the breaded pickles in advance and store them in the fridge. Just fry them right before serving for that perfect crunch!
What dipping sauces pair well with Crispy Fried Pickles?
Ranch dressing is a classic choice, but don’t shy away from spicy mayo or even a tangy remoulade. The right sauce can elevate your pickles to a whole new level!
Can I use other types of pickles?
Absolutely! While dill pickles are traditional, feel free to experiment with bread and butter pickles or even spicy pickles for a different flavor profile.
How do I store leftover fried pickles?
If you have any leftovers (which is rare!), store them in an airtight container in the fridge. Reheat them in the oven to regain some of that crispy texture.
Are Crispy Fried Pickles healthy?
They’re definitely a treat! While they’re not the healthiest option, you can make them a bit lighter by using less oil or baking instead of frying. Enjoy them in moderation!
Final Thoughts
Making Crispy Fried Pickles is more than just a cooking endeavor; it’s a delightful experience that brings joy to your kitchen. The aroma of frying pickles fills the air, creating an inviting atmosphere that draws everyone in. Each bite delivers a satisfying crunch, paired with that tangy pickle flavor we all love. Whether you’re sharing them with friends during a game or enjoying them solo on a quiet evening, these pickles are sure to bring a smile to your face. So, roll up your sleeves and dive into this crunchy delight—you won’t regret it!
PrintCrispy Fried Pickles: Discover This Crunchy Delight!
- Total Time: 25 minutes
- Yield: Serves 4
- Diet: Vegetarian
Description
Crispy Fried Pickles are a delicious and crunchy snack made by breading and frying dill pickle slices until golden brown.
Ingredients
- 1 cup dill pickle slices (about 12-15 slices)
- 1 cup all-purpose flour
- 1 teaspoon garlic powder
- 1 teaspoon onion powder
- 1 teaspoon paprika
- 1/2 teaspoon cayenne pepper (optional for heat)
- 1/2 teaspoon salt
- 1/2 teaspoon black pepper
- 2 large eggs
- 1 cup buttermilk
- 2 cups breadcrumbs (preferably panko for extra crunch)
- Vegetable oil for frying
Instructions
- Begin by draining the pickle slices and patting them dry with paper towels to remove excess moisture.
- In a shallow bowl, combine the flour, garlic powder, onion powder, paprika, cayenne pepper, salt, and black pepper.
- In another bowl, whisk together the eggs and buttermilk until well combined.
- Place the breadcrumbs in a third shallow bowl.
- Dip each pickle slice first into the flour mixture, coating it evenly, then into the egg mixture, and finally into the breadcrumbs, pressing gently to adhere.
- Heat about 2 inches of vegetable oil in a deep skillet or pot over medium-high heat until it reaches 350°F.
- Carefully add the breaded pickle slices to the hot oil in batches, frying for about 2-3 minutes on each side or until golden brown and crispy.
- Use a slotted spoon to remove the fried pickles and place them on a paper towel-lined plate to drain excess oil.
- Serve immediately with your favorite dipping sauce, such as ranch or spicy mayo.
Notes
- For a gluten-free version, substitute all-purpose flour and breadcrumbs with gluten-free alternatives.
- Add a teaspoon of your favorite hot sauce to the egg mixture for an extra kick of flavor.
- Prep Time: 15 minutes
- Cook Time: 10 minutes
- Category: Appetizer
- Method: Frying
- Cuisine: American
Nutrition
- Serving Size: 1 serving
- Calories: 250
- Sugar: 2g
- Sodium: 500mg
- Fat: 15g
- Saturated Fat: 2g
- Unsaturated Fat: 13g
- Trans Fat: 0g
- Carbohydrates: 20g
- Fiber: 1g
- Protein: 6g
- Cholesterol: 100mg