
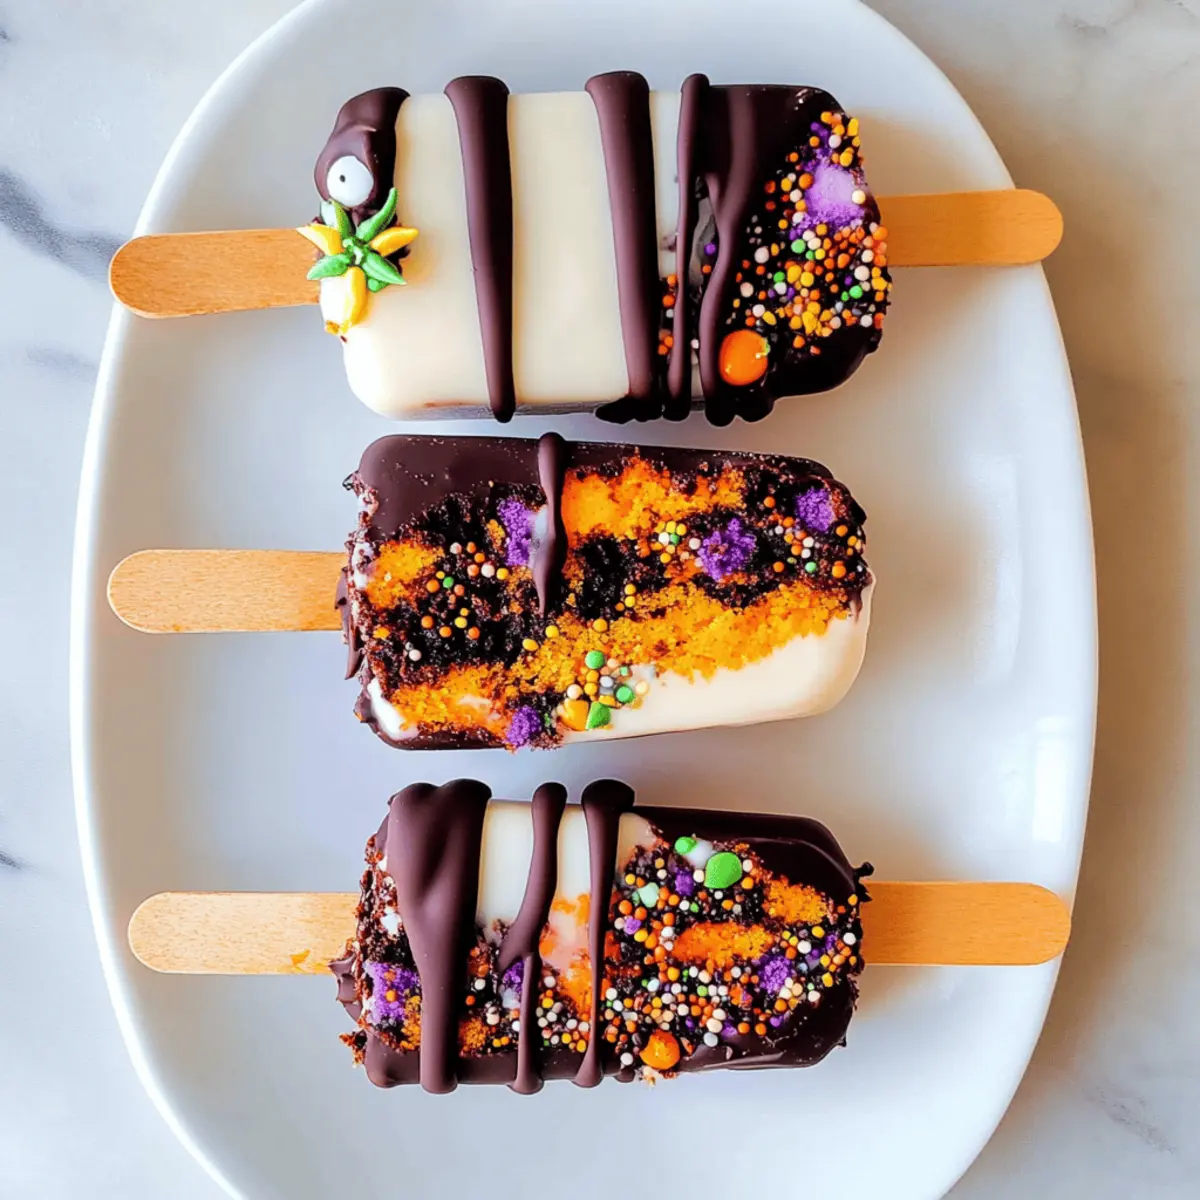
As the air turns crisp and the leaves paint the world in shades of orange and gold, it’s time to dig into something truly enchanting: Halloween Cakesicles! These delightful treats transform leftover cake into sweet, spooky goodness, making them an easy and creative way to repurpose yesterday’s dessert into a festive favorite. Picture this: your little ones eagerly helping in the kitchen, crafting these whimsical treats covered in luscious chocolate. Not only are these cakesicles kid-friendly, but they also make for a spectacular centerpiece at any Halloween gathering. Whether you’re celebrating with friends or treating the family, these easy Halloween Cakesicles are sure to cast a delicious spell. Ready to bring some magic to your kitchen?
Why Are Halloween Cakesicles So Fun?
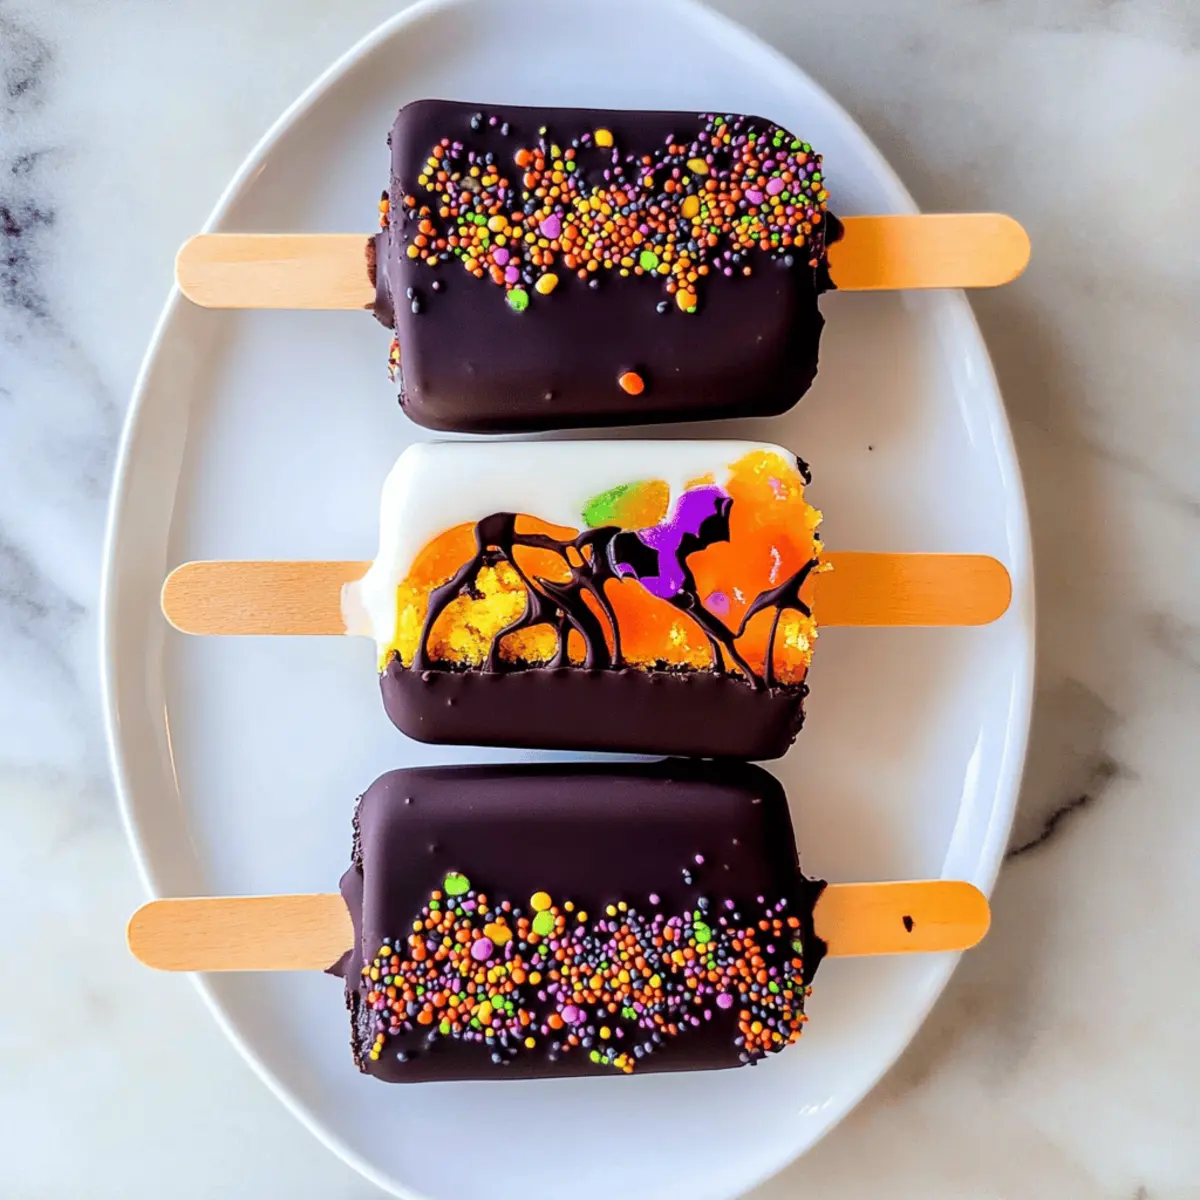
Creativity Unleashed: Halloween Cakesicles offer a unique way to express yourself in the kitchen! With endless decorating possibilities, you can let your imagination run wild—think colorful sprinkles or eerie drizzles!
Family Bonding: Involve the kids in this easy process; they’ll love molding and decorating these spooky treats. What a fantastic way to create lasting memories together!
Versatile Treats: Want to swap flavors? No problem! These cakesicles can be crafted using any leftover cake or frosting remnants, making them a delightfully adaptable dessert.
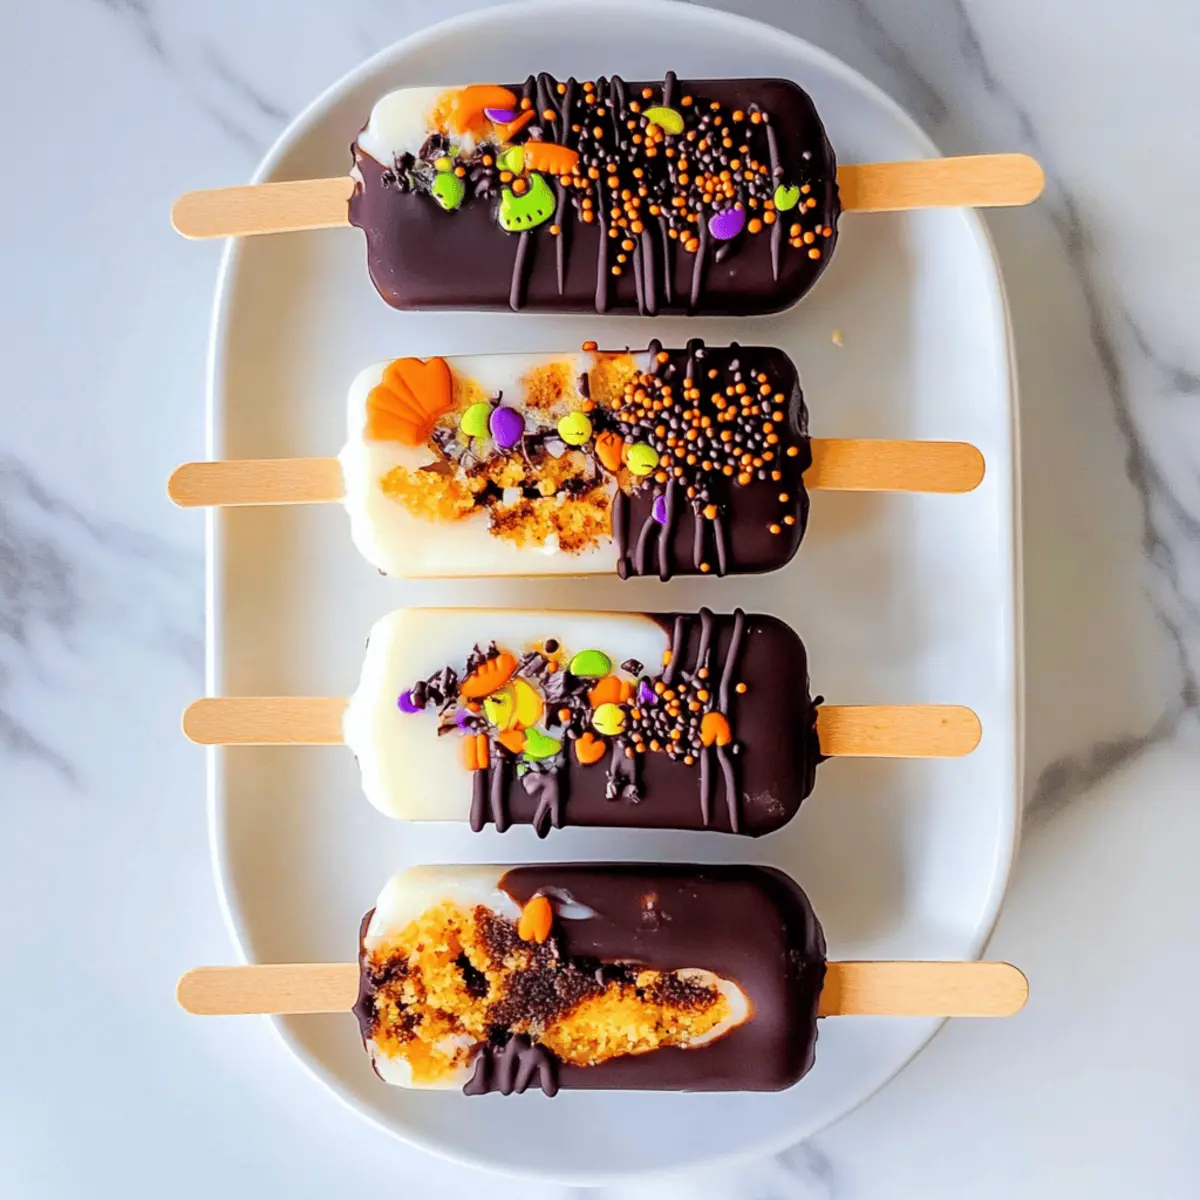
Visual Appeal: They’re not just delicious; they’re also visually stunning! Plated on a festive platter, these cakesicles become an eye-catching centerpiece for any Halloween party.
Quick and Easy: With simple steps and readily available ingredients, these cakesicles can be whipped up in no time, making this a hassle-free cooking adventure! Give them a try and discover how easy it is to transform leftovers into a treat that will enchant your guests!
Halloween Cakesicles Ingredients
Simple and Fun Ingredients: Here’s what you’ll need to create these delightful Halloween Cakesicles!
- Leftover Cake or Cupcakes – The heart of the cakesicles; any flavor will work, but consider using red velvet for a spooky twist.
- Frosting – Acts as a binder for the cake crumbs; choose store-bought for convenience or homemade for a personal touch.
- Coating Chocolate or Candy Melts – This delicious coating brings everything together; opt for high-quality chocolate for a smooth finish.
- Food Coloring (optional) – Brighten up your treats with vibrant colors; oil-based colors are the best choice for decorating.
- Cakesicle Molds – Essential for shaping; have 2-3 molds ready if you’re making a larger batch to keep the fun going!
Step‑by‑Step Instructions for Halloween Cakesicles
Step 1: Prepare the Cake Mixture
Start by crumbling your leftover cake or cupcakes into a large mixing bowl. Use your hands or a food processor to create fine crumbs, ensuring there are no large pieces remaining. Gradually add frosting to the crumbs—about a half cup at a time—and mix until fully combined; the mixture should hold together when pressed.
Step 2: Mold the Mixture
Take your cakesicle molds and pack the cake mixture tightly into each cavity, using about two tablespoons per mold. Press firmly to ensure there are no air pockets, which will help maintain shape once frozen. Smooth the tops with a spatula for an even finish, making note to fill each mold to the top for optimal results.
Step 3: Insert Sticks
Carefully insert wooden sticks into the center of each filled mold, pressing them about halfway in. If desired, wiggle them slightly to ensure they stay put once frozen. Place the filled molds in the freezer for at least 1-2 hours, or until the cakesicles are completely firm and can hold their shape when removed.
Step 4: Melt Coating Chocolate
While the cakesicles freeze, melt your coating chocolate or candy melts. Use a microwave-safe bowl and heat in 30-second intervals, stirring in between, until smooth and fully melted. Ensure the chocolate is fluid but not too hot to touch; you want a nice dipping consistency for your Halloween Cakesicles.
Step 5: Coat the Cakesicles
Once the cakesicles are completely frozen, gently remove them from the molds, being careful not to break them. Dip each cakesicle into the melted chocolate, rotating to ensure it’s fully coated. Let the excess chocolate drip back into the bowl, and place the coated cakesicles on a parchment-lined baking sheet for easy cleanup.
Step 6: Decorate (optional)
Before the chocolate hardens, add some festive flair to your cakesicles! Sprinkle colorful decorations, spooky designs, or even drizzle with contrasting melted chocolate to create fun patterns. Be creative—this is where your Halloween Cakesicles come to life with excitement and personality.
Step 7: Chill
Once decorated, refrigerate the cakesicles for about 30 minutes, or until the chocolate coating is set and firm to the touch. This final chilling step ensures a delightful crunch when biting into your treats and makes for an easier serving experience. Prepare to showcase your delicious creations!
Make Ahead Options
These Easy Halloween Cakesicles are perfect for busy home cooks looking to simplify their meal planning! You can prepare the cake mixture up to 24 hours in advance by crumbling your leftover cake and mixing it with frosting, then storing it tightly covered in the refrigerator. Additionally, once you’ve packed the mixture into the molds, freeze them for up to 3 days before dipping in chocolate. To maintain quality, ensure the cakesicles are wrapped properly to prevent freezer burn. When you’re ready to serve, simply melt your coating chocolate, dip the frozen cakesicles, decorate as desired, and chill until set—you’ll have delightful treats ready with minimal effort!
Expert Tips for Halloween Cakesicles
-
Tightly Packed Mixture: Ensure the cake mixture is packed tightly into the molds to prevent them from falling apart during dipping. This keeps your Halloween Cakesicles sturdy and intact.
-
Quality Coating Chocolate: Using high-quality chocolate enhances the flavor and texture of your cakesicles; it melts smoothly and sets nicely. Avoid cheap coatings for the best results.
-
Avoid Overheating: When melting candy melts, work in short bursts to prevent overheating. Too much heat can cause clumping, making it difficult to achieve a smooth coating.
-
Creative Decoration: Let your imagination run wild with decorations! Use vibrant sprinkles, festive designs, or colored drizzles that suit the Halloween theme—this adds charm and visual appeal.
-
Cool Before Dipping: Allow your frozen cakesicles to rest for a minute at room temperature before dipping in chocolate. This helps maintain their shape and makes the coating easier.
What to Serve with Easy Halloween Cakesicles
These fun, festive treats will shine even brighter when paired with delicious sides and sweet delights that enhance the Halloween spirit.
- Spooky Fruit Salad: A mix of seasonal fruits like oranges, pomegranates, and blackberries offers a refreshing contrast to the rich cakesicles while adding a pop of color.
- Pumpkin Spice Latte: Warm, comforting, and oh-so-autumnal, this drink will complement the chocolatey sweetness of your cakesicles—plus, it’s perfect for chilly evenings!
- Ghoulish Cheese Platter: An assortment of cheeses, crackers, and spooky-themed accompaniments like ghost-shaped cut-outs can create a charming starter, balancing flavors beautifully.
- Crispy Pumpkin Chips: Lightly salted and crunchy, these autumn-inspired chips provide a satisfying texture, contrasting against the softness of the cakesicles—ideal for snacking!
- Witch’s Brew Hot Chocolate: A rich, velvety drink topped with whipped cream and sprinkles will enchant the little ones and enhance the festive mood as they indulge in their cakesicles.
- Chocolate-Covered Pretzels: These sweet-and-salty snacks are an easy addition, their crispy texture and delightful taste pairing well with the fudgy interior of the cakesicles.
- Mummy Dogs: Mini hot dogs wrapped in crescent dough and baked to look like mummies make for a whimsical savory treat that complements your Halloween celebration!
- Caramel Apple Slices: Dipping tart apple wedges into smooth caramel sauce provides a sweet, crunchy snack that contrasts beautifully with the rich cakesicles.
- Ghostly Marshmallow Pops: Simple and fun to make, these pops also bring in another layer of sweetness while celebrating the Halloween theme on the dessert table!
Storage Tips for Halloween Cakesicles
-
Room Temperature: These cakesicles can be left at room temperature for up to 2 hours during parties. However, if you’re entertaining, keep them cool for the best flavor.
-
Fridge: Keep leftover Halloween cakesicles in an airtight container in the refrigerator for up to a week. They’ll retain their delightful fudgy texture!
-
Freezer: For longer storage, wrap each cakesicle in plastic wrap and place them in a freezer-safe bag or container. They can be frozen for up to 3 months.
-
Reheating: To enjoy frozen cakesicles, simply take them out and let them thaw in the fridge for a few hours. They’ll be just as delightful as when first made!
Halloween Cakesicles: Fun Variations
Feel free to play around with your Halloween Cakesicles to create something totally unique and delicious!
-
Flavor Swap: Use any leftover cake flavors, like chocolate or pumpkin spice, to elevate the taste. Seasonal swaps add a delightful twist!
The versatility of flavors lets you discover new favorites. Imagine a spiced pumpkin cakesicle dressed up for Halloween! -
Frosting Alternatives: Try different frostings, like rich cream cheese or fluffy whipped cream. Each adds its own depth to the cakesicles.
A tangy cream cheese frosting works beautifully with red velvet cake, creating a magical flavor combination perfect for the season. -
Chocolate Coating Variations: Go for white, dark, or even milk chocolate to suit your taste preference. Each type brings something special to the table!
Consider adding a hint of flavoring, like peppermint extract in the dark chocolate, for a memorable, festive treat. -
Add Crunch: Toss in some crushed nuts or cookie crumbs to the cake mixture for an exciting texture twist.
This added crunch breaks through the creamy sweetness, making each bite a delightful surprise that your family won’t forget. -
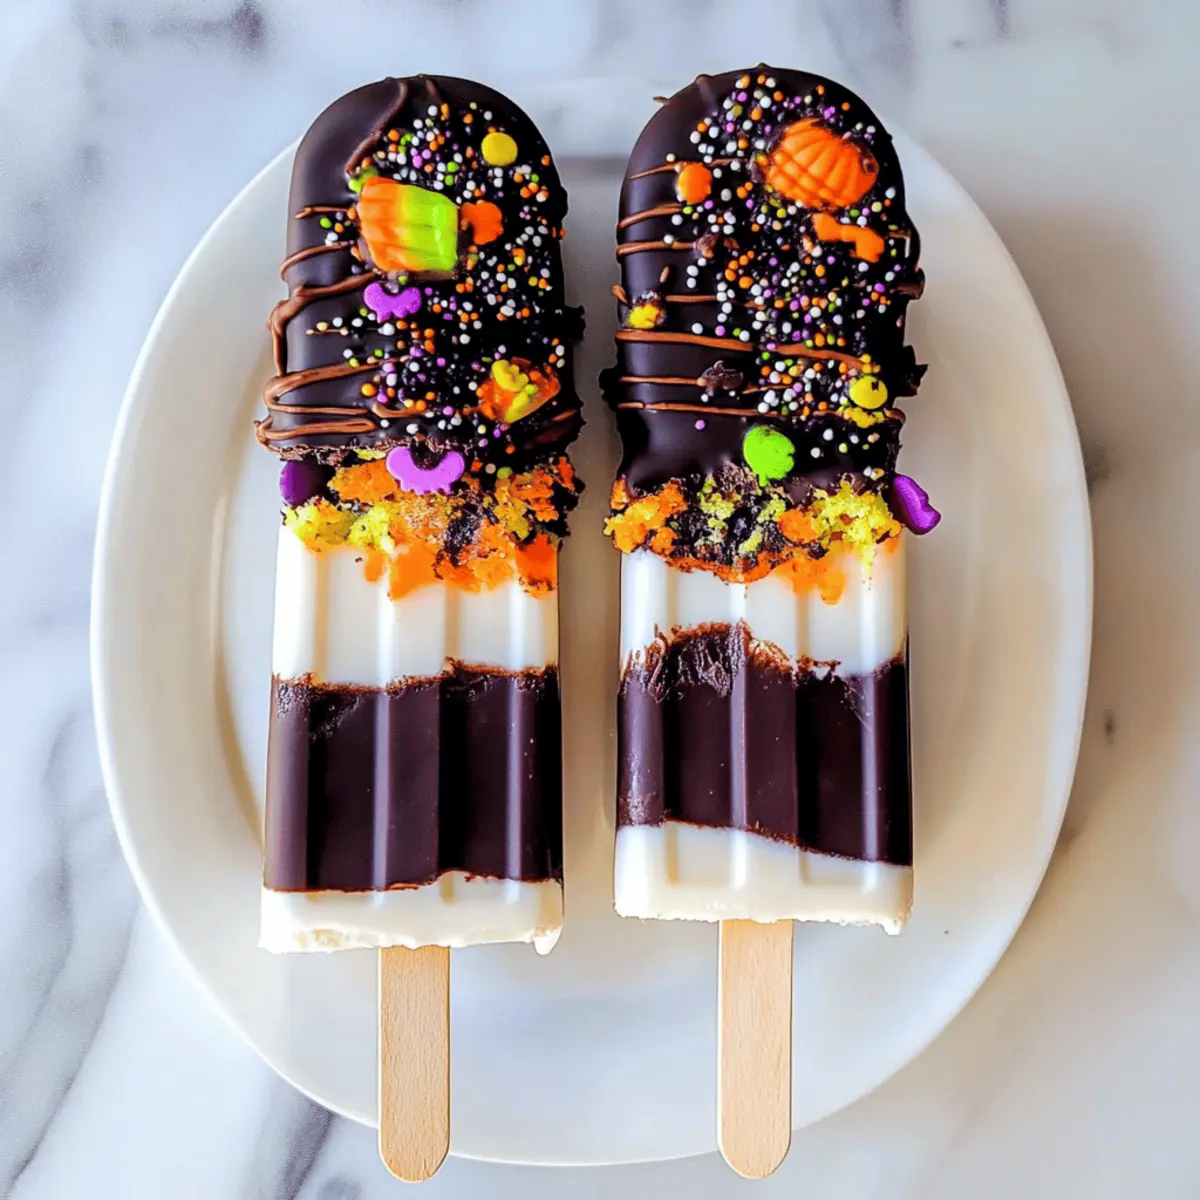
Colorful Decorators: Use vibrant food coloring in your chocolate coating to create spooky shades, like eerie greens or ghostly whites.
Layered effects can turn your cakesicles into vibrant works of art, captivating both kids and adults alike at your Halloween gathering! -
Heat it Up: Spice things up with a sprinkle of cinnamon or cayenne in the cake mixture for a subtle kick that surprises the taste buds.
Just a pinch can transform your cakesicles into something extraordinary—watch out for those who dare to take a bite! -
Fragrant Infusions: Incorporate some citrus zest, like orange or lemon, into your cake mixture for a refreshing contrast.
This bright flavor profile pairs wonderfully with the sweetness of chocolate, creating a lively balance that is hard to resist! -
Fun Shapes: Slide into creativity by using different molds, such as pumpkin or ghost-shaped silicone molds, for a playful presentation.
Your spooky cakesicles will not only taste amazing; they’ll also be aesthetically pleasing, perfect for sharing on social media.
For added inspiration on how to use up your leftover treats creatively, check out our guide on repurposing cake scraps.
Easy Halloween Cakesicles Recipe FAQs
What type of leftover cake works best for Halloween Cakesicles?
Absolutely! Any leftover cake or cupcakes will work wonderfully to create Halloween Cakesicles. For a spooky theme, I highly recommend using red velvet, chocolate, or vanilla cake. Just be sure the cake isn’t overly dry; a moist cake will yield a better texture in the final treats.
How should I store leftover Halloween Cakesicles?
After you’ve enjoyed some cakesicles, the rest can be easily stored! Keep them in an airtight container in the refrigerator for up to a week. Just a heads up, they’ll be best enjoyed within the first few days for maximum freshness and flavor.
Can I freeze Halloween Cakesicles? If so, how?
Of course! Freezing is a great way to extend their life. Simply wrap each cakesicle tightly in plastic wrap and place them in a freezer-safe bag or container. They can be frozen for up to 3 months. When you’re ready to enjoy, thaw them in the fridge for several hours or overnight for the best results.
What should I do if my cakesicles fall apart when dipping in chocolate?
No problem! If your cakesicles are falling apart, it might be due to the cake mixture not being packed tightly enough into the molds. To prevent this, during the molding step, make sure to press really firmly to eliminate air pockets. If they still seem delicate, try freezing them for an extra hour before dipping to help them hold their shape better.
Are there any dietary considerations for Halloween Cakesicles?
Very! If you or your guests have allergies, consider using gluten-free cakes or dairy-free frosting to accommodate dietary needs. Just be sure to check the ingredients of your coating chocolate or candy melts, as some brands may contain allergens. You can even use vegan chocolate for an entirely plant-based treat!
Easy Halloween Cakesicles to Delight Your Kids and Guests
Ingredients
Equipment
Method
- Crumble leftover cake or cupcakes into fine crumbs in a large mixing bowl. Gradually add frosting until fully combined.
- Pack the cake mixture tightly into the cakesicle molds, smoothing the tops for an even finish.
- Insert wooden sticks into the center of each filled mold and freeze for at least 1-2 hours.
- Melt the coating chocolate or candy melts in a microwave-safe bowl, stirring until smooth.
- Remove the frozen cakesicles from the molds and dip each one in the melted chocolate, ensuring full coverage.
- Before the chocolate sets, add colorful decorations and let them cool on a parchment-lined baking sheet.
- Refrigerate the decorated cakesicles for about 30 minutes until the chocolate coating is firm.