
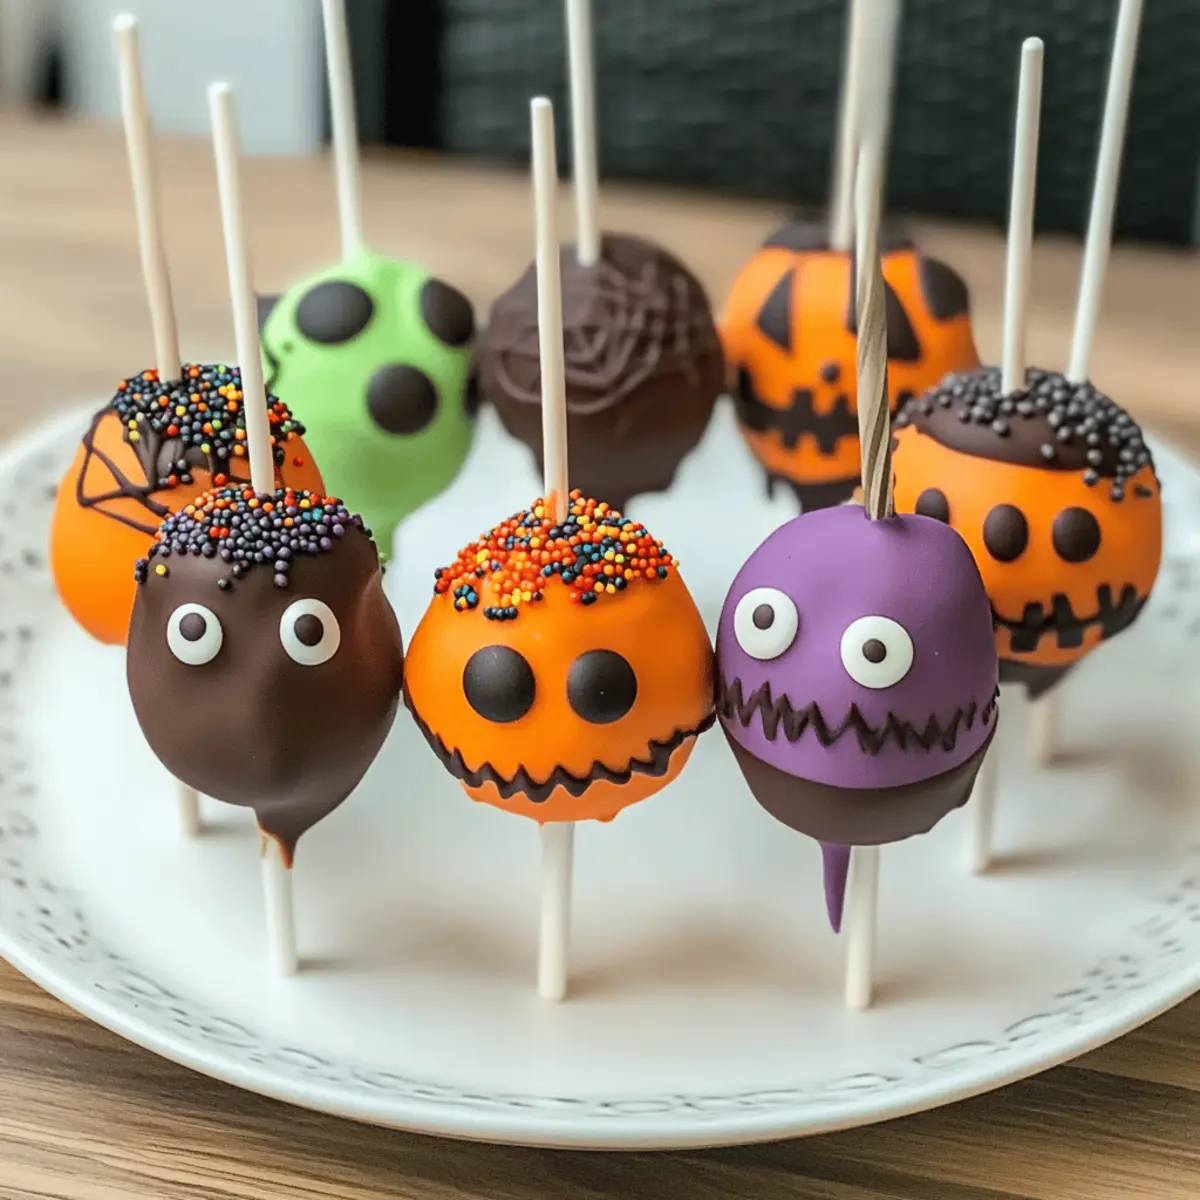
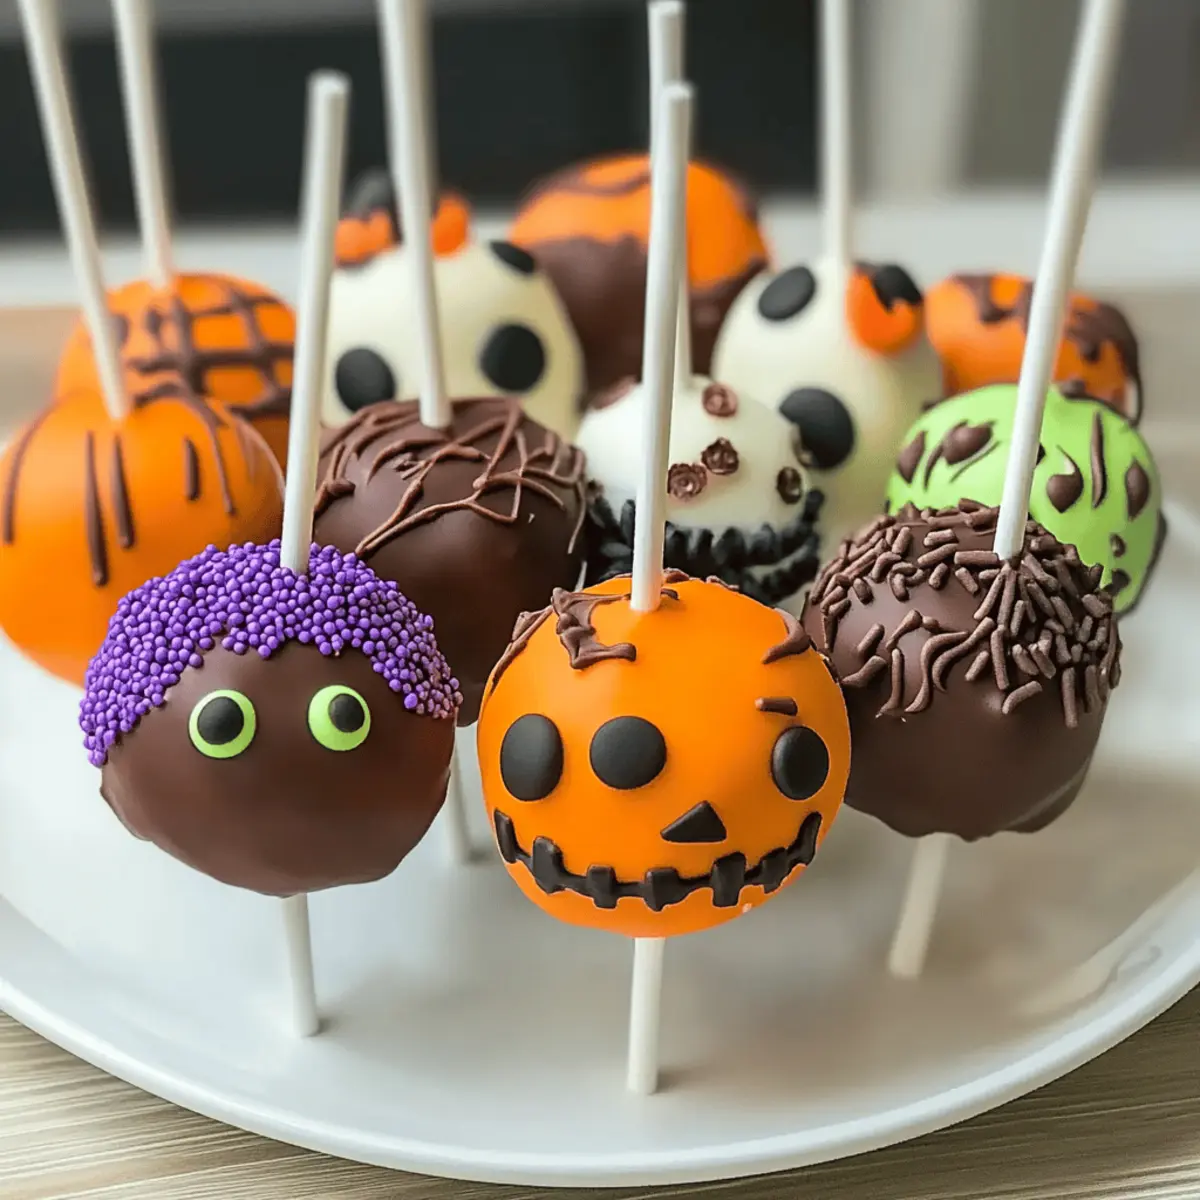
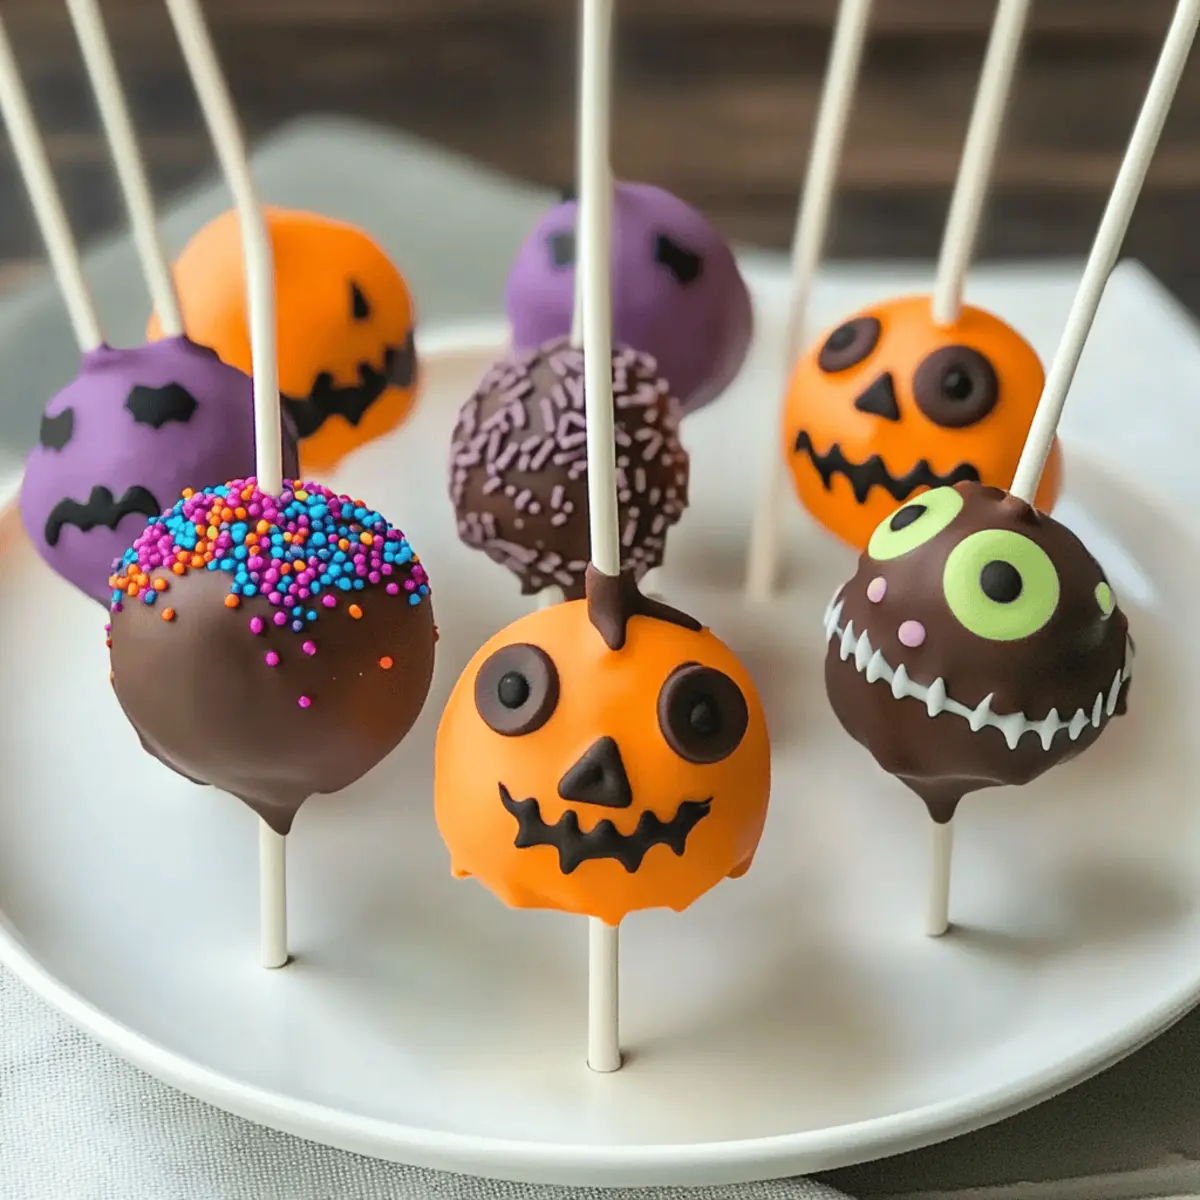
As I rummaged through my pantry searching for some Halloween inspiration, I stumbled upon a treasure: a box of cake mix that sparked a delightful idea. Enter our Halloween Cake Pops, the perfect blend of festive fun and creative expression! These charming treats transform ordinary cake into whimsical, bite-sized goodies—think mummies, pumpkins, and those cute little eyeball pops that will have everyone at the party smiling. Not only are they incredibly easy to make, but they also allow for endless customization, making them the ultimate crowd-pleaser for your Halloween festivities. Whether you’re hosting a party, seeking a playful classroom treat, or simply want to add some spooky flair to your family bake-off, these cake pops are your answer. Ready to dive into the delicious world of cake pops? Let’s get crafting!
Why Are Halloween Cake Pops So Irresistible?
Festive Fun: These delightful treats bring the spirit of Halloween to life with their spooky designs and vibrant colors.
Endless Creativity: With simple customization options, you can create everything from ghoulish eyeballs to cheerful pumpkins.
Easy to Make: The straightforward process makes it perfect for bakers of all levels, ensuring everyone can join in on the fun!
Perfect Party Treat: Whether for Halloween gatherings or classroom celebrations, these bites are an instant crowd favorite.
Make Ahead: Prepare them in advance for hassle-free entertaining, allowing you to enjoy the festivities with your loved ones.
For even more festive ideas, check out our delicious Cinnamon Roll Cake or the enchanting Jellycat Birthday Cake!
Halloween Cake Pops Ingredients
• Get ready to create some spooky treats with these simple ingredients!
For the Cake
- Box Cake Mix – Your choice of flavor sets the stage; chocolate or red velvet are perfect for a Halloween vibe.
- Eggs, Oil, and Water – Essential for following the cake mix instructions and ensuring a moist texture.
For the Binding
- Frosting (½ to 1 cup) – This holds the crumbled cake together; opt for chocolate or cream cheese for a rich taste.
For the Coating
- Candy Melts/Chocolate (12 oz) – The colorful outer layer; use Halloween-themed colors like orange, black, or green for a festive touch.
For the Presentation
- Lollipop Sticks (24) – Essential for a proper cake pop; they help transform cake into fun treats on a stick.
For the Decorations
- Candy Eyeballs, Halloween Sprinkles, Colored Sugar – These add some whimsical flair; though optional, they make your cake pops more festive and fun!
- Gel Food Coloring – Use this for tinting white chocolate to match your creative designs.
- Red Gel Icing – Great for adding spooky details like eyeball veins!
- Green Frosting or Fondant – Perfect for crafting cute pumpkin stems or other decorations.
Get ready to have fun creating your Halloween Cake Pops as you mix, roll, and decorate these treats into eerie delights!
Step‑by‑Step Instructions for Halloween Cake Pops
Step 1: Bake the Cake
Preheat your oven to the temperature specified on the cake mix package. Prepare the box cake mix using the required eggs, oil, and water, then pour the batter into a greased cake pan. Bake for 25–30 minutes or until a toothpick inserted in the center comes out clean. Once done, let the cake cool completely on a wire rack, which is essential for the perfect texture when crumbling.
Step 2: Crumble and Mix
Once the cake is thoroughly cooled, break it into crumbs using your hands or a fork in a large mixing bowl. Add in ½ to 1 cup of frosting, gradually mixing until the texture resembles a sticky dough without overmixing. This will create the necessary consistency to shape into cake pops. The mixture should hold together without being overly wet, setting you up for the next step.
Step 3: Roll Into Balls
Take about a tablespoon of the mixture and roll it into 1-inch balls. Place each ball onto a lined baking sheet, giving them space to avoid sticking. Once formed, it’s time to firm them up—refrigerate the cake balls for 1–2 hours, or freeze them for about 30 minutes until they are solid enough to support the lollipop sticks for your Halloween cake pops.
Step 4: Insert Sticks
Melt a small portion of your candy melts in the microwave, heating in short bursts and stirring until smooth. Dip the tip of each lollipop stick into the melted chocolate, then gently insert it into the center of each chilled cake ball. This step ensures that the sticks hold firmly when you dip the pops later. Once all the sticks are in place, chill the cake pops briefly to set the chocolate.
Step 5: Dip in Chocolate
Melt the remaining candy melts according to package instructions until completely smooth. Hold each cake pop by the stick and submerge it into the melted chocolate, allowing excess to drip off. Aim for a thick coating that looks bright and colorful—this is what makes your Halloween cake pops visually appealing! Set the dipped pops aside on parchment paper.
Step 6: Decorate
While the chocolate coating is still warm, go wild with your creative flair! Sprinkle Halloween-themed decorations, such as colored sugar, candy eyeballs, or themed sprinkles, over the pops for a festive effect. This is the fun part where your spooky designs can truly come to life—bring on the mummies, pumpkins, and ghosts for your Halloween cake pops!
Step 7: Let Set
To ensure that your delicious creations firm up, place the cake pops upright in a Styrofoam block or a cake pop stand. Let them dry completely at room temperature for about 30 minutes, or speed up the process by placing them in the fridge. Once set, they’ll be ready to serve at your Halloween party or for a fun treat!
Make Ahead Options
These Halloween Cake Pops are perfect for busy home cooks looking to save time while still enjoying festive fun! You can prepare the cake and crumble it up up to 24 hours in advance, storing the crumbs in an airtight container in the refrigerator to maintain freshness. Once you’ve mixed the crumbs with frosting, shape them into balls and keep them in the fridge for a quick chilling process; they can be rolled into balls up to 3 days prior to dipping. When you’re ready to finish your Halloween Cake Pops, simply insert the sticks, dip them in melted chocolate, and decorate as desired. This way, you can enjoy all the delightful tastes without the last-minute rush!
Storage Tips for Halloween Cake Pops
- Room Temperature: Store finished Halloween Cake Pops in an airtight container at room temperature for up to 1 week, allowing the chocolate to maintain its perfect texture.
- Fridge: If you prefer keeping them fresh longer, refrigerate the cake pops in a sealed container for up to 2 weeks. Just be aware that the chocolate shell may lose some sheen.
- Freezer: To save for a later date, freeze the cake pops by placing them in a single layer on a baking sheet until solid, then transfer them to a freezer-safe bag. They can last for up to 2 months.
- Reheating: There’s no need to thaw if freezing; simply enjoy them straight from the freezer, or let them set at room temperature for about 10-15 minutes before serving for the best texture.
Tips for the Best Halloween Cake Pops
Chill for Stability: Ensure the cake balls are firm before inserting lollipop sticks to prevent them from falling apart during dipping.
Uniform Size: Use a small cookie scoop to ensure even cake pop sizes, which helps them dip more evenly and look better.
Work Quickly: When dipping in chocolate, act fast to avoid the melted coating setting before you can add decorations—this keeps your pops festive and fun!
Cool Completely: Allow the baked cake to cool completely before crumbling to achieve the right texture for your Halloween cake pops.
Frosting Matters: Don’t skimp on the frosting; it’s crucial for binding the cake crumbs. Use chocolate or cream cheese for a rich taste that enhances the overall flavor.
Enjoy the creative process and have fun crafting your own delightful Halloween cake pops!
What to Serve with Halloween Cake Pops?
These bewitching treats are not just delightful on their own; they pair beautifully with a variety of dishes that enhance your Halloween celebrations.
-
Spooky Punch: A bright, fruity mocktail or soda punch adds fun flavors and festive colors to your spread, perfectly complementing the cake pops.
-
Cheesy Monster Eyes: Create playful cheese balls shaped like eyeballs for a savory contrast that excites the palate while keeping the theme alive.
-
Ghostly Cupcakes: Fluffy vanilla cupcakes topped with fluffy white frosting and ghost decorations offer a sweet balance to the rich cake pops.
-
Mini Sausage Mummies: Wrapped in crescent dough, these fun and savory bites bring a scrumptious element to your Halloween table while being irresistibly cute!
-
Customized Candy Bags: Fill bags with assorted Halloween candies for party favors—these sweet treats keep the sugar rush going alongside your cake pops.
-
Caramel Apple Slices: Fresh apples dipped in caramel provide a crunchy, fruity bite that refreshes the palate amidst the sweetness of cake pops, enhancing the seasonal flavors.
-
Creepy Cheese Platter: A selection of creepy-themed cheeses, like ghost-shaped cheddar, paired with crackers brings a savory touch to balance all that sweetness.
-
Witch’s Brew Soup: A hearty green soup can serve as a spooky main dish, offering warmth and comfort that contrasts the lightness of your cake pops.
Pair these enjoyable treats with your Halloween cake pops and watch as your gathering transforms into a delightful celebration of flavors!
Halloween Cake Pops Variations & Substitutions
Feel free to let your imagination run wild as you customize these delightful treats!
- Flavor Twist: Experiment with different cake flavors like vanilla, spice, or even lemon for a unique touch.
- Frosting Fun: Switch out the frosting for flavored options—cream cheese or caramel can add exciting dynamics.
- Chocolate Colors: Use colored candy melts for Halloween magic, such as purple or bright green, to match your theme.
- Decorative Sprinkles: Toss in edible glitter, themed sprinkles, or even edible eyes to elevate your spooky presentation.
- Texture Variation: For crunch, roll your cake pops in crushed nuts or graham crackers after dipping in chocolate.
- Themed Designs: Get creative! Shape your cake pops into bats or ghosts, using fondant for details to amplify the fun.
- Spicy Kick: Add a hint of cayenne or chili powder to your chocolate coating for a surprising heat that will tingle your taste buds.
- Mini-Pops: Make bite-sized treats by rolling smaller balls and using shorter lollipop sticks for a little pop of fun!
Remember, these Halloween cake pops can be as charming or as spooky as you desire! For more scrumptious ideas, check out our delightful Decadent Caramel Cake or the tempting Carrot Cake Cheesecake for festive inspiration!
Halloween Cake Pops Recipe FAQs
What type of cake mix works best for Halloween Cake Pops?
Absolutely! While any flavor of box cake mix will work, I recommend chocolate or red velvet for that extra spooky vibe. These flavors not only taste great but also pair wonderfully with the colorful chocolate coating!
How should I store my Halloween Cake Pops?
To keep your cake pops fresh, store them in an airtight container at room temperature for up to a week. If you prefer a longer shelf life, they can be refrigerated for up to two weeks in a sealed container. Just remember that refrigeration might dull the chocolate’s shine.
Can I freeze Halloween Cake Pops?
Yes! To freeze your cake pops, place them in a single layer on a baking sheet to ensure they don’t stick together, then transfer them to a freezer-safe bag once they solidify. They can be kept frozen for up to 2 months. When you’re ready to enjoy, you can eat them straight from the freezer or allow them to sit at room temperature for about 10-15 minutes for optimal texture.
What if the cake pops fall apart when I dip them?
Very good question! To prevent your cake pops from crumbling, make sure the cake balls are sufficiently chilled before inserting lollipop sticks—refrigerate them for at least 1-2 hours. Also, avoid overmixing when combining the cake and frosting; the texture should be sticky but not overly wet.
Do I need to worry about allergies with my Halloween Cake Pops?
Indeed! If you’re serving these delightful treats to others, check for common allergens. Ingredients like eggs in the cake, dairy in the frosting, and certain chocolate or candy melting products may cause issues for some. Always read labels carefully and consider using allergen-free alternatives if needed.

Halloween Cake Pops: Spooky Treats For a Fun Celebration
Ingredients
Equipment
Method
- Preheat your oven and prepare the box cake mix according to the package instructions. Bake for 25-30 minutes and let cool completely.
- Crumble the cooled cake in a large mixing bowl and mix with 1/2 to 1 cup of frosting until it resembles a sticky dough.
- Roll the mixture into 1-inch balls and place them on a lined baking sheet. Chill for 1-2 hours or freeze for 30 minutes.
- Melt candy melts in the microwave. Dip the tip of each lollipop stick into the melts and insert into the center of each cake ball.
- Dip each cake pop into the melted chocolate, allowing excess to drip off. Set aside on parchment paper.
- While the coating is still warm, decorate with candy eyeballs, sprinkles, or colored sugar.
- Place the finished cake pops upright in a Styrofoam block or cake pop stand and let dry completely.