
As the aroma of sizzling chicken fills the kitchen, I can’t help but feel an immediate sense of comfort and excitement over my Japanese Katsu Bowls. This dish isn’t just a meal; it’s a celebration of crispy perfection paired with fluffy rice and a drizzle of savory sauce. The best part? It’s incredibly customizable—switch out the chicken for pork or even tofu for a delightful vegetarian twist. These Katsu Bowls are perfect for a busy weeknight or a cozy family dinner, offering both hearty satisfaction and a touch of culinary adventure. What sauces will you experiment with to make it your own?
Why are Japanese Katsu Bowls a must-try?
Comforting and satisfying, these bowls offer a perfect blend of crispy katsu and fluffy rice, making them a family favorite. Customizable to suit your cravings, you can easily swap chicken for pork or tofu, ensuring everyone can enjoy. Quick to prepare, they are ideal for busy weeknights while delivering a gourmet touch. Rich in flavor, the savory tonkatsu sauce elevates each bite, enhancing the overall experience. Looking for more delicious dining inspirations? Try these Japanese Cotton Candy dessert delights as a perfect sweet ending!
Japanese Katsu Bowls Ingredients
For the Katsu
• Chicken Breasts (or Pork Loin) – Protein source that forms the base of the katsu; substitute pork loin for chicken for a different taste.
• Salt and Pepper – Essential seasoning to enhance flavor; adjust to personal preference.
• All-Purpose Flour – Creates a dry coating for the katsu; use gluten-free flour as a substitute if desired.
• Eggs – Binds panko to the meat for better adhesion.
• Panko Breadcrumbs – Provides a crispy texture to the katsu; substitute with regular breadcrumbs if necessary, though texture may differ.
• Vegetable Oil – Used for frying katsu to achieve a crispy exterior; can substitute with canola or peanut oil.
For the Rice
• Japanese Short-Grain Rice – Creates a fluffy foundation; substitute with sushi rice or other short-grain varieties.
• Water – Needed for cooking rice.
• Rice Vinegar – Adds a tangy flavor to rice; substitute with apple cider vinegar if needed, but flavor may vary.
• Sugar & Salt – Seasoning for the rice; adjust based on desired sweetness.
For the Sauce
• Tonkatsu Sauce – Gives a savory taste to the dish; pre-made sauce is acceptable or make homemade.
• Soy Sauce, Worcestershire Sauce, Ketchup – Enhance flavor profile of the sauce.
For Toppings
• Shredded Cabbage – Provides freshness and crunch as a topping.
• Green Onions and Sesame Seeds – Garnish for added flavor and visual appeal.
• Pickled Ginger (optional) – Adds zing and balances richness of katsu.
Dive into making these delightful Japanese Katsu Bowls and enjoy a comforting experience worth sharing with family and friends!
Step‑by‑Step Instructions for Japanese Katsu Bowls
Step 1: Prepare the Rice
Rinse the Japanese short-grain rice under cold water until the water runs clear, removing excess starch. Soak the rice in water for 30 minutes. Then, bring a pot of water to a boil, add the soaked rice, and cover. Reduce heat to low and simmer for 15 minutes without lifting the lid. Once done, let it rest off the heat for another 10 minutes before folding in a mixture of rice vinegar, sugar, and salt.
Step 2: Prepare the Katsu
While the rice is cooking, pound the chicken breasts to about ½ inch thickness for even cooking. Season both sides generously with salt and pepper. Set up a breading station with three shallow dishes: one for all-purpose flour, one for beaten eggs, and one for panko breadcrumbs. Dredge each piece of chicken in flour, dip it into the eggs, and finally coat it with panko, pressing gently to adhere.
Step 3: Fry the Katsu
In a large skillet, heat about ½ inch of vegetable oil over medium heat until it shimmers, indicating it’s ready for frying. Carefully place the breaded chicken into the hot oil and fry for about 4-5 minutes per side, or until golden brown and crisp, reaching an internal temperature of 165°F (75°C). Once cooked, transfer the katsu to a plate lined with paper towels to drain excess oil and let it rest before slicing.
Step 4: Make the Sauce
In a small mixing bowl, combine the tonkatsu sauce, soy sauce, Worcestershire sauce, and ketchup, stirring well until fully blended. This savory sauce will enhance your Japanese Katsu Bowls, providing a rich and tangy flavor profile that beautifully complements the crispy katsu and fluffy rice.
Step 5: Assemble the Bowl
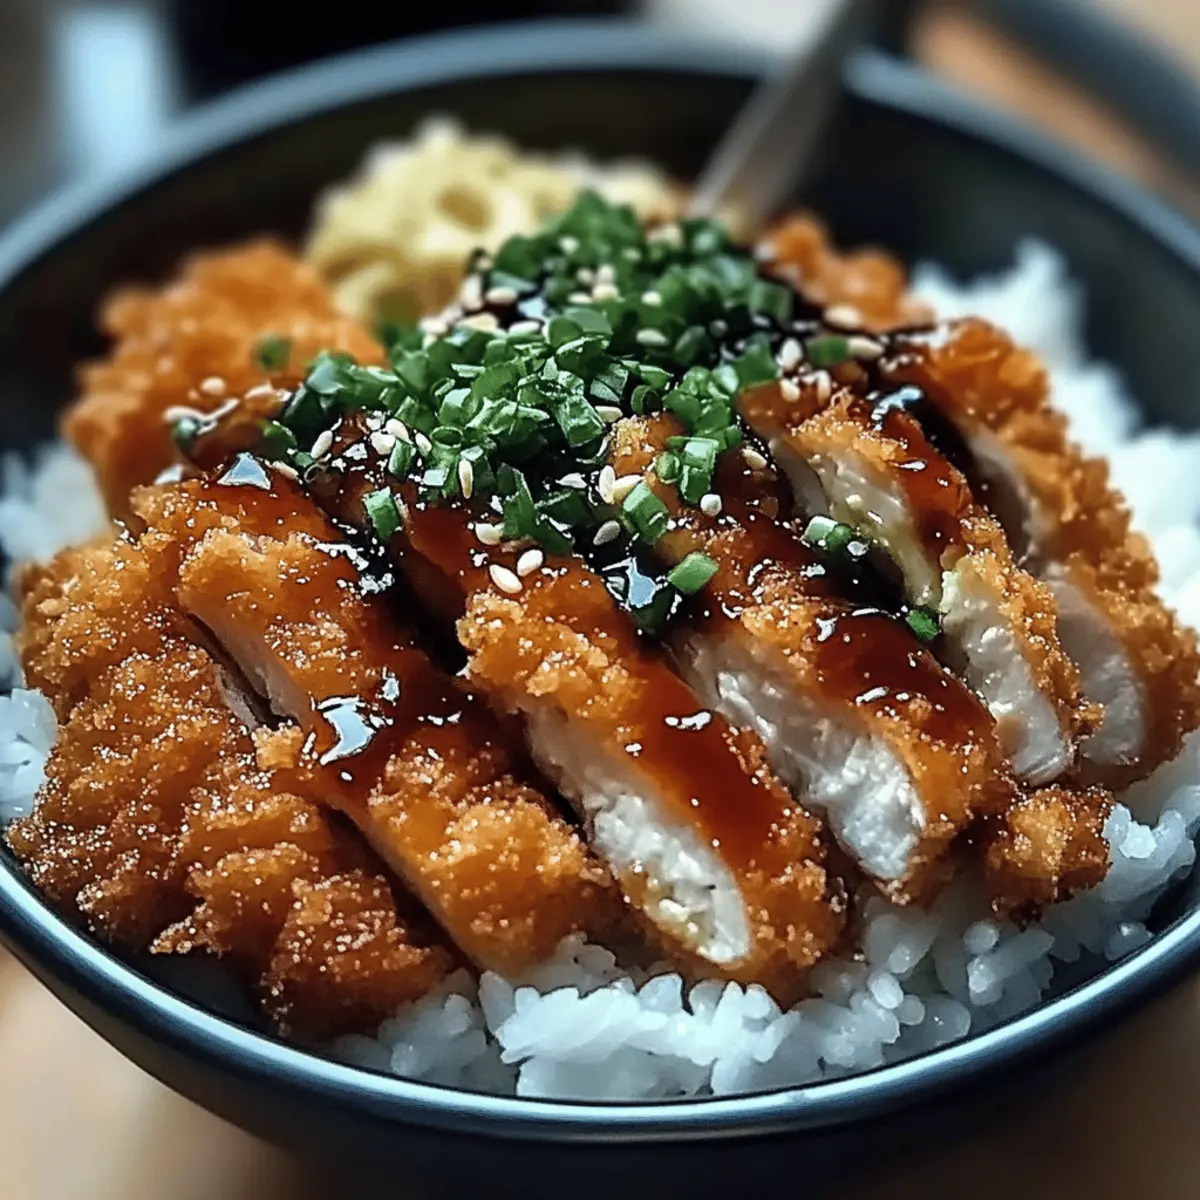
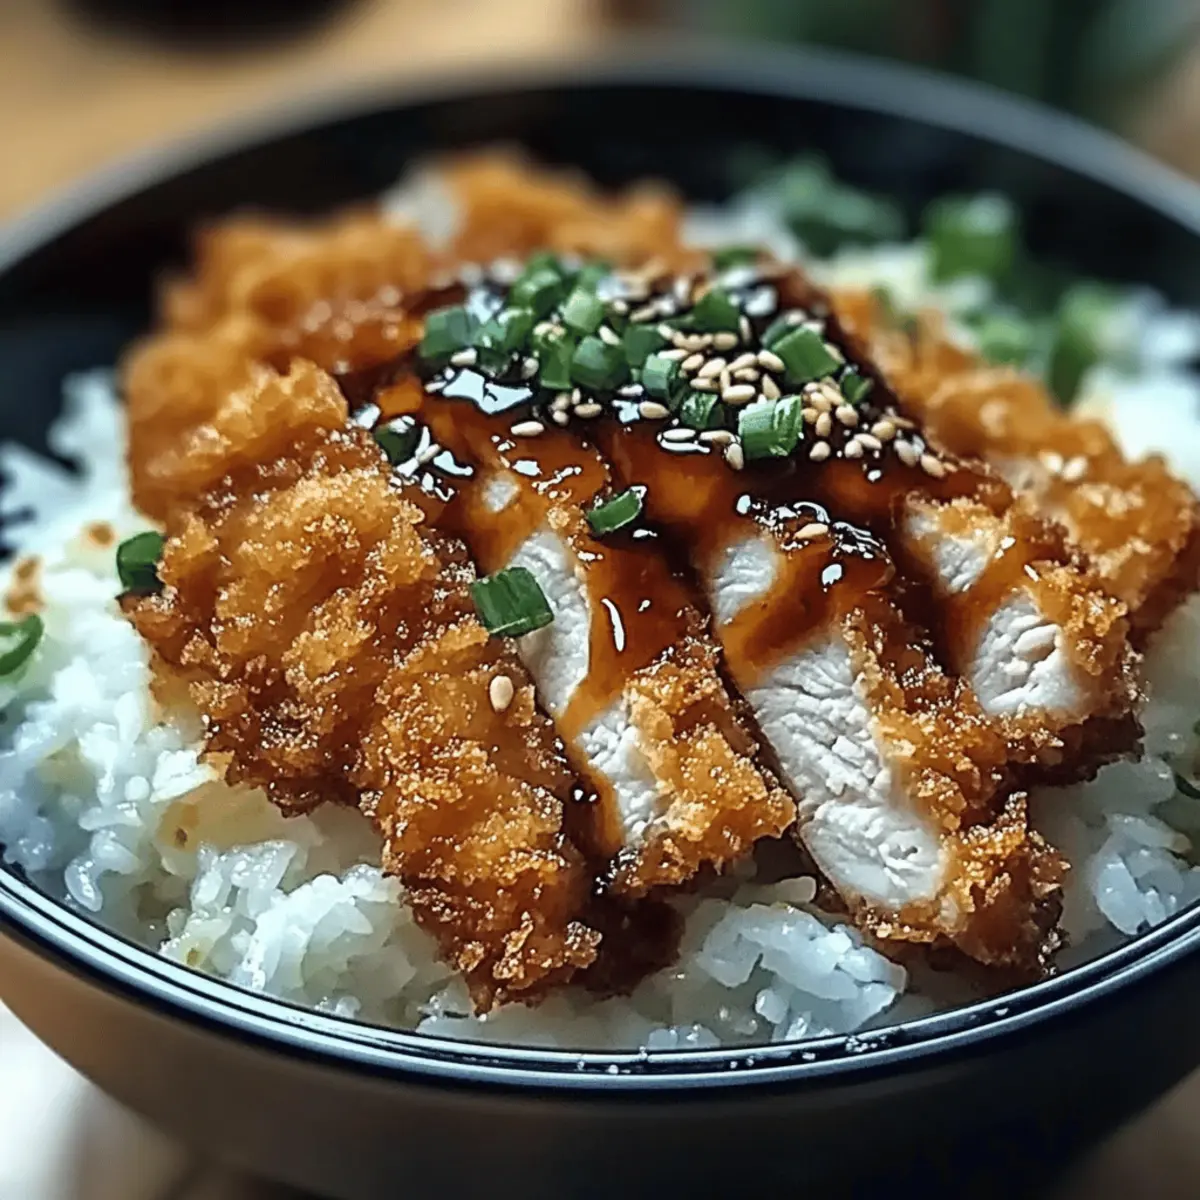
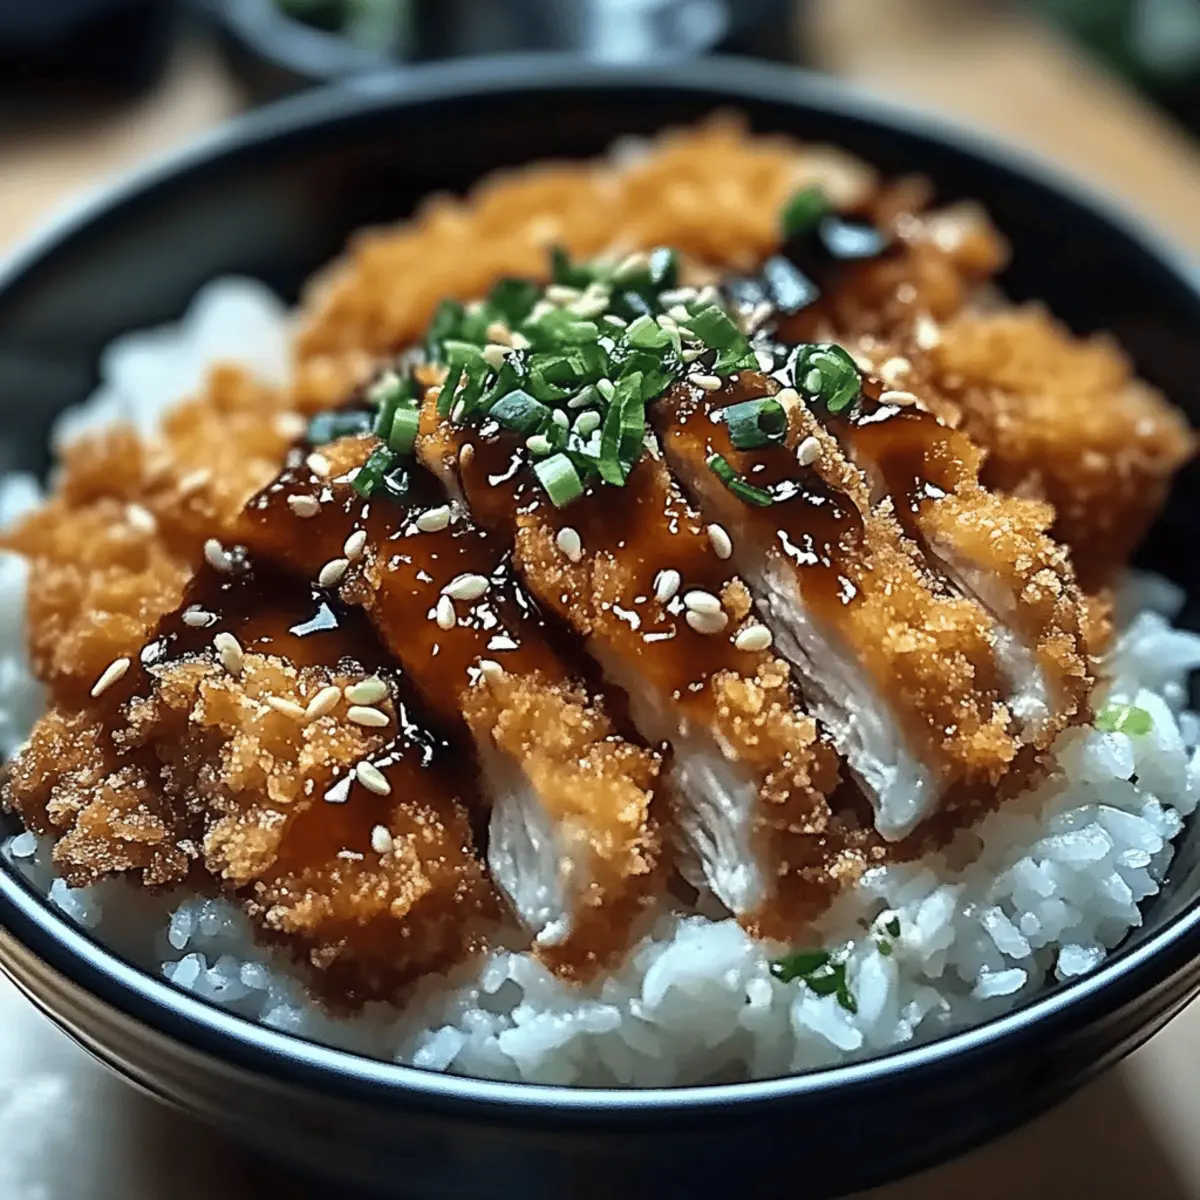
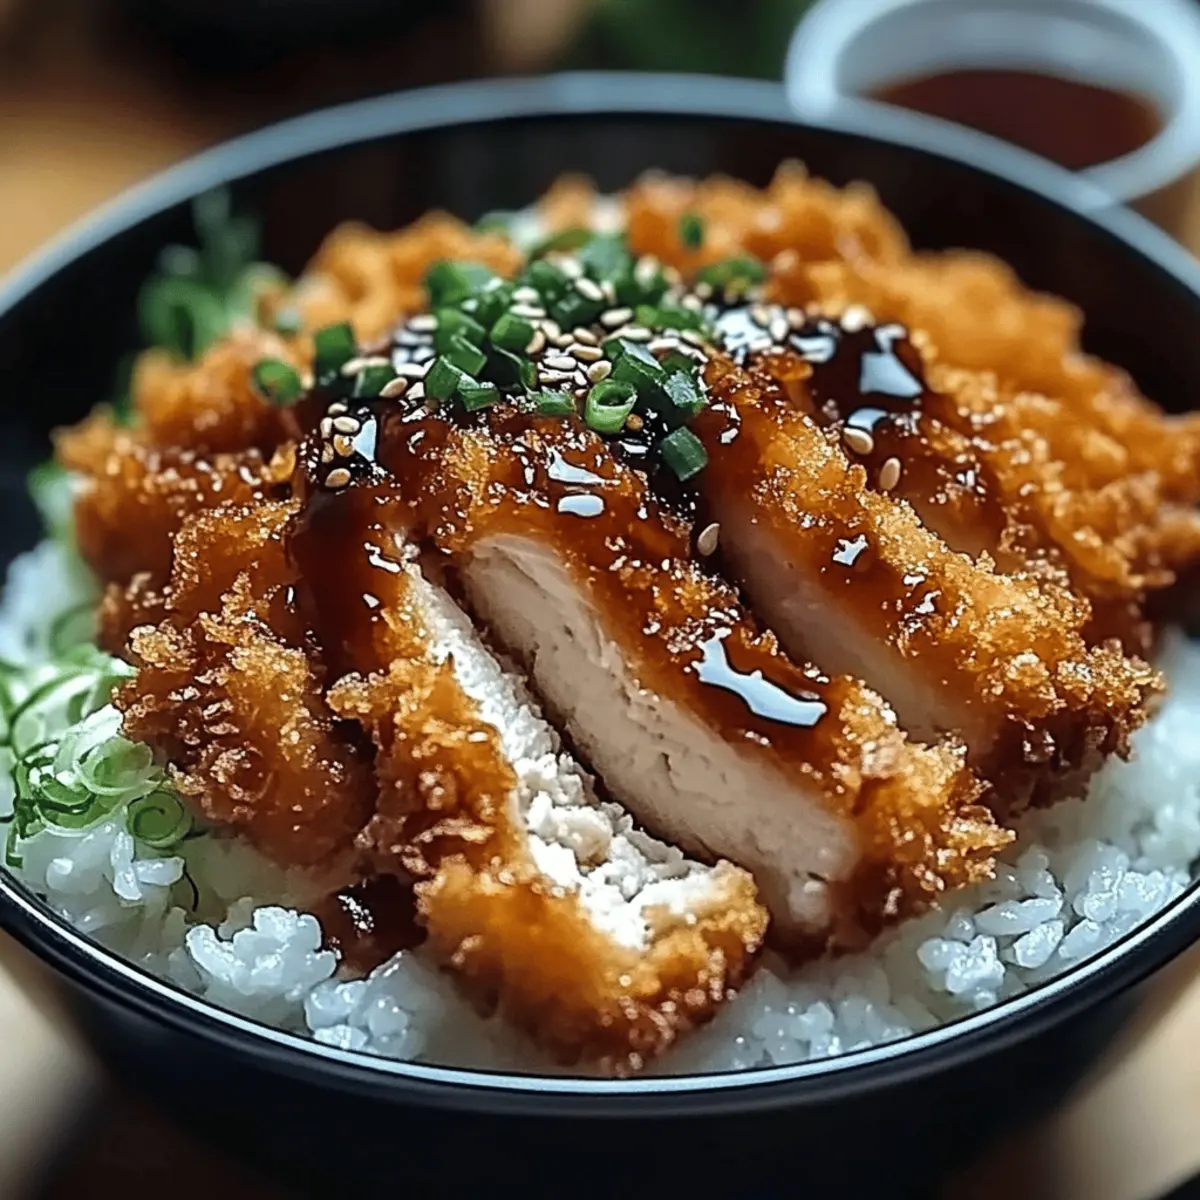
To serve, layer the seasoned rice at the bottom of a bowl and arrange the sliced chicken katsu on top in an appealing manner. Add a generous heap of shredded cabbage alongside the katsu for freshness and crunch. Drizzle your homemade sauce over the entire dish and garnish with sliced green onions, sesame seeds, and pickled ginger for an added touch of flavor and visual appeal.
Storage Tips for Japanese Katsu Bowls
Fridge: Store leftovers in an airtight container in the fridge for up to 2 days. This keeps your Japanese Katsu Bowls fresh and tasty for tomorrow’s lunch!
Freezer: If you want to enjoy katsu later, freeze the cooked katsu in a sealed freezer bag for up to 3 months. Reheat after thawing for the best results.
Reheating: For the crispiest katsu, reheat in a preheated oven at 375°F (190°C) for about 10-15 minutes. This will revive the crunch while warming the rice.
Packaging: When storing, separate the katsu from the rice and sauce to maintain texture and flavor. Keep everything covered tightly to avoid moisture loss.
Japanese Katsu Bowls Variations & Substitutions
Feel free to play around with these ideas to create your perfect version of Japanese Katsu Bowls!
-
Pork Option: Swap chicken for thinly sliced pork loin for a traditional katsu experience. The richness of pork really enhances the savory flavor.
-
Vegetarian Delight: Choose eggplant or tofu as the protein. Coat them in the same panko for a delightful crunch while keeping your meal meat-free and delicious.
-
Gluten-Free Twist: Use gluten-free flour and panko breadcrumbs to keep the crunch without the gluten. Your katsu will still come out crispy and satisfying!
-
Sauce Variations: Try different sauces like spicy mayo or ponzu for an exciting flavor twist. Each sauce brings a unique profile, making each meal feel special.
-
Creamy Addition: Top your bowls with a soft-boiled egg or creamy avocado for a luxurious touch. The richness will elevate your comfort food experience to new heights!
-
Extra Crunch: Add crispy fried onions for enhanced texture and flavor. These little morsels add a delightful crunch that pairs beautifully with the other ingredients.
-
Spicy Kick: Mix in a dash of sriracha or chili oil to your dipping sauce for those who enjoy a little heat. Just a small amount transforms the flavor profile and makes it exciting!
-
Flavorful Rice: Infuse your rice with a touch of coconut milk or broth for extra flavor. This subtle change creates a creamy, aromatic base that complements the katsu beautifully.
For delightful desserts after dinner, you can explore these Japanese Cotton Candy treats that are perfect to cap off your cozy meal!
Expert Tips for Japanese Katsu Bowls
-
Oil Temperature: Ensure the oil is hot enough before frying; ideally, it should shimmer and bubble slightly when you add the katsu. This prevents sogginess.
-
Avoid Overcrowding: Fry katsu in batches to avoid overcrowding the pan. This allows each piece to cook evenly and achieve that desired crispiness.
-
Rest the Katsu: Allow the fried katsu to rest on paper towels for a few minutes before slicing. This helps retain moisture and keeps the meat juicy.
-
Season the Rice: Make sure to season your rice with the rice vinegar mixture while it’s still warm for better absorption of flavors and a delightful tanginess.
-
Sourcing Ingredients: For the best loyalty to flavor, use high-quality tonkatsu sauce. Look for authentic brands at Asian grocery stores for a richer taste in your Japanese Katsu Bowls.
Make Ahead Options
Japanese Katsu Bowls are a fantastic meal prep choice for busy home cooks! You can prepare the katsu and sauce up to 24 hours in advance. Simply bread the chicken and store it in the refrigerator, wrapped tightly to maintain freshness. You can also make the tonkatsu sauce and refrigerate it for up to 3 days. When you’re ready to enjoy your katsu bowls, simply fry the chicken straight from the fridge for crispy results, and reheat the sauce gently on the stove or in the microwave. With these make-ahead tips, you’ll save precious time while still serving up a delicious, hearty meal!
What to Serve with Japanese Katsu Bowls
As you take a moment to relish the crispy goodness of your katsu, consider these delightful accompaniments that will elevate your meal experience to new heights.
-
Creamy Coleslaw: This tangy and creamy salad adds a refreshing crunch, harmonizing wonderfully with the crispy katsu and offering a crisp textural contrast.
-
Steamed Edamame: Tossed with a sprinkle of sea salt, these tender, protein-packed beans offer a light, vegetal flavor that pairs perfectly with the savory elements of the katsu.
-
Miso Soup: A warm cup of umami-rich miso soup can enhance the meal, providing a comforting warmth that complements the crispy fried katsu beautifully.
-
Cucumber Salad: Bright and refreshing, a simple cucumber salad dressed in rice vinegar and sesame oil adds a tangy element that balances the richness of the katsu.
-
Pickled Vegetables: The acidity of pickled vegetables like daikon or carrots lifts the flavors of the dish, cutting through the richness of the fried chicken and adding a pop of color.
-
Sake or Green Tea: Sip on chilled sake or a warm cup of green tea to cleanse the palate between bites, enhancing the overall dining experience.
-
Chocolate Mochi: For a sweet finish, these delightful chewy treats provide a subtle sweetness that beautifully contrasts the savory katsu, rounding out your dinner in an indulgent way.
-
Soft Boiled Egg: A beautifully soft-boiled egg adds a luxurious creaminess on top of the katsu, enhancing both flavor and texture, for a gourmet touch to your bowl.
Japanese Katsu Bowls Recipe FAQs
How do I choose the right chicken or pork for the katsu?
When selecting chicken breasts, look for ones that are plump and have a consistent color without any dark spots, as freshness is key. If opting for pork loin, it should be bright pink and firm. Feel free to ask your butcher for recommendations!
What’s the best way to store leftover Katsu Bowls?
Store your leftovers in an airtight container in the refrigerator for up to 2 days. Ensure the katsu is cooled completely before sealing to avoid condensation. If you’re planning on enjoying them later in the week, I recommend separating the katsu, rice, and sauce to preserve their textures and flavors.
Can I freeze my katsu leftovers?
Absolutely! For freezing katsu, place it in a single layer on a baking sheet until frozen solid, then transfer it to a sealed freezer bag. It’s great for up to 3 months! When you’re ready to eat, thaw in the fridge overnight and reheat in a preheated oven at 375°F (190°C) for about 10-15 minutes to restore the crispiness.
What if my katsu is not crispy after frying?
If your katsu isn’t as crispy as you’d like, it might be due to the oil temperature being too low. Ensure the oil is shimmering before adding the katsu to achieve that perfect crunch. Additionally, make sure to not overcrowd the pan, as this can lower the oil temperature and lead to sogginess.
Are there any allergy considerations with this recipe?
Yes, if you or someone you’re serving has allergies, consider the ingredients carefully. Panko can contain gluten, so use gluten-free breadcrumbs if needed. For those with egg allergies, you can use a flax egg or cornstarch slurry as a binding agent. Always take the time to check labels on sauces as well to avoid gluten and soy if allergic.
Can I make a vegetarian version of Japanese Katsu Bowls?
Very much so! Swap out chicken for eggplant or tofu for a delicious vegetarian option. Slice the eggplant into rounds or slabs, bread it just like traditional katsu, and fry until golden brown. Tofu can be pressed and sliced, providing a hearty alternative that’s just as satisfying!
Crispy Japanese Katsu Bowls: Comfort Food at Home
Ingredients
Equipment
Method
- Rinse the Japanese short-grain rice under cold water until the water runs clear. Soak the rice in water for 30 minutes. Then, bring a pot of water to a boil, add the soaked rice, and cover. Reduce heat to low and simmer for 15 minutes.
- Pound the chicken breasts to about ½ inch thickness and season with salt and pepper. Set up a breading station with flour, beaten eggs, and panko breadcrumbs. Dredge the chicken in flour, dip in the eggs, and coat with panko.
- Heat ½ inch of vegetable oil in a skillet over medium heat until it shimmers. Fry the chicken for 4-5 minutes on each side until golden brown and cooked through. Transfer to paper towels to drain excess oil and let rest.
- In a bowl, combine tonkatsu sauce, soy sauce, Worcestershire sauce, and ketchup. Stir until blended.
- To serve, layer the rice in a bowl, top with sliced chicken katsu, add shredded cabbage, and drizzle with sauce. Garnish with green onions, sesame seeds, and pickled ginger.