
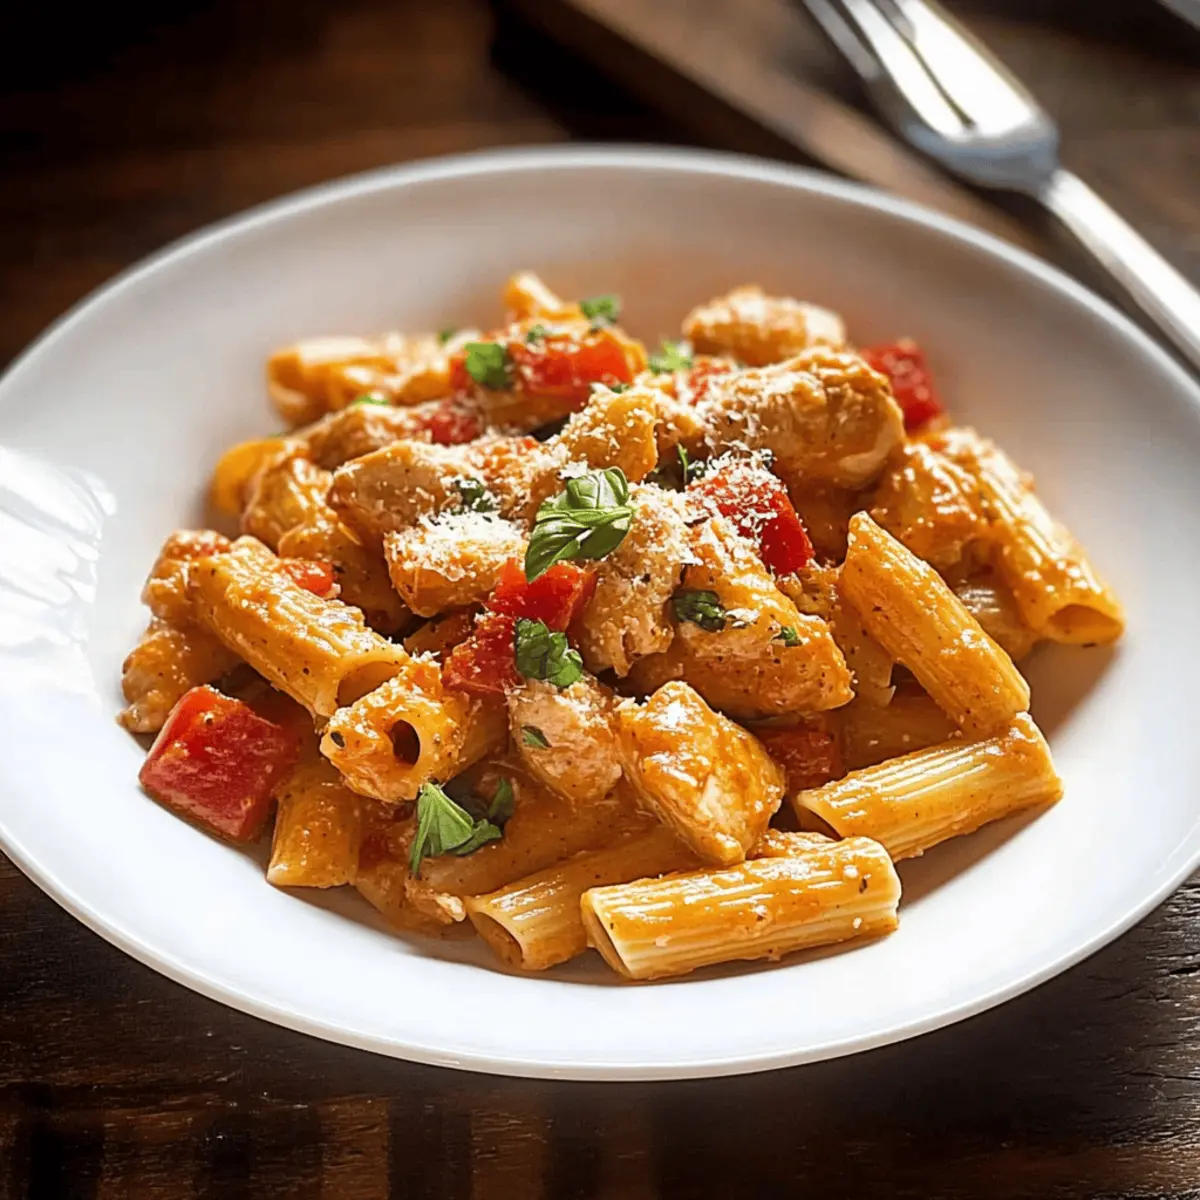
As the sun dipped low on the horizon, casting a warm glow across my kitchen, I felt that familiar tingle of excitement for a culinary adventure. Today, I’m whipping up Instant Pot Rasta Pasta, a mouthwatering dish that delivers a tropical escape right to your table. With its vibrant medley of tender chicken, colorful bell peppers, and creamy, jerk-seasoned sauce, this recipe is a delightful mix of flavors and textures, perfect for busy weeknights. The beauty of Instant Pot Rasta Pasta lies not just in its irresistible taste but also in its quick prep time—allowing you to savor homemade goodness without hours spent cooking. Plus, it can easily accommodate various dietary needs, so whether you’re sticking to a budget or looking for vegetarian alternatives, this dish has you covered. Are you ready to dive into a taste of the Caribbean and discover just how simple it can be to create a meal that’s both comforting and exciting?
Why is Instant Pot Rasta Pasta a Must-Try?
Quick and Easy: Instant Pot Rasta Pasta comes together in just minutes, perfect for those busy evenings. Flavor Explosion: The vibrant jerk seasoning creates an aromatic experience that will transport your taste buds straight to the Caribbean. Versatile Ingredients: Swap chicken for shrimp, beans, or tofu to cater to different dietary preferences—making it a hit for everyone. Creamy Goodness: A rich, creamy sauce envelops the pasta for a comforting touch that is simply irresistible. Budget-Friendly: With simple ingredients, you won’t break the bank while enjoying a gourmet meal at home. Don’t forget to explore more delightful recipes like Crockpot Chicken Nachos for more inspiration!
Instant Pot Rasta Pasta Ingredients
• Get ready to whip up this delicious fusion dish featuring bold flavors and creamy goodness!
For the Pasta
- Pasta – Use penne, fusilli, or any short pasta shape you love for easy cooking.
For the Protein
- Chicken (1 lb, diced) – Provides heartiness, but try shrimp, tofu, or beans for a vegetarian option!
For the Sauté
- Oil (2 tbsp, olive or vegetable) – Essential for sautéing your chicken and veggies to perfection.
- Red Pepper (1, thinly sliced) – Brightens the dish with color and adds sweet crunch.
- Garlic (4 cloves, minced) – Enhances the aroma and flavor of your Instant Pot Rasta Pasta.
For the Sauce
- Tomato Sauce (1 can) – Forms the base of your luscious sauce, adding moisture and tang.
- Jerk Seasoning (2 tbsp) – Showcases that authentic Caribbean kick; adjust based on your spice tolerance!
- Chicken Stock (1 cup) – Deepens the flavor; feel free to swap for vegetable stock!
For the Creaminess
- Heavy Cream (1 cup) – Gives that delicious creamy texture, but coconut milk offers a lighter alternative.
- Parmesan Cheese (½ cup, grated) – Adds richness and a lovely flavor; swap with nutritional yeast for vegan goodness.
For Seasoning
- Salt and Pepper – Essential to taste, ensuring a well-rounded flavor profile.
Now that you have all your ingredients ready, you’re just a few steps away from enjoying a delightful bowl of Instant Pot Rasta Pasta!
Step‑by‑Step Instructions for Instant Pot Rasta Pasta
Step 1: Set Up the Instant Pot
Begin by plugging in your Instant Pot and selecting the “Sauté” function. Add 2 tablespoons of olive or vegetable oil to the pot, allowing it to heat for about 2-3 minutes until shimmering. This step will ensure your chicken has the perfect sear, enhancing the overall flavor of your Instant Pot Rasta Pasta.
Step 2: Sear the Chicken
Carefully add 1 pound of diced chicken breasts to the pot, spreading them evenly. Sear the chicken for 2-3 minutes until it turns lightly browned, stirring occasionally. Season with salt and pepper to taste during this process, ensuring the chicken is flavorful and tender, which is essential for your Instant Pot Rasta Pasta.
Step 3: Sauté the Vegetables
Once the chicken is browned, add 1 thinly sliced red pepper and 4 chopped green onions to the pot. Sauté the mixture for 2-3 minutes until the vegetables soften and release their vibrant colors. This will not only add sweetness but also a beautiful visual appeal to your Instant Pot Rasta Pasta.
Step 4: Add Garlic and Jerk Seasoning
Stir in 4 minced garlic cloves and 2 tablespoons of jerk seasoning, letting them cook for about 1 minute. The goal is to allow the garlic to become aromatic without burning, which will add a delightful depth of flavor to your dish. The warm spices will fill your kitchen as you prepare the Instant Pot Rasta Pasta.
Step 5: Deglaze with Sauces
Pour in 1 cup of chicken stock and 1 can of tomato sauce, using a wooden spoon to scrape the bottom of the pot. This deglazing step is crucial to prevent burning and adds depth to the sauce. Stir until everything is well combined, creating a delicious base for your Instant Pot Rasta Pasta.
Step 6: Add the Pasta
Carefully add your choice of pasta, such as penne or fusilli, ensuring it is fully submerged in the sauce. Cancel the “Sauté” function and secure the lid on the Instant Pot, making sure it’s properly sealed. This step is key for cooking the pasta thoroughly in the flavorful sauce.
Step 7: Pressure Cook the Pasta
Select the “Manual” or “Pressure Cook” function and set it to high pressure for 4 minutes. If you prefer your pasta a bit softer, you can adjust the time to 5-6 minutes. Once the cook time is complete, the Instant Pot will beep, and your Instant Pot Rasta Pasta will be nearly ready!
Step 8: Quick Pressure Release
Carefully perform a quick pressure release by turning the valve, allowing the steam to escape safely. Once the steam has fully released, open the lid cautiously. Take a moment to enjoy the rich aroma of your cooked Instant Pot Rasta Pasta as you prepare the final touches.
Step 9: Stir in Cream and Cheese
Add 1 cup of heavy cream and ½ cup of grated Parmesan cheese to the pot, stirring well to combine. If you’d like the sauce to thicken, you can switch back to the “Sauté” function for a couple of minutes, stirring occasionally. This step gives the Instant Pot Rasta Pasta its creamy, indulgent texture.
Step 10: Final Seasoning and Serve
Taste the dish and adjust the seasoning with additional salt and pepper if needed. Serve your delicious Instant Pot Rasta Pasta hot, garnished with chopped green onions and extra Parmesan cheese for a burst of flavor. Enjoy the vibrant colors and comforting taste of this Caribbean-inspired dish!
How to Store and Freeze Instant Pot Rasta Pasta
Fridge: Store leftover Instant Pot Rasta Pasta in an airtight container for up to 3 days. Reheat on the stove or in the microwave, adding a splash of water or broth to maintain creaminess.
Freezer: If you want to keep it longer, freeze portions of Rasta Pasta in freezer-safe containers for up to 2 months. Thaw overnight in the fridge before reheating.
Reheating: Gently reheat your pasta on the stove over low heat, stirring frequently to prevent sticking. Add a bit of cream or stock to restore its creamy texture!
Expert Tips for Instant Pot Rasta Pasta
-
Lock It Properly: Ensure the lid is securely locked to prevent leaks during pressure cooking; this step is crucial for a successful Instant Pot Rasta Pasta.
-
Add Garlic Last: To avoid burning, add minced garlic towards the end of the sauté process; burnt garlic can impart a bitter taste.
-
Adjust Cooking Time: For firmer pasta, stick to the 4-minute cook time; if you prefer softer pasta, increase the pressure cooking time to 5-6 minutes.
-
Season to Taste: Don’t forget to taste and adjust the seasoning at the end before serving; adding extra salt and pepper enhances the flavor balance.
-
Garnish Wisely: Garnishing with green onions and a sprinkle of extra Parmesan cheese adds freshness and elevates the dish’s presentation.
Make Ahead Options
Instant Pot Rasta Pasta is a fantastic choice for meal prep! You can chop all your vegetables and store them in an airtight container in the refrigerator for up to 3 days. Additionally, you can marinate your diced chicken in jerk seasoning and keep it refrigerated for up to 24 hours for even deeper flavor. When you’re ready to enjoy this delicious dish, simply combine the prepped ingredients in your Instant Pot as instructed, adding the cream and cheese afterward for optimal creaminess. This way, you’ll be savoring the comforting, vibrant flavors of Instant Pot Rasta Pasta on busy weeknights, with just a few minutes of final prep!
What to Serve with Instant Pot Rasta Pasta
Pair your vibrant pasta with delightful sides that complement its creamy and spicy essence.
-
Garlic Bread: A crispy, buttery side that offers a wonderful texture to balance the creamy pasta, perfect for soaking up sauce.
-
Mixed Green Salad: Fresh greens with a tangy vinaigrette create a refreshing contrast to the rich flavors of Rasta Pasta. Think about adding colorful veggies!
-
Caribbean Slaw: Crunchy cabbage with a zesty dressing adds both texture and a touch of brightness, perfect to cut through the creaminess.
-
Plantains: These sweet, caramelized slices or chips are a must for a true Caribbean experience, adding a lovely sweet balance.
-
Coconut Rice: Creamy coconut rice enhances the tropical theme, offering nutty flavors that pair beautifully with jerk seasoning.
-
Mango Salsa: Fresh mango salsa brings a sweet and spicy kick, boosting the flavor profile while adding a refreshing coolness.
-
Pina Colada Smoothie: This fruity drink is both indulgent and refreshing, setting a fun tropical vibe to complement your meal.
-
Lemon Sorbet: For dessert, a light and refreshing sorbet can cleanse the palate and provide a sweet finish after a hearty meal.
Each of these pairings brings specific flavors and textures, inviting you to relish every mouthful!
Instant Pot Rasta Pasta Variations
Feel free to make this dish your own by exploring different ingredients and flavor profiles!
- Vegetarian Swap: Replace chicken with chickpeas or mixed beans for a hearty, meat-free delight. The bean protein will keep your meal satisfying and flavorful.
- Gluten-Free Pasta: Use gluten-free pasta like brown rice or quinoa noodles to accommodate dietary needs while keeping the taste intact. Everyone deserves to enjoy a delicious plate of Rasta Pasta!
- Shrimp Upgrade: For a seafood twist, swap out chicken for shrimp, adjusting cooking time to ensure they’re tender without being overcooked. Incredible taste awaits in every bite!
- Spicy Kick: Add more jerk seasoning or a diced jalapeño for heat lovers! You can always balance the spice with some sour cream or yogurt on the side.
- Coconut Cream: Replace heavy cream with coconut milk for a tropical flavor and dairy-free option. It adds a unique sweetness that perfectly complements the jerk seasoning.
- Pasta Variety: Switch up the pasta shape—try farfalle or rotini for fun textures. Each bite will offer a delightful twist to the overall dish!
- Herb Infusion: Mix in fresh herbs like cilantro or basil just before serving for a fresh finish. These herbs can brighten up the dish and enhance the complex flavors.
- Add Veggies: Toss in an assortment of veggies like zucchini or spinach for extra nutrients and a vibrant pop of color in your dish. Everybody will be asking for more!
With these variations, you can customize your Rasta Pasta to fit every occasion and taste preferences, ensuring it’s an unforgettable meal every time! If you’re in the mood for other comforting recipes, don’t forget to check out my Sweet Potato Honey Biscuits for a delightful dessert or snack!
Instant Pot Rasta Pasta Recipe FAQs
What type of pasta should I use for Instant Pot Rasta Pasta?
You can use penne or fusilli for this dish since their shapes hold the creamy sauce beautifully. If you want a gluten-free option, substitute with your favorite gluten-free pasta. Just be aware that cooking times may vary slightly, so check for doneness!
How should I store leftover Instant Pot Rasta Pasta?
Leftover Rasta Pasta can be stored in an airtight container in the refrigerator for up to 3 days. To reheat, place it on the stove over low heat or in the microwave, adding a splash of water or broth to keep it creamy.
Can I freeze Instant Pot Rasta Pasta?
Absolutely! You can freeze your Rasta Pasta in portions using freezer-safe containers for up to 2 months. Thaw it in the fridge overnight before reheating, and gently heat it on the stove. Add a little cream or chicken stock if it seems dry!
What should I do if my pasta is too sticky after cooking?
If your pasta ends up being sticky, it’s usually due to not enough liquid or overcooking. Make sure the pasta is fully submerged in the sauce before sealing the Instant Pot. If it’s already cooked and sticky, try adding a splash of water or broth while reheating and gently stirring to separate the strands.
Are there any dietary considerations for Instant Pot Rasta Pasta?
Yes! For gluten-free options, simply use gluten-free pasta. For a vegetarian version, replace the chicken with tofu or various beans like black beans or chickpeas. Also, you can use coconut milk instead of heavy cream for a dairy-free alternative and skip the Parmesan cheese or substitute it with nutritional yeast for a vegan option.
Can I adjust the spice level in Instant Pot Rasta Pasta?
Certainly! You can vary the amount of jerk seasoning according to your spice tolerance. If you’re looking for a milder flavor, start with a smaller amount and gradually increase it to suit your taste. You might also consider using a milder jerk seasoning to keep the dish flavorful without the heat!
Instant Pot Rasta Pasta: A Flavor-Packed Weeknight Winner
Ingredients
Equipment
Method
- Plug in your Instant Pot and select the 'Sauté' function. Add 2 tablespoons of oil and heat for 2-3 minutes.
- Add 1 pound of diced chicken to the pot and sear for 2-3 minutes until lightly browned. Season with salt and pepper.
- Add 1 sliced red pepper and 4 chopped green onions. Sauté for 2-3 minutes until softened.
- Stir in 4 minced garlic cloves and 2 tablespoons of jerk seasoning; cook for about 1 minute.
- Pour in 1 cup of chicken stock and 1 can of tomato sauce, deglazing the pot by scraping the bottom.
- Add your choice of pasta ensuring it is submerged, secure the lid and cancel the 'Sauté' function.
- Select 'Manual' or 'Pressure Cook' setting and set for 4 minutes. Adjust for softer pasta if needed.
- Perform a quick pressure release once cooking is done, and cautiously open the lid.
- Stir in 1 cup of heavy cream and ½ cup of grated Parmesan until well combined. Switch to 'Sauté' to thicken if desired.
- Taste and adjust seasoning with salt and pepper. Serve hot, garnished with green onions and extra Parmesan.