
As the autumn leaves begin to swirl in the brisk air, the festive magic of Halloween rolls in with a sweet invitation. I can almost hear the laughter of kids crafting spooky creations as they gather around the kitchen table. This is the perfect time to whip up some delicious Spiderweb Chocolate Cake for your Halloween celebrations! Packed with rich chocolate flavor and decorated with whimsical spiderwebs, this easy recipe is the ideal centerpiece for your spooky soirée. Whether you’re a seasoned pro or a novice in the kitchen, this dessert promises to be a crowd-pleaser and a fun family activity. Plus, it allows you to ditch the fast food and instead indulge in the comforting embrace of homemade goodness. Are you ready to bring a little magic to your holiday table with these enchanting treats?
Why Make Spiderweb Chocolate Cake?
Rich Chocolate Bliss: This cake is a chocolate lover’s dream, bursting with deep, fudgy flavor that will leave everyone craving more.
Eyeball-Popping Presentation: The whimsical spiderweb decoration adds a fun and festive touch that’s perfect for Halloween parties, delighting guests of all ages.
Easy to Create: With simple steps and widely available ingredients, even beginner bakers can master this charming dessert without stress.
Versatile & Customizable: Feel free to play with flavors—add a hint of espresso or swap in chocolate chips for extra texture.
Family Fun: Involve the kids in the decorating process; it’s a fantastic way to bond and get creative together—much more enjoyable than fast food outings!
Spiderweb Chocolate Cake Ingredients
For the Cake
• All-purpose flour – Essential for creating the cake’s structure and ensuring a moist texture.
• Granulated sugar – Adds sweetness; feel free to use brown sugar for a richer flavor.
• Cocoa powder – Creates the deep chocolate flavor; opt for Dutch-processed for a smoother taste.
• Baking powder – Gives the cake its lift; ensure it’s fresh for the best results.
• Salt – Enhances the overall flavor of the cake; a pinch makes a big difference!
• Butter – Provides richness and moisture; can be substituted with margarine for a non-dairy option.
• Eggs – Act as a binding agent; replace with a flaxseed mixture for a vegan version.
• Vanilla extract – Enhances the chocolate flavor; swap for almond extract if desired.
• Buttermilk – Ensures a tender crumb; homemade buttermilk works just as well by mixing milk and vinegar.
For the Spiderweb Decoration
• White chocolate chips – Melted to create the spiderweb; you can also use white chocolate bars.
• Dark chocolate – For contrasting spider decorations that add a fun touch to your cake.
• Food coloring (optional) – Use sparingly to tint the white chocolate for more festive fun.
This Spiderweb Chocolate Cake is not just a dessert; it’s a bewitching centerpiece that elevates your Halloween celebrations!
Step‑by‑Step Instructions for Spiderweb Chocolate Cake
Step 1: Prepare Your Ingredients
Begin by gathering all the ingredients for your Spiderweb Chocolate Cake. Preheat your oven to 350°F (175°C) and grease two 9-inch round cake pans with butter or non-stick spray. This ensures easy removal later. In a large mixing bowl, combine the all-purpose flour, cocoa powder, baking powder, and salt, whisking until uniform.
Step 2: Mix the Wet Ingredients
In another bowl, cream together the softened butter and granulated sugar using an electric mixer until fluffy and pale, about 3-4 minutes. Add the eggs one at a time, mixing well after each addition. Pour in the vanilla extract and buttermilk, continuing to blend until the mixture is smooth and well incorporated, creating a rich base for your cake.
Step 3: Combine Dry and Wet Ingredients
Gradually add the dry mixture to your wet ingredients, mixing on low speed until just combined. Be careful not to overmix; it’s okay if there are a few lumps. Once your batter is smooth, it will have a rich chocolatey color that’s inviting. Divide the batter evenly between the prepared cake pans.
Step 4: Bake the Cakes
Place the pans in your preheated oven and bake for 25-30 minutes. You’ll know your Spiderweb Chocolate Cake is done when a toothpick inserted into the center comes out clean, and the cake springs back when gently pressed. Once baked, remove the cakes from the oven and let them cool in the pans for 10 minutes before inverting them onto a wire rack to cool completely.
Step 5: Prepare the Spiderweb Decoration
While the cakes cool, melt the white chocolate chips in a microwave-safe bowl, heating in 30-second intervals and stirring in between until smooth. If you wish, add a few drops of food coloring to achieve a festive look. Transfer the melted chocolate to a piping bag for easy decorating, or use a plastic sandwich bag with the tip cut off.
Step 6: Assemble the Cake
Once the cakes are completely cool, place one layer on a serving plate. Spread a layer of frosting over the top, then gently place the second cake layer on top. Add frosting to the top and sides of the cake, smoothing it out for an even finish. The rich chocolate layers should be beautifully stacked and ready for decoration.
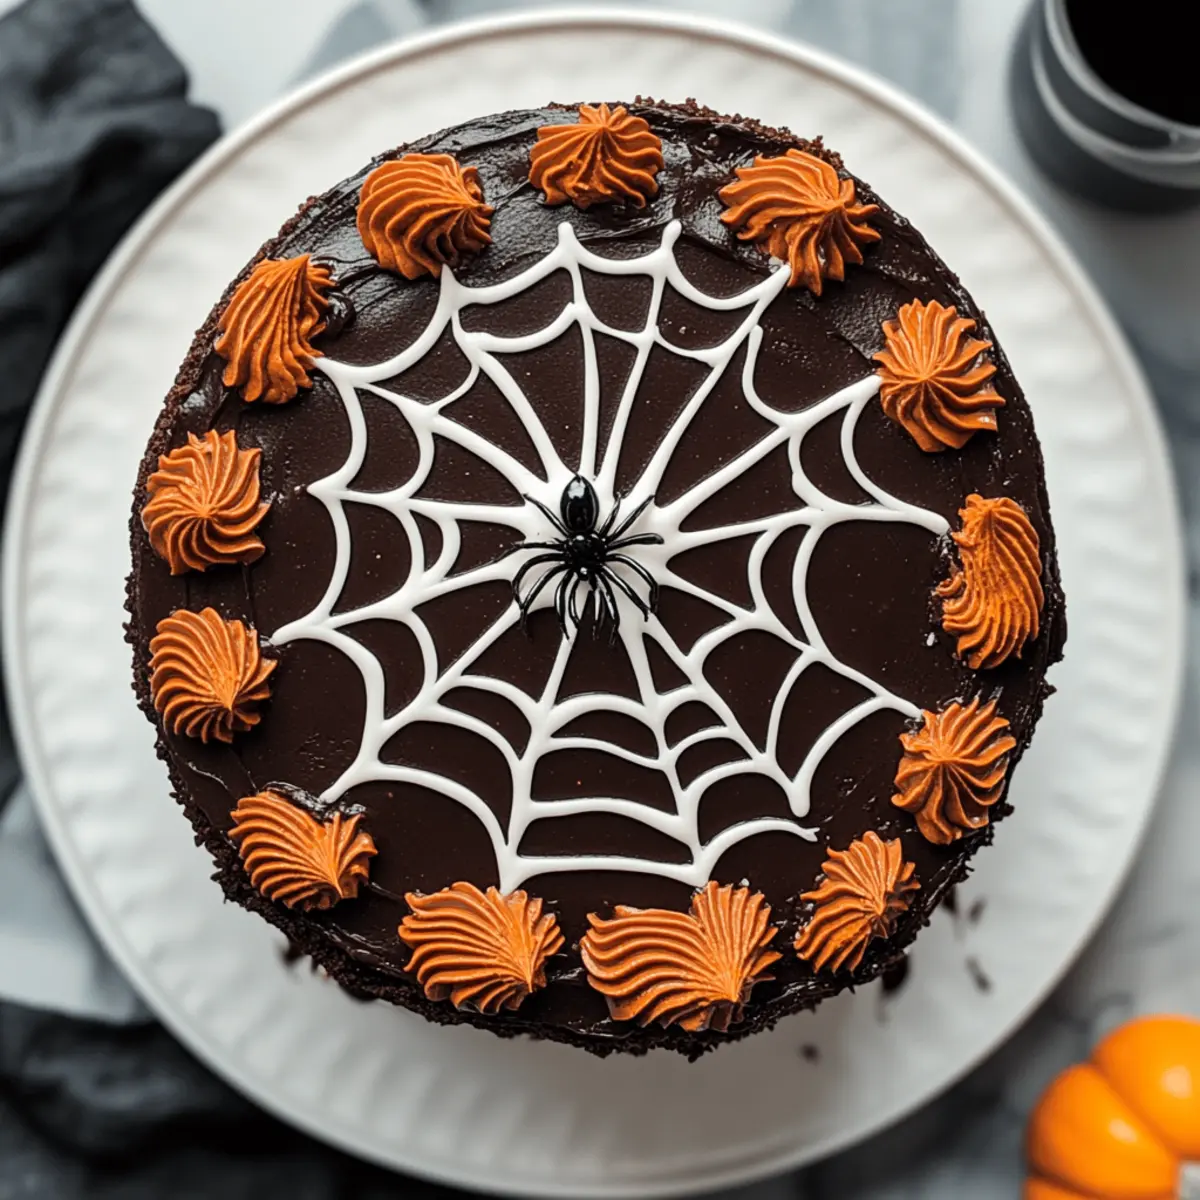
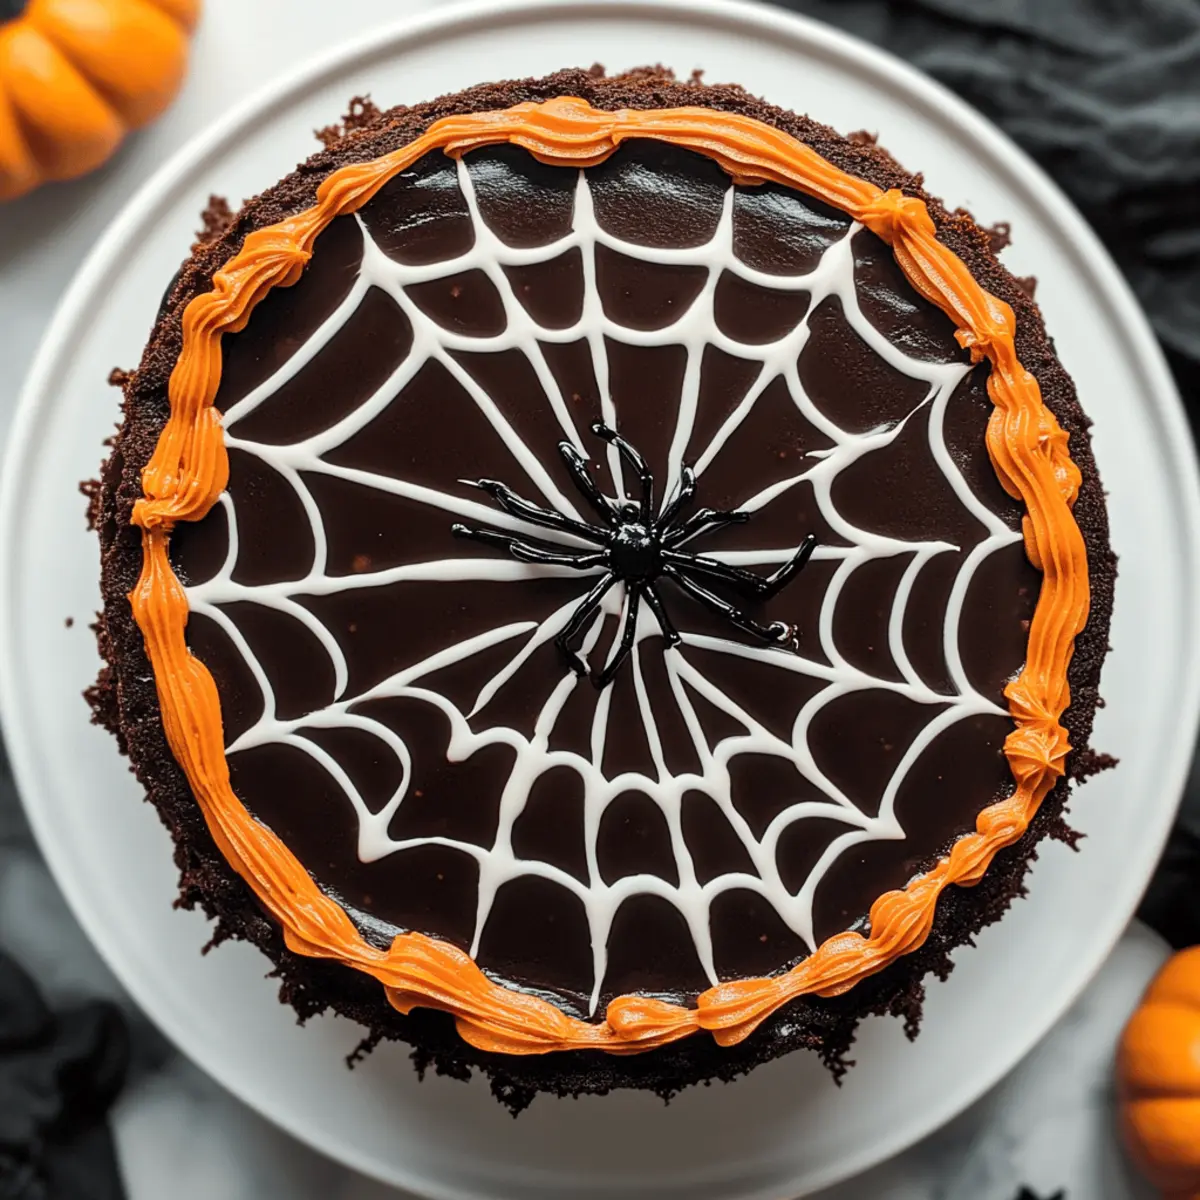
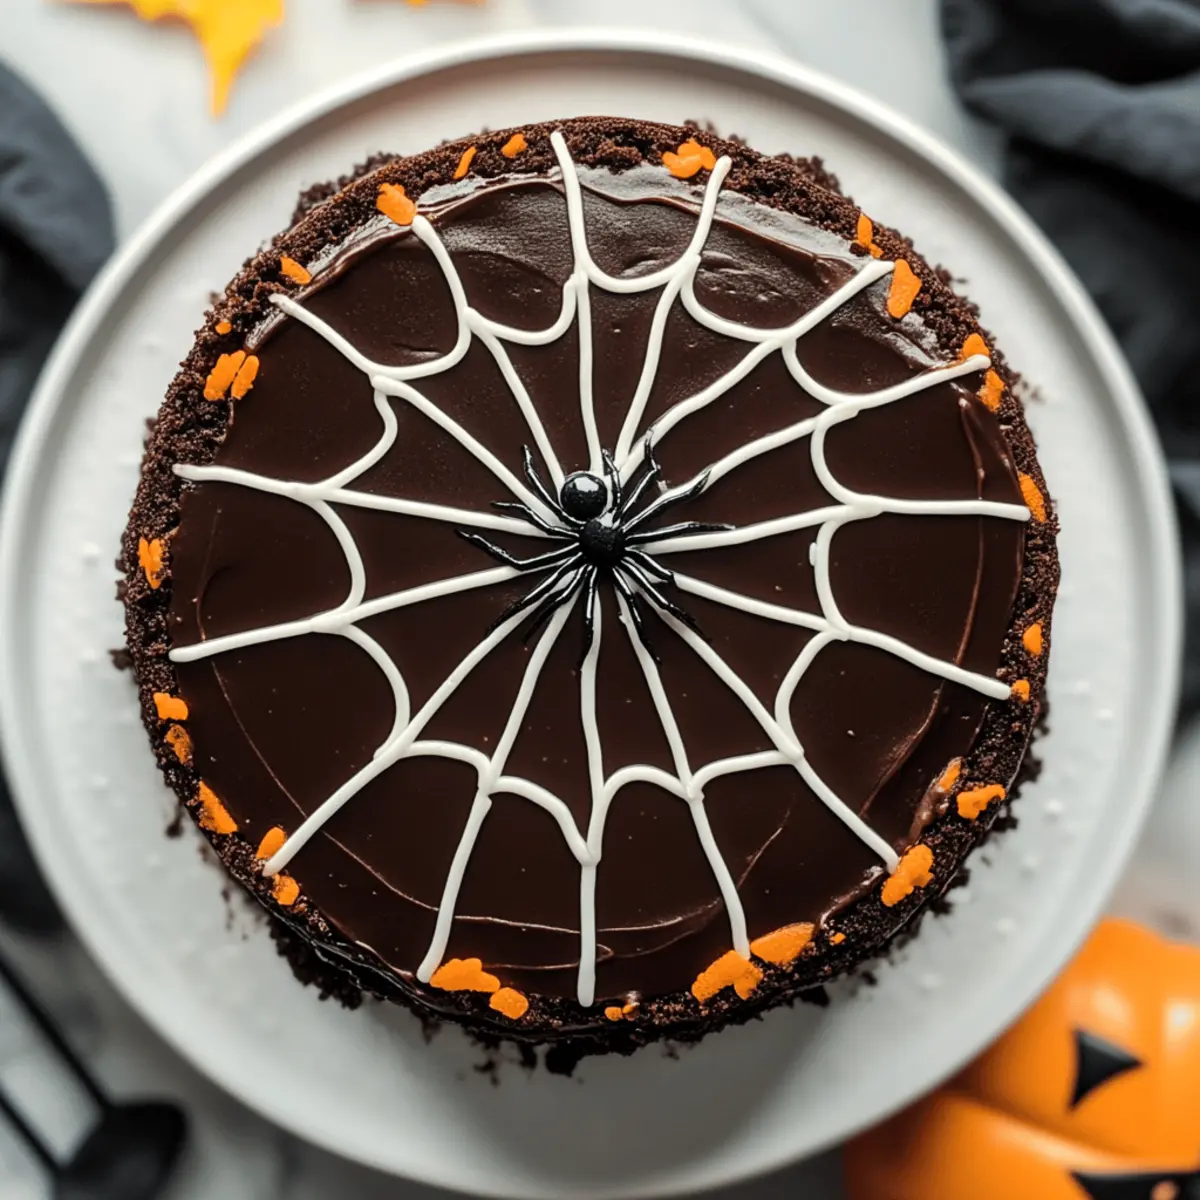
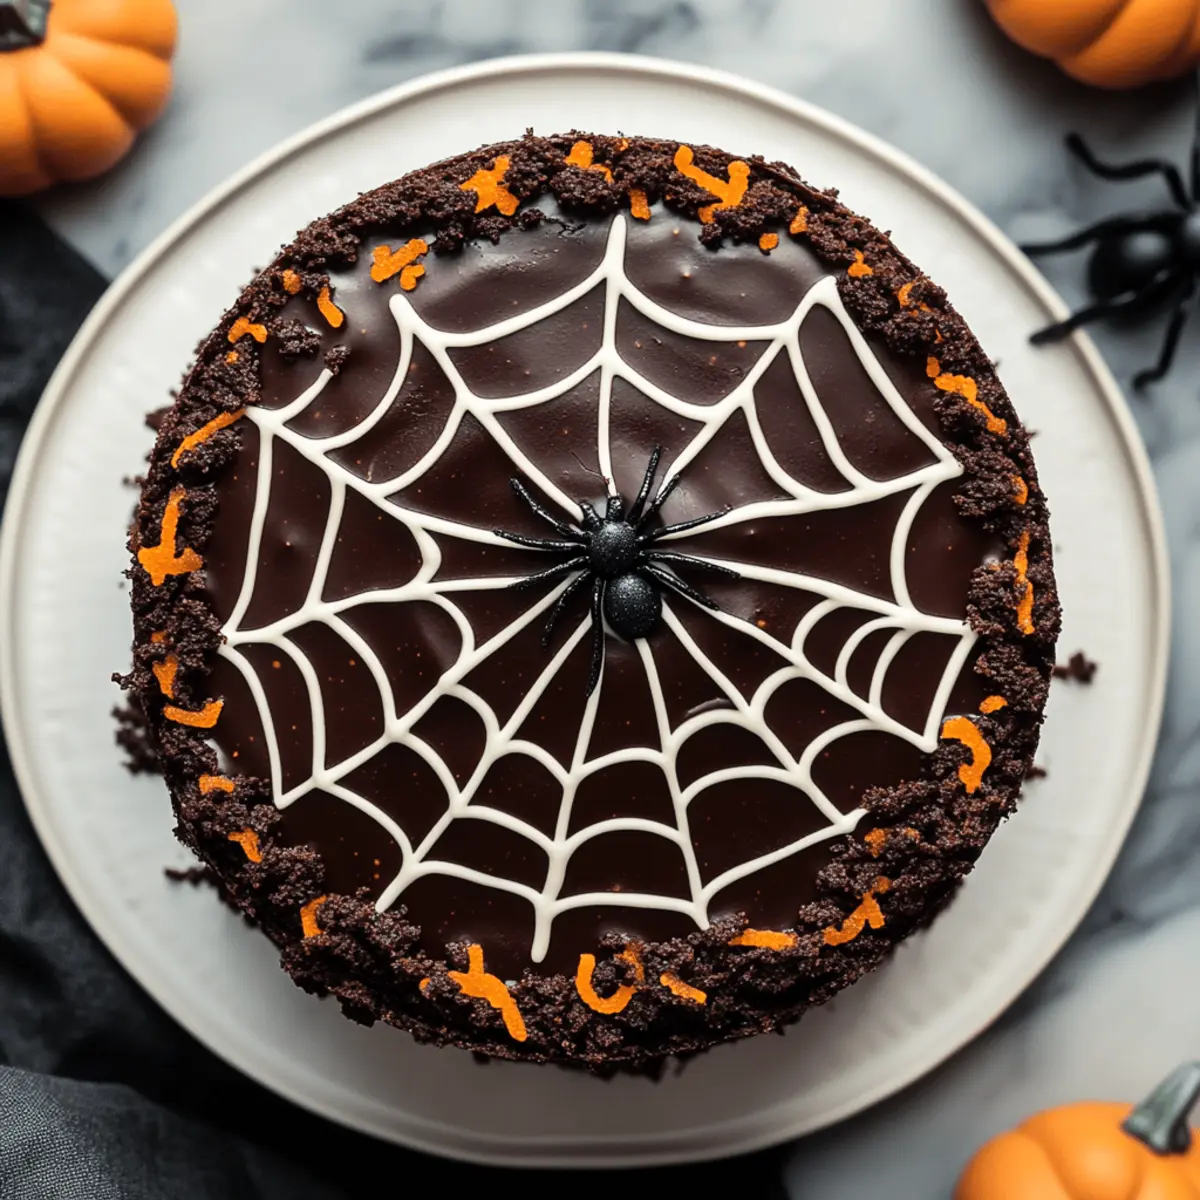
Step 7: Create the Spiderweb Design
Using your piping bag filled with melted white chocolate, begin at the center of the top layer and pipe a spiral outward, then add straight lines radiating out from the center to create a web effect. Feel free to enjoy the creative process as you form your whimsical spiderweb design.
Step 8: Final Touches
To add a spooky flair, sprinkle some dark chocolate or candy spider decorations on top of the web you’ve created. This makes your Spiderweb Chocolate Cake not only delicious but also visually captivating for your Halloween gathering. Serve immediately or store in an airtight container until ready to enjoy!
Spiderweb Chocolate Cake Variations
Dive into creativity and personalize your Spiderweb Chocolate Cake with these delightful twists that amplify flavor and fun!
- Gluten-Free: Replace all-purpose flour with almond or coconut flour for a gluten-free version that’s just as tasty.
- Vegan Delight: Swap eggs for a flaxseed mixture and use non-dairy butter for a completely vegan treat without losing moisture.
- Pumpkin Twist: Incorporate pumpkin puree into the batter for an autumnal flavor that will warm your heart and tingle your taste buds.
- Espresso Infusion: Add a tablespoon of instant espresso powder to the batter for a rich mocha flavor that enhances the chocolate bliss.
- Nutty Crunch: Fold in some chopped walnuts or hazelnuts for a delightful crunch and a hearty texture that contrasts beautifully with the softness of the cake.
- Chocolate Variation: Use dark chocolate chips instead of the standard semi-sweet for a more intense chocolate experience; pair with bright white chocolate decorations for contrast.
- Fruity Surprise: Layer a thin spread of raspberry or cherry jam between the cake layers for a tart burst of flavor that beautifully complements the chocolate.
- Halloween Colors: Use colored white chocolate to create vibrant spiderweb designs; think orange and black for that spooktacular flair perfect for Halloween gatherings.
These variations let you explore different flavors and textures while your family creates an enchanting dessert. If you’re curious for more inspiration, check out how to perfect a Carrot Cake Cheesecake or dive into the world of Salted Caramel Chocolate treats that everyone will enjoy!
Expert Tips for Spiderweb Chocolate Cake
-
Room Temp Ingredients: Ensure all ingredients, especially eggs and butter, are at room temperature for a smoother batter and lighter cake.
-
Avoid Overmixing: Gently combine wet and dry ingredients; overmixing can lead to a dense Spiderweb Chocolate Cake.
-
Cooling Matters: Allow cakes to cool completely before frosting to prevent melting and sliding of frosting; this creates a perfect base for your spiderweb decoration.
-
Piping Precision: Practice piping the spiderweb on a plate before decorating the cake; this allows you to master the technique without wastage.
-
Chocolate Types: Use high-quality chocolate for the best flavor in your decorations; it enhances both taste and presentation.
-
Festive Fun: Involve the kids in the decoration process! Let them help with pouring and spreading the frosting, turning dessert-making into a memorable family activity.
How to Store and Freeze Spiderweb Chocolate Cake
Fridge: Store the Spiderweb Chocolate Cake in an airtight container for up to 3 days. This will keep it fresh while protecting it from absorbing other odors.
Freezer: If you’d like to make it ahead, wrap the cooled cake tightly in plastic wrap and aluminum foil. It can be frozen for up to 3 months.
Reheating: When ready to enjoy, thaw the cake in the fridge overnight. If desired, warm individual slices in the microwave for about 10-15 seconds on low power.
Decoration Care: Keep the spiderweb decoration intact by adding it fresh right before serving, ensuring your cake looks spooky and delightful for your Halloween festivities!
What to Serve with Spiderweb Chocolate Cake?
Indulging in a slice of enchanting Spiderweb Chocolate Cake is just the beginning of a delightful Halloween feast.
-
Pumpkin Spice Latte: A warm, spiced drink perfectly complements the rich chocolate flavor, enhancing the festive atmosphere of your gathering.
-
Vanilla Ice Cream: The creamy, cool texture offsets the luscious chocolate cake wonderfully, providing a delightful contrast on every bite.
-
Fruit Medley: Fresh fruits like strawberries and raspberries add a burst of color and tartness, balancing the sweetness of the cake beautifully. Mix in a hint of mint for freshness!
-
Chocolate-Dipped Pretzels: Crunchy and salty, these pretzels create an exciting textural contrast, making each dessert moment even more fun.
-
Witch’s Brew Punch: A vibrant, fruity punch brings an extra festive flair, with hints of citrus to refresh the palate, especially after the sweetness of the cake.
-
Spider Cookies: Keep the Halloween theme going with these fun, spooky treats that are not only adorable but also offer a chewy bite that pairs well with the cake.
In creating a lively dessert table, these charming pairings will enhance the magic of your Halloween celebration!
Make Ahead Options
These delicious Spiderweb Chocolate Cakes are perfect for meal prep enthusiasts! You can bake the cake layers up to 3 days in advance, allowing you to focus on frosting and decorating later. Once the cakes have cooled completely, wrap each layer tightly in plastic wrap and refrigerate to keep them fresh and moist. The spiderweb decoration can also be prepared ahead; simply melt the white chocolate and store it in a piping bag in the fridge for up to 24 hours. When you’re ready to serve, assemble the cake by frosting it and adding your spiderweb design, ensuring a festive and delicious centerpiece with minimal last-minute effort!
Spiderweb Chocolate Cake Recipe FAQs
How do I choose the right cocoa powder for my Spiderweb Chocolate Cake?
Choosing the right cocoa powder is essential for achieving a rich chocolate flavor. Dutch-processed cocoa powder offers a smoother taste and deeper color compared to natural cocoa powder. If you want an intense chocolate experience, I recommend trying the Dutch-processed option, as it pairs beautifully with other ingredients. Always double-check the packaging to ensure you are getting pure cocoa without added sugars or fillers.
How should I store my Spiderweb Chocolate Cake after making it?
Store your Spiderweb Chocolate Cake in an airtight container in the fridge for up to 3 days. This prevents it from drying out and keeps the flavors fresh. Ensure the cake is completely cooled before storing to avoid condensation. For longer storage, wrap the cooled cake tightly in plastic wrap and aluminum foil, and freeze it for up to 3 months. Just remember to add the spiderweb decoration before serving to keep it looking festive!
Can I freeze the Spiderweb Chocolate Cake for later use?
Absolutely! To freeze your Spiderweb Chocolate Cake, follow these steps: Cool the cake completely and then wrap it tightly in plastic wrap to prevent freezer burn. Next, place the wrapped cake in an airtight container or zip-top bag for extra protection. It can stay frozen for up to 3 months. When it’s time to enjoy, simply transfer the cake to the fridge overnight to thaw before serving.
What if my Spiderweb Chocolate Cake is dry?
If your Spiderweb Chocolate Cake turns out dry, it may be due to overbaking or using too much flour. To prevent this, always check your cake for doneness a few minutes before the recommended baking time by inserting a toothpick into the center. It should come out with a few moist crumbs. If the cake is already baked, you can try serving it with a scoop of ice cream or warm chocolate sauce to add moisture and enhance the dessert experience!
Are there any dietary considerations when making the Spiderweb Chocolate Cake?
Yes! If you’re catering to specific dietary needs, you can easily adapt the recipe. For a dairy-free option, use margarine instead of butter and substitute buttermilk with a mix of almond milk and vinegar. If you need a vegan version, replace the eggs with a flaxseed mixture (1 tablespoon of ground flaxseed mixed with 3 tablespoons of water equals one egg). Always be cautious with any allergies related to chocolate and ensure all ingredients used are safe for your guests.
Decadent Spiderweb Chocolate Cake to Thrill Your Halloween Party
Ingredients
Equipment
Method
- Prepare Your Ingredients: Gather all ingredients and preheat your oven to 350°F (175°C). Grease two 9-inch round cake pans.
- Mix the Wet Ingredients: In a bowl, cream the butter and sugar until fluffy, then add eggs, vanilla, and buttermilk.
- Combine Dry and Wet Ingredients: Gradually mix the dry ingredients into the wet until just combined.
- Bake the Cakes: Pour batter into pans and bake for 25-30 minutes until a toothpick comes out clean.
- Prepare the Spiderweb Decoration: Melt white chocolate chips until smooth; add food coloring if desired.
- Assemble the Cake: Layer the baked cakes with frosting and prepare for decoration.
- Create the Spiderweb Design: Pipe the melted white chocolate into a spiderweb design on top of the cake.
- Final Touches: Add chocolate decorations to enhance the spooky look before serving.