
As the aroma of warm, garlicky goodness wafts through the kitchen, I can’t help but feel excited about the simple joy of baking. Today, I’m sharing my Fluffy Garlic-Swirl Rolls, a recipe that combines the irresistible allure of buttery garlic with the comfort of freshly baked bread. Not only are these rolls a delightful side to elevate your favorite meals—think pasta and soups—but they’re also incredibly easy to customize with your favorite add-ins, turning a humble dish into a show-stopping centerpiece. Whether you’re a seasoned home chef or just starting to explore the world of baking, you’ll find that this recipe offers a rewarding baking experience filled with fluffy, flavorful rewards. Ready to get your hands floury and create something memorable? Let’s dive in!
Why are Garlic-Swirl Rolls so special?
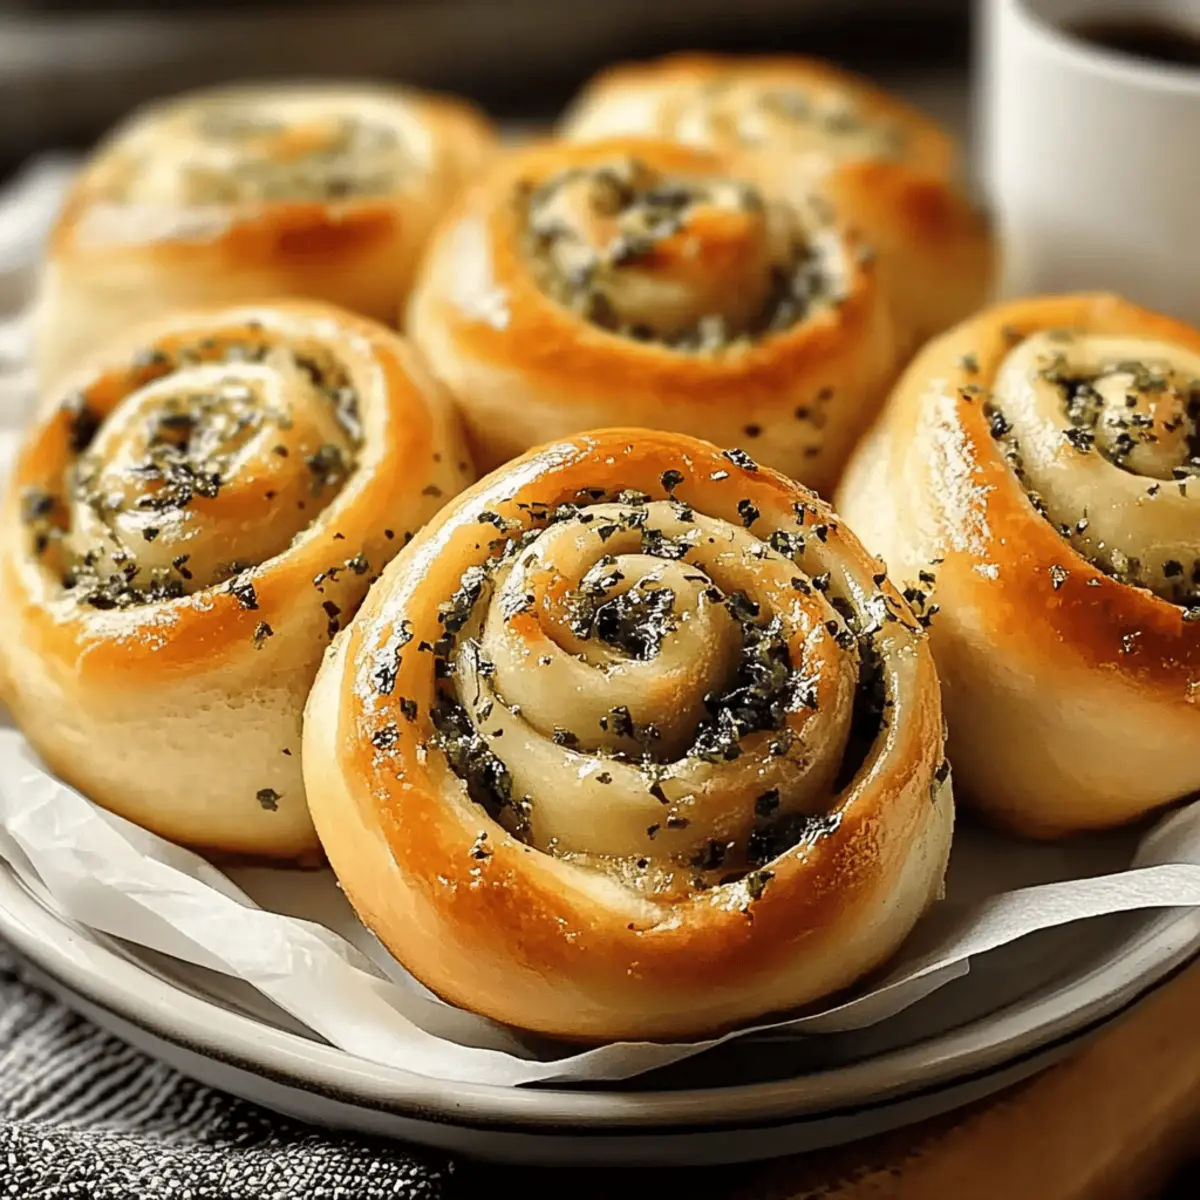
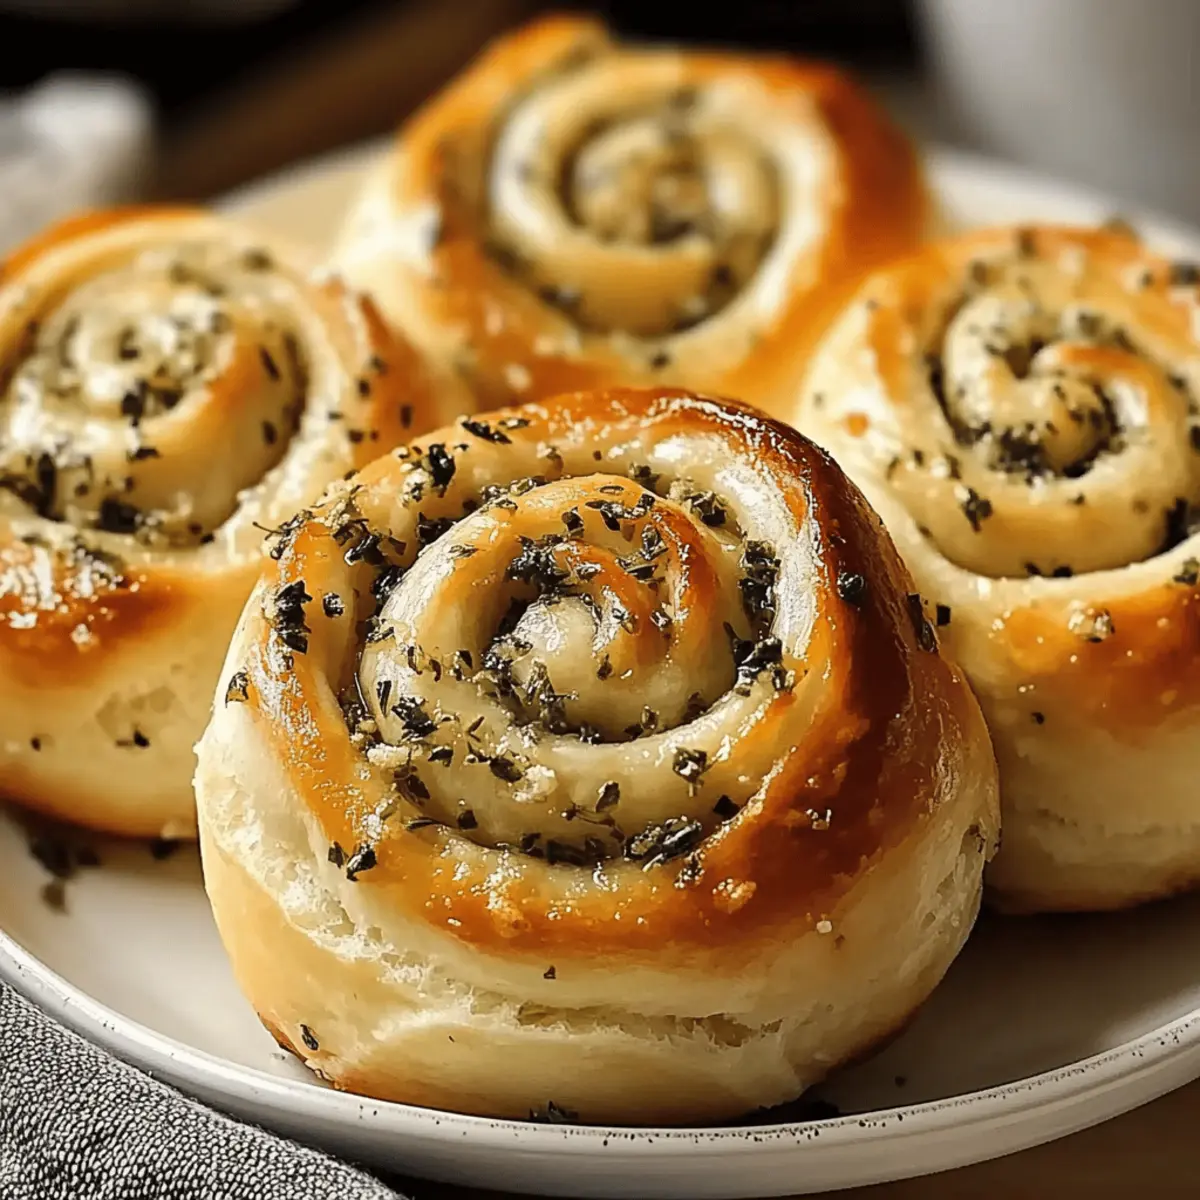
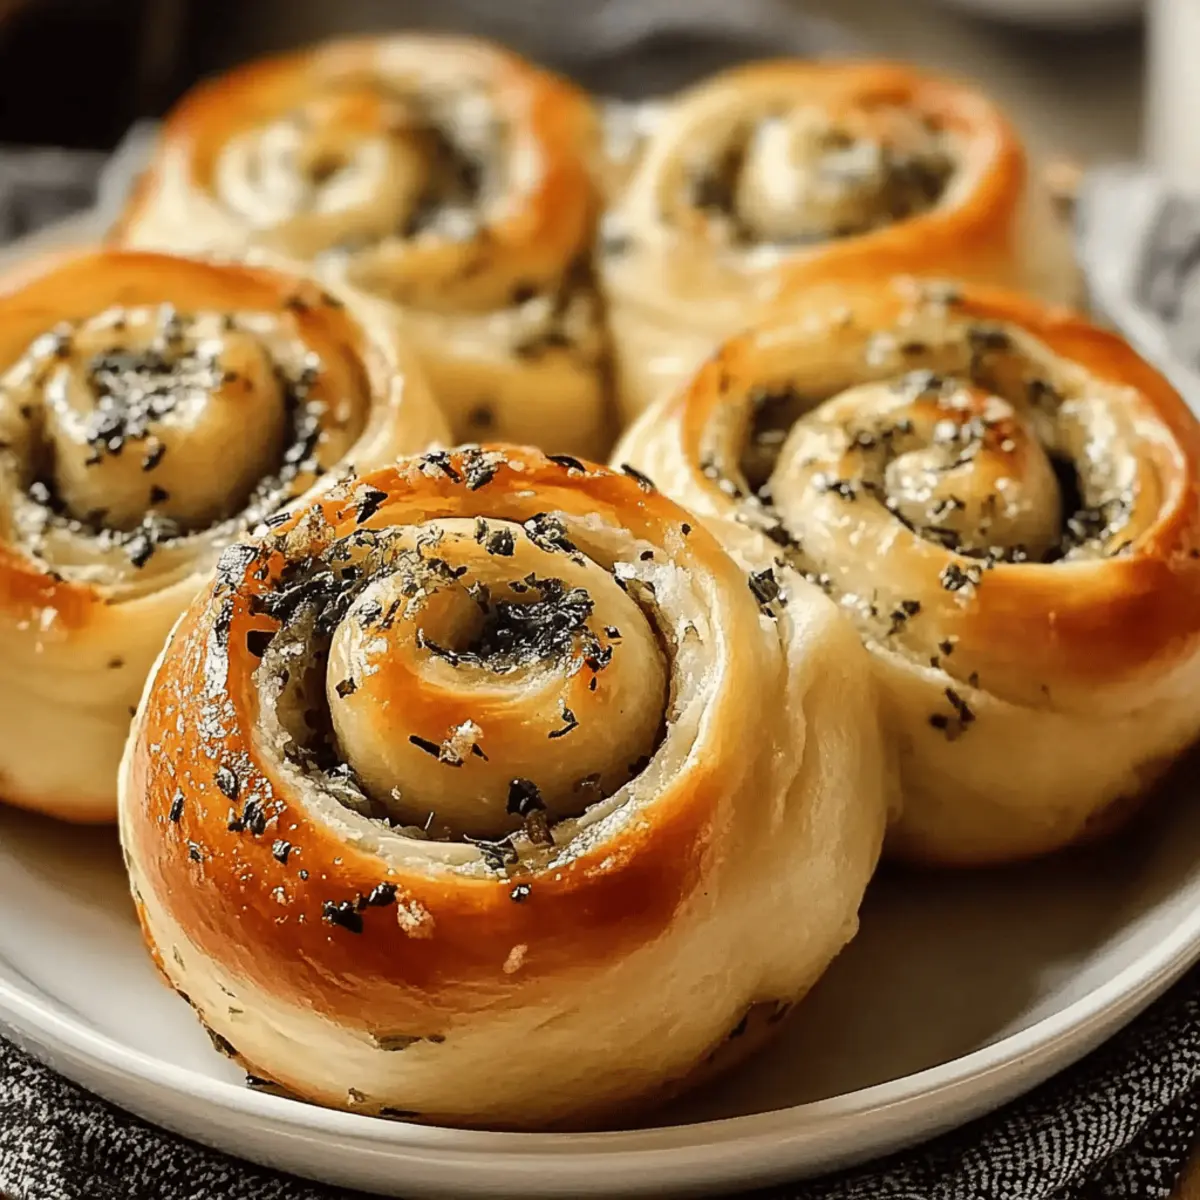
Fluffy Perfection: These rolls emerge soft and airy, with a delightful swirl of flavorful garlic butter that makes each bite a taste sensation.
Effortlessly Customizable: Feel free to swap in your favorite herbs or add cheese, caramelized onions, or spinach to create your unique twist.
Simple Process: With minimal ingredients and a straightforward approach, even novice bakers can create these impressive rolls.
Crowd-Pleasing: Ideal for family dinners, these rolls pair wonderfully with soups, salads, or pasta—making them a versatile addition to any meal. Don’t forget to check out my guide on Homemade Ciabatta Rolls for a delightful twist on fresh bread!
Garlic-Swirl Rolls Ingredients
Transform your baking with these essential ingredients.
For the Dough
- All-Purpose Flour – Provides structure and chewiness; replace with bread flour for extra chew.
- Yeast – Helps the dough rise, creating a fluffy texture; instant yeast is great for quicker activation.
- Warm Water – Activates the yeast and hydrates the dough; ensure it’s comfortably warm to avoid killing the yeast.
- Sugar – Feeds the yeast for activation and adds a hint of sweetness; honey or agave can be used as substitutes.
- Salt – Enhances flavor and controls yeast activity; sprinkle evenly to avoid salt spots.
- Butter – Adds richness and moisture; prefer unsalted butter for better control of salt.
For the Flavor
- Garlic (minced or powder) – Infuses that signature flavor; fresh garlic offers a more vibrant taste.
- Herbs (e.g., rosemary, parsley) – Customize the flavor; dried herbs work too, but adjust the quantity as needed.
Optional Add-Ins
- Cheese – For a creamy, savory twist; consider mozzarella or cheddar for gooey goodness.
- Caramelized Onions – Adds a hint of sweetness and depth; perfect for enhancing the filling’s richness.
- Spinach – A great way to sneak in some veggies; use fresh or sautéed for added texture and flavor.
Baking these Garlic-Swirl Rolls is not just a process; it’s a celebration of flavor—let’s get started!
Step‑by‑Step Instructions for Garlic‑Swirl Rolls
Step 1: Prepare the Dough
In a large mixing bowl, combine 4 cups of all-purpose flour, 2 teaspoons of instant yeast, 2 tablespoons of sugar, and 1 teaspoon of salt. Gradually stir in 1.5 cups of warm water and 4 tablespoons of melted unsalted butter until a cohesive dough forms. Your mixture should look slightly sticky but manageable. Once combined, allow the dough to rest for about 5 minutes to let the ingredients meld.
Step 2: Knead the Dough
Transfer the dough onto a floured work surface. Knead the dough for about 5-7 minutes until it becomes smooth and elastic. You should notice it becoming less tacky and more pliable as you work with it. This step is essential for developing the beautiful texture that will make your Garlic-Swirl Rolls soft and fluffy.
Step 3: First Rise
Place the kneaded dough in a greased bowl, ensuring all sides are coated in oil to prevent sticking. Cover the bowl with a clean kitchen towel or plastic wrap and let it rise in a warm, undisturbed place for about 1 hour, or until it has doubled in size. You’ll know it’s ready when it feels puffy and has expanded significantly.
Step 4: Prepare the Filling
While the dough rises, mix your filling by combining 4 tablespoons of softened unsalted butter, 4 cloves of minced garlic, 2 tablespoons of chopped fresh herbs (like parsley or rosemary), and any optional add-ins you desire, such as cheese or caramelized onions. Stir until all ingredients are well blended, creating a rich, aromatic mixture that will enhance your Garlic-Swirl Rolls.
Step 5: Shape the Rolls
Once the dough has risen, punch it down gently to release any air. On a floured surface, roll the dough into a rectangle about ¼ inch thick. Spread the prepared garlic-herb filling evenly over the surface, ensuring to cover the edges. Then, starting from one long edge, tightly roll the dough into a log. Slice the log into roughly 12 equal pieces, ensuring each roll is filled with that delicious garlic goodness.
Step 6: Second Rise
Arrange the sliced rolls in a greased baking dish, ensuring they are placed closely together but not touching. Cover them loosely with a kitchen towel or plastic wrap and allow them to rise for another 30-40 minutes. During this time, the rolls should puff up noticeably, reaching the perfect size for baking.
Step 7: Bake
Preheat your oven to 375°F (190°C) while the rolls are rising. Once they have puffed up, uncover the dish and bake the Garlic-Swirl Rolls for 20-25 minutes, or until they turn golden brown on top. Keep an eye on them in the last few minutes to ensure they don’t over-bake; a golden hue indicates they’re ready.
Step 8: Cool and Serve
Once baked, remove your Garlic-Swirl Rolls from the oven and let them cool in the pan for about 5 minutes. Then, carefully transfer them to a cooling rack or a serving platter. Serve warm to enjoy their delightful flavors, and consider offering extra garlic butter for dipping!
Storage Tips for Garlic-Swirl Rolls
Room Temperature: Store leftover Garlic-Swirl Rolls in an airtight container for up to 3 days to maintain their softness and flavor.
Freezer: For longer storage, freeze the rolls in an airtight container or freezer bag for up to 3 months. Be sure to wrap them tightly to prevent freezer burn.
Reheating: Reheat the rolls in a preheated oven at 350°F (175°C) for about 10 minutes or until warmed through. This will help restore their fluffy texture.
Thawing: To thaw frozen Garlic-Swirl Rolls, simply leave them at room temperature for a few hours, or overnight in the fridge, before reheating.
Garlic-Swirl Rolls: Your Customization Canvas
Feel free to unleash your creativity and tailor these rolls to match your taste, adding even more deliciousness!
-
Herb Options: Italian Twist – Swap in Italian seasoning for a delightful Mediterranean flavor explosion. Pair it with homemade marinara for dipping!
-
Cheesy Delight: Add Cheese – Sprinkle some grated mozzarella or cheddar inside the filling for a gooey, savory surprise that will wow your guests.
-
Veggie Lovers: Sautéed Veggies – Incorporate sautéed mushrooms, bell peppers, or spinach for added nutrition and texture. It’s a wonderful way to sneak in vegetables.
-
Spice It Up: Heat Factor – Add a touch of crushed red pepper or minced jalapeños into your filling for a kick of heat that elevates the rolls to a new level.
-
Sweet & Savory: Caramelized Onions – Mixing in caramelized onions will give a rich, sweet flavor that complements the garlic beautifully. It’s a satisfying flavor combination!
-
Dough Variation: Whole Wheat – Swap half of the all-purpose flour with whole wheat flour for a nuttier flavor and added fiber, without sacrificing softness.
-
Herb-Infused Butter: Flavored Butter – Try blending your softened butter with different herbs or even a hint of lemon zest for a refreshing twist on the classic garlic butter.
-
Savory Cinnamon Swirl: Cinnamon Sugar Roll – For a sweet yet savory option, replace garlic with cinnamon and sugar for a unique breakfast treat. Perfect with your morning cup of coffee or tea!
These variations can make your Garlic-Swirl Rolls a true reflection of your unique culinary style. Don’t forget, if you’re in the mood for more bread-making fun, check out my detailed guide on Cinnamon Rolls Dough for another delightful adventure!
Make Ahead Options
These Garlic-Swirl Rolls are perfect for busy weeknights or prepping for gatherings! You can prepare the dough and shape the rolls up to 24 hours in advance. Simply follow the recipe up to the second rise, then cover the baking dish tightly with plastic wrap and refrigerate. When you’re ready to bake, allow them to sit at room temperature for about 30 minutes before preheating your oven. This gives the rolls time to rise a bit more and ensures they’re just as fluffy and delicious. For longer storage, feel free to freeze the shaped, unbaked rolls for up to 3 months—just thaw them in the fridge overnight and follow the same baking instructions. Enjoy hassle-free baking that tastes just as fantastic!
What to Serve with Garlic-Swirl Rolls
These warm, fluffy rolls set the stage for an unforgettable mealtime experience, inviting everyone to gather around the table.
- Creamy Tomato Soup: The rich tomato flavor complements the garlicky notes while providing a comforting, hearty pairing.
- Caesar Salad: The crisp greens and creamy dressing offer a refreshing contrast to the warm, buttery rolls, making for a delightful balance.
- Herbed Pasta: Tossed with olive oil and fresh herbs, this dish enhances the robust flavors of the rolls, creating a harmonious Italian vibe.
- Savory Roasted Vegetables: Sweet, caramelized veggies like carrots and bell peppers add a flavorful punch, making the meal more colorful and nutritious.
- Marinara Sauce: Perfect for dipping, the zesty sauce accentuates the garlic, creating a delightful culinary journey with each bite.
- Garlic Butter: A drizzle of extra garlic butter right before serving elevates the rolls and enhances their luscious flavor further.
- Light White Wine: A chilled glass of Sauvignon Blanc or Pinot Grigio provides a crisp finish, balancing the richness of the rolls.
- Homemade Pesto: Spoon some fresh basil pesto over the rolls for an aromatic, herby boost that takes your meal to the next level.
- Lemon Sorbet: End your meal on a refreshing note, as this light dessert cleanses the palate perfectly after the savory flavors.
Tips for the Best Garlic-Swirl Rolls
Softened Butter: Use soft, not melted, butter for the filling to spread evenly without making the dough soggy.
Kneading Essentials: Ensure you knead the dough well for a fluffy texture; it should be smooth and elastic before rising.
Watch the Color: Keep an eye on the rolls while baking; golden brown indicates they’re perfectly cooked and ready to enjoy your Garlic-Swirl Rolls.
Proper Storage: Store leftovers in an airtight container; they maintain their softness for up to 3 days at room temperature or can be frozen for longer freshness.
Garlic-Swirl Rolls Recipe FAQs
What type of garlic should I use for the best flavor?
Absolutely! For the most potent flavor, I recommend using fresh garlic cloves, which you can mince or finely chop. However, if you’re in a pinch, garlic powder works well too; just remember that it will give a milder taste—typically about 1 teaspoon of garlic powder is equal to 1 clove of fresh garlic.
How should I store leftover Garlic-Swirl Rolls?
To keep your rolls deliciously soft, place them in an airtight container at room temperature for up to 3 days. If you want to save them longer, you can freeze them! Just wrap each roll in plastic wrap, then place them in a freezer bag. They should stay good for up to 3 months.
Can I freeze Garlic-Swirl Rolls?
Yes, absolutely! To freeze your rolls, allow them to cool completely after baking. Then, wrap each roll tightly in plastic wrap or aluminum foil to prevent freezer burn. Place them in a freezer-safe bag or container, and you can enjoy them for up to 3 months. When you’re ready to enjoy, just thaw at room temperature and reheat in the oven!
What should I do if my dough isn’t rising?
Oh no! If your dough isn’t rising, it could be due to yeast that hasn’t activated. Make sure your warm water is about 110°F (43°C); water that’s too hot can kill the yeast. If you suspect your yeast is inactive, you can test it by mixing it with warm water and sugar and letting it sit for 5-10 minutes. If it doesn’t bubble and froth, it might be time to get a new packet of yeast.
Are there any dietary considerations when making Garlic-Swirl Rolls?
Yes! If you or someone you’re serving has allergies, always check the labels of your ingredients. The recipe includes all-purpose flour, butter, and garlic, so consider using gluten-free flour for those with gluten sensitivities and dairy-free butter as an alternative for lactose intolerance. It’s all about making sure everyone can enjoy those delightful rolls!
How can I enhance the flavor of my Garlic-Swirl Rolls?
Great question! You can elevate the flavor profile by incorporating herbs like rosemary or thyme into your garlic butter filling. Adding a sprinkle of grated cheese like mozzarella or Parmesan inside the rolls can also create a luscious, cheesy center. Feel free to get creative and add caramelized onions or even a touch of chili flakes for some heat!

Garlic-Swirl Rolls: Fluffy, Flavorful Delight for Every Meal
Ingredients
Equipment
Method
- In a large mixing bowl, combine 4 cups of all-purpose flour, 2 teaspoons of instant yeast, 2 tablespoons of sugar, and 1 teaspoon of salt. Gradually stir in 1.5 cups of warm water and 4 tablespoons of melted unsalted butter until a cohesive dough forms.
- Transfer the dough onto a floured work surface. Knead the dough for about 5-7 minutes until it becomes smooth and elastic.
- Place the kneaded dough in a greased bowl, cover, and let it rise for about 1 hour or until doubled in size.
- While the dough rises, mix the filling by combining 4 tablespoons of softened unsalted butter, 4 cloves of minced garlic, 2 tablespoons of chopped fresh herbs, and any optional add-ins.
- Once risen, roll the dough into a rectangle and spread the filling evenly over the surface. Roll tightly and slice into 12 equal pieces.
- Arrange the sliced rolls in a greased baking dish, cover loosely and let rise for another 30-40 minutes.
- Preheat your oven to 375°F (190°C) and bake the rolls for 20-25 minutes until golden brown.
- Once baked, let cool in the pan for about 5 minutes before transferring to a cooling rack or serving platter.