
“Can you believe we’re living in a world where dessert can be both super simple and irresistibly delicious?” That’s exactly what I thought when I first whipped up this No-Bake Butterfinger Peanut Butter Pie. Combining the rich, creamy taste of peanut butter with the delightful crunch of Butterfinger candy, this dessert is all about indulgence without the fuss of baking. Perfect for any gathering, it promises to be a showstopper that requires minimal effort and offers maximum enjoyment. Whether you’re planning a potluck or just treating yourself after a long day, this pie strikes the perfect balance of sweet and savory, making it an instant favorite. Are you ready to create a delightful masterpiece that’ll charm your friends and family? Let’s dive in!
Why is this Butterfinger Pie a winner?
Irresistible flavor: The creamy peanut butter and crunchy Butterfinger combination delivers a nostalgic treat that’s hard to resist. No-bake convenience: It’s ready to impress without ever turning on the oven, making it a perfect choice for warmer days or busy schedules. Quick prep time: With just a few easy steps, you can have this pie chilling in the fridge in no time. Crowd-pleasing dessert: Perfect for parties and potlucks, it’s a guaranteed hit that brings smiles to everyone’s faces. And if you’re a fan of peanut butter, don’t miss trying our Peanut Butter Brownie Cups for another delicious twist!
Butterfinger Peanut Butter Pie Ingredients
• Here’s what you need for this delightful pie!
For the Crust
- Graham cracker crumbs – 2 cups, these make a great crust base. Can substitute with crushed Oreos for a chocolatey twist.
- Unsalted butter – ½ cup, melted to bind the crust.
For the Filling
- Creamy peanut butter – 1 cup, the core flavor of the pie. Use high-quality, smooth peanut butter for the best taste.
- Cream cheese – 8 oz, softened for a smooth, rich texture.
- Powdered sugar – 1 cup, this adds sweetness and stabilizes the mixture.
- Vanilla extract – 1 teaspoon to enhance the flavor.
- Whipped topping – 8 oz, thawed to lighten the filling. Cool Whip can be used here.
- Butterfinger candy bars – 4, crushed, for that signature flavor and a satisfying crunch. Reserve some for topping.
Now that you have your ingredients ready, it’s time to get started on this decadent Butterfinger Peanut Butter Pie!
Step‑by‑Step Instructions for Butterfinger Peanut Butter Pie
Step 1: Prepare the Crust
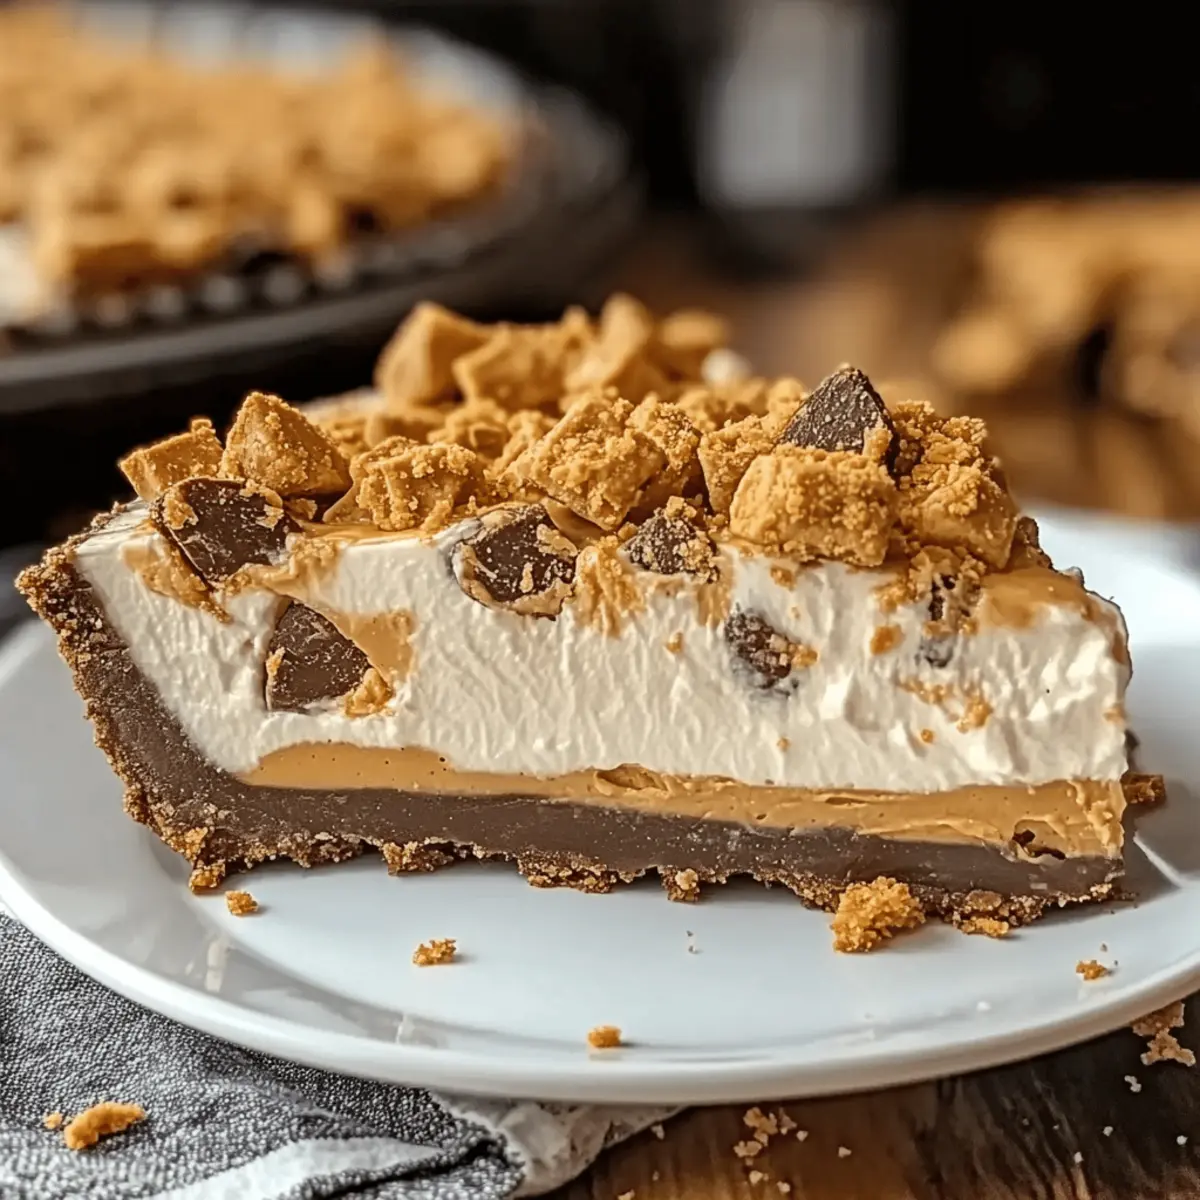
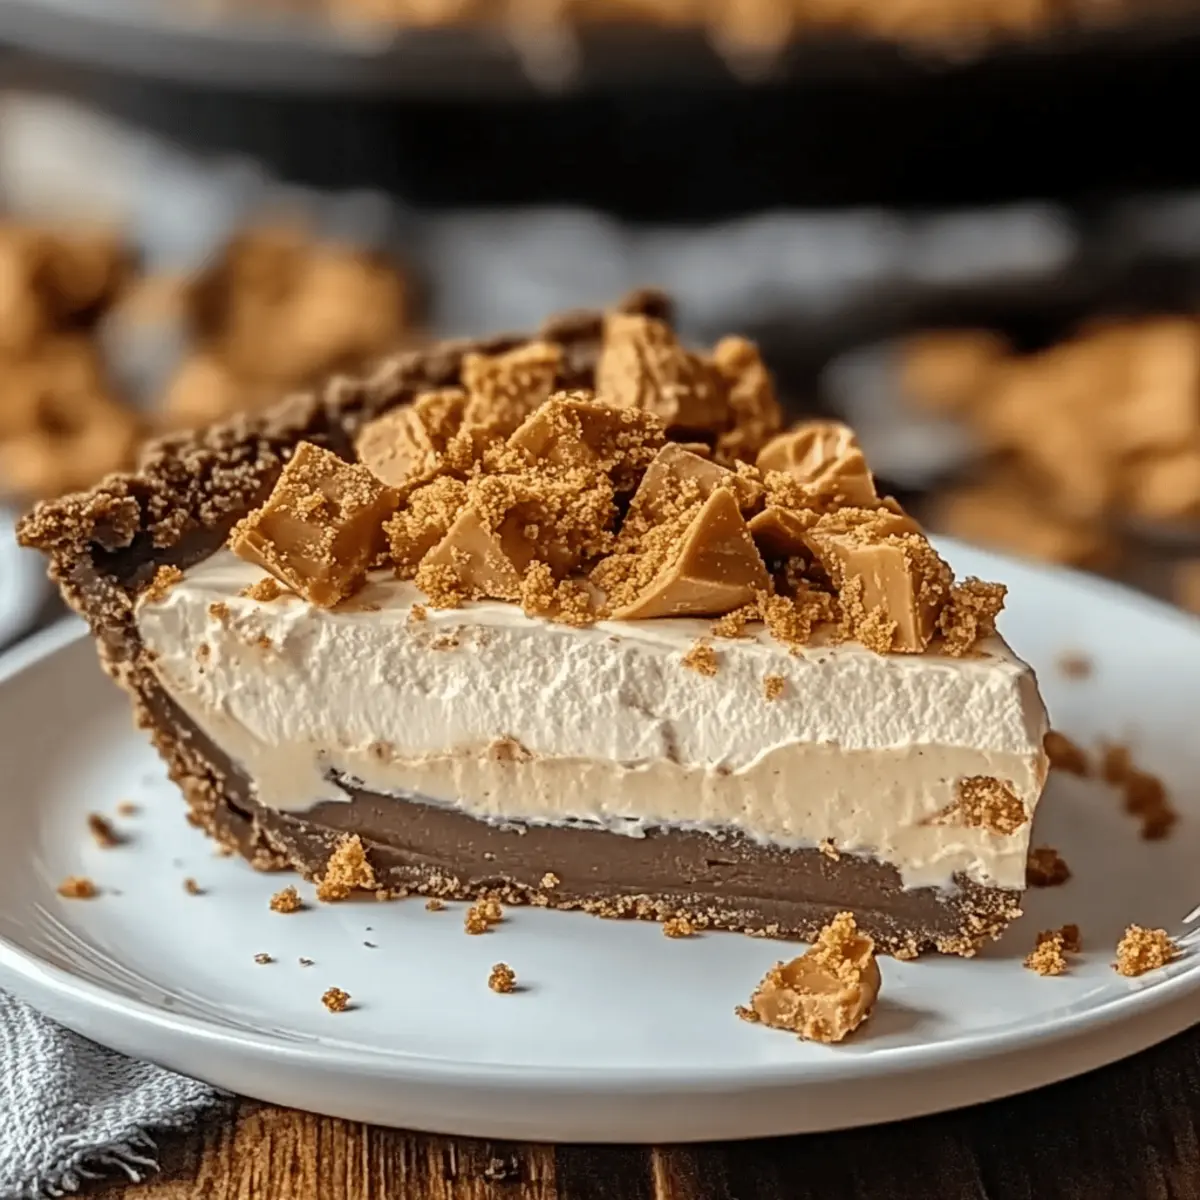
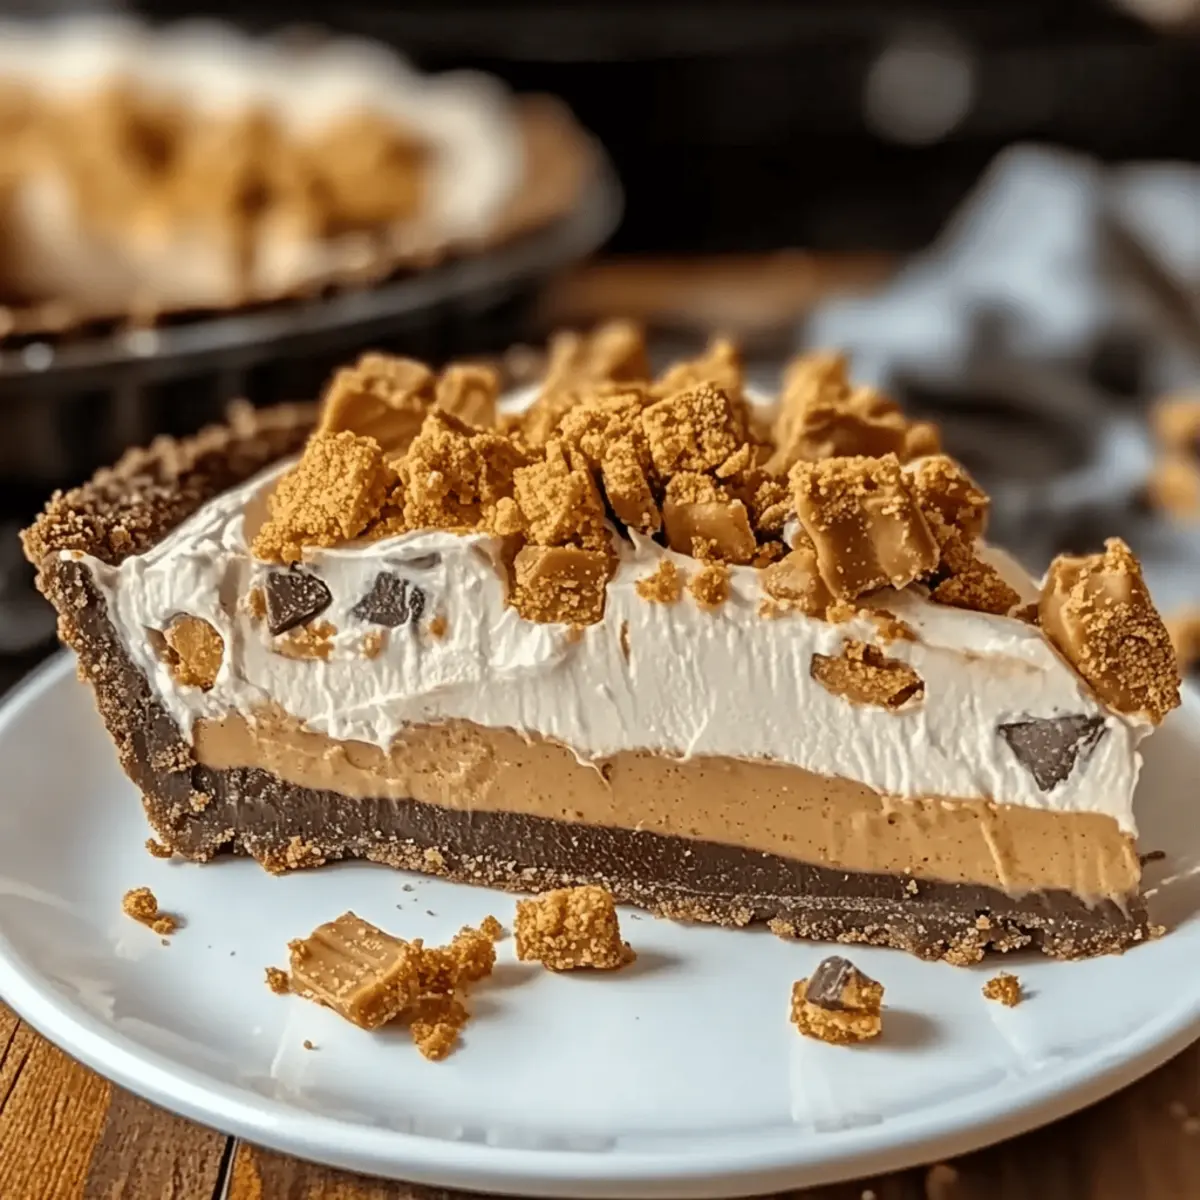
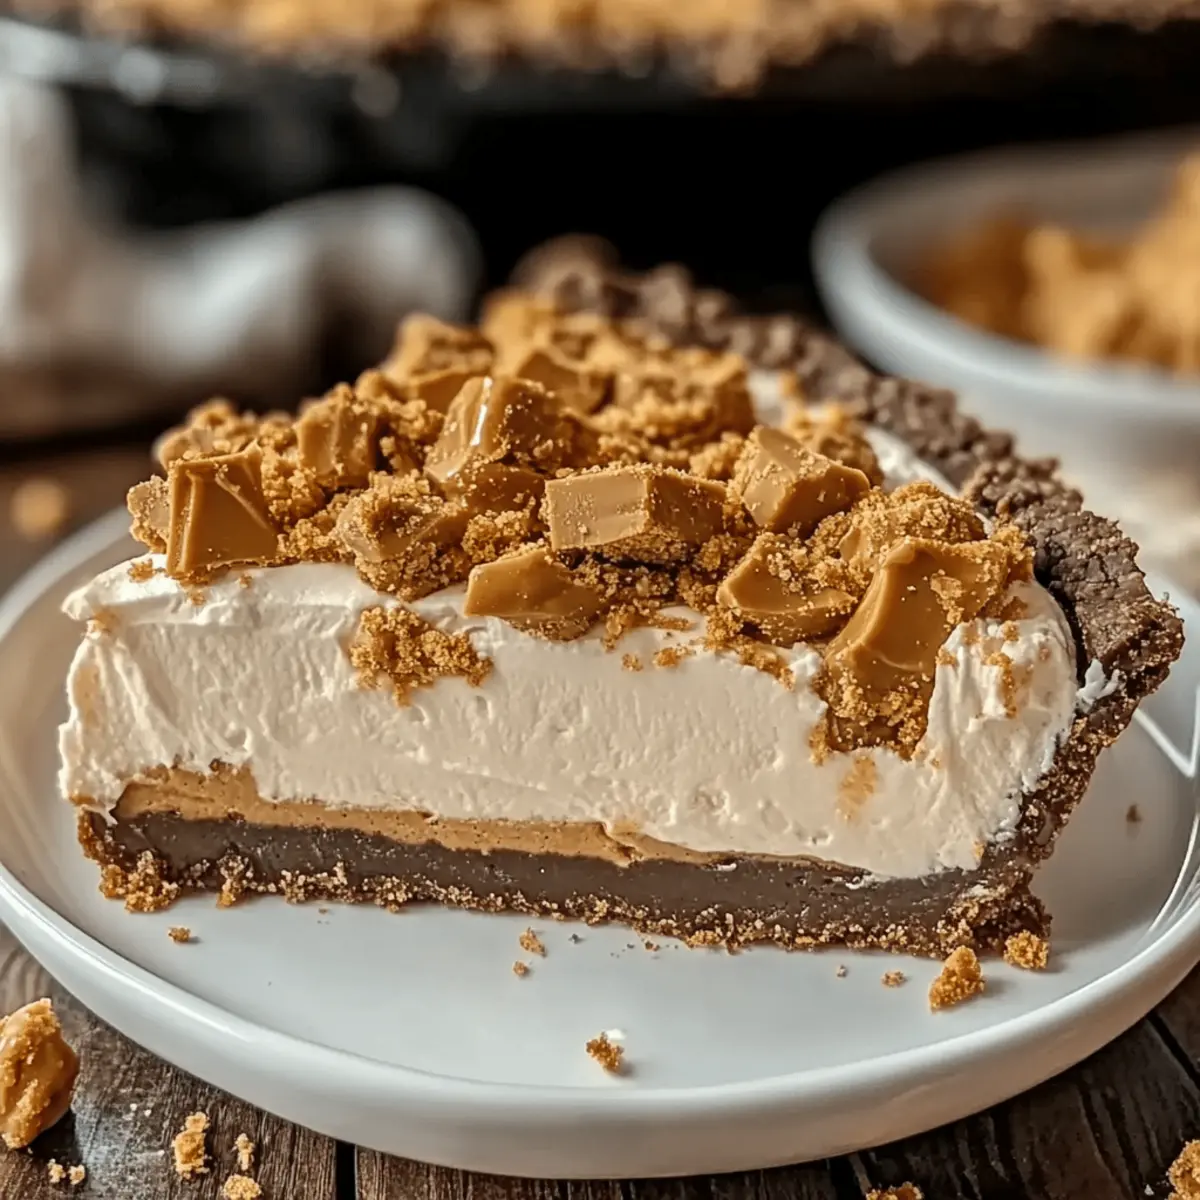
In a large mixing bowl, combine 2 cups of graham cracker crumbs with ½ cup of melted unsalted butter. Mix until the crumbs are evenly coated and resemble wet sand. Press the mixture firmly into the bottom of a 9-inch pie pan to form a compact crust. Aim for an even thickness, making sure it’s tightly packed, then set aside while you prepare the filling.
Step 2: Mix the Filling
In another mixing bowl, beat together 8 oz of softened cream cheese, 1 cup of creamy peanut butter, and 1 cup of powdered sugar using a hand mixer or stand mixer. Blend on medium speed until the mixture is smooth and creamy, about 2-3 minutes. Once combined, add in 1 teaspoon of vanilla extract and continue to mix until well integrated and fluffy.
Step 3: Fold in the Whipped Topping
Gently fold 8 oz of thawed whipped topping into the peanut butter mixture with a spatula. Be careful to incorporate it without deflating the mixture, which should remain light and airy. Mix until uniformly blended, allowing the lightness of the whipped topping to enhance the creaminess of the Butterfinger Peanut Butter Pie filling.
Step 4: Add the Candy
Take your 4 crushed Butterfinger candy bars and stir them into the filling mixture, evenly distributing the crunchy pieces throughout. Make sure to reserve some crushed Butterfinger for topping later. This blend of textures will give your pie its signature flavor and delightful crunch.
Step 5: Assemble the Pie
Carefully pour the creamy filling into the prepared crust. Use a spatula to smooth the top and ensure the filling is evenly distributed. The filling should reach the edges of the crust, creating a nice, inviting layer that showcases the rich, creamy Butterfinger Peanut Butter Pie you’re creating.
Step 6: Chill the Pie
Place the pie in the refrigerator and let it chill for at least 4 hours, or ideally overnight, to allow it to set fully. This step is crucial for ensuring the pie holds its shape when sliced. While chilling, the flavors will meld, creating a deliciously rich dessert that’s ready to impress when served.
Step 7: Serve the Pie
Before serving, sprinkle the reserved crushed Butterfinger bars on top of the pie for an extra crunchy garnish. Slice into wedges and enjoy this delightful Butterfinger Peanut Butter Pie. Each slice should reveal a creamy filling with a hint of crunch, making it a perfect dessert for gatherings or a sweet treat at home.
Make Ahead Options
These Butterfinger Peanut Butter Pie preparations are perfect for busy weeknights or occasions when you want to impress without the last-minute stress! You can prepare the crust and filling up to 24 hours in advance. Simply mix the graham cracker crust and press it into the pie pan, then blend the filling and store it separately in an airtight container in the refrigerator. To maintain quality, ensure the filling is well-covered to prevent any moisture transfer. When you’re ready to serve, simply pour the chilled filling into the crust, smooth the top, and refrigerate for at least 4 hours, or overnight for the best results. This way, you’ll have a show-stopping dessert waiting for you with minimal fuss!
Butterfinger Peanut Butter Pie Variations
Feel free to explore these delightful twists that allow your Butterfinger Peanut Butter Pie to shine even brighter, making your kitchen adventures all the more exciting!
-
Chocolate Crust: Swap crushed graham crackers for crushed Oreos to create a rich chocolate crust that complements the peanut butter flavor beautifully. This adds a new layer of indulgence you won’t want to miss!
-
Nutty Alternative: Use almond or cashew butter instead of peanut butter for a unique flavor profile. The nuttiness of these alternatives introduces a new twist that might just become your new favorite!
-
Candy Mix-Up: Try adding a mix of different candy bars such as Snickers or Milky Way along with the Butterfinger for a diverse flavor experience. This can take your pie from ordinary to extraordinary in no time!
-
Dairy-Free Delight: Substitute cream cheese and whipped topping with dairy-free alternatives to make this pie accessible for those who are lactose intolerant or prefer plant-based choices. The flavors remain vibrant and delicious!
-
Crunchy Toppings: Add chopped nuts or toasted coconut on top of the pie before serving to enhance the texture and flavor, giving an extra crunch that everyone will love. It’s like a surprise in every bite!
-
Peanut Butter Swirl: Fold in some extra creamy peanut butter into the filling for an intensified peanut butter experience. The swirls provide a beautiful marbled effect that looks as good as it tastes!
-
Spicy Twist: For those who crave a bit of heat, sprinkle in a pinch of cayenne pepper to the filling. This unexpected kick pairs surprisingly well with the sweetness, creating an exciting contrast!
-
Layered Dessert: Transform it into a parfait by layering the pie filling with crushed Butterfinger and whipped topping in individual glasses. This makes for a fun presentation, perfect for parties or gatherings!
No matter which variation you choose, your Butterfinger Peanut Butter Pie is bound to be a memorable treat. And if you’re in love with peanut butter desserts, don’t forget to explore our Chewy Peanut Butter Chocolate Candy Bars for another delicious option that’s sure to delight!
Expert Tips for Butterfinger Peanut Butter Pie
-
Choose Quality Ingredients: Use high-quality, creamy peanut butter and fresh cream cheese for the best flavors. Poor-quality ingredients can lead to a lackluster pie.
-
Mix Gently: When folding in the whipped topping, do so gently to maintain the airy texture needed for a fully creamy Butterfinger Peanut Butter Pie.
-
Firm Crust: Ensure your graham cracker crust is tightly packed and firm; a soft crust can lead to a pie that falls apart when served.
-
Chill Time Matters: Don’t skip the chilling step! Allow the pie to set overnight for the best texture and flavor.
-
Reserve Candy for Topping: Always save some crushed Butterfinger bars for the top. This adds a fresh look and crunchy texture once sliced.
-
Avoid Overmixing: While preparing the filling, be cautious not to overmix; this can result in a denser filling that isn’t as smooth and light.
What to Serve with Butterfinger Peanut Butter Pie
Elevate your dessert experience by pairing this delightful treat with complementary dishes that enhance its flavors and textures.
- Creamy Mashed Potatoes: Their velvety texture provides a savory contrast to the sweet pie, perfect for balancing your meal.
- Fresh Fruit Salad: A refreshing medley of seasonal fruits adds brightness and acidity, cutting through the richness of the pie.
- Chocolate Chip Cookies: This classic dessert echoes the sweet indulgence of the pie while adding a touch of nostalgia.
- Vanilla Ice Cream: A scoop of creamy vanilla ice cream offers a cool, smooth pairing, enhancing every slice of peanut butter bliss.
- Coffee or Espresso: A warm cup of coffee or a rich espresso creates a perfect balance with the pie’s sweetness, making each bite even more satisfying.
- Chocolate Ganache Tart: If you’re craving a chocolate twist, this luxurious tart harmonizes perfectly with the peanut butter flavor— a dreamy match!
- Whipped Cream Topping: A simple addition to the pie itself is a dollop of lightly sweetened whipped cream for an extra layer of creaminess.
- Sparkling Water with Citrus: For a light and refreshing drink option, sparkling water infused with lemon or lime keeps the palate lively and clean.
How to Store and Freeze Butterfinger Peanut Butter Pie
Fridge: Keep the pie covered in the refrigerator for up to 1 week. This ensures it stays fresh and creamy for your enjoyment.
Freezer: You can freeze individual slices for up to 2 months. Wrap tightly in plastic wrap and place in an airtight container.
Thawing: To enjoy frozen slices, simply transfer them to the fridge for a few hours or overnight before serving.
Serving Tip: Top each slice with fresh whipped cream and additional crushed Butterfinger candy for an enticing presentation before serving!
Butterfinger Peanut Butter Pie Recipe FAQs
What type of peanut butter should I use?
Absolutely! For the best results, use high-quality, creamy peanut butter without added sugar or oils. This ensures that your Butterfinger Peanut Butter Pie has rich flavor and a smooth texture.
How should I store the pie, and how long does it last?
You can keep the Butterfinger Peanut Butter Pie covered in the refrigerator for up to 1 week. If you want to make it in advance, it actually tastes even better after a day of chilling! Just remember to cover it well to maintain its creamy goodness.
Can I freeze this pie?
Very much! To freeze your Butterfinger Peanut Butter Pie, first, cut it into individual slices. Wrap each slice tightly with plastic wrap and place them in an airtight container. This way, you can enjoy your pie later for up to 2 months! For the best experience, thaw the slices in the fridge for a few hours or overnight prior to serving.
What if my pie doesn’t set properly?
If your pie doesn’t set as expected, it might be due to insufficient chilling time. Make sure to chill it for at least 4 hours, but overnight is best! If you’re still having trouble, you could blend an additional ½ cup of whipped topping into the filling, which will help stabilize it. Also, ensure that the cream cheese is softened well before mixing for a smoother texture.
Can I use different types of candy?
Absolutely! If you’re looking to mix things up, you can substitute the Butterfinger bars with other crunchy candy bars like Snickers or Reese’s Peanut Butter Cups for a delicious twist. Just chop them into similar-sized pieces before folding them into the mixture.
Is this pie suitable for people with allergies?
When it comes to allergies, this pie contains common allergens, including peanuts and dairy. If you’re making it for someone with nut allergies, consider using almond or sunflower seed butter instead of peanut butter. Always check each ingredient for potential allergens to ensure a safe dessert for everyone.
Creamy Butterfinger Peanut Butter Pie for Sweet Moments
Ingredients
Equipment
Method
- In a large mixing bowl, combine 2 cups of graham cracker crumbs with ½ cup of melted unsalted butter. Mix until evenly coated and resembles wet sand. Press into a 9-inch pie pan to form a compact crust.
- In another mixing bowl, beat together 8 oz of softened cream cheese, 1 cup of creamy peanut butter, and 1 cup of powdered sugar using a mixer until smooth, about 2-3 minutes. Add 1 teaspoon of vanilla extract and mix until well blended.
- Gently fold 8 oz of thawed whipped topping into the peanut butter mixture with a spatula until uniformly blended.
- Stir in 4 crushed Butterfinger candy bars, evenly distributing throughout the filling.
- Pour the creamy filling into the prepared crust, smoothing the top.
- Refrigerate the pie for at least 4 hours or ideally overnight to set.
- Before serving, sprinkle the reserved crushed Butterfinger bars on top.