
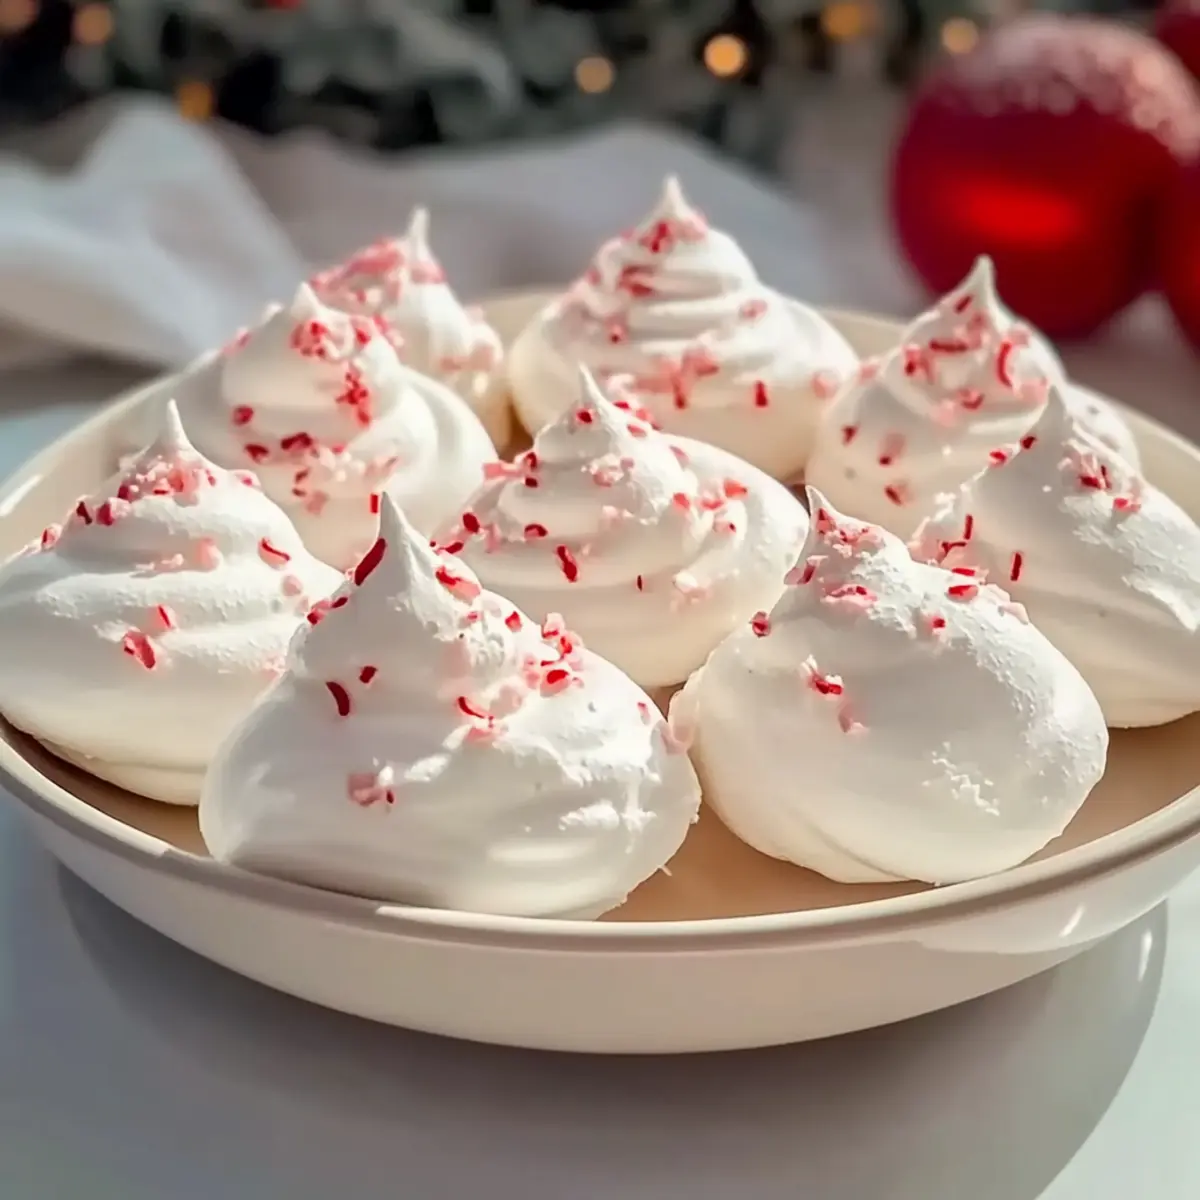
Standing in my kitchen, the unmistakable scent of peppermint wafts through the air, transporting me straight to a cozy winter wonderland. Today, I’m excited to share my go-to recipe for Peppermint Meringues, a culinary delight that perfectly captures the spirit of the holiday season. These light and airy treats are not just visually stunning with their crisp exteriors and soft, melt-in-your-mouth interiors; they’re also gluten-free and a delightful addition to any festive gathering. Their simplicity in preparation makes them accessible for every home chef, while their whimsical presentation ensures they’ll be a stunning centerpiece on your dessert table. So, are you ready to bring a sprinkle of holiday magic into your kitchen? Let’s dive into this easy and fun recipe!
Why Are Peppermint Meringues So Irresistible?
Lightness and Airiness: These meringues are like little clouds of goodness that melt in your mouth, offering a refreshing peppermint flavor that instantly reminds you of the holiday spirit.
Simple Preparation: Even if you’re a kitchen novice, you can whip up these treats without any stress. Just a few ingredients and you’ll have beautiful meringues in no time!
Gluten-Free Delight: Perfect for everyone at your festive gathering, these meringues are gluten-free, so you can indulge without worry.
Versatile Presentation: Dress them up with colorful sprinkles or swap crushed candy canes for chocolate shavings to match your theme—the possibilities are endless!
Crowd-Pleasing Treat: Serve these with hot cocoa or coffee and watch them disappear; they’re equally delicious as a snack or as an elegant garnish on other desserts.
Get ready to impress your guests with this delightful recipe and learn more about how to create a festive atmosphere with your dessert table!
Peppermint Meringue Ingredients
• Here’s what you need for these delightful treats!
For the Meringue
- Egg Whites – Provides structure and volume; ensure they are room temperature for best results.
- Granulated Sugar – Sweetness and stability; can be replaced with caster sugar for quicker dissolving.
- Cream of Tartar – Stabilizes the egg whites to achieve stiff peaks; avoid substitution for the best texture.
- Salt – Enhances flavor; just a pinch suffices.
- Vanilla Extract – Adds depth to flavor; substitutable with almond extract for a unique twist.
- Peppermint Extract – The primary flavoring ingredient that brings the holiday spirit; can be swapped with vanilla or almond extract for different tastes.
For Topping
- Crushed Peppermint Candies – A festive garnish that adds color and crunch; can be substituted with chocolate shavings or colorful sprinkles for decoration.
Now you’re all set to create these airy Peppermint Meringues that’ll enchant everyone at your table!
Step‑by‑Step Instructions for Peppermint Meringues
Step 1: Preheat the Oven
Begin by preheating your oven to 200°F (93°C). While the oven warms, prepare a baking sheet by lining it with parchment paper. This will ensure the peppermint meringues do not stick to the surface, allowing for easy removal once baked. It’s essential to maintain a low temperature to dry the meringues slowly, resulting in that delightful crispness.
Step 2: Beat Egg Whites
In a clean mixing bowl, start beating your room-temperature egg whites on medium speed until they become foamy and slightly bubbly. At this stage, you may notice the color change, indicating they’re beginning to aerate. This should take around 2-3 minutes, setting you up for the next steps in creating those airy peppermint meringues.
Step 3: Add Stabilizers
Once your egg whites appear foamy, gently add the cream of tartar and a pinch of salt to the mix. Increase the mixer speed to high and continue beating until soft peaks form, usually within 2-3 minutes. You’ll know it’s ready when you can lift the beaters and the peaks gently flop over, resembling soft, fluffy clouds.
Step 4: Incorporate Sugar
Now, gradually add the granulated sugar, one tablespoon at a time, while keeping the mixer on high speed. Continue mixing for about 5-7 minutes until the sugar dissolves completely, and the mixture transforms into stiff, glossy peaks. The meringue should be thick enough to hold its shape when lifted, making it perfect for peppermint meringues.
Step 5: Flavor the Meringue
With the mixer still running, carefully fold in the vanilla and peppermint extracts. Use a gentle hand to avoid deflating the meringue, as you want to preserve that lovely volume. The combination of these extracts gives the peppermint meringues their signature flavor, so ensure they are evenly distributed without losing air.
Step 6: Pipe the Meringues
Transfer the meringue mixture into a piping bag fitted with a large star tip. Begin piping small mounds onto the prepared baking sheet, making sure to space them about an inch apart. If they are not perfectly shaped, don’t worry; the whimsical look of peppermint meringues adds to their charm, embracing the festive spirit!
Step 7: Bake the Meringues
Once you have all your mounds piped, pop the baking sheet into the preheated oven. Bake the peppermint meringues for about 90 minutes, or until they are dry to the touch and easily lift off the parchment. The low and slow baking method is key to achieving that perfect airy texture while keeping them crisp on the outside.
Step 8: Cool in the Oven
After the baking time is up, turn off the oven and leave the peppermint meringues inside to cool for 1-2 hours. This gradual cooling process helps prevent cracking, enabling them to maintain their shape and delightful texture. It’s a simple yet essential step to achieve the best results.
Step 9: Garnish with Peppermint
Once completely cooled, it’s time to have fun! Sprinkle the tops of each peppermint meringue with crushed peppermint candies. This not only adds a festive touch but also enhances the peppermint flavor, turning your delightful treats into beautiful holiday confections that are sure to impress.
Peppermint Meringues Variations & Substitutions
Feel free to explore these delightful twists and substitutions to make your peppermint meringues uniquely yours!
-
Dairy-Free: Use a few drops of almond milk flavoring for a nutty touch, maintaining that airy texture without the dairy.
Almond milk lends a subtle depth, and can elevate your meringues to new heights. -
Colorful Meringues: Add a few drops of food coloring to the meringue for a festive presentation that dazzles and delights.
Vibrant hues can make your treats pop, transforming a simple dessert into a show-stopper at any holiday gathering. -
Alternative Extracts: Swap the peppermint extract for almond or even orange extract for a unique flavor twist.
Mixing it up can lead to an unexpected yet delicious variation, appealing to different palates at your table. -
Chocolate Lovers: Instead of crushed peppermint candies, top with chocolate shavings or mini chocolate chips for a decadent surprise.
The combination of mint and chocolate is a classic that always brings joyful smiles! -
Nutty Crunch: Fold in finely chopped nuts like pistachios or almonds before piping the meringues for added texture.
They introduce a delightful crunch that perfectly contrasts the meringue’s lightness, creating a beautiful balance in every bite. -
Sprinkle the Spice: For some heat, add a pinch of cayenne or chili powder to the meringue for an unexpected spicy kick.
This playful twist can ignite your taste buds, leaving an adventurous impression on your holiday guests. -
Festive Garnishes: Decorate with edible glitter or colorful sprinkles for an eye-catching finish that suits any holiday theme.
This simple addition can turn your meringues into dazzling pieces of art, enticing everyone to indulge. -
Layered Treats: Create an impressive dessert by sandwiching two meringues with whipped cream or a peppermint mousse.
This elegant twist not only elevates presentation but also offers a luscious bite that’s sure to impress at any celebration.
Feel free to mix and match these variations to create the ultimate festive treat. Enjoy creating joyful moments in your kitchen with every delicious bite!
Storage Tips for Peppermint Meringues
Room Temperature: Store peppermint meringues in an airtight container at room temperature for up to 2 weeks. This helps maintain their crispness while keeping them accessible for festive snacking.
Avoid Moisture: Keep meringues away from humid environments, as exposure to moisture can cause them to lose their delightful texture and become soft.
Freezer: For longer storage, you can freeze meringues. Place them in an airtight container with parchment paper between layers, and they can last up to 3 months.
Reheating: If meringues become slightly soft, you can gently re-crisp them in a low oven (200°F/93°C) for about 10-15 minutes. Enjoy these airy peppermint meringues at your leisure!
Make Ahead Options
These Peppermint Meringues are perfect for meal prep enthusiasts! You can whip up the meringue mixture up to 24 hours in advance. Simply beat the egg whites, sugar, and stabilizers until stiff peaks form, then store the mixture in an airtight container in the refrigerator. For the best texture, avoid refrigerating after piping; instead, pipe the meringues directly onto the prepared baking sheet and bake them fresh when you’re ready. If you want to make them even earlier, you can bake the meringues and store them in an airtight container at room temperature for up to 3 days. Just remember to add the crushed peppermint candies right before serving for that festive touch! Enjoy the time-saving benefits while still impressing your guests with these delightful, light treats.
Expert Tips for Perfect Peppermint Meringues
-
Clean Equipment: Ensure all mixing bowls and utensils are spotless and completely dry, as even a trace of fat can deflate the egg whites.
-
Room Temperature Eggs: Use egg whites at room temperature for the best volume and stability when whipped, resulting in those signature fluffy peppermint meringues.
-
Gradual Sugar Addition: Add sugar slowly, one tablespoon at a time. This allows for better incorporation and helps achieve the glossy consistency needed for stiff peaks.
-
Oven Humidity: Keep the oven door closed during baking. Excess humidity can affect the crispness, so resist the urge to peek!
-
Cooling Gradually: Don’t skip the cooling step in the oven. It helps maintain the meringues’ structure and keeps them from cracking as they cool.
-
Experiment with Flavors: Feel free to play with flavors! Mixing in almond or lemon extract can create exciting variations of your peppermint meringues.
What to Serve with Peppermint Meringues
Indulge in a festive feast by pairing these light, airy treats with delightful accompaniments that enhance your holiday experience.
-
Creamy Hot Chocolate: A rich cup of hot chocolate creates a warm, cozy contrast to the meringues’ crispness, making every bite a joyous delight.
-
Fresh Berries: Juicy, tart raspberries or strawberries add a fresh and colorful burst that balances the sweetness of the meringues.
-
Classic Coffee: The robust flavor of freshly brewed coffee complements the peppermint essence beautifully, ideal for a flavorful afternoon treat.
-
Whipped Cream: Lightly sweetened whipped cream offers a velvety texture, making the perfect dip for your peppermint meringues for added indulgence.
-
Fruit Salad: A vibrant fruit salad, tossed with citrus and mint, provides a refreshing touch alongside the sweetness of your meringues.
-
Chocolate Ganache: Drizzling chocolate ganache over the airy meringues intensifies their festive vibe, providing a rich flavor that pairs wonderfully with peppermint.
-
Gingerbread Cookies: The spiced flavors of gingerbread cookies will evoke the holiday spirit, showcasing a delightful mix of textures and tastes on your dessert table.
Feel free to mix and match these pairings to create a wonderful holiday treat experience everyone will enjoy!
Peppermint Meringues Recipe FAQs
What should I look for when selecting egg whites?
Always use fresh, room-temperature egg whites for your peppermint meringues. This helps achieve maximum volume when whipping. If you’re unsure, check for any off smells or dark spots, as these may indicate spoilage.
How should I store leftover meringues?
Store your peppermint meringues in an airtight container at room temperature for up to 2 weeks. This will help maintain their crispness. Make sure to keep them in a cool, dry place to prevent moisture from compromising their texture.
Can I freeze peppermint meringues?
Absolutely! To freeze your peppermint meringues, place them in an airtight container with layers of parchment paper in between to prevent sticking. They can last up to 3 months in the freezer. When you’re ready to enjoy them, let them thaw at room temperature, and if they seem a bit soft, pop them back in a low oven (200°F/93°C) for about 10-15 minutes to re-crisp.
What if my egg whites don’t whip to stiff peaks?
If your egg whites aren’t reaching stiff peaks, ensure that your mixing bowl and utensils are completely clean and free of any grease. Even a small amount of fat can prevent them from whipping properly. Also, ensure that you’re using fresh egg whites, and check that there’s no yolk mixed in, as it can also interfere with the process.
Are peppermint meringues suitable for people with dietary restrictions?
Yes! Peppermint meringues are naturally gluten-free and low in fat, making them a delightful treat for many dietary preferences. However, if you’re serving someone with allergies, be mindful of the crushed peppermint candies, as they may contain allergens. You could replace them with nut-free sprinkles for a safe alternative.
How can I ensure my meringues turn out perfectly?
For perfect peppermint meringues, make sure to:
- Use clean, dry equipment.
- Gradually add sugar to the egg whites for better incorporation.
- Keep your oven closed during baking to avoid humidity.
- Allow them to cool gradually in the oven to prevent cracking. Following these steps can help you achieve that coveted crisp exterior and airy center!

Light and Airy Peppermint Meringues for Festive Joy
Ingredients
Equipment
Method
- Preheat the oven to 200°F (93°C) and line a baking sheet with parchment paper.
- Beat egg whites in a clean mixing bowl on medium speed until foamy and bubbly (about 2-3 minutes).
- Add cream of tartar and a pinch of salt. Increase speed to high and beat until soft peaks form (2-3 minutes).
- Gradually add granulated sugar, one tablespoon at a time, while mixing on high speed. Mix until stiff, glossy peaks form (5-7 minutes).
- Gently fold in vanilla and peppermint extracts without deflating the meringue.
- Transfer meringue to a piping bag and pipe small mounds onto baking sheet, spaced about an inch apart.
- Bake in preheated oven for about 90 minutes or until dry to the touch.
- Turn off the oven and leave meringues inside to cool for 1-2 hours.
- Once cooled, sprinkle tops with crushed peppermint candies to garnish.