
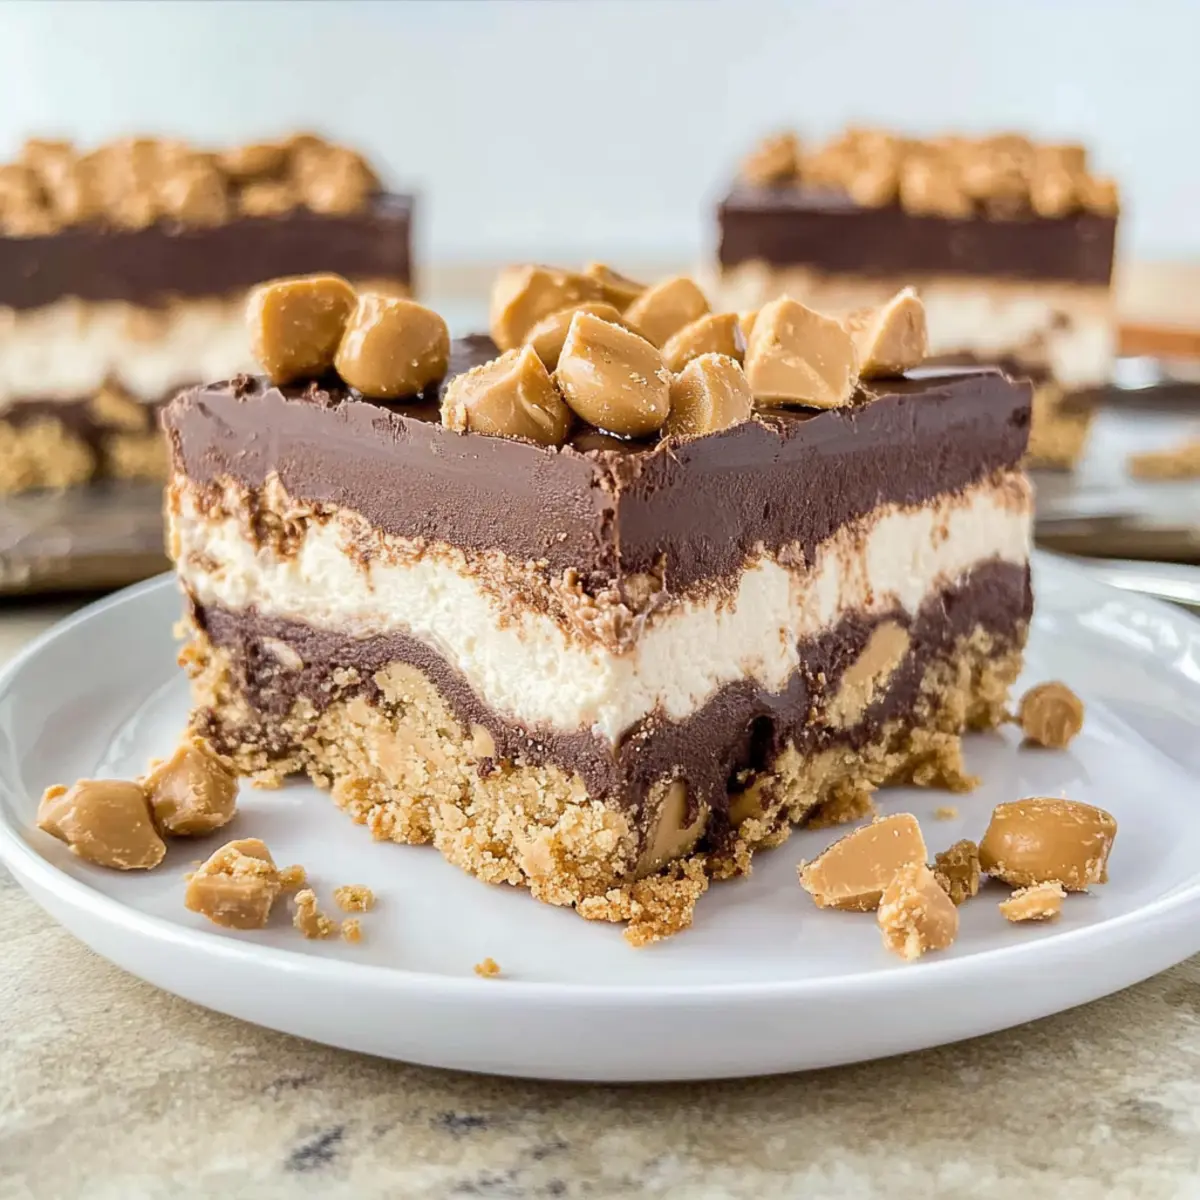
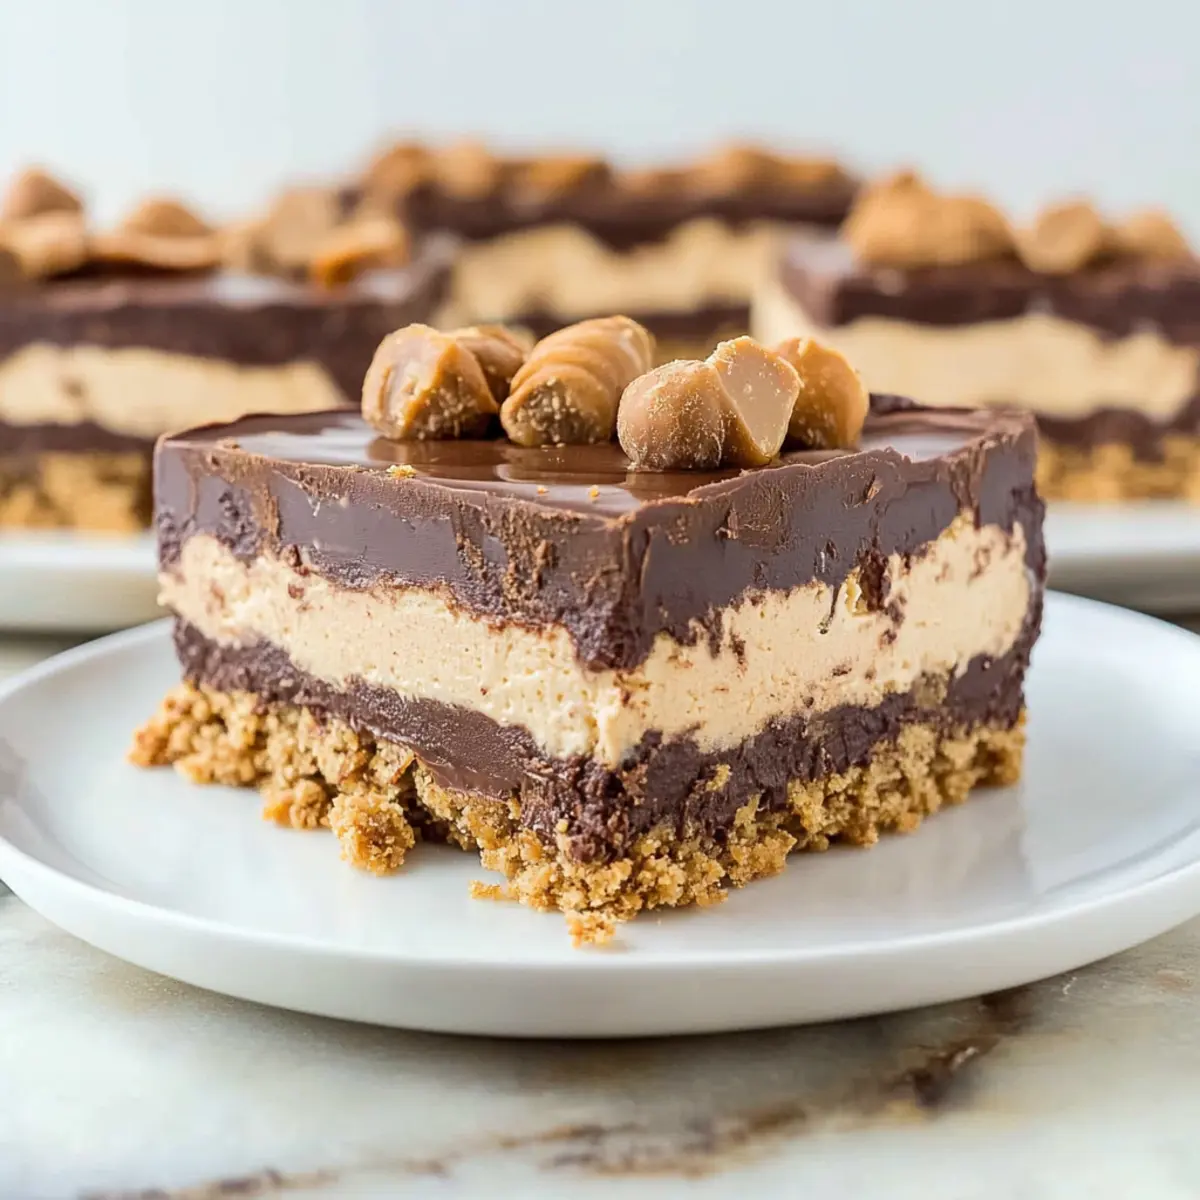
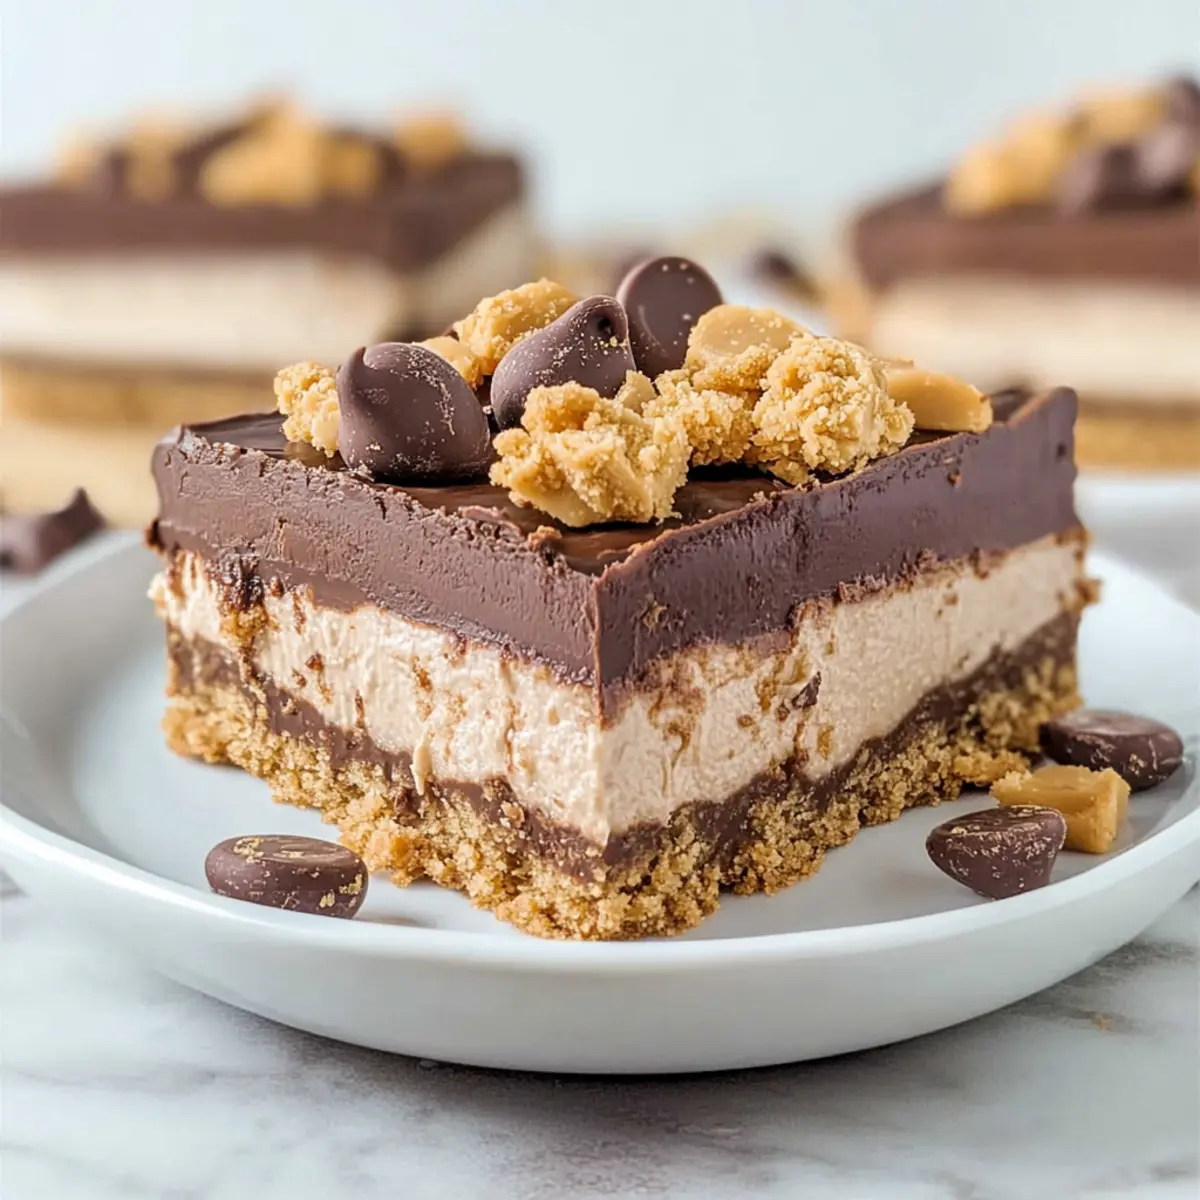
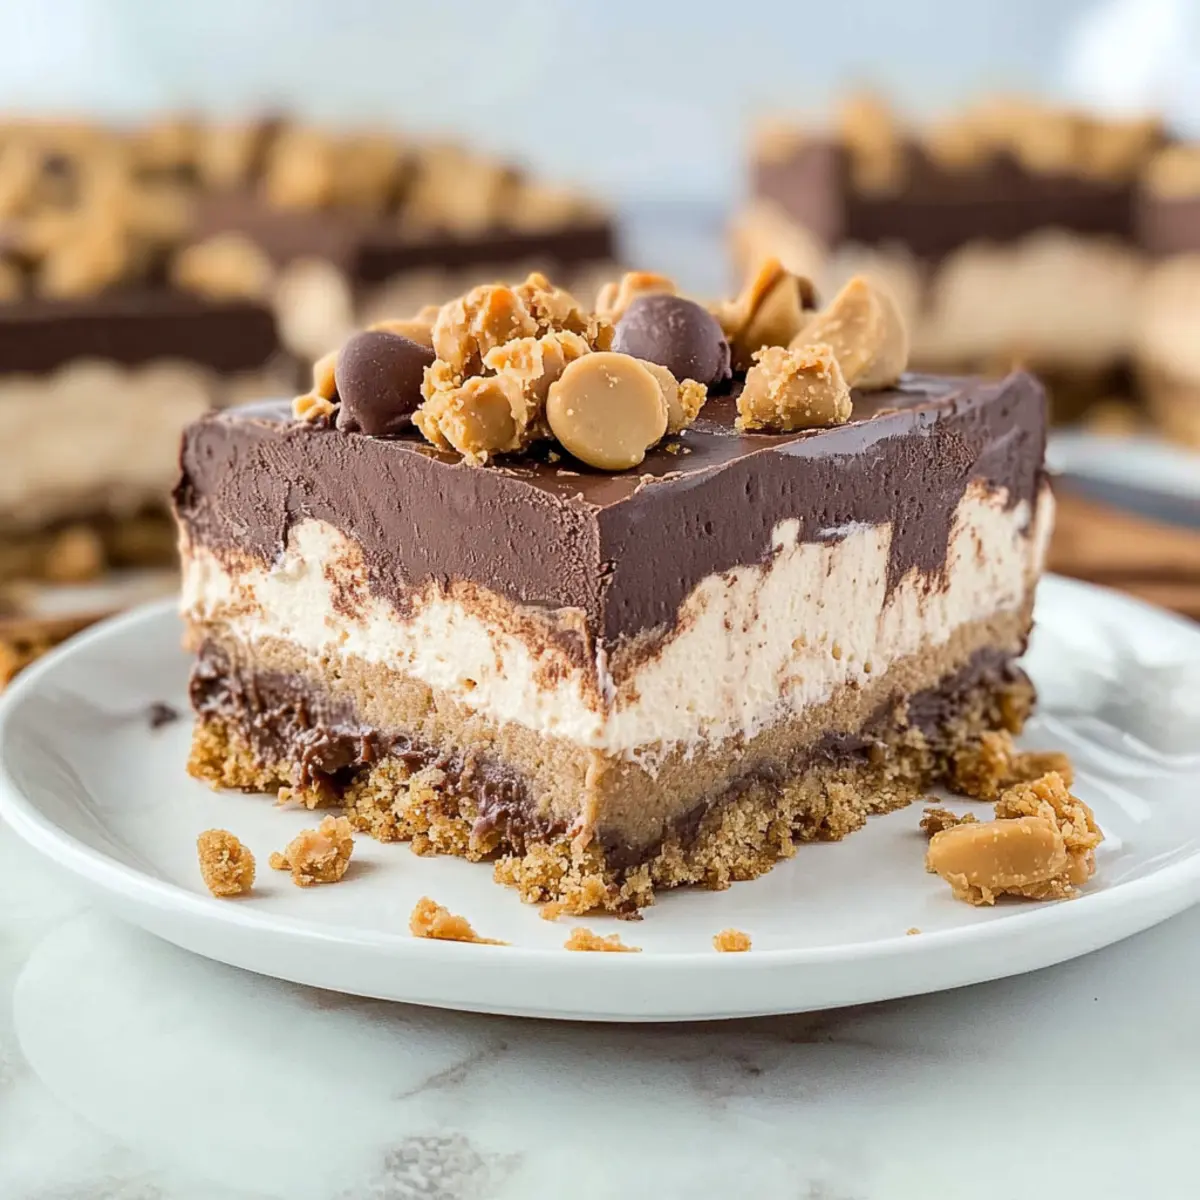
The moment I unwrapped the last of the creamy chocolate pudding mix, I knew I was onto something special. These No Bake Chocolate Peanut Butter Dream Bars are more than just a dessert; they’re a divine combination of chocolate and peanut butter that transports you back to childhood bliss with every bite. The beauty of this layered dessert lies not only in its rich, delectable flavors but also in its effortless prep. With no baking required, it’s the ultimate answer to busy days or impromptu gatherings. Imagine the joy on your friends’ faces as they savor this creamy delight while you effortlessly breeze through your kitchen duties. Are you ready to whip up a sweet experience that requires minimal effort but promises maximum enjoyment?
Why Are These Bars So Irresistible?
Decadent Flavor: The rich combination of chocolate and creamy peanut butter creates a treat that’s hard to resist, delivering a nostalgic, comforting experience in every bite.
Effortless Preparation: With no baking required, you can whip these up in minutes, perfect for those spontaneous dessert cravings or busy weeknights.
Crowd-Pleasing Delight: Ideal for sharing at parties or gatherings, these bars are sure to impress guests and family alike—everyone will be asking for the recipe!
Versatile Options: Experiment with substitutions like a gluten-free version or different layers; your imagination is your only limit! Looking for additional chocolatey delights? Don’t miss out on Peanut Butter Chocolate or Peanut Butter Brownie.
Textural Bliss: Enjoy a delightful crunch from the cookie crust paired with the creamy, fluffy layers on top—it’s an irresistible dessert experience!
Chocolate Peanut Butter Dream Bars Ingredients
For the Crust
• Peanut Butter Sandwich Cookies – Adds a crunchy, sweet base; substitute with similar peanut butter-flavored cookies if preferred.
• Butter – Binds the crust together for a rich flavor; can be replaced with margarine or coconut oil for a dairy-free version.
For the Creamy Layer
• Cream Cheese – Provides a smooth, creamy contrast; swap for Neufchâtel cheese as a lighter alternative.
• Confectioners’ Sugar – Sweetens the cream cheese layer for that delightful taste; consider using powdered erythritol for a sugar-free option.
• Creamy Peanut Butter – Enhances the peanut flavor in the dessert; natural peanut butter can be a healthier substitute.
• Pure Vanilla Extract – Adds depth of flavor; leave out only if necessary, though it may lose some complexity.
• Cool Whip – Gives a light, fluffy texture on top; homemade whipped cream is a lovely alternative if you prefer.
For the Chocolate Layer
• Instant Chocolate Pudding – Forms a rich chocolate layer; can experiment with flavors like vanilla or caramel pudding for a twist.
• Milk – Needed to prepare the instant pudding mix; any milk type works, including almond milk for a dairy-free choice.
For the Topping
• Milk Chocolate Chips – Adds a chocolatey crunch on top; try using dark chocolate chips for a richer taste or omit for a lower-calorie option.
• Peanut Butter Chips – Provides a sweet and nutty flavor; substitute with mini chocolate chips if that’s your preference.
These Chocolate Peanut Butter Dream Bars are sure to be a hit with their irresistible layers and creamy texture!
Step‑by‑Step Instructions for Chocolate Peanut Butter Dream Bars
Step 1: Crust Preparation
Begin by finely crushing 20 peanut butter sandwich cookies in a blender or food processor until they resemble fine crumbs. In a microwave-safe bowl, melt ½ cup of butter and then combine it with the crushed cookies. Press this mixture firmly into the bottom of an 8×8-inch baking dish, creating an even layer. Place the dish in the freezer for at least 30 minutes for the crust to firm up.
Step 2: Pudding Preparation
While the crust firms up, prepare the chocolate layer by mixing 1 package of instant chocolate pudding with 1½ cups of milk in a medium bowl. Whisk the mixture vigorously until fully combined and smooth. Once the pudding begins to thicken, cover it with plastic wrap and place it in the refrigerator to chill for about 10 minutes.
Step 3: Cream Cheese Mixture
In the meantime, take 8 ounces of softened cream cheese and beat it in a mixing bowl until smooth. Add in 1 cup of confectioners’ sugar, ½ cup of creamy peanut butter, and 1 teaspoon of pure vanilla extract. Mix these ingredients until well combined, creating a creamy consistency. Finally, gently fold in 1 cup of Cool Whip to lighten the mixture.
Step 4: Layering
Once the crust is set, spread the creamy cheese mixture evenly over the chilled cookie crust using a spatula. Then, retrieve the chocolate pudding from the fridge and pour it over the cream cheese layer, smoothing it out gently until even. Top this layer with the remaining Cool Whip, spreading it to cover the chocolate layer completely.
Step 5: Final Touches
To ensure the layers hold together, place the prepared Chocolate Peanut Butter Dream Bars in the freezer for another 30 minutes. Before serving, sprinkle crushed cookies and optional milk chocolate or peanut butter chips on top for an added crunch. Slice into squares with a warm knife for clean edges, and enjoy this delightful no-bake treat!
Expert Tips for Chocolate Peanut Butter Dream Bars
Room Temperature Cream Cheese: Make sure your cream cheese is softened to room temperature for effortless mixing and a smoother texture in your layers.
Chill Layers Separately: To maintain the structure of each layer, consider chilling them individually before the final assembly. This helps prevent any unwanted mixing.
Storage Know-How: If you have leftovers, keep them tightly covered in the refrigerator for up to a week—just note that the Cool Whip might lose some fluffiness over time.
Warm Knife Trick: For perfectly sliced bars, run a knife under hot water before cutting, and wipe it clean between slices. This will give you clean edges on your Chocolate Peanut Butter Dream Bars.
Customization Options: Feel free to swap out the toppings or layers; using white chocolate chips instead of peanut butter chips can create a new flavor experience!
How to Store and Freeze Chocolate Peanut Butter Dream Bars
Fridge: Store these bars in an airtight container in the refrigerator for up to 7 days. They taste best fresh, but the flavors remain delicious for a week.
Freezer: While freezing is not recommended due to texture changes, if necessary, you can keep them in the freezer for up to 2 months. Wrap them tightly to prevent freezer burn.
Reheating: If you choose to thaw frozen bars, do it in the refrigerator overnight. Avoid reheating in the microwave, as it can alter the creamy texture of this no-bake dessert.
Serving Tip: For best enjoyment, let the bars sit at room temperature for about 10 minutes before serving to soften slightly, enhancing the flavor of the Chocolate Peanut Butter Dream Bars.
Chocolate Peanut Butter Dream Bars Variations
Feel free to play around with these variations and make this dessert truly your own!
-
Gluten-Free: Use gluten-free peanut butter cookies for the crust to accommodate gluten sensitivities while keeping the flavor delicious.
-
Dairy-Free: Swap the butter with coconut oil and use dairy-free cream cheese for a creamy finish that everyone can enjoy.
-
Sugar-Free: Substitute confectioners’ sugar with powdered erythritol for a tasty yet guilt-free treat that won’t spike sugar levels.
-
Nutty Twist: Add a sprinkle of crushed nuts like pecans or almonds on top to enhance the flavor profile and add a satisfying crunch.
-
Flavor Infusion: Drizzle caramel sauce between layers for an indulgent flavor boost that will make every bite unforgettable.
-
Trifle Style: Layer components in a larger glass dish for a stunning presentation that showcases each delicious layer.
-
Fruit Enhancement: Top with fresh raspberries or strawberries to introduce a tart contrast to the rich chocolate and creamy layers.
For more delightful chocolate combinations, don’t forget to check out these recipes: Peanut Butter Chocolate or Peanut Butter Jelly. Enjoy exploring these variations!
What to Serve with No Bake Chocolate Peanut Butter Dream Bars
Indulging in these creamy bars is an experience best shared; complementing them with delightful side dishes and drinks enhances the sweetness of the moment.
-
Fresh Berries: The tartness of strawberries or raspberries provides a refreshing contrast to the rich flavors, balancing each bite beautifully. Their vibrant color adds an inviting touch to your dessert table!
-
Vanilla Ice Cream: Serving a scoop of vanilla ice cream alongside these bars creates a heavenly creamy duo that everyone will love. The cold treat melts slightly on the bars, amplifying the luxuriousness of each mouthful.
-
Coffee: A warm cup of freshly brewed coffee offsets the sweetness of the bars and accentuates their rich chocolate flavors. It’s a classic pairing that elevates the entire dessert experience!
-
Nutty Trail Mix: A handful of nutty trail mix brings crunch and contrast to the creamy texture of the bars. This delightful combination keeps the vibe casual and fun while offering a nutty snack option!
-
Chocolate Sauce Drizzle: For those who can never have too much chocolate, a generous drizzle of chocolate sauce over the bars takes them to another level. It enhances the decadence, leaving your tastebuds dancing with joy!
-
Chilled Milk: A tall glass of chilled milk not only cools down the palate but also mirrors the creaminess of the bars. It’s a nostalgic choice that invites everyone to revisit childhood treats!
-
Fruit Salad: Brighten your dessert with a refreshing fruit salad, featuring seasonal fruits. The vibrant flavors of citrus, melon, and berries enliven the overall meal and cleanse the palate between bites.
-
Rice Krispie Treats: For an extra crunch, serve classic rice Krispie treats alongside. Their light and airy texture contrasts well with the richness of the bars, making for a playful dessert spread.
-
Sparkling Water: A splash of sparkling water or flavored seltzer adds a layer of refreshment. It uplifts the dessert, keeping the celebration light and bubbly!
-
Mini Cupcakes: Serve a few mini cupcakes for an added sweet touch. They can be made in various flavors, providing a delightful assortment alongside your Chocolate Peanut Butter Dream Bars!
Make Ahead Options
These Chocolate Peanut Butter Dream Bars are perfect for meal prep enthusiasts! You can prepare the crust up to 24 hours in advance, just be sure to keep it tightly covered in the freezer to maintain its crunch. The cream cheese mixture and the chocolate pudding can also be made ahead and refrigerated for up to 3 days—just ensure they are in airtight containers to keep them fresh and creamy. When you’re ready to serve, simply layer the prepared cream cheese mixture over the crust, add the chocolate pudding layer, and top with Cool Whip. Freeze for an additional 30 minutes to set, and your delicious dessert will be just as delightful!
Chocolate Peanut Butter Dream Bars Recipe FAQs
What type of peanut butter sandwich cookies should I use?
Absolutely! You can use any peanut butter-flavored cookie; however, I recommend using ones that are crunchy to provide a nice texture contrast in your crust. If you’re looking for a healthier option, gluten-free peanut butter cookies also work wonderfully.
How long can I store the Chocolate Peanut Butter Dream Bars?
These delicious bars can be stored in your refrigerator for up to 7 days when kept in an airtight container. Just remember that the Cool Whip may lose some of its fluffiness over time, so for the best texture, enjoy these within the first few days!
Can I freeze the bars for later?
Very! Although the texture may change slightly upon thawing, you can freeze them for up to 2 months. To do so, wrap the bars tightly in plastic wrap or aluminum foil, then place them in a freezer-safe container. When you’re ready to enjoy, thaw them in the refrigerator overnight rather than using the microwave to maintain their texture.
What should I do if my cream cheese isn’t mixing smoothly?
If you find your cream cheese is a bit difficult to mix, that could be because it’s too cold. Make sure your cream cheese is at room temperature for at least 30 minutes before starting the recipe; this ensures it blends smoothly and easily into the mixture. If you’ve already begun, try warming it slightly in the microwave (in 10-second increments) to soften it.
Are these bars safe for pets or people with nut allergies?
No, these Chocolate Peanut Butter Dream Bars are not safe for dogs or those with nut allergies. The recipe contains peanut butter and peanut butter sandwich cookies, both of which can be harmful to your pets. If serving to someone with a nut allergy, consider making a nut-free version by substituting the peanut butter with a seed butter like sunflower seed butter.
Chocolate Peanut Butter Dream Bars: A No-Bake Delight
Ingredients
Equipment
Method
- Begin by finely crushing 20 peanut butter sandwich cookies in a blender or food processor until they resemble fine crumbs. In a microwave-safe bowl, melt ½ cup of butter and then combine it with the crushed cookies. Press this mixture firmly into the bottom of an 8x8-inch baking dish, creating an even layer. Place the dish in the freezer for at least 30 minutes for the crust to firm up.
- While the crust firms up, prepare the chocolate layer by mixing 1 package of instant chocolate pudding with 1½ cups of milk in a medium bowl. Whisk the mixture vigorously until fully combined and smooth. Once the pudding begins to thicken, cover it with plastic wrap and place it in the refrigerator to chill for about 10 minutes.
- In the meantime, take 8 ounces of softened cream cheese and beat it in a mixing bowl until smooth. Add in 1 cup of confectioners' sugar, ½ cup of creamy peanut butter, and 1 teaspoon of pure vanilla extract. Mix these ingredients until well combined. Finally, gently fold in 1 cup of Cool Whip to lighten the mixture.
- Once the crust is set, spread the creamy cheese mixture evenly over the chilled cookie crust. Then, retrieve the chocolate pudding from the fridge and pour it over the cream cheese layer, smoothing it out gently until even. Top this layer with the remaining Cool Whip, spreading it to cover the chocolate layer completely.
- To ensure the layers hold together, place the prepared Chocolate Peanut Butter Dream Bars in the freezer for another 30 minutes. Before serving, sprinkle crushed cookies and optional milk chocolate or peanut butter chips on top for an added crunch. Slice into squares with a warm knife for clean edges.