
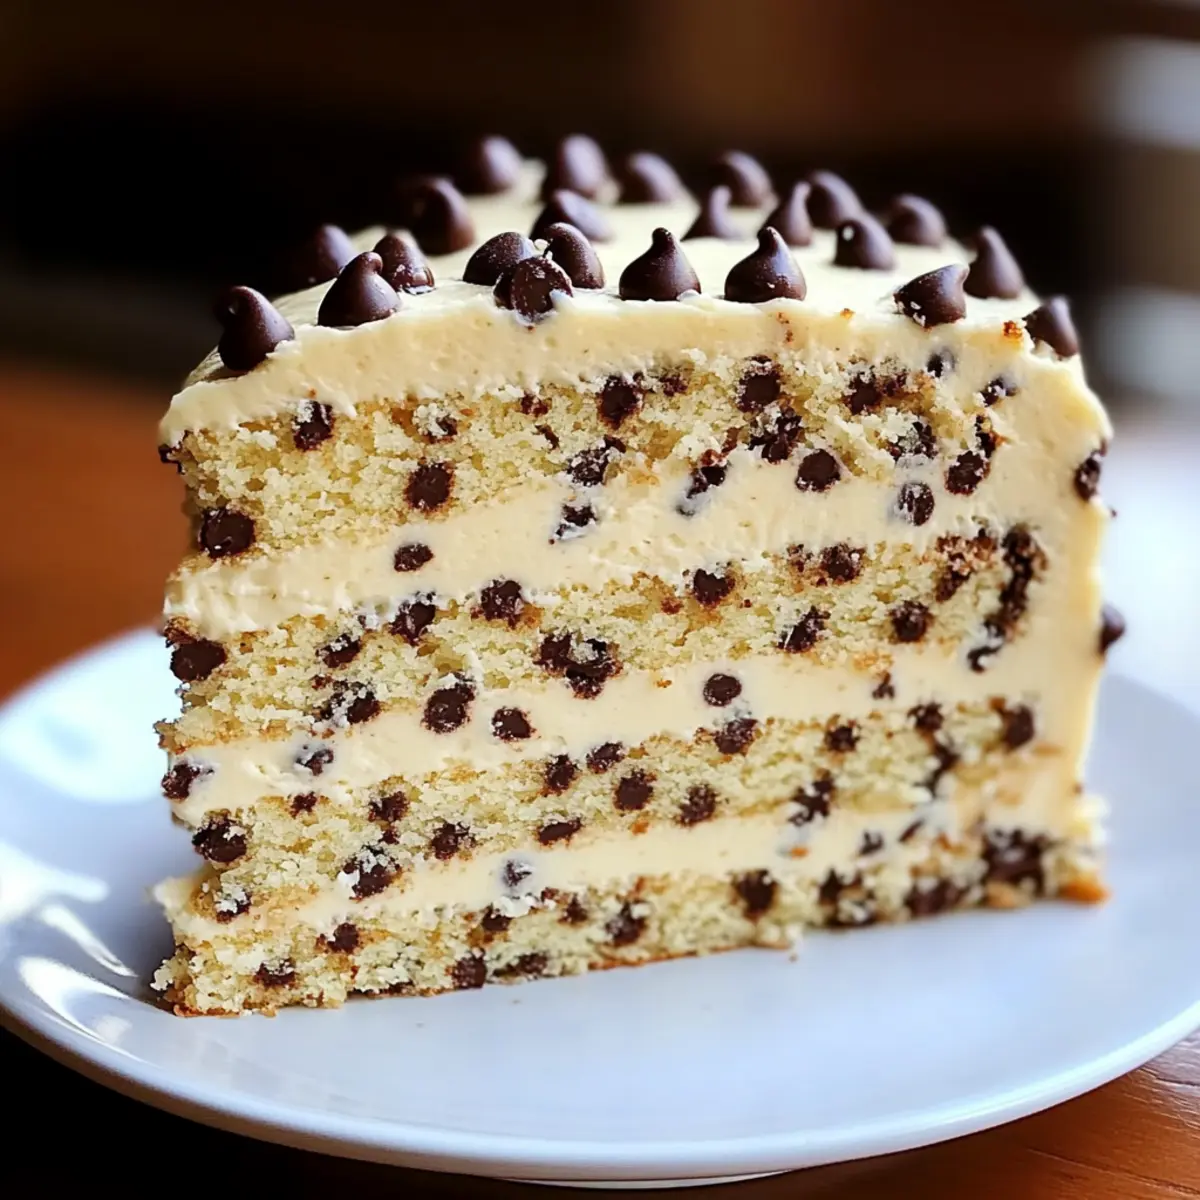
What a delightful way to relive our childhood memories than with a slice of Milk and Cookies Cake! This cake beautifully marries the comfort of warm chocolate chip cookies with the silky allure of creamy milk, creating a decadent dessert that even your inner child can’t resist. Rich, soft, and lovingly crafted, each layer of this cake boasts buttery vanilla flavors and tantalizing chocolate chips. Plus, it’s incredibly easy to whip up, making it a perfect choice for any gathering or just a cozy night in. Want to indulge your sweet tooth without compromising on dietary needs? Fear not! I’ve included gluten-free substitutions to satisfy everyone around the table. Curious about how to make this enchanting dessert a showstopper? Let’s dive into the delicious details!
Why is Milk and Cookies Cake so appealing?
Nostalgic Charm: Capturing the essence of your favorite childhood treat, this cake brings back blissful memories of warm cookies and cold milk.
Decadent Layers: Each slice offers a delightful combination of fluffy cake and cookie dough frosting, making it feel incredibly indulgent.
Easy-to-Make: Even beginner bakers can master this recipe, ensuring everyone can enjoy a homemade treat with minimal effort!
Versatile Substitutions: Gluten-free options let you cater to all dietary needs. Whether using gluten-free flour or dairy alternatives, everyone can indulge in this dessert.
Perfect for Celebrations: From birthdays to cozy nights, this cake is a crowd-pleaser that will impress guests and family alike. Serve it alongside a scoop of ice cream or with a glass of milk, and watch smiles light up the room!
If you enjoy sweet and nostalgic treats, be sure to check out my delicious Raspberry Cookies Sweet or delight in the colorful flavors of Cotton Candy Cookies.
Milk and Cookies Cake Ingredients
• Get ready to whip up this delightful dessert with the following essential ingredients!
For the Cake
- All-Purpose Flour – Provides structure; substitute 1:1 gluten-free baking flour for a gluten-free version.
- Baking Powder – Acts as a leavening agent; ensure it’s fresh for a lovely rise.
- Kosher Salt – Balances the cake’s sweetness; adjust according to taste preferences.
- Unsalted Butter – Adds richness and moisture; can be replaced with salted butter—just reduce added salt.
- Granulated Sugar – Sweetness; coconut sugar is a great alternative for a unique flavor.
- Brown Sugar – Imparts moisture and a rich molasses flavor; consider using dark brown sugar for added depth.
- Eggs – Provide binding and moisture; flax eggs are a perfect vegan substitution.
- Vanilla Extract – Enhances the cake’s overall flavor; opt for pure vanilla for the best result.
- Milk – Adds moisture and richness; use non-dairy milk for a dairy-free option.
- Semi-Sweet Chocolate Chips – Contribute flavor and texture; feel free to swap in milk or dark chocolate to match your preference.
For the Frosting
- Powdered Sugar – Sweetens the frosting; low-calorie alternatives can replace regular sugar.
- Heavy Cream – Creates a delightful texture for the frosting; heavy coconut cream is great for a dairy-free option.
Embrace this Milk and Cookies Cake for a cozy dessert night, and delight in every nostalgic bite!
Step‑by‑Step Instructions for Milk and Cookies Cake
Step 1: Preheat the Oven and Prepare Pans
Begin by preheating your oven to 350°F (175°C). While it heats, grab two 9-inch round cake pans. Lightly coat them with baking spray to ensure the cake layers release easily once baked. Keeping your workspace organized will make the process smoother as you dive into creating this delicious Milk and Cookies Cake.
Step 2: Whisk the Dry Ingredients
In a medium mixing bowl, combine 2 cups of all-purpose flour, 1 tablespoon of baking powder, and ½ teaspoon of kosher salt. Whisk these together until well mixed, creating an even blend. This step ensures your dry ingredients are evenly incorporated, which is vital for the structure of your Milk and Cookies Cake.
Step 3: Cream the Butter and Sugars
Using a stand mixer, cream together ½ cup of unsalted butter and ¾ cup of granulated sugar on medium speed until the mixture is light and fluffy—around 3-5 minutes. This aeration introduces air into the batter, ensuring a soft and tender cake. Then add ½ cup of brown sugar and continue mixing until fully combined.
Step 4: Incorporate Eggs and Vanilla
Next, add in 2 large eggs, one at a time, mixing well after each addition to maintain an airy texture. Then pour in 2 teaspoons of vanilla extract, continuing to mix until everything is well combined. You’ll notice the batter becoming richer in color and aroma, which is a delightful sign that your Milk and Cookies Cake is on the right track.
Step 5: Combine Wet and Dry Mixtures
Gradually incorporate the flour mixture into the wet ingredients, alternating with 1 cup of milk. Start and end with the flour mixture, mixing until just combined—about one minute. Be careful not to overmix, as that can lead to a dense cake. Finally, fold in 1 cup of semi-sweet chocolate chips to add a delightful burst of flavor.
Step 6: Divide the Batter and Bake
Evenly divide the batter between the prepared cake pans. Smooth the tops with a spatula for a uniform surface. Bake in the preheated oven for 30–35 minutes, or until a toothpick inserted into the center comes out clean. The cakes should be lightly golden and spring back when touched. Let them cool in the pans for 10 minutes before transferring to a wire rack.
Step 7: Prepare the Frosting
In a large bowl, cream together ½ cup of unsalted butter, 1 cup of brown sugar, and 1 cup of powdered sugar on medium speed until smooth. Add a pinch of salt and 1 teaspoon of vanilla extract, mixing until well combined. This frost will add that cookie dough flavor to your Milk and Cookies Cake, enhancing its delectable layers.
Step 8: Create the Perfect Frosting Consistency
Gradually add in ½ cup of all-purpose flour and 2 tablespoons of milk to the frosting mixture. Continue mixing until you achieve a smooth, spreadable consistency. If you’re looking for a fun twist, fold in ½ cup of mini chocolate chips for extra sweetness and texture. This frosting will beautifully complement the cake layers.
Step 9: Level and Stack the Cake
Once the cake layers are completely cooled, use a serrated knife or a cake leveler to trim the tops for a flat surface. Stack one layer on a plate or cake stand and spread a generous layer of frosting on top. Place the second cake layer on top, ensuring the layers are aligned for a stunning presentation.
Step 10: Frost the Cake and Add Final Touches
Cover the top and sides of the entire Milk and Cookies Cake with the remaining frosting using a spatula. For an elegant finish, use a piping bag to create decorative dollops along the edges. You can sprinkle a few mini chocolate chips on top for added flair. Once frosted, the cake is ready to be served, so grab some cold milk to enjoy alongside this delightful dessert!
How to Store and Freeze Milk and Cookies Cake
Room Temperature: Store leftover Milk and Cookies Cake in an airtight container at room temperature for up to 3 days. This keeps the cake moist and delicious for quick snacking!
Fridge: For longer freshness, refrigerate the cake in an airtight container for up to a week. Just remember to allow it to come to room temperature before serving for the best flavor.
Freezer: To freeze, wrap individual slices or the whole cake tightly in plastic wrap, then place it in a freezer-safe bag. Enjoy it within 2-3 months for ideal taste and texture.
Reheating: If you prefer your cake warm, gently reheat slices in the microwave for about 15-20 seconds. This will bring back that just-baked comfort!
Helpful Tricks for Milk and Cookies Cake
Avoid Overmixing: Mix just until combined to prevent a dense cake. Overmixing can break down the batter’s structure and lead to a tough texture.
Check for Doneness: Insert a toothpick into the center around the 30-minute mark. If it comes out clean or with a few moist crumbs, your Milk and Cookies Cake is ready!
Use a Cake Leveler: For even layers, use a cake leveler or serrated knife to trim tops for flawless stacking. Level layers ensure stability and an elegant presentation.
Heat-Treat Your Flour: To avoid raw flour in frosting, heat-treat your all-purpose flour by baking it at 350°F for 5 minutes before using it in the frosting.
Store Properly: Keep leftovers in an airtight container at room temperature for up to 3 days, or refrigerate for longer freshness—up to a week. Enjoy this delightful cake at your convenience!
Milk and Cookies Cake Variations
Feel free to get creative and customize your Milk and Cookies Cake to suit your flavor cravings and dietary preferences!
- Gluten-Free: Use a 1:1 gluten-free baking flour instead of all-purpose flour for a deliciously inclusive option.
- Vegan-Friendly: Substitute the eggs with flax eggs and use non-dairy butter along with plant-based milk for a vegan twist.
- Nutty Delight: Add chopped nuts like walnuts or pecans to the batter for an irresistible crunch!
- Chocolate Lovers: Replace a portion of the flour with cocoa powder to create a rich chocolate version that’s simply decadent.
- Flavor Fusion: Try swapping semi-sweet chocolate chips with white chocolate or butterscotch chips for a delightful flavor twist.
- Birthday Fun: Elevate your cake experience by layering in a colorful sprinkle mix for a festive and cheerful touch, perfect for special occasions.
- Syrup Drizzle: A light drizzle of caramel or chocolate syrup on top adds an extra layer of indulgence and visual appeal.
- Dairy-Free Frosting: Use heavy coconut cream instead of heavy cream in the frosting to maintain that delicious texture without dairy.
These variations will keep your baking game fresh and exciting! If you need more sweet inspirations, don’t miss the chance to try my Jellycat Birthday Cake or indulge in delightful Samoa Cookies Homemade. Happy baking!
What to Serve with Milk and Cookies Cake?
Delight your senses as you create a heartwarming meal to accompany this nostalgic dessert.
- Cold Milk: The classic pairing evoking fond memories, a glass of chilled milk perfectly complements the rich flavors of the cake.
- Vanilla Ice Cream: A scoop of creamy vanilla ice cream enhances the cake’s buttery layers, adding an indulgent touch of cool sweetness.
- Chocolate Sauce: Drizzling warm chocolate sauce over a slice adds an extra layer of decadence that chocolate lovers will adore.
For a more festive finish, how about including some fresh fruit?
- Berries: Serve with strawberries or raspberries for a refreshing burst of flavor that balances the cake’s sweetness. Their vibrant colors also bring a lovely visual appeal to the table.
- Whipped Cream: Light and airy, whipped cream is an elegant addition that adds texture and complements the creamy frosting.
And don’t forget the drinks!
- Coffee: A steaming cup of coffee elevates the experience, allowing the rich flavors of the cake to shine through.
- Hot Chocolate: For chocolate enthusiasts, pairing the cake with a cup of hot cocoa amplifies the indulgence, creating a cozy ambiance perfect for dessert.
With these delightful pairings, your Milk and Cookies Cake will shine as the star of your dessert table!
Make Ahead Options
Preparing your Milk and Cookies Cake in advance is a wonderful time-saving strategy for busy home cooks! You can bake the cake layers up to 3 days ahead; simply allow them to cool completely, then wrap them tightly in plastic wrap and refrigerate to keep them fresh. The frosting can also be made up to 24 hours in advance and stored in an airtight container in the refrigerator—just bring it back to room temperature and re-whip slightly before spreading. On the day you plan to serve, stack and frost the cake, and you’ll enjoy all the nostalgic deliciousness without the last-minute hustle. This way, your Milk and Cookies Cake will taste just as delightful, making your dessert a relaxing part of the occasion!
Milk and Cookies Cake Recipe FAQs
How do I select the right chocolate chips for the Milk and Cookies Cake?
Absolutely! For the Milk and Cookies Cake, I recommend using semi-sweet chocolate chips for a classic taste. If you prefer a sweeter option, feel free to swap them for milk chocolate chips. Dark chocolate chips are another wonderful alternative if you’re seeking a richer flavor. Just keep in mind that different types of chocolate can change the overall sweetness of the cake, so choose based on your preferences!
How do I properly store leftovers of the Milk and Cookies Cake?
Very simple! Store leftover Milk and Cookies Cake in an airtight container at room temperature for up to 3 days. This keeps the cake moist and ready for snacking at a moment’s notice! If you’re looking to preserve it longer, you can also refrigerate it in an airtight container for up to a week. Just remember to let it come to room temperature before serving for the best flavor.
Can I freeze my Milk and Cookies Cake for later enjoyment?
Absolutely! To freeze the Milk and Cookies Cake, wrap individual slices or the whole cake tightly in plastic wrap, ensuring no air pockets are present. Then place it in a freezer-safe bag. It’s best enjoyed within 2-3 months to maintain its flavor and texture. When ready to serve, simply thaw in the refrigerator overnight or let it sit at room temperature for a few hours.
What should I do if my cake comes out too dense?
If your Milk and Cookies Cake turns out dense, it may be due to overmixing the batter or using flour that was packed down. To prevent this, mix the ingredients just until they are combined, and avoid packing the flour when measuring. Additionally, make sure your baking powder is fresh, as old leavening agents can lead to inadequate rising.
Are there any dietary considerations I should keep in mind when making this cake?
Absolutely! This Milk and Cookies Cake can easily be adapted for different dietary needs. For a gluten-free version, use a 1:1 gluten-free baking flour. If you’re looking for a dairy-free dessert, substitute the milk with almond milk or oat milk, and use heavy coconut cream instead of heavy cream in the frosting. Also, if needed, flax eggs can replace chicken eggs for a vegan alternative.
Milk and Cookies Cake
Ingredients
Equipment
Method
- Preheat your oven to 350°F (175°C) and prepare two 9-inch round cake pans with baking spray.
- In a medium bowl, whisk together the flour, baking powder, and salt until well mixed.
- Cream the butter with granulated sugar for 3-5 minutes until light and fluffy, then mix in brown sugar.
- Add in eggs one at a time and mix. Incorporate the vanilla extract.
- Gradually mix in the dry ingredients with the milk, alternating until just combined. Fold in the chocolate chips.
- Divide the batter between the prepared pans and bake for 30-35 minutes until a toothpick comes out clean.
- Let the cakes cool in pans for 10 minutes before transferring to a wire rack.
- In a large bowl, cream together butter, brown sugar, and powdered sugar until smooth. Add salt and vanilla extract.
- Incorporate flour and milk into the frosting until it reaches a smooth consistency. Optionally fold in mini chocolate chips.
- Level the cooled cake layers, stack with frosting in between, and cover the cake with the remaining frosting.