
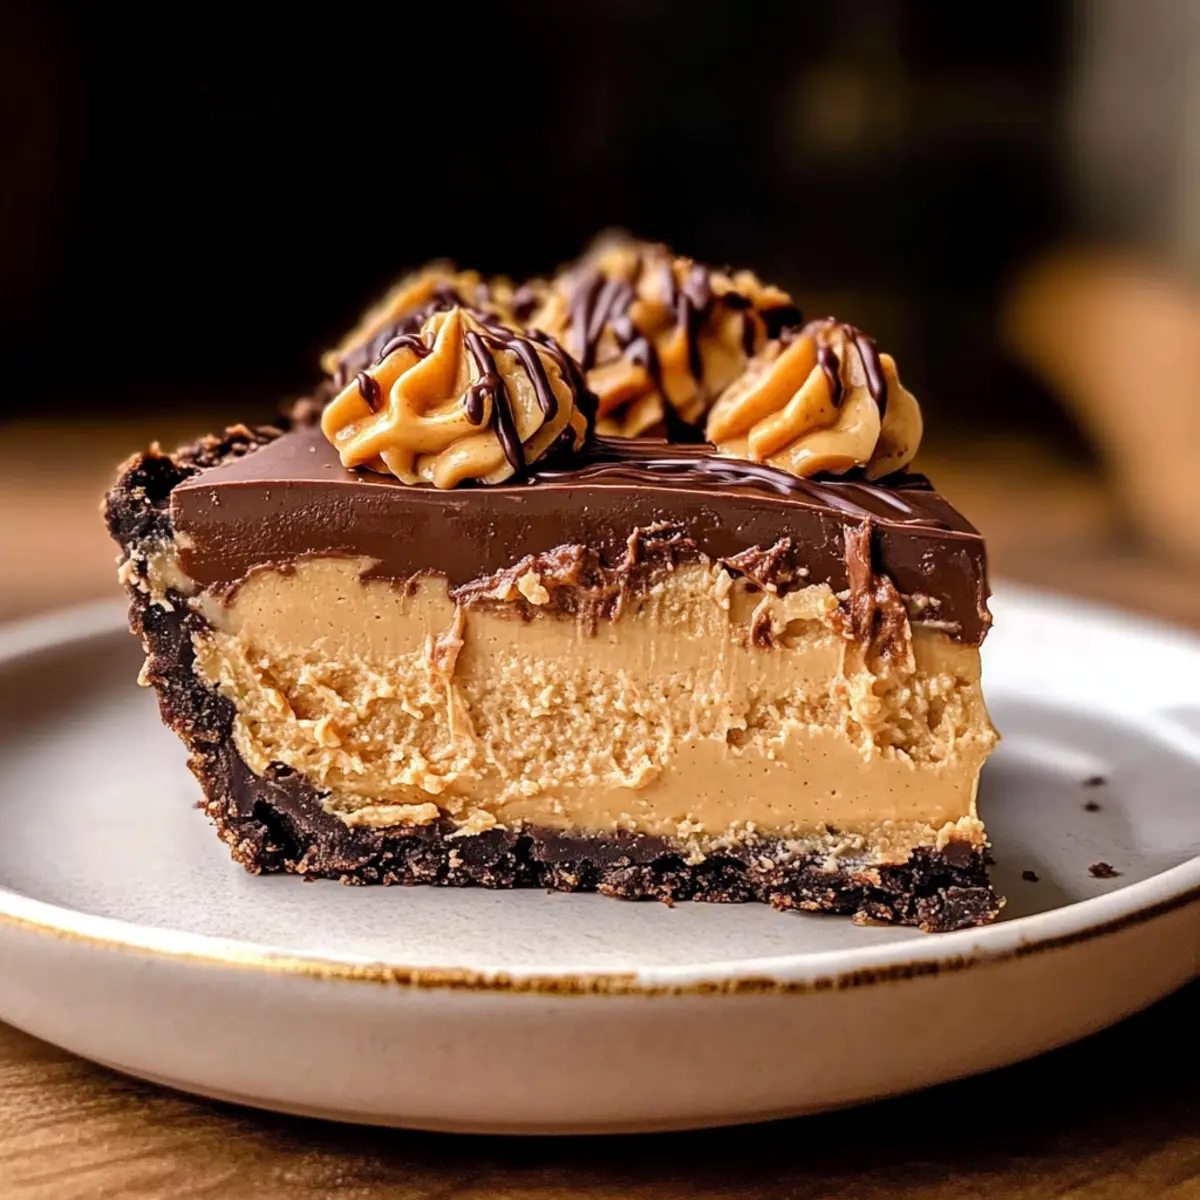
As I stood in my kitchen, the tantalizing aroma of melted chocolate intertwined with creamy peanut butter transported me to a moment of bliss. This No-Bake Chocolate Peanut Butter Pie is my cherished secret for indulgence without the oven hassle. Its luscious layers—a rich chocolate base paired with creamy peanut butter—sit serenely atop a crunchy Oreo crust, making it a showstopper at any gathering. What I love most is how quickly it comes together; no baking means more time to savor life and less time worrying about oven timers. Plus, with each bite, you’ll experience a delightful creaminess that keeps you coming back for more. Ready to impress your friends and family with this decadent dessert? Let’s dive into this delicious creation together!
Why is this pie a must-try?
Irresistible Layers: Each slice reveals an elegant dance between a rich chocolate layer and a creamy peanut butter filling—a combination that will leave you craving more.
No-Bake Convenience: Effortless to prepare, you can whip it up without turning on the oven, making it perfect for hot days or spontaneous dessert cravings.
Crowd-Pleasing Delight: This pie is an instant hit at gatherings! Its visual appeal and exceptional flavor make it a showstopper, just like my Peanut Butter Chocolate treats.
Versatile Options: Feel free to get creative by substituting the crust with graham crackers or experimenting with different nut butters—endless possibilities await!
Easy Storage: Leftovers? No problem—this pie stays fresh in the fridge or freezer, ready to satisfy your sweet tooth anytime you need a treat!
Chocolate Peanut Butter Pie Ingredients
For the Crust
• Oreo Cookies – Use whole Oreos; no need to separate the cream for a rich flavor.
• Unsalted Butter – Holds the crust together; can substitute with coconut oil for a dairy-free version.
For the Chocolate Layer
• Cream Cheese (6 oz / 10 oz) – Provides smoothness; make sure it’s at room temperature for easy mixing.
• Unsweetened Cocoa Powder – Adds depth to the chocolate layer; ensure it’s fresh for optimal flavor.
• White Granulated Sugar – Sweetens the layer; coconut sugar can be a less refined alternative.
• Sour Cream (1/3 cup / 1/4 cup) – Adds tang and creaminess; Greek yogurt can serve as a substitute.
• Pure Vanilla Extract – Enhances flavor; homemade vanilla extract is a great alternative.
• Chocolate Bar (3.5 oz) – Melted for the chocolate layer; use high-quality dark chocolate for best results.
For the Peanut Butter Layer
• Peanut Butter (3/4 cup + 1/4 cup melted) – Provides the distinct nutty flavor; feel free to substitute with almond or sunflower butter.
• Cream Cheese – This works beautifully in the peanut butter layer too, ensuring a creamy texture.
For the Whipped Topping
• Heavy Cream (2 cups) – Whips up light and fluffy; for a lighter option, consider whipping coconut cream.
• Powdered Sugar (1/2 cup) – Sweetens the whipped cream; can be reduced for less sweetness.
For Decoration
• Peanut Butter Cups – Highly recommended for added flavor and appearance; optional but delightful!
Each layer of this Chocolate Peanut Butter Pie promises a creamy, indulgent experience that is sure to please any dessert lover!
Step‑by‑Step Instructions for Chocolate Peanut Butter Pie
Step 1: Prepare the Oreo Crust
Start by spraying a 9-inch pie pan with nonstick spray to ensure easy release. In a food processor, pulse whole Oreo cookies into fine crumbs, then mix in melted unsalted butter until combined. Press the mixture firmly and evenly into the bottom and up the sides of the pie pan. Place the crust in the freezer for at least 15 minutes to firm up before adding the layers.
Step 2: Make the Chocolate Layer
In a mixing bowl, beat 6 oz of room-temperature cream cheese with white granulated sugar and unsweetened cocoa powder on high speed for about 2 minutes until smooth and creamy. Slowly incorporate the pure vanilla extract and sour cream, blending until well combined. Finally, add the melted high-quality dark chocolate, mixing until the chocolate layer is rich and uniform in texture.
Step 3: Create the Peanut Butter Layer
In another bowl, beat 6 oz of cream cheese with sugar until fluffy, about 2 minutes. Mix in the peanut butter, pure vanilla extract, and remaining sour cream until the mixture is completely smooth and creamy. This layer will provide the delicious peanut flavor that complements the rich chocolate layer in your Chocolate Peanut Butter Pie.
Step 4: Whip the Heavy Cream
In a cold metal bowl, whip 2 cups of heavy cream and 1/2 cup of powdered sugar using an electric mixer. Beat on high speed until stiff peaks form, which will take about 3-5 minutes. Be careful not to overmix; the whipped cream should be fluffy and light. This will add a lovely texture to both layers of the pie.
Step 5: Fold in Whipped Cream
Gently fold half of the whipped cream into the chocolate mixture until no streaks remain, ensuring the mixture stays airy. Then, fold the remaining whipped cream into the peanut butter mix, achieving a light and fluffy consistency. These steps are crucial for creating a delightful texture in your Chocolate Peanut Butter Pie layers.
Step 6: Assemble the Pie
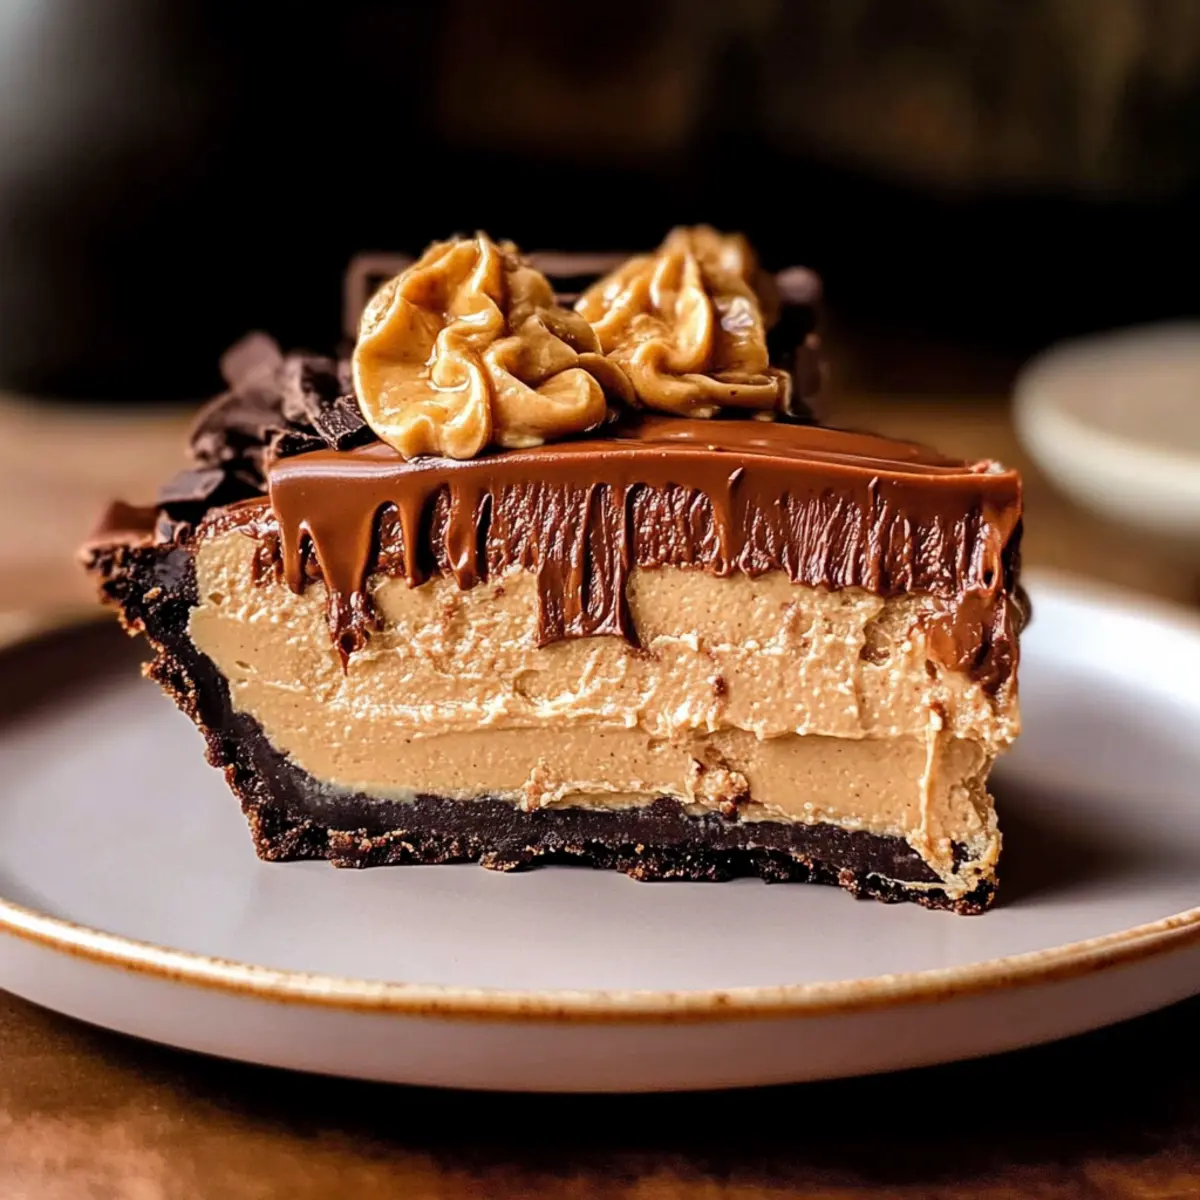
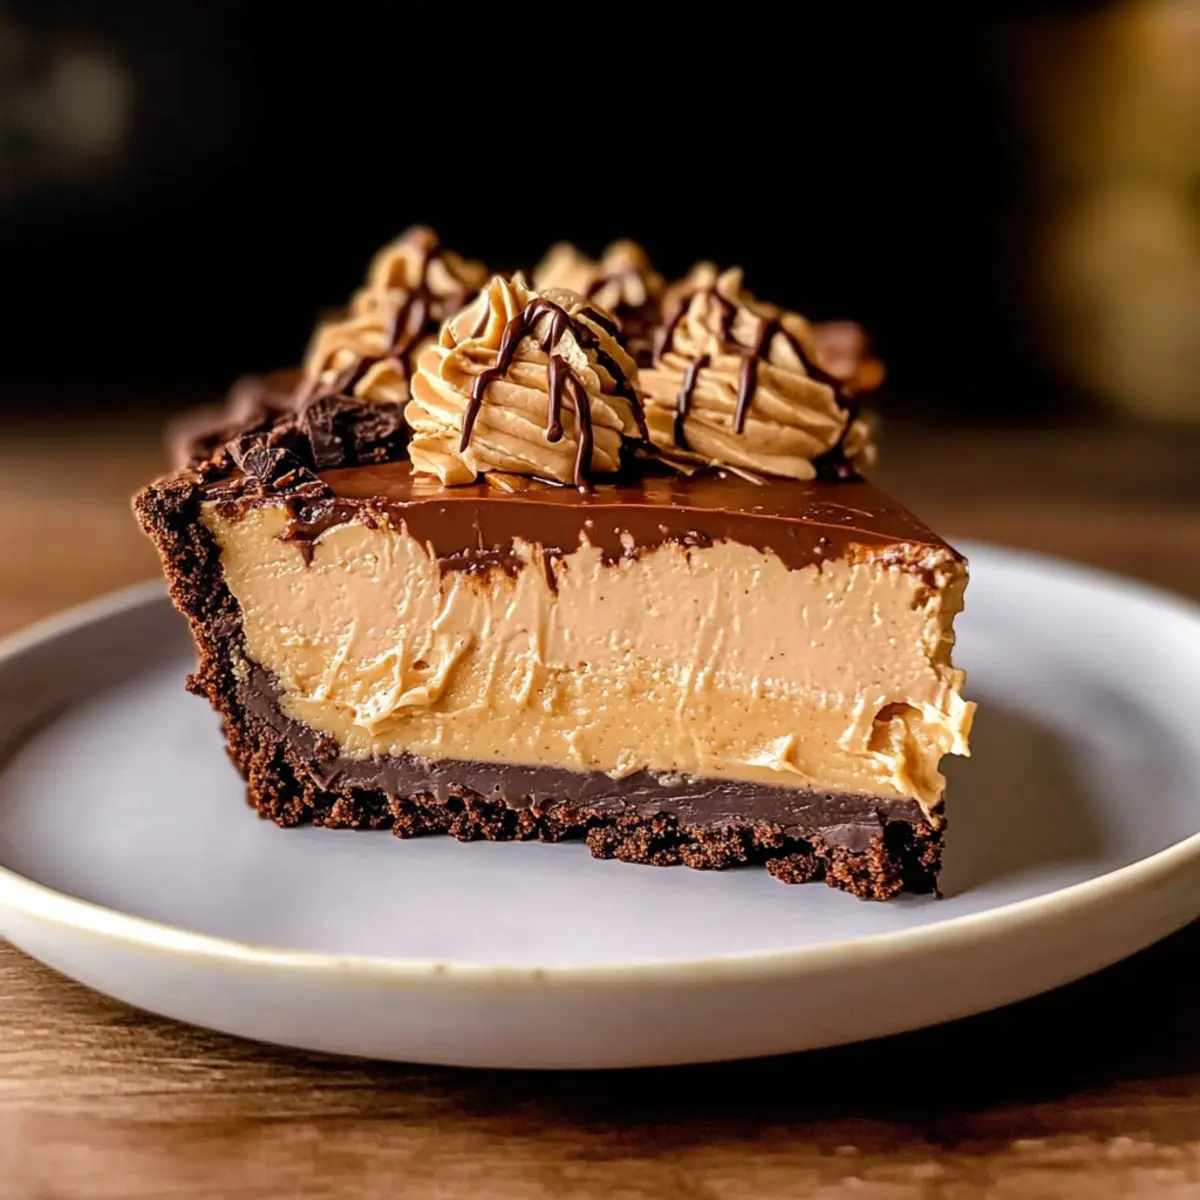
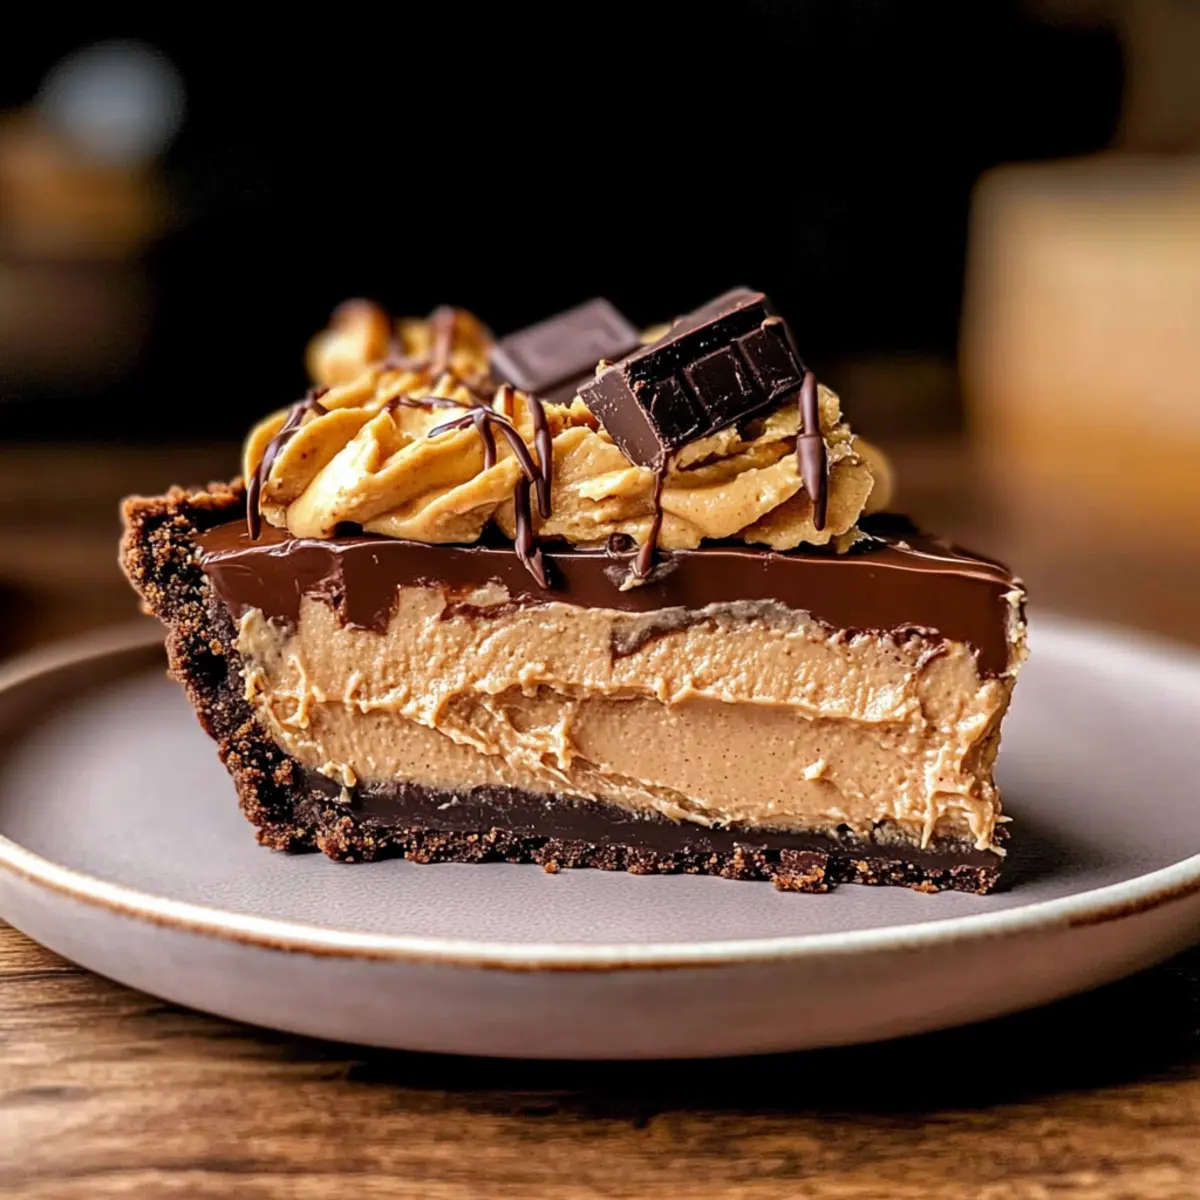
Carefully spread the chocolate layer over the chilled Oreo crust, smoothing the top with a spatula for an even layer. Next, layer the peanut butter mixture on top, distributing it evenly. Drizzle the melted peanut butter on the surface, using a knife to swirl it gently for a beautiful marbled effect. This presentation adds both flavor and charm!
Step 7: Chill the Pie
Cover the assembled pie with foil and refrigerate for at least 6 hours, but overnight is recommended for the best flavor and texture. Allowing it to set completely helps the Chocolate Peanut Butter Pie maintain its structure when sliced, creating that perfect balance of creamy layers and crunchy crust.
Step 8: Decorate and Serve
Before serving, remove the pie from the refrigerator and decorate it with chopped peanut butter cups on top for added visual appeal and flavor. Use a warm knife to slice through the pie, ensuring clean cuts. This attention to detail enhances the presentation and makes your Chocolate Peanut Butter Pie delightful to serve at any occasion.
Chocolate Peanut Butter Pie Variations
Feel free to let your creativity shine while customizing this indulgent chocolate peanut butter pie!
-
Graham Cracker Crust: Swap Oreos for graham crackers for a lighter, alternative crust flavor that’s just as delicious.
-
Nut-Free Option: Use sunflower butter instead of peanut butter to create a nut-free dessert without losing that creamy goodness.
-
Mini Pies: Divide the ingredients to create mini chocolate peanut butter pies in muffin tins—perfect for individual servings!
-
Mint Chocolate Delight: Add a hint of mint extract to the chocolate layer for an unexpected twist that refreshes each bite.
-
Chocolate Drizzle: After chilling, finish with a rich chocolate drizzle to add an extra layer of indulgence and visual appeal.
For those who crave a mix of flavors, you might want to explore more variations. Consider integrating pieces of Peanut Butter Chocolate cups or using different nut butters! Each addition brings a delightful nuance to this classic favorite.
-
Flavor Boost: Incorporate some espresso powder into the chocolate layer for a rich mocha twist that coffee lovers will adore.
-
Crunchy Topping: Sprinkle crushed nuts or toffee bits on top before serving for an extra crunch that beautifully contrasts with the creaminess.
Your journey to dessert paradise can start right here! Let this chocolate peanut butter pie be the canvas for your delicious creativity.
What to Serve with No-Bake Chocolate Peanut Butter Pie
The perfect meal deserves delightful accompaniments that elevate your dining experience to the next level.
-
Fruity Berry Compote: A vibrant mix of fresh strawberries and blueberries adds a tangy contrast that brightens the richness of the pie.
-
Light Vanilla Ice Cream: Its creamy, smooth texture complements the pie beautifully, offering a cooling effect with every decadent bite.
-
Whipped Cream Topping: A fluff of sweetened whipped cream can add an airy touch that balances the dense, indulgent layers of the pie.
-
Strong Black Coffee: A robust brew contrasts nicely with the sweetness, enhancing the chocolate and peanut butter flavors, making every taste more profound.
-
Chilled Sparkling Water: Its fresh and crisp bubbles cleanse the palate between bites, allowing you to truly appreciate the pie’s rich flavors.
-
Chocolate-Covered Pretzels: For a delightful sweet-and-salty twist, serve these crunchy snacks alongside the pie. They perfectly contrast the creamy layers while mirroring the chocolatey theme.
-
Nutty Trail Mix: A simple blend of nuts and seeds provides an enjoyable crunch and a healthy option that complements the pie’s creamy texture.
-
Chocolate Drizzled Fruit Skewers: These fun, colorful bites offer freshness as well as a playful nod to the pie’s flavors while also adding a vibrant touch to your dessert table.
Expert Tips for Chocolate Peanut Butter Pie
Room Temperature Cream Cheese: Ensure your cream cheese is at room temperature for easy blending, creating a smooth filling with no lumps.
Don’t Over-Mix: Be cautious when mixing the whipped cream into the layers. Over-mixing can deflate the light, airy texture, making your Chocolate Peanut Butter Pie heavy instead of fluffy.
Chill Thoroughly: Allow the pie to chill for at least 6 hours or overnight. This ensures the layers set properly and enhances the flavor.
Warm Knife for Slicing: Use a warm knife to cut through the pie cleanly. This keeps the beautiful layers intact, making each slice a visual treat.
Taste as You Go: Don’t forget to taste your layers as you prepare them. Adjust sweetness based on your preference, ensuring a delightful balance in your Chocolate Peanut Butter Pie.
Storage Tips for Chocolate Peanut Butter Pie
Fridge: Store leftovers in an airtight container in the fridge for up to 5 days. This keeps the pie fresh and flavors intact.
Freezer: For longer storage, slice the pie and wrap each piece in plastic wrap, then place them in a freezer-safe container. It can be frozen for up to 30 days.
Thawing: To serve from frozen, transfer the desired slice to the fridge for a few hours to thaw. Once thawed, enjoy the creamy layers of your Chocolate Peanut Butter Pie as if it were freshly made.
Reheating: Remember, there’s no need to bake this pie. Just chill and enjoy at your leisure!
Make Ahead Options
These No-Bake Chocolate Peanut Butter Pies are perfect for meal prep, saving you time during busy weeknights! You can prepare the Oreo crust and the chocolate and peanut butter layers up to 24 hours in advance. Simply store them separately in airtight containers in the refrigerator to maintain their freshness. When you’re ready to serve, gently fold the whipped cream into each layer and assemble the pie. For the best results, refrigerate the assembled pie overnight, allowing the layers to meld beautifully. This makes the pie just as delicious, ensuring your guests are treated to a rich and satisfying dessert without any last-minute stress!
Chocolate Peanut Butter Pie Recipe FAQs
What type of Oreos should I use for the crust?
Absolutely! Use whole Oreo cookies with the cream still intact for a richer flavor in your crust. If you’re looking to switch it up, graham crackers can also work nicely for a different taste!
How long can I store leftovers of the Chocolate Peanut Butter Pie?
You can store leftovers in an airtight container in the fridge for up to 5 days. Just cover the pie tightly to keep it fresh, ensuring you can enjoy those luscious layers for a few more days.
Can I freeze the Chocolate Peanut Butter Pie?
Yes! For longer storage, slice the pie and wrap each piece in plastic wrap, then place them in a freezer-safe container. It will keep well for up to 30 days. To enjoy, simply thaw the slices in the fridge for a few hours before serving.
What should I do if the whipped cream doesn’t stiffen?
Very common! Make sure your metal mixing bowl and beaters are cold; chilling them before use can make all the difference. If your whipped cream is still not reaching stiff peaks, you might need to try adding a bit of cornstarch or cream of tartar as stabilizers.
Are there any dietary considerations for pets or allergies?
Yes! Keep in mind that chocolate is toxic to dogs, so ensure that any leftovers are stored safely away from your furry friends. For those with nut allergies, you can substitute the peanut butter with sunflower seed butter or another nut-free spread.
What should I do if my cream cheese is too stiff?
If your cream cheese is too stiff to blend easily, try cutting it into smaller pieces and allowing it to sit at room temperature for about 30 minutes. You can also microwave it for 10 seconds if you’re in a hurry, but watch closely—too much heat can change its texture!
Decadent Chocolate Peanut Butter Pie That Will Wow You
Ingredients
Equipment
Method
- Start by spraying a 9-inch pie pan with nonstick spray. In a food processor, pulse whole Oreo cookies into fine crumbs, then mix in melted unsalted butter. Press the mixture into the pie pan and place in the freezer for at least 15 minutes.
- In a mixing bowl, beat cream cheese with sugar and cocoa powder on high speed until smooth. Slowly incorporate vanilla extract and sour cream, then add melted chocolate until rich and uniform.
- In another bowl, beat cream cheese with sugar until fluffy, then mix in peanut butter, vanilla extract, and remaining sour cream until smooth.
- In a cold metal bowl, whip heavy cream and powdered sugar until stiff peaks form, about 3-5 minutes. Be careful not to overmix.
- Gently fold half of the whipped cream into the chocolate mixture, then fold the remaining whipped cream into the peanut butter mix.
- Spread the chocolate layer over the crust, then layer the peanut butter mixture on top. Drizzle melted peanut butter and swirl with a knife.
- Cover the pie with foil and refrigerate for at least 6 hours or overnight. This helps the layers set.
- Before serving, decorate the pie with chopped peanut butter cups. Use a warm knife to slice cleanly.