
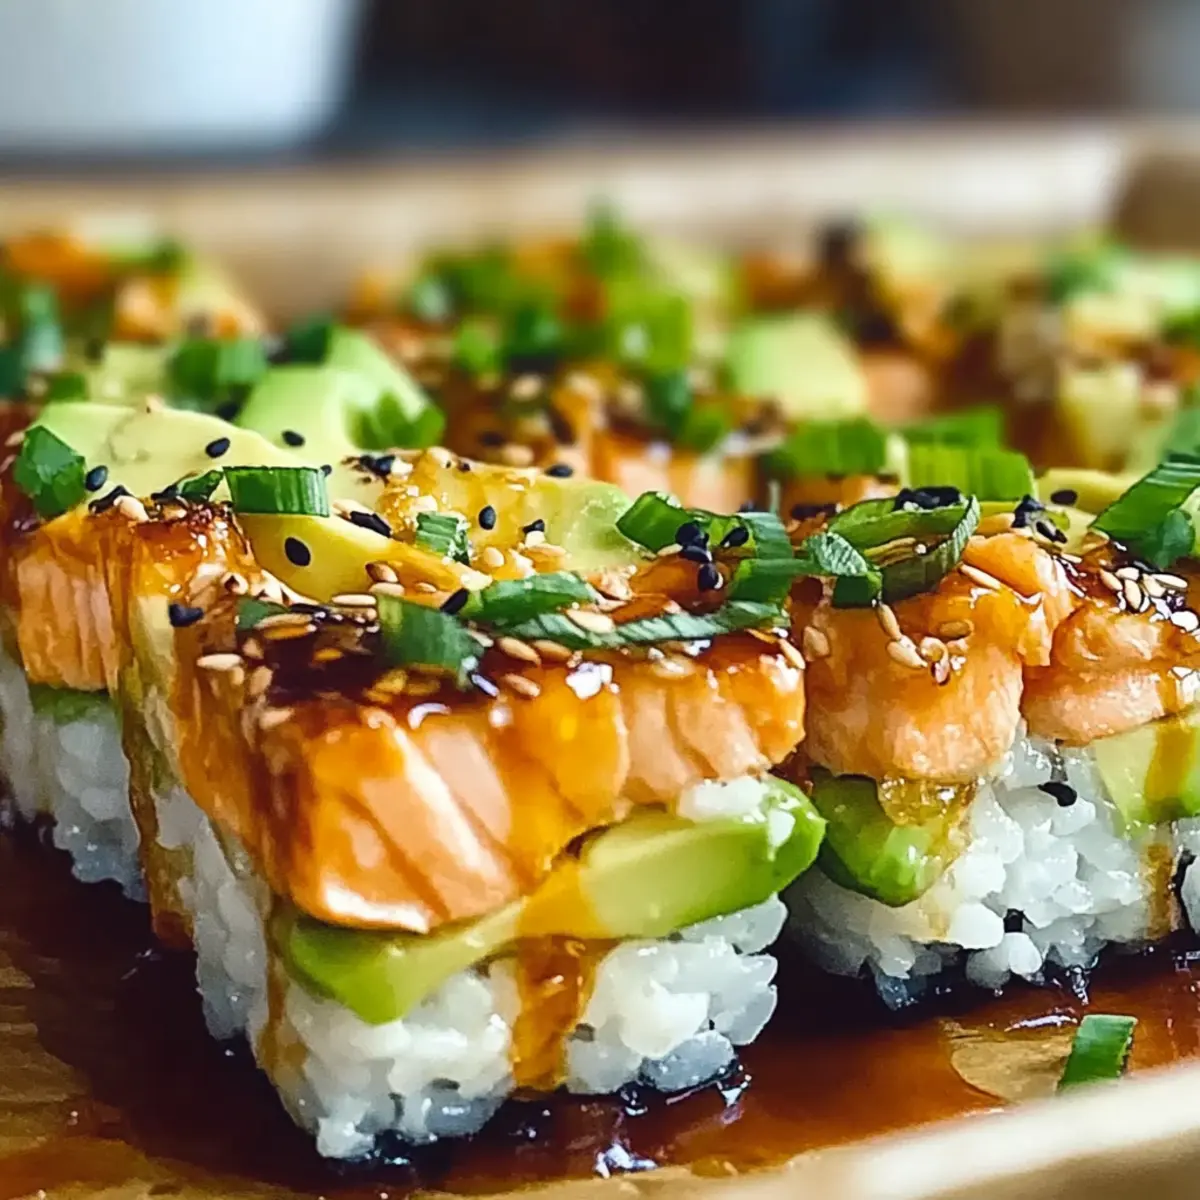
Stepping into my kitchen recently, I was struck by an unexpected wave of inspiration—what if I could encapsulate the delicious essence of sushi in a comforting, shareable dish? Enter the Spicy Salmon Sushi Bake, a perfect blend of tradition and innovation. This easy sushi bake takes the rich warmth of baked salmon and combines it with perfectly cooked sushi rice, resulting in a meal that’s both cozy and exciting. Not only is it a fantastic option for family dinners, but it also doubles as a crowd-pleaser for gatherings. With a creamy spicy kick, topped off with fresh avocado and crispy nori, each bite will leave your taste buds cheering. Are you ready to dive into this comforting yet vibrant culinary adventure?
Why Is This Sushi Bake So Irresistible?
Comforting Fusion: This Spicy Salmon Sushi Bake unites the best of both worlds—traditional sushi elements with a cozy casserole form, making it perfect for any occasion.
Quick and Easy: You can have this delectable dish ready in under an hour—ideal for busy weeknights or last-minute gatherings.
Customizable Delight: Feel free to switch out the salmon for shrimp or crab based on your preferences, or add in your favorite veggies for an extra crunch!
Crowd-Pleasing Flavor: Its creamy, spicy taste will appeal to sushi lovers and newcomers alike, ensuring everyone at your table enjoys every bite.
Satisfying Warmth: Perfectly cooked sushi rice paired with rich salmon brings a delightful warmth, making it a go-to comfort food—especially when served with some delightful cucumber salad on the side.
Elevate your dining experience with this extraordinary recipe that brings the fun of sushi right to your kitchen!
Spicy Salmon Sushi Bake Ingredients
For the Rice
• Sushi Rice – Essential for that signature sticky texture that holds the bake together.
• Water – A crucial component for cooking the sushi rice properly.
• Seasoned Rice Vinegar – Adds a sweet and tangy note to balance the rice.
For the Salmon Mixture
• Salmon Fillet – The primary protein; use skinless to keep it light and flaky.
• Mayonnaise – Delivers creaminess; Greek yogurt can be used for a lighter option.
• Sriracha Sauce – Provides a spicy kick; adjust to your desired heat level.
• Sesame Oil – Infuses a nutty depth into the salmon mixture.
For the Toppings
• Avocado – Creamy and fresh, it contrasts beautifully with the spicy salmon.
• Green Onions – Offers a bright, crunchy garnish that elevates the dish.
• Nori Strips – Adds that familiar crunch reminiscent of traditional sushi.
Now that you have all the ingredients ready, your journey to creating the delicious Spicy Salmon Sushi Bake is just a step away!
Step‑by‑Step Instructions for Spicy Salmon Sushi Bake
Step 1: Rinse and Cook the Rice
Start by rinsing 1 cup of sushi rice under cold water until the water runs clear to remove excess starch. This step is crucial for fluffy rice. Cook the rinsed rice in a rice cooker or pot with the appropriate amount of water according to package instructions, typically around 20 minutes. Once done, fluff the rice and mix in 2 tablespoons of seasoned rice vinegar for added flavor.
Step 2: Preheat and Bake the Salmon
Preheat your oven to 375°F (190°C). While the oven warms up, lay a skinless salmon fillet in a baking dish. Bake for 15-20 minutes, or until the salmon is opaque and flakes easily with a fork. Keep an eye on it; you want it perfectly tender to blend seamlessly into your Spicy Salmon Sushi Bake.
Step 3: Prepare the Salmon Mixture
Once baked, remove the salmon from the oven and allow it to cool slightly before flaking it into a bowl. Mix the flaked salmon with ¼ cup of mayonnaise, 2-3 tablespoons of sriracha sauce (adjust according to your spice preference), and 1 teaspoon of sesame oil. Ensure everything is well combined for a creamy, spiced mixture that brings richness to your bake.
Step 4: Assemble the Sushi Bake
In a large baking dish, spread the cooked sushi rice evenly across the bottom to form a delicious base. Layer the spicy salmon mixture generously over the rice, making sure it covers all areas evenly. Use a spatula to smooth the top for a nice presentation in your Spicy Salmon Sushi Bake.
Step 5: Bake to Perfection
Return the assembled dish to the oven and bake for an additional 10-15 minutes. This will meld all the flavors beautifully, allowing the top to get slightly golden. Keep an eye out for the edges to bubble, indicating it’s ready to bring that comforting warmth to your meal.
Step 6: Garnish and Serve
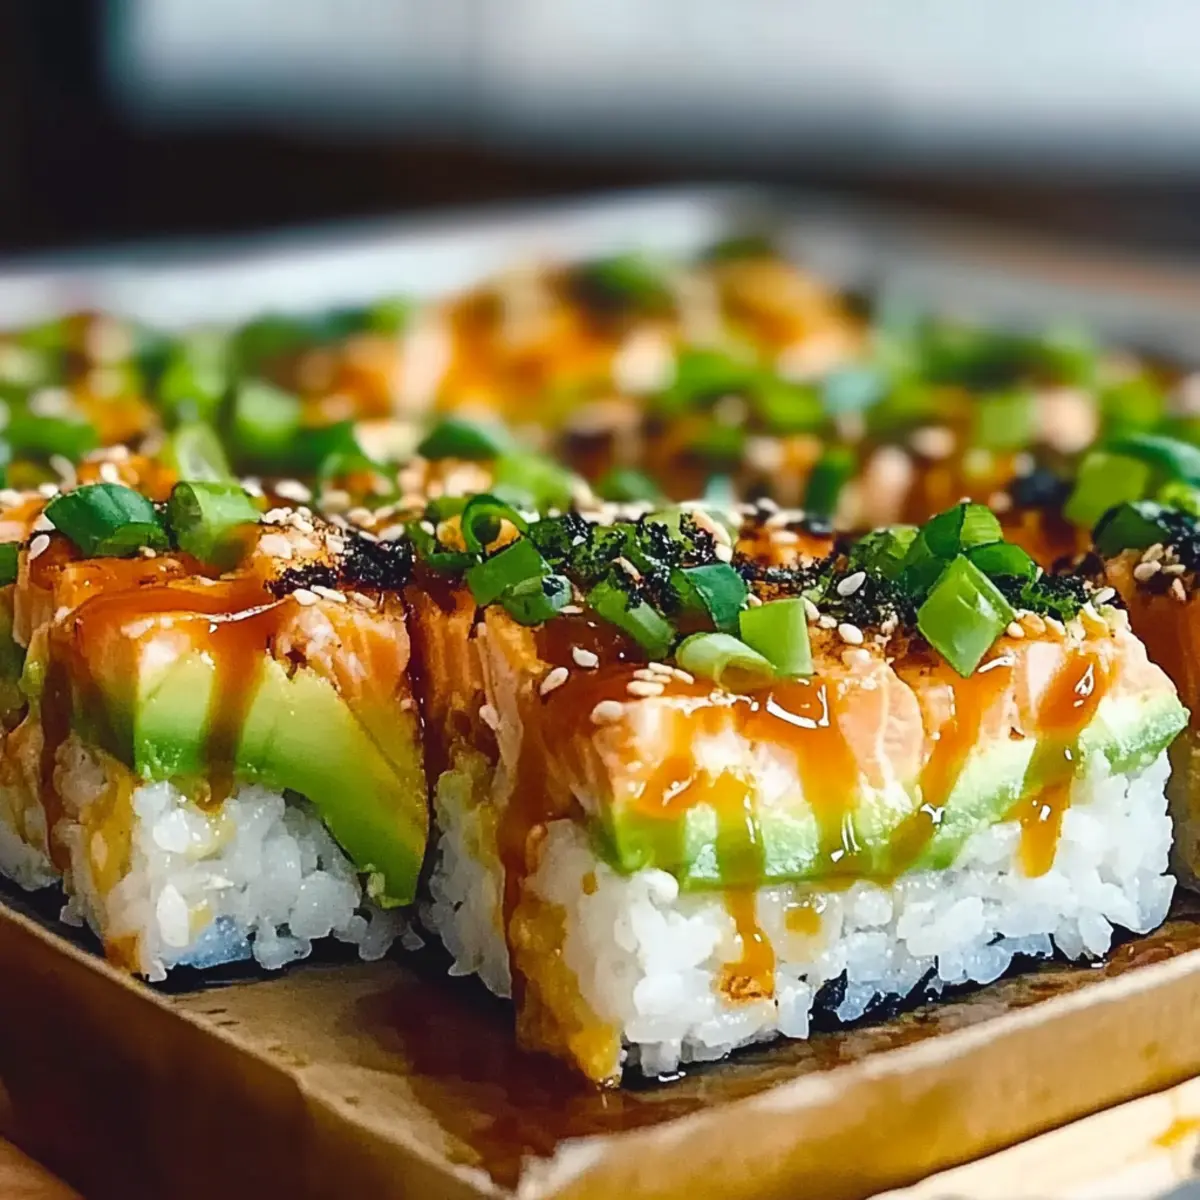
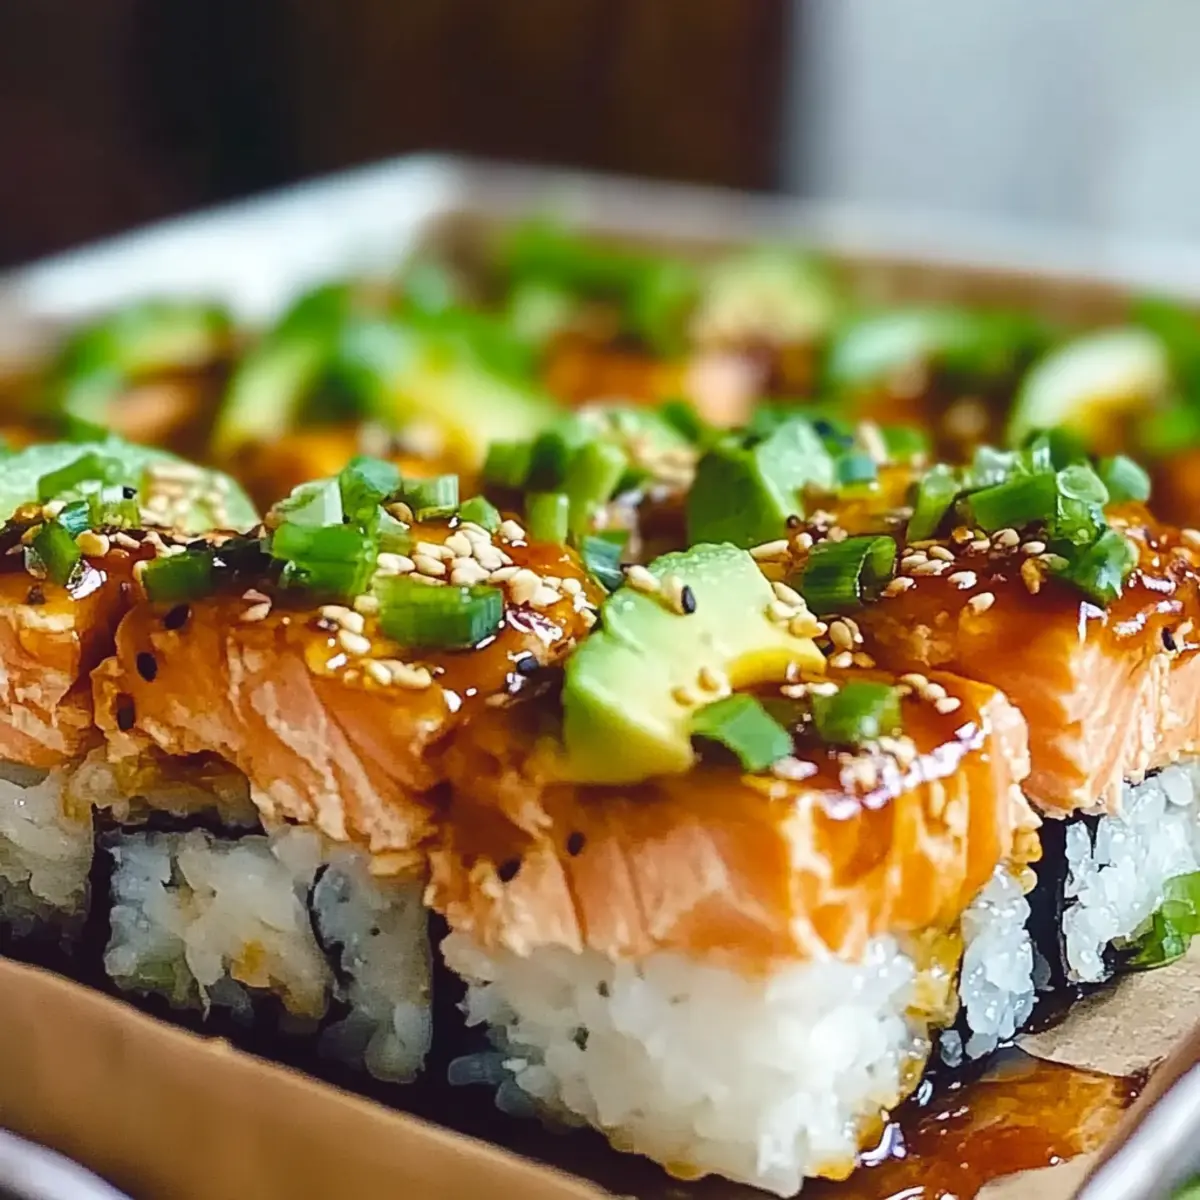
Once baked, carefully remove the Spicy Salmon Sushi Bake from the oven and let it cool for a few minutes. Top with fresh slices of avocado and a sprinkle of chopped green onions for added color and crunch. Serve with nori strips on the side, and maybe some soy sauce, to enhance the sushi experience!
Spicy Salmon Sushi Bake Variations
Feel free to personalize this delightful dish, bringing your unique touch to the comforting flavors!
-
Seafood Swap: Substitute salmon with cooked shrimp or crab for a delicious twist that adds variety to your meal.
-
Creamy Alternative: Use Greek yogurt instead of mayonnaise for a lighter version while maintaining that creamy satisfaction.
-
Veggie Boost: Add diced cucumbers, carrots, or bell peppers to the salmon mixture for an extra crunch that complements the creaminess.
-
Spice Variation: Adjust the sriracha level up or down based on your heat preferences—think sweet chili sauce for a milder yet flavorful experience.
-
Herb Infusion: Incorporate fresh herbs like cilantro or basil into the salmon mixture to elevate the dish with vibrant, aromatic notes.
-
Quinoa Fusion: Swap out sushi rice for quinoa—this gluten-free option provides a nutty flavor and a delightful twist on the classic.
-
Nori Alternatives: Try crispy seaweed snacks or toasted sesame seeds in place of nori strips for different textures while keeping that sushi essence.
-
Serving Suggestions: Pair your Spicy Salmon Sushi Bake with a refreshing cucumber salad or a bowl of miso soup for a delightful, well-rounded meal. You might love serving it alongside a comforting Berry Croissant Bake for a sweet ending!
How to Store and Freeze Spicy Salmon Sushi Bake
Fridge: Store leftovers in an airtight container in the refrigerator for up to 3 days. Keep toppings separate until ready to serve to maintain freshness.
Freezer: If you want to freeze your Spicy Salmon Sushi Bake, cover it tightly with plastic wrap and then foil; it will last for up to 2 months.
Reheating: For the best texture, reheat in the oven at 350°F (175°C) for about 20 minutes, or until heated through. Avoid using the microwave to prevent sogginess.
Serving Tip: Always let the dish cool slightly before slicing to help maintain its layers for the best presentation.
Expert Tips for Spicy Salmon Sushi Bake
-
Rinse Thoroughly: Rinse the sushi rice well until the water is clear; this prevents it from being too gummy after cooking.
-
Flavor Adjustments: If the sriracha is too spicy for your taste, feel free to reduce the amount or mix in a bit of sweetness with honey for balance.
-
Cooking Time: Be careful not to overbake the salmon; it should be perfectly flaky and moist to create the most delicious Spicy Salmon Sushi Bake.
-
Layering Matters: Spread the rice evenly and layer the salmon mixture generously to achieve a well-balanced flavor throughout the dish.
-
Storage Tips: To maintain freshness, store leftovers in an airtight container in the fridge for no more than 3 days.
-
Reheating Best Practices: For the best texture when reheating, place the leftover sushi bake in the oven instead of the microwave; this keeps it from getting soggy.
What to Serve with Spicy Salmon Sushi Bake
Elevate your meal experience with delightful accompaniments that balance the rich flavors of this cozy dish.
-
Cucumber Salad: A refreshing counterpart that adds a crisp texture, balancing the warm and creamy sushi bake.
-
Miso Soup: The savory umami in miso soup perfectly complements the spicy notes, cleansing the palate between bites.
-
Steamed Edamame: Lightly salted edamame brings a satisfying crunch, enhancing the meal while keeping it light.
-
Pickled Ginger: These tangy, sweet slices offer a burst of flavor that cleanses the mouth—great when transitioning to the next delicious bite.
-
Chilled Sake: A glass of chilled sake enhances the sushi experience, with its smooth, subtle sweetness perfectly complementing the dish’s spiciness.
-
Green Tea: This soothing beverage pairs beautifully, offering a warm, calming flavor to contrast the spicy salmon.
Serve these delightful companions alongside your Spicy Salmon Sushi Bake for a truly memorable dining experience!
Make Ahead Options
Preparing your Spicy Salmon Sushi Bake ahead of time is a fantastic way to save time on busy weeknights! You can cook the sushi rice and flake the salmon up to 24 hours in advance; just refrigerate them separately to maintain their texture. Mix the flaked salmon with mayonnaise, sriracha, and sesame oil the day before you plan to serve it. When you’re ready to enjoy your sushi bake, simply assemble the layers and bake for 10-15 minutes until heated through and bubbly. This way, you’ll enjoy the same delicious flavors without the last-minute hassle! Just remember to keep the avocado fresh until serving to avoid browning.

Spicy Salmon Sushi Bake Recipe FAQs
What type of sushi rice should I use for this recipe?
Absolutely! For the Spicy Salmon Sushi Bake, use short-grain sushi rice. It has the perfect sticky texture that holds the bake together beautifully. Rinse the rice under cold water until the water runs clear to remove excess starch, ensuring a fluffy final dish.
How should I store leftovers?
Very! Store any leftovers of your Spicy Salmon Sushi Bake in an airtight container in the refrigerator for up to 3 days. To keep the toppings like avocado and green onions fresh, I recommend keeping them separate until you’re ready to serve again.
Can I freeze the Spicy Salmon Sushi Bake?
Absolutely! If you want to freeze it, wrap your Spicy Salmon Sushi Bake tightly in plastic wrap and then in foil to prevent freezer burn. It can be stored for up to 2 months. When you’re ready to enjoy it again, simply thaw it in the refrigerator overnight before reheating.
What should I do if my sushi rice turns out gummy?
Oh no! If your sushi rice becomes gummy, it may have been rinsed inadequately or overcooked. To salvage it next time, make sure to rinse the rice under cold water thoroughly until it runs clear, and check the cooking time. Use the right water-to-rice ratio, typically 1:1.2 for sushi rice, to keep it perfectly fluffy.
Is this dish suitable for those with seafood allergies?
It’s important to note that the Spicy Salmon Sushi Bake isn’t suitable for those with seafood allergies since it primarily uses salmon as the main ingredient. However, you can substitute the salmon with ingredients like grilled chicken or roasted vegetables to make it allergy-friendly.
Savor the Comfort: Spicy Salmon Sushi Bake Delight
Ingredients
Equipment
Method
- Rinse 1 cup of sushi rice under cold water until the water runs clear. Cook the rinsed rice in a rice cooker or pot with 1 cup of water for about 20 minutes. Mix in 2 tablespoons of seasoned rice vinegar once cooked.
- Preheat your oven to 375°F (190°C). Place the salmon fillet in a baking dish and bake for 15-20 minutes until flaked easily.
- Flake the salmon into a bowl and mix with ¼ cup of mayonnaise, 2-3 tablespoons of sriracha sauce, and 1 teaspoon of sesame oil.
- In a baking dish, spread the cooked sushi rice at the bottom. Layer the spicy salmon mixture over the rice.
- Bake the assembled dish for an additional 10-15 minutes until slightly golden.
- Remove from the oven, cool slightly, and garnish with avocado and green onions. Serve with nori strips.