
As I flipped through my recipe book one rainy afternoon, a sudden craving hit me—the irresistible crunch of crispy Beef and Cheese Chimichangas. These delightful bundles of seasoned beef and gooey cheese are not just tasty; they’re a huge hit with everyone, making them perfect for family dinners or casual get-togethers. What’s even better? They’re quick to whip up and easily customizable, accommodating everything from chicken to vegetarian fillings for picky eaters. Plus, they freeze beautifully, ensuring you always have a homemade meal ready to save the day. Curious about how to make these Tex-Mex treasures? Let’s dive in!
Why Will You Love These Chimichangas?
Versatile and Customizable: Whether you’re craving beef, chicken, or a hearty vegetarian option, this recipe easily adapts to your taste. Feel free to explore flavors with ingredients like jalapeños for a spicy kick or see how to make a great breakfast chimichanga with scrambled eggs!
Family-Friendly Delight: With its blend of familiar ingredients, everyone will be clamoring for more, making it an excellent choice for busy weeknights or family gatherings.
Make-Ahead Magic: Prepare your filling a day in advance or freeze the assembled chimichangas for quick weeknight meals. Imagine a tasty homemade dinner in under 30 minutes!
Crispy Texture: The golden brown exterior achieved through frying or baking provides satisfying crunch, perfectly contrasting the cheesy, savory filling that awaits inside.
Crowd-Pleasing Meal: Perfect for casual get-togethers, these chimichangas are sure to impress your friends! Serve with sour cream or guacamole, and watch the compliments roll in.
Discover more delicious recipes like these Beef and Cheese Chimichangas and bring joy to your kitchen!
Beef and Cheese Chimichangas Ingredients
• A delightful combination of flavors awaits!
For the Filling
- Ground Beef – Provides the main filling with rich flavor. Use lean ground beef to reduce grease.
- Small Onion – Adds depth of flavor; finely diced for even cooking. Substitute with shallots for a sweeter taste.
- Garlic – Enhances aroma and flavor; fresh minced garlic is ideal. Garlic powder can be used in a pinch.
- Taco Seasoning – Introduces classic Tex-Mex flair; use homemade for freshness. Store-bought works fine if time is short.
- Salsa – Keeps the filling moist and zesty. Tomato sauce can be a substitute if salsa is unavailable.
- Refried Beans – Adds creaminess and protein; can be omitted for a leaner filling. Black beans are a suitable alternative for added texture.
- Shredded Cheese (Cheddar/Mexican blend) – Melts and holds the filling together. Monterey Jack can be used for a different flavor profile.
For the Wrap
- Flour Tortillas (10-inch) – Wrap that holds all the goodness; warm them to prevent tearing. Corn tortillas can be a gluten-free option.
- Vegetable Oil – Used for frying for crispiness; can also brush on when baking. Canola oil or melted butter can substitute.
Embrace the joy of cooking with these Beef and Cheese Chimichangas and create a meal that your family will love!
Step‑by‑Step Instructions for Beef and Cheese Chimichangas
Step 1: Prepare the Filling
In a large skillet, heat over medium heat, adding the ground beef and finely diced onion. Cook for about 5-7 minutes, stirring occasionally until the beef is browned and the onion is translucent. Drain any excess grease from the skillet. Add minced garlic, taco seasoning, and salsa, mixing well. Let the mixture simmer for another 2-3 minutes until heated through and aromatic.
Step 2: Assemble the Chimichangas
On a clean surface, warm each flour tortilla to make them pliable. Begin by spreading a spoonful of refried beans (if using) in the center of the tortilla, followed by a generous scoop of the beef mixture and a handful of shredded cheese. Carefully fold in the sides of the tortilla and roll it tightly from the bottom to encase the filling securely, ensuring no gaps are left.
Step 3: Cook the Chimichangas
For frying, heat vegetable oil in a deep pan over medium-high heat until it reaches 350°F (175°C). Place the chimichangas seam-side down into the hot oil, frying them for 2-3 minutes until golden brown and crisp on the outside. Using tongs, carefully remove them and let them drain on paper towels. For baking, preheat your oven to 400°F (200°C), brush the chimichangas with oil, and arrange them seam-side down on a baking sheet. Bake for 20-25 minutes until they are crispy and golden.
Step 4: Serve and Enjoy
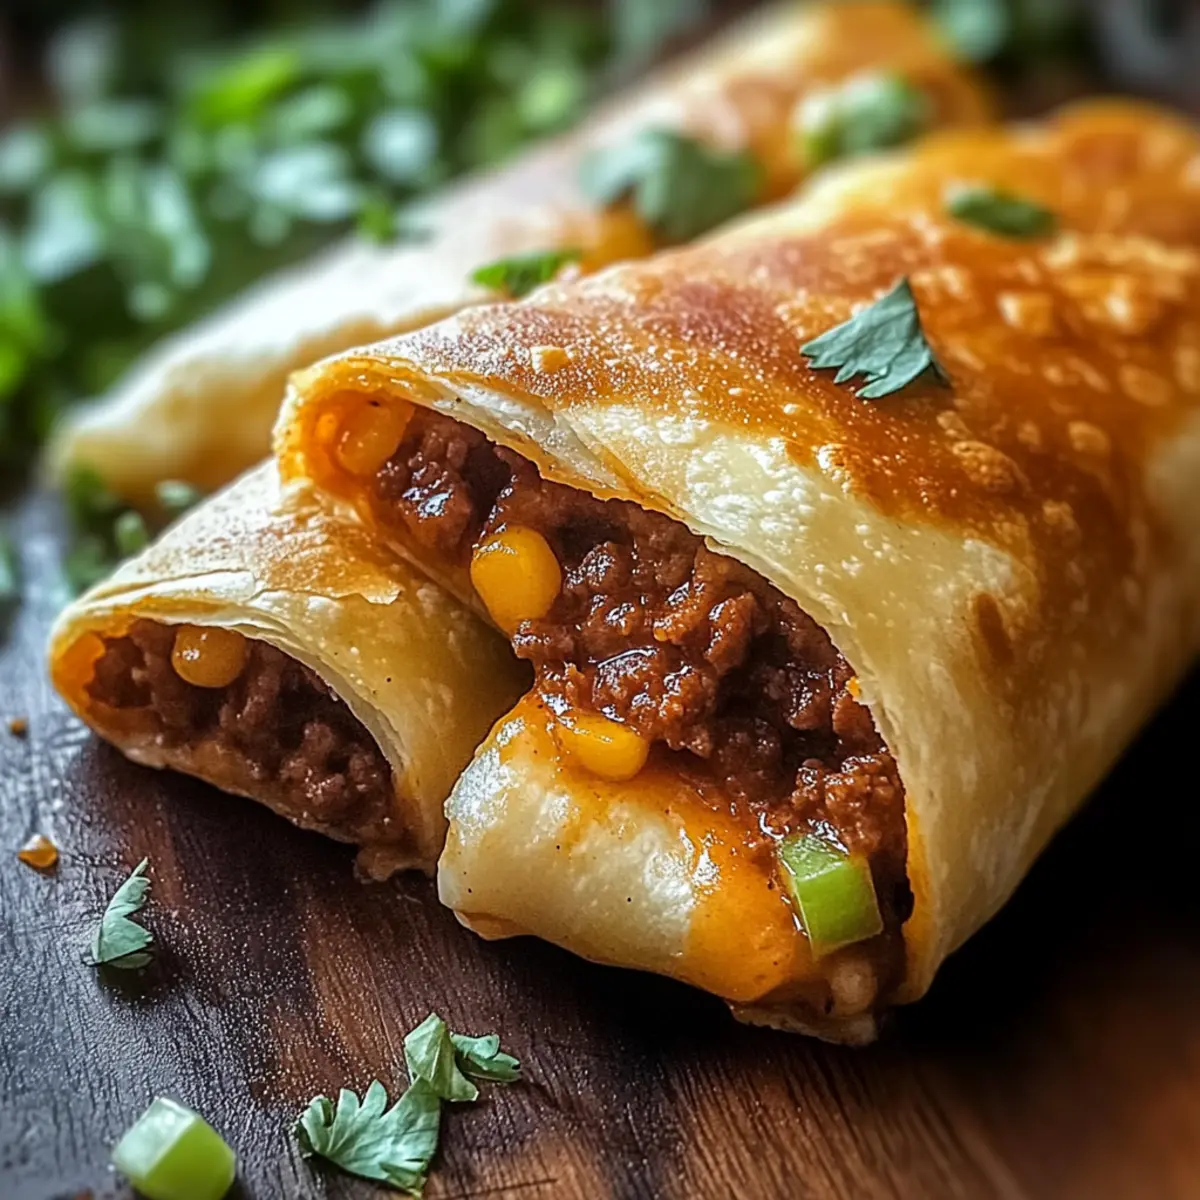
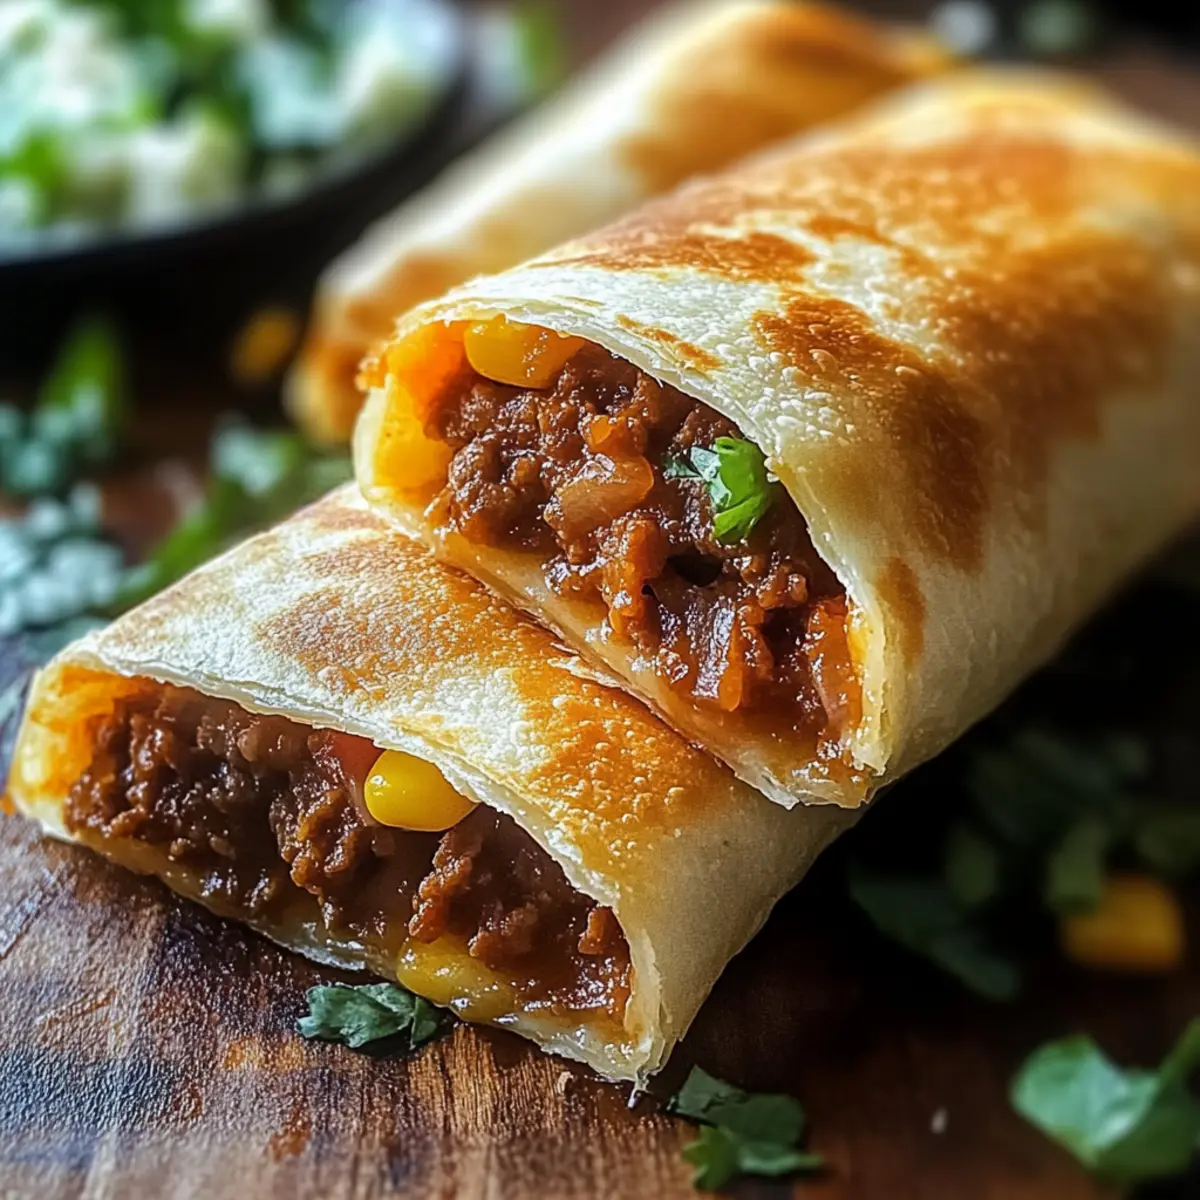
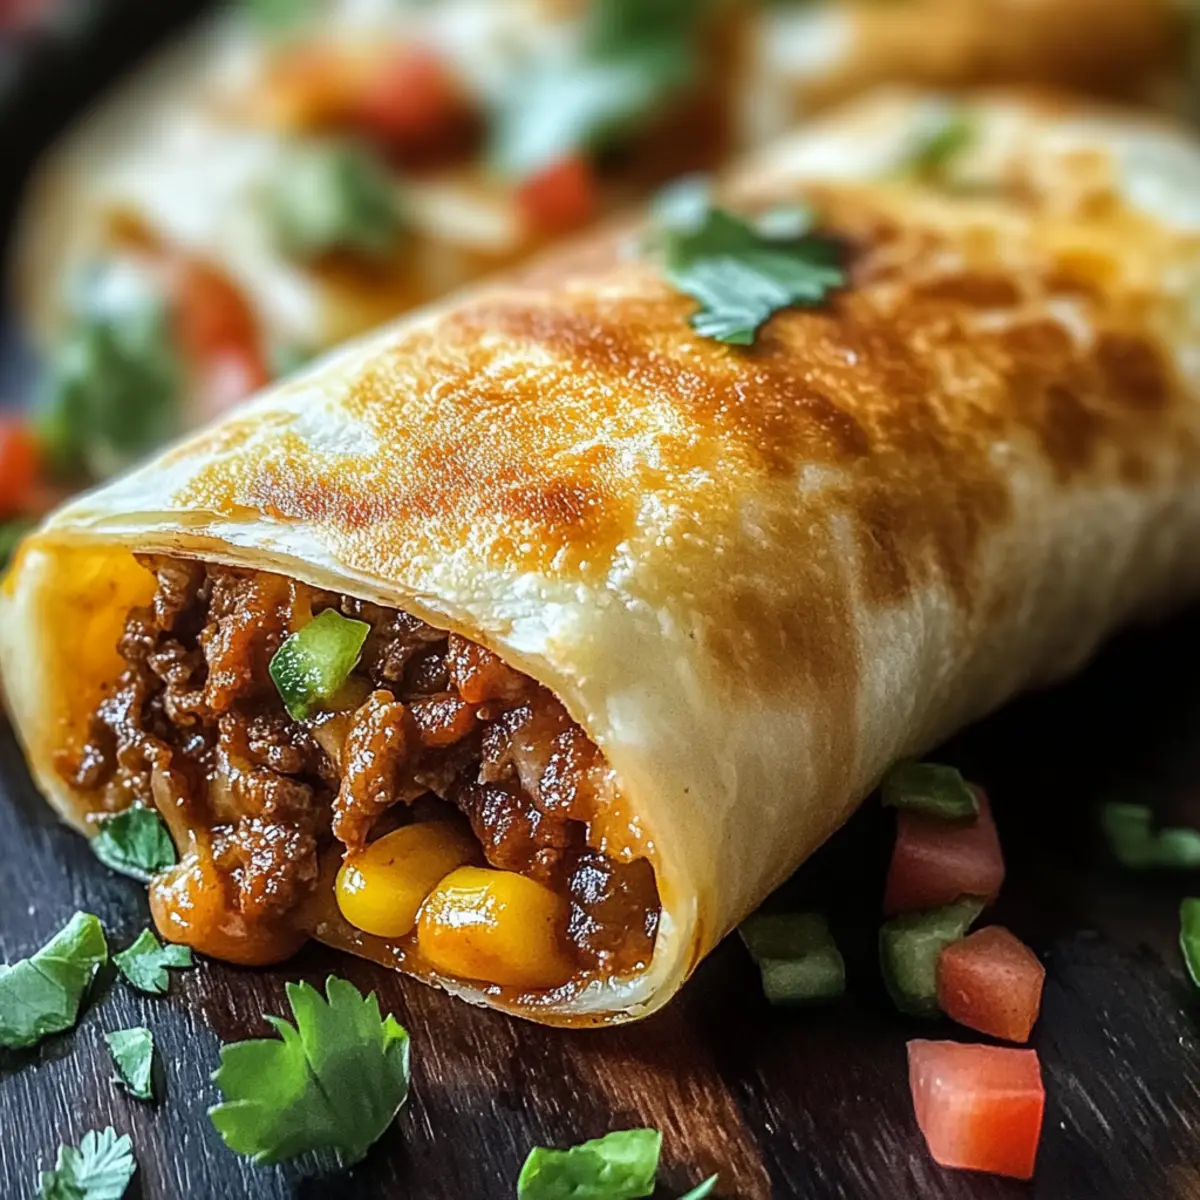
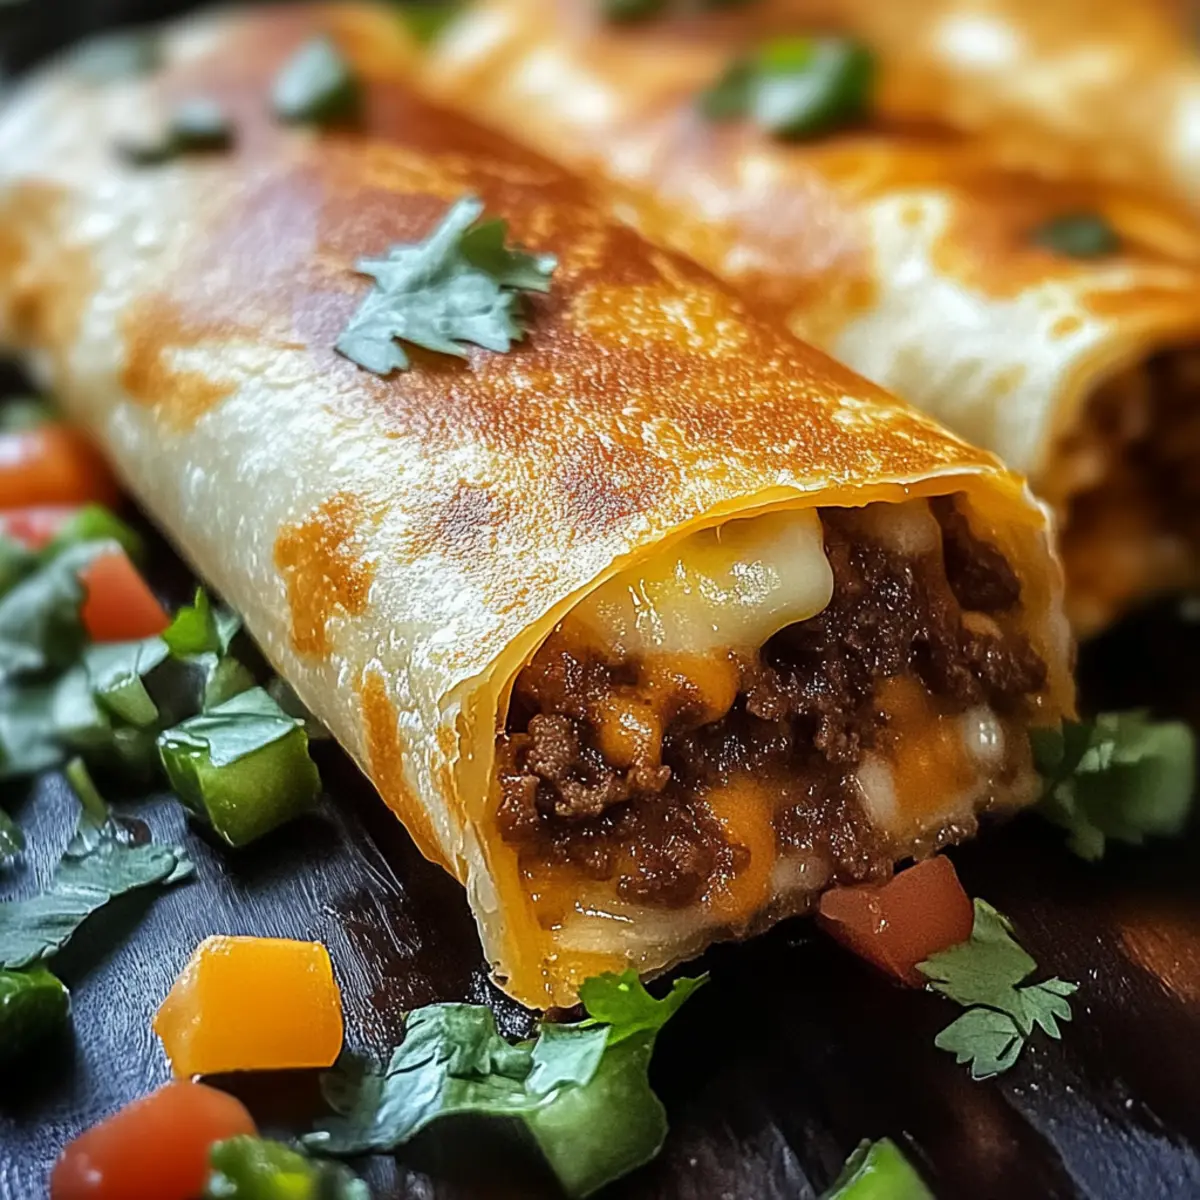
Allow the chimichangas to cool slightly on a wire rack before serving. These crispy Beef and Cheese Chimichangas can be garnished with fresh cilantro or chopped green onions for an added burst of flavor. Serve them alongside your favorite dipping sauces like sour cream or guacamole, and watch your family delight in this hearty, homemade meal!
Beef and Cheese Chimichangas Variations
Feel free to experiment and make these chimichangas your own masterpiece that tantalizes your taste buds!
-
Chicken Twist: Replace ground beef with shredded rotisserie chicken for a quick, savory option that’s just as satisfying.
-
Pork Alternative: Use ground pork instead of beef for a richer flavor profile that adds a tasty twist to this classic dish.
-
Spicy Kick: Incorporate diced jalapeños or splash some hot sauce into the filling for a zesty heat that will awaken your palate.
-
Vegetarian Delight: Swap out meat for a mix of sautéed bell peppers, onions, and black beans for a hearty vegetarian option that everyone will love.
-
Breakfast Special: Transform these chimichangas into a breakfast treat by adding scrambled eggs, breakfast sausage, or bacon for a delicious morning feast.
-
Cheesy Variation: Experiment with different cheeses such as pepper jack or gouda for an extra layer of flavor and creaminess that will melt in your mouth.
-
Gluten-Free Option: Use corn tortillas instead of flour for a gluten-free version that maintains the crunch and flavor you crave.
Don’t forget to accompany your chimichangas with sides like guacamole or sour cream for dipping! And for more amazing recipes, check out Chicken Chimichangas Perfectly or Beef Cabbage Stir.
Tips for the Best Chimichangas
• Seal Tight: Ensure each chimichanga is tightly rolled to prevent filling from leaking during cooking; you can use toothpicks for added security.
• Customize Away: Experiment with different fillings beyond beef and cheese chimichangas. Try chicken, pork, or vegetarian options for variety and dietary needs!
• Temperature Control: When frying, maintain oil temperature at 350°F for optimal crispiness; too hot can burn the outsides while leaving the insides cold.
• Make Extra: Prepare a larger batch and freeze uncooked chimichangas for up to 2 months. They’ll save you on busy nights with a quick microwave or oven cook!
• Crispy Finish: For baked chimichangas, brushing the tops with oil helps achieve a golden, crispy crust without deep frying.
• Serve Fresh: Enjoy immediately for the best texture; reheating is possible but may sacrifice that delightful crunch!
Make Ahead Options
These Beef and Cheese Chimichangas are a fantastic option for busy home cooks looking to save time during the week! You can prepare the filling up to 24 hours in advance by cooking the ground beef with onions, garlic, taco seasoning, and salsa, then storing it in an airtight container in the refrigerator. To maintain quality, making sure the filling is completely cooled before refrigerating is key. When ready to serve, simply assemble the chimichangas, fry or bake them as directed, and you’ll enjoy a delicious homemade meal with minimal last-minute effort. Additionally, uncooked chimichangas can be frozen for up to 2 months; just cook them straight from the freezer, adjusting the cook time as needed, for that fresh, crispy texture everyone loves!
How to Store and Freeze Beef and Cheese Chimichangas
Fridge: Store leftover chimichangas in an airtight container for up to 3 days. Reheat in the oven or air fryer to regain that crispy texture.
Freezer: For long-term storage, freeze uncooked chimichangas wrapped in foil or placed in freezer bags for up to 2 months. Cook directly from frozen, adjusting the time as needed.
Make-Ahead Tip: Prepare the filling and store it in the fridge for up to 24 hours before assembly to save time on busy nights.
Reheating: For the best results, reheat fried or baked chimichangas in the oven or air fryer at 350°F (175°C) until hot and crispy.
What to Serve with Beef and Cheese Chimichangas?
Imagine a lively dinner gathering where everyone revels in the perfect harmony of textures and flavors accompanying your crispy delights.
- Creamy Guacamole: The cool, creamy nature of guacamole offers a refreshing contrast to the warm, crispy chimichangas, making each bite unforgettable.
- Zesty Salsa: A bright, tangy salsa adds vibrant flavor with every bite, enhancing the Tex-Mex experience and keeping the palate excited.
- Crisp Mexican Street Corn: The sweet corn with creamy dressing and zesty lime elevates your meal with delightful sweetness and crunch.
- Fried Rice: Savory fried rice brings an additional layer of deliciousness that complements the bold flavors of your chimichangas seamlessly.
- Chilled Mexican Beer: A light beer adds a fizzy, refreshing element, perfectly washing down the richness of the chimichangas.
- Fresh Green Salad: A crisp garden salad with avocado, tomatoes, and a tangy dressing adds a healthy balance and hydrates the palate between bites.
- Pico de Gallo: Fresh Pico de Gallo introduces brightness and crunch, making each bite more dynamic and enticing.
- Sour Cream: A dollop of sour cream adds a tangy creaminess that perfectly melds with the flavors of the chimichangas and adds richness.
- Margaritas: A classic margarita with its citrusy zing complements the savory flavors of chimichangas and makes any gathering feel festive.
- Chocolate Flan: For dessert, creamy chocolate flan offers a sweet finish, ensuring your meal ends on a beautifully rich note.
Beef and Cheese Chimichangas Recipe FAQs
What type of ground beef should I use for my chimichangas?
Absolutely opt for lean ground beef to keep your chimichangas flavorful without excessive grease. This choice will not only enhance the taste but also ensure a healthier bite!
How should I store leftover chimichangas?
To keep your leftover beef and cheese chimichangas fresh, store them in an airtight container in the refrigerator for up to 3 days. Reheating them in the oven or air fryer ensures they regain their delightful crispiness!
Can I freeze uncooked chimichangas?
Yes, you can freeze uncooked chimichangas for up to 2 months. Wrap each chimichanga tightly in foil or place them in freezer bags, ensuring as much air is removed as possible. When you’re ready to enjoy them, cook directly from frozen, adding a few extra minutes to your cook time.
What if my chimichangas are leaking while frying?
If you notice your chimichangas leaking, it’s usually because they weren’t sealed tightly enough. Be sure to fold the sides in tightly and roll them securely from the bottom. Using toothpicks can also help to keep the seams together during cooking.
Can I make these chimichangas vegetarian-friendly?
Very! To create a vegetarian version of your beef and cheese chimichangas, simply omit the meat and use a combination of sautéed vegetables or canned black beans as your filling. Add cheese and spices to enhance flavors based on your preference.
How can I make these chimichangas ahead of time?
To prepare for busy weeknights, you can make the filling a day in advance and store it in the refrigerator for up to 24 hours before assembly. Additionally, you can freeze the assembled chimichangas and pop them into the oven whenever you have a craving for a homemade, crispy treat!
Beef and Cheese Chimichangas: Crispy Tex-Mex Comfort Food
Ingredients
Equipment
Method
- In a large skillet, heat over medium heat, adding the ground beef and finely diced onion. Cook for about 5-7 minutes, stirring occasionally until the beef is browned and the onion is translucent. Drain any excess grease from the skillet. Add minced garlic, taco seasoning, and salsa, mixing well. Let the mixture simmer for another 2-3 minutes until heated through and aromatic.
- On a clean surface, warm each flour tortilla to make them pliable. Begin by spreading a spoonful of refried beans (if using) in the center of the tortilla, followed by a generous scoop of the beef mixture and a handful of shredded cheese. Carefully fold in the sides of the tortilla and roll it tightly from the bottom to encase the filling securely, ensuring no gaps are left.
- For frying, heat vegetable oil in a deep pan over medium-high heat until it reaches 350°F (175°C). Place the chimichangas seam-side down into the hot oil, frying them for 2-3 minutes until golden brown and crisp on the outside. Using tongs, carefully remove them and let them drain on paper towels. For baking, preheat your oven to 400°F (200°C), brush the chimichangas with oil, and arrange them seam-side down on a baking sheet. Bake for 20-25 minutes until they are crispy and golden.
- Allow the chimichangas to cool slightly on a wire rack before serving. These crispy Beef and Cheese Chimichangas can be garnished with fresh cilantro or chopped green onions for an added burst of flavor. Serve them alongside your favorite dipping sauces like sour cream or guacamole.