
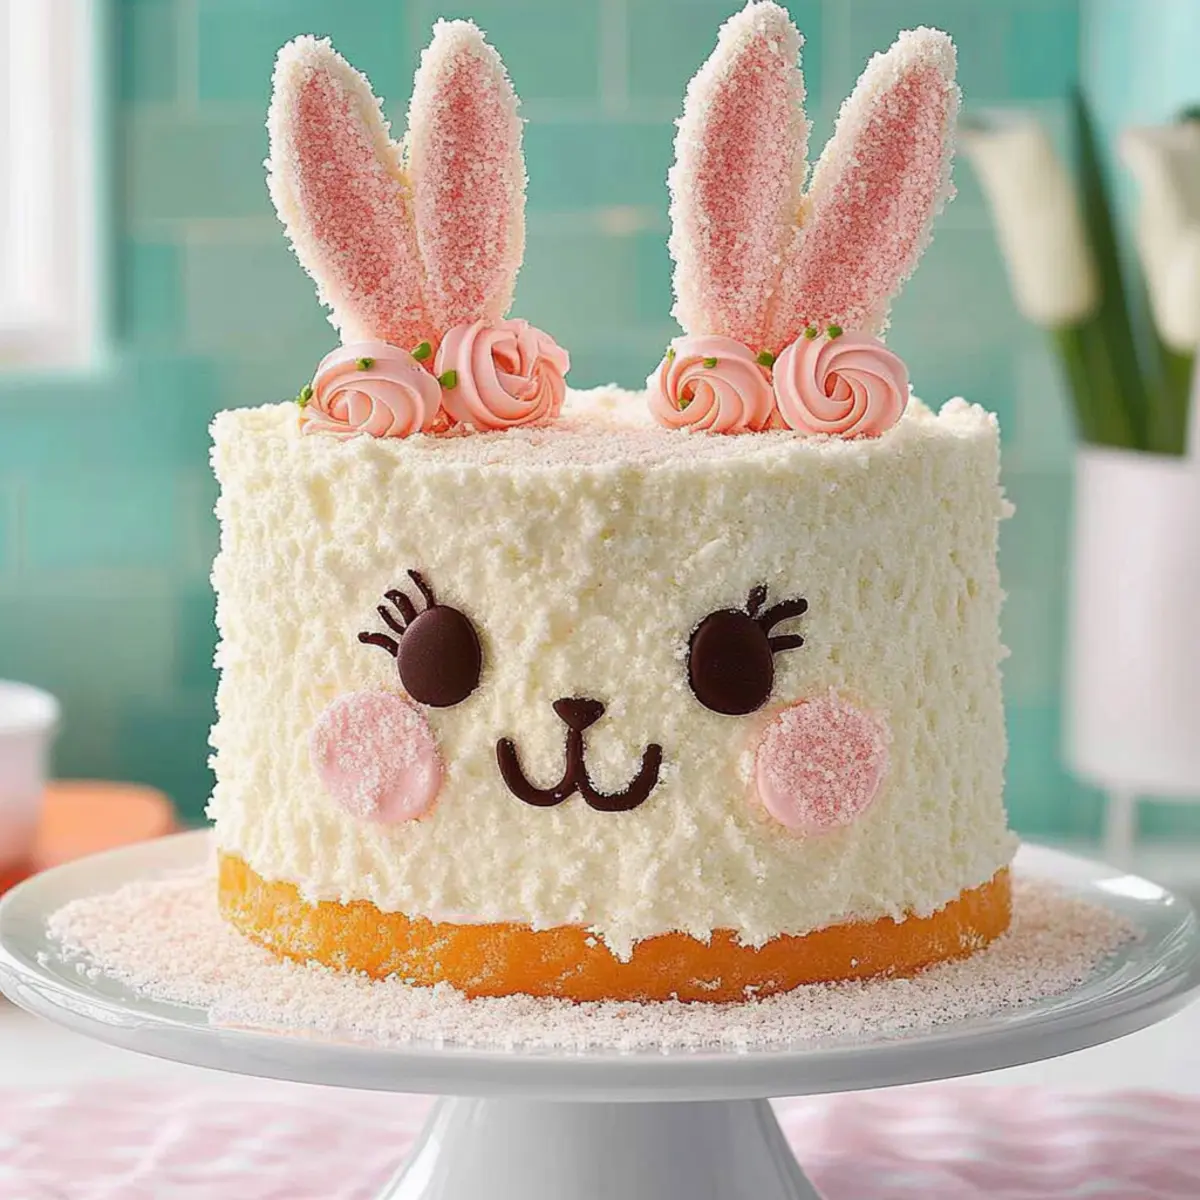
As I was flipping through old family photo albums, I stumbled upon a snapshot of my childhood Easter celebrations, where the star of the show was an adorably decorated cake that looked just like a bunny. The sight immediately filled my heart with warmth and nostalgia, inspiring me to recreate this festive delight. Enter the Hippity Hop Bunny Cake, a whimsical masterpiece that’s just as fun to make as it is to share. With luscious layers of homemade orange curd and silky buttercream, it’s an absolute crowd-pleaser that brings a sweet zing to family gatherings. Not only is this cake a charming centerpiece for your spring celebrations, but it also comes together with surprisingly simple steps, ensuring that anyone can whip it up—no professional skills required! Are you ready to hop into the kitchen and create something special that your loved ones will treasure?
What Makes This Cake So Special?
Whimsical Design: The adorable bunny shape makes it a delightful centerpiece for any festive occasion, especially Easter.
Flavorful Layers: Enjoy the bright and tangy homemade orange curd paired with smooth, creamy buttercream, creating a perfect harmony of taste.
Easy to Assemble: With straightforward steps and readily available ingredients, you can create this show-stopper even if you’re a novice in the kitchen.
Family-Friendly Fun: This cake is not just about flavor; it’s an opportunity to bring family together, making decorating a joyous activity for kids and adults alike.
Perfect for Sharing: Whether it’s for a birthday, Easter, or just because, the Hippity Hop Bunny Cake is sure to impress your guests and leave them asking for seconds! For more delightful cake ideas, check out my Cinnamon Roll Cake or Carrot Cake Cheesecake.
Hippity Hop Bunny Cake Ingredients
For the Orange Curd
- Sugar – Sweetens the cake and curd; consider using a sugar substitute for diabetic-friendly options.
- Cornstarch – Thickens the orange curd; no substitutes needed for this essential ingredient.
- Salt – Balances the flavors in curd; don’t skip it for a well-rounded taste.
- Orange Juice – Provides tartness and moisture; freshly squeezed is sure to elevate the flavor.
- Egg Yolks – Enrich the curd with fat and color; for an eggless version, silken tofu works as a great thickener.
- Unsalted Butter – Adds richness to both cake and buttercream; margarine can be used for a dairy-free alternative.
- Grated Orange Zest – Enhances citrus flavor; you can swap it with lemon zest for a different zing.
For the Cake
- Egg Whites – Create a light, airy texture in the cake; aquafaba is a perfect substitute for a vegan option.
- Clear Vanilla Extract – Adds depth of flavor without altering the color; feel free to use regular vanilla extract if needed.
- Cake Flour – Ensures a delicate crumb; all-purpose flour can be used in a pinch.
- Baking Powder – Acts as a leavening agent for the cake rise; make sure it’s fresh for the best results.
- 2% Milk – Moistens the cake; a non-dairy milk can be used for an appropriate substitute.
For the Buttercream
- White Baking Chocolate – Necessary for smooth buttercream; dark chocolate can enrich the flavor if you prefer.
- Heavy Whipping Cream – Adds richness to the buttercream; non-dairy heavy cream is a fantastic option.
For Decoration
- Coarse Sugar – Adds texture and a decorative touch; regular sugar can substitute but won’t have the same visual appeal.
- Optional Bunny Decorations – Various candies for creative embellishment; let your imagination run wild for a fun finish!
With these lively ingredients in hand, you’re ready to hop into making this delightful Hippity Hop Bunny Cake! Celebrate the special moments with this sweet treat that’s sure to create lasting memories!
Step‑by‑Step Instructions for Hippity Hop Bunny Cake
Step 1: Prepare the Orange Curd
In a medium saucepan, combine 1 cup of sugar, 1/4 cup of cornstarch, and a pinch of salt. Gradually stir in 1 cup of freshly squeezed orange juice, then cook over medium heat until the mixture thickens, about 5-7 minutes. Remove from heat and whisk in 4 egg yolks, returning it to the stove until it reaches a gentle simmer. Stir in 1/4 cup of unsalted butter and 1 tablespoon of grated orange zest until melted and smooth. Transfer to a bowl, cover with plastic wrap, and refrigerate to cool.
Step 2: Preheat and Prepare the Cake Pans
Preheat your oven to 350°F (175°C). While the oven heats, grease and flour two 9-inch round cake pans to prevent sticking. In a large mixing bowl, cream together 1/2 cup of unsalted butter and 1 1/2 cups of sugar until light and fluffy, about 3-5 minutes. Add in 4 egg whites, mixing until well incorporated, then blend in 1 teaspoon of clear vanilla extract and the zest from 1 orange.
Step 3: Mix the Cake Batter
In a separate bowl, whisk together 2 cups of cake flour and 2 teaspoons of baking powder, then slowly add this dry mixture into the creamed butter and sugar. Mix until just combined. Gradually add 1 cup of 2% milk, mixing until the batter is smooth and well-blended. Pour the cake batter evenly into the prepared pans, smoothing the tops for even baking.
Step 4: Bake the Cake Layers
Place the pans in the preheated oven and bake for 30-35 minutes, or until a toothpick inserted in the center comes out clean. Keep an eye on them; the edges should be lightly golden, and the center should spring back when gently pressed. Once baked, cool the cakes in the pans for 10 minutes, then transfer them to wire racks to cool completely.
Step 5: Prepare the Buttercream
In a heatproof bowl, combine 4 egg whites and 1 cup of sugar. Set this bowl over a pot of simmering water, whisking continuously until the mixture reaches 160°F (70°C) to pasteurize the eggs, which takes about 5 minutes. Once heated, beat the mixture until it forms stiff peaks and is cool to the touch, about 10 minutes. Gradually add in 1 cup of softened unsalted butter and 4 ounces of melted white baking chocolate, beating until smooth and creamy.
Step 6: Assemble the Hippity Hop Bunny Cake
Place one cake layer on a serving plate. Spread a generous layer of the cooled orange curd on top, then carefully place the second cake layer on top of the curd. Use the buttercream to frost the top and sides of the entire cake, smoothing it out for a clean finish.
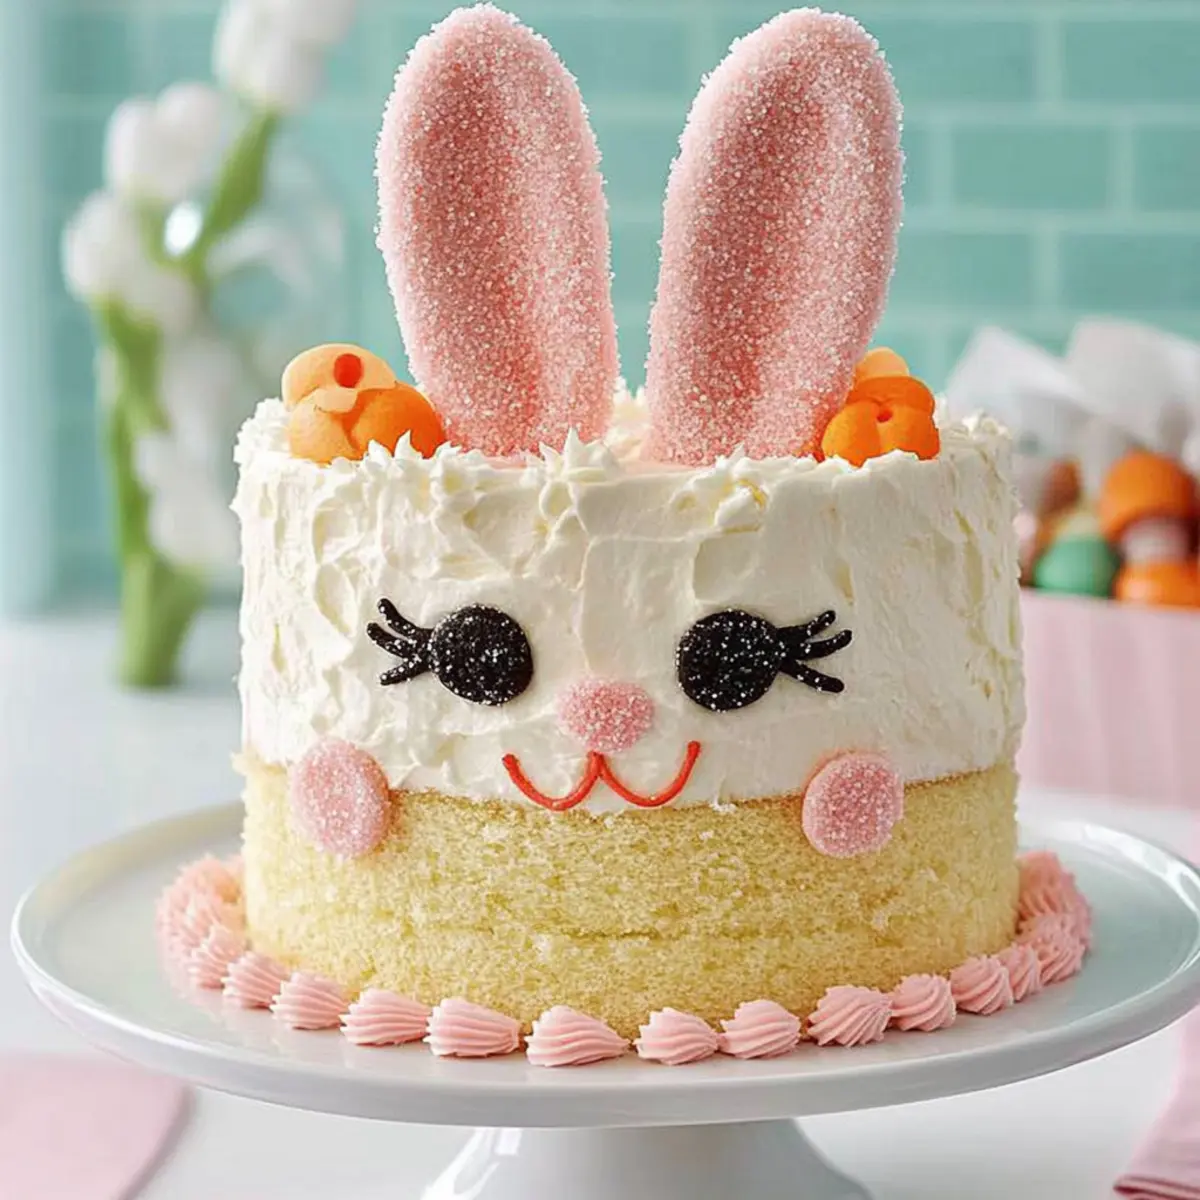
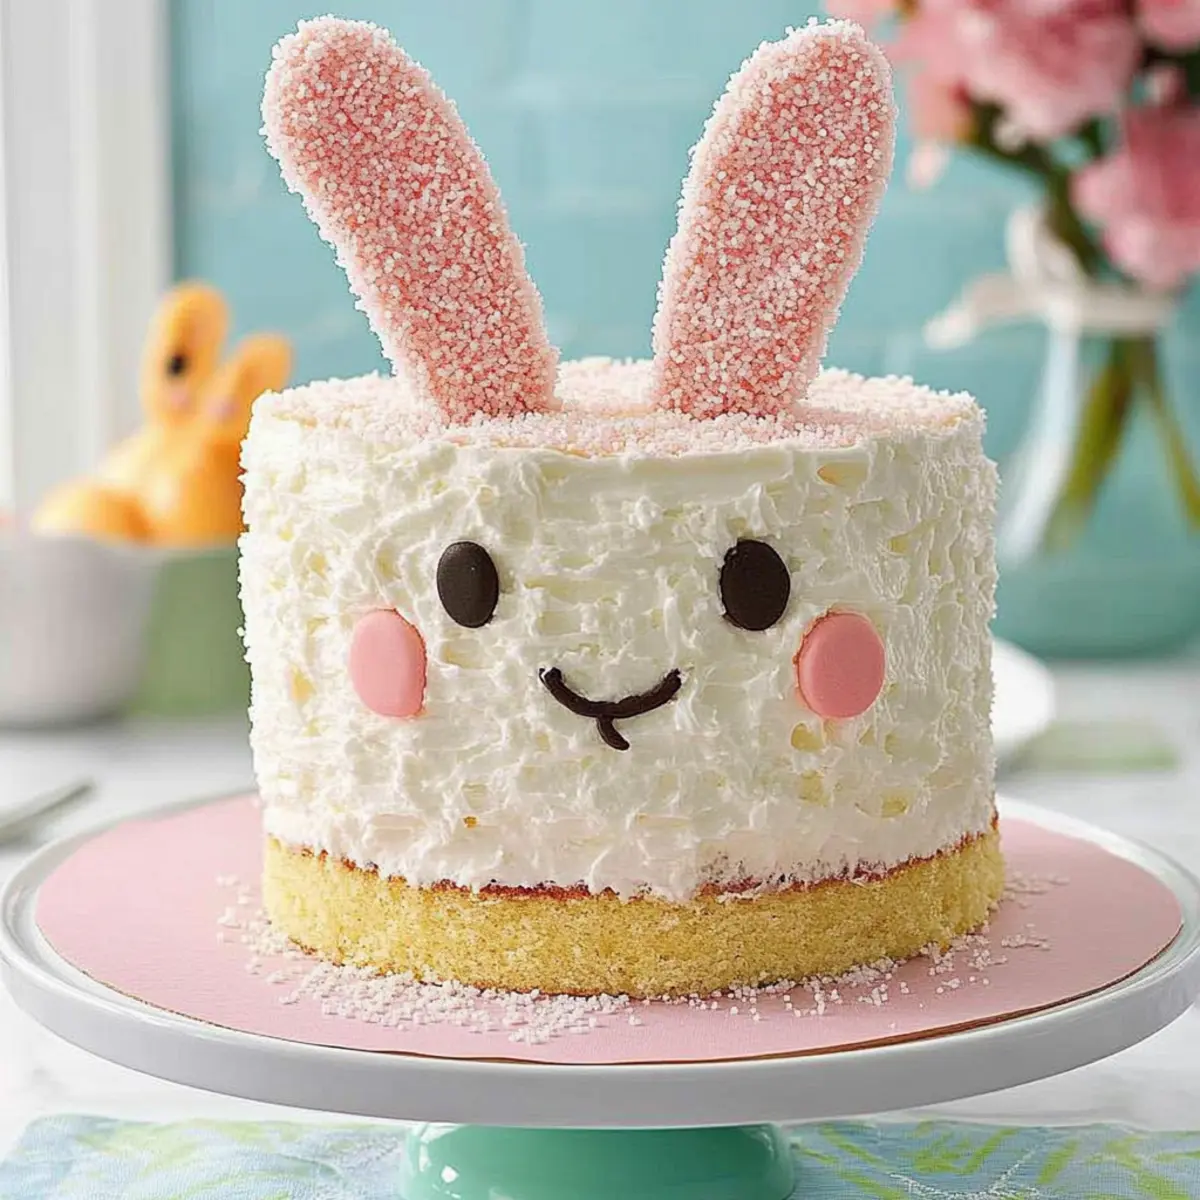
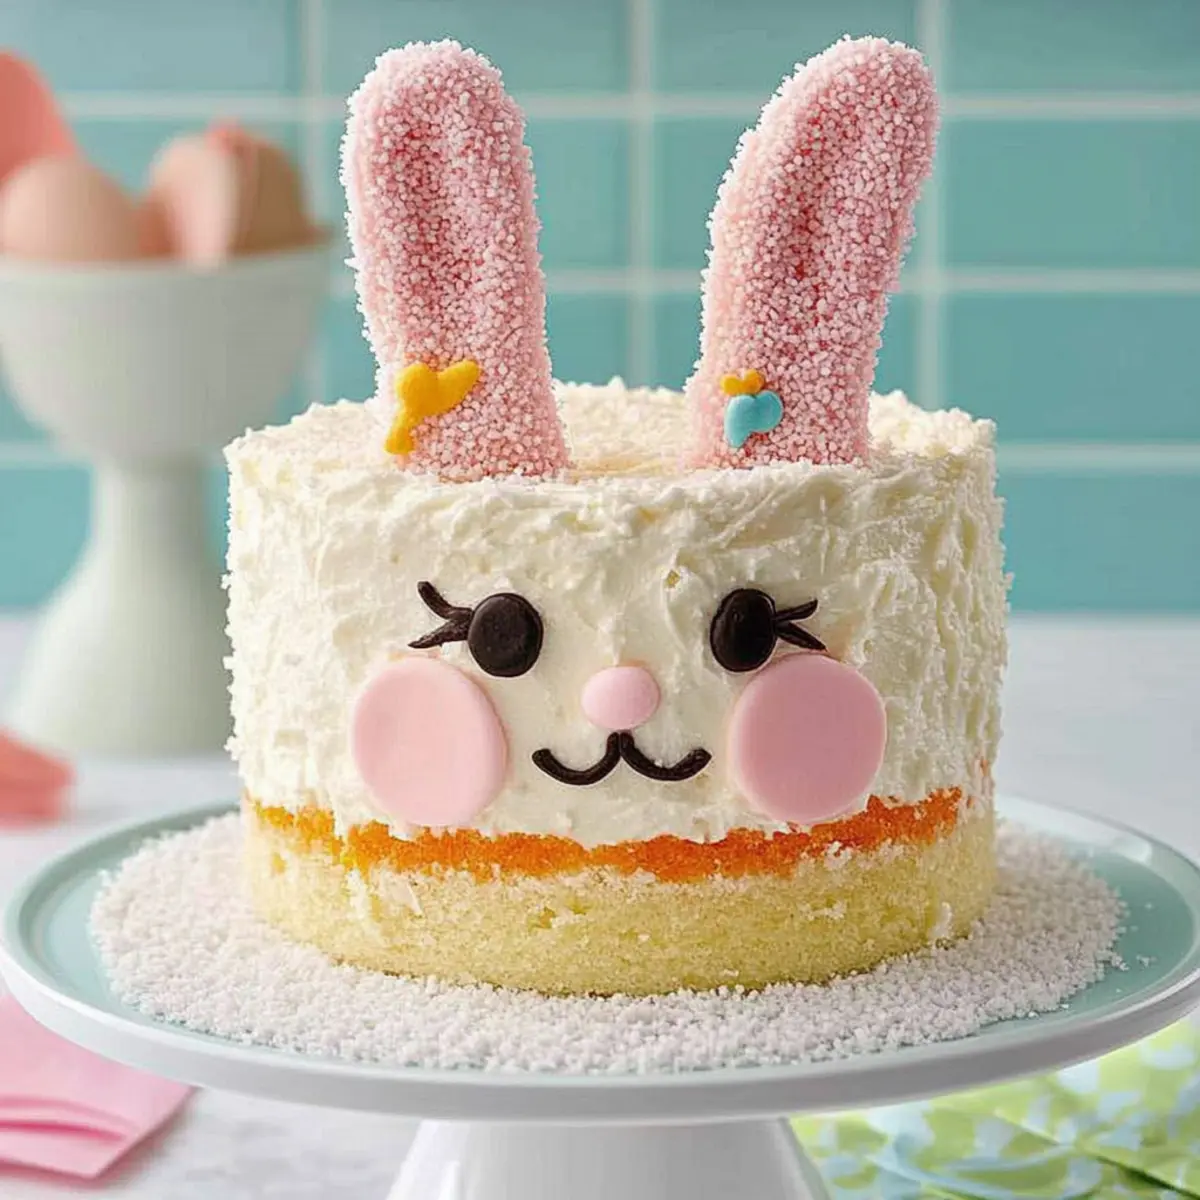
Step 7: Decorate the Cake
To create the adorable bunny features, use assorted candies and fluffy decorations. Attach skewers for added stability if necessary while placing the candy to form eyes, nose, and whiskers. Finally, dust the top of the cake with coarse sugar for sparkle and texture, bringing your delightful Hippity Hop Bunny Cake to life!
Make Ahead Options
The Hippity Hop Bunny Cake is perfect for meal prep enthusiasts looking to save time during busy festive occasions! You can prepare the orange curd up to 3 days in advance and store it in an airtight container in the refrigerator to keep it fresh and flavorful. Additionally, the cake layers can be baked up to 24 hours ahead; just ensure they are completely cooled before wrapping them tightly in plastic wrap to maintain moisture. When you’re ready to assemble, simply frost the cake with the buttercream and decorate. Following these steps will give you a show-stopping cake that’s just as delicious with a fraction of the stress!
How to Store and Freeze Hippity Hop Bunny Cake
Fridge: Store leftover Hippity Hop Bunny Cake in an airtight container for up to 3 days. This keeps the cake moist and fresh.
Freezer: If you want to keep it longer, wrap individual cake layers in plastic wrap followed by aluminum foil and freeze for up to 2 months. Thaw in the refrigerator before use.
Reheating: When ready to enjoy, let the cake sit at room temperature for about 30 minutes before serving, or gently warm single slices in the microwave for about 10-15 seconds.
Expert Tips for Hippity Hop Bunny Cake
-
Buttercream Perfection: Beat the egg whites until they form stiff peaks for a smooth and airy buttercream. This enhances the overall texture of your Hippity Hop Bunny Cake.
-
Cool Completely: Allow your cake layers to cool completely before frosting. This prevents melting and sliding of the buttercream, ensuring a beautifully decorated cake.
-
Secure Decorations: When placing candy decorations, ensure that any wooden skewers are firmly inserted and stable to avoid any collapsing bunny features.
-
Fresh Ingredients: Use fresh orange juice and zest for the curd for maximum flavor. It truly elevates the taste of your cake!
-
Baking Time: Keep an eye on your cakes as they bake; the perfect moment is when the edges are lightly golden and the cake springs back when tapped.
-
Experiment with Flavors: Don’t hesitate to play with flavors. Consider incorporating different fruit curds like raspberry or even adding cocoa powder for a chocolate version of your Hippity Hop Bunny Cake!
Hippity Hop Bunny Cake Variations
Feel free to get creative with the Hippity Hop Bunny Cake, infusing your unique touch with these delightful twists!
-
Chocolate Delight: Substitute half of the cake flour with cocoa powder for a rich, chocolatey flavor. This adds a fun twist while still maintaining the delightful cake texture.
-
Berry Bliss: Swap the orange curd for homemade raspberry or lemon curd for a refreshing change. The tartness of berries creates a vibrant contrast with the sweet buttercream.
-
Dairy-Free Option: Use plant-based butter and almond milk in the cake batter and buttercream for a dairy-free version. You’ll still enjoy a fluffy and rich cake that everyone can savor!
-
Gluten-Free Bliss: Substitute cake flour with a gluten-free blend to accommodate gluten sensitivities. Just make sure your baking powder is labeled gluten-free too for safe baking.
-
Extra Zest: Add a splash of lemon juice to the batter for a zesty kick. This little adjustment brightens the flavors and complements the sweetness beautifully.
-
Coconut Dream: Mix in shredded coconut into the buttercream for a tropical flavor boost. This adds a unique texture and enhances both taste and decoration.
-
Spiced Up: Feel adventurous? Add cinnamon or nutmeg to your cake batter for a warm, spiced version of this classic cake. Perfect for a cozy holiday gathering!
-
Nutty Crunch: Fold in finely chopped nuts like walnuts or almonds into the batter for a delightful crunch. It introduces a new texture that marries perfectly with the soft cake layers.
Embrace your creativity and make this Hippity Hop Bunny Cake your own! And if you need more cake inspiration, don’t miss out on the delicious Snickerdoodle Bundt Cake or the traditional Russian Honey Cake.
What to Serve with Hippity Hop Bunny Cake
Elevate your festive celebrations with delightful pairings that harmonize beautifully with this charming cake.
-
Fresh Fruit Salad: A refreshing mix of seasonal fruits adds a burst of color and natural sweetness, balancing the cake’s richness.
-
Vanilla Ice Cream: Creamy, cool ice cream enhances the cake’s flavor while providing a delightful contrast to the fluffy texture.
-
Sparkling Lemonade: The fizzy, zesty notes of sparkling lemonade bring a whimsical touch, perfect for springtime gatherings.
-
Chocolate Covered Strawberries: These sweet bites echo the cake’s festive charm and add a luscious, chocolaty touch to your dessert spread.
-
Pistachio Cookies: Their nutty crunch perfectly complements the softness of the cake, creating an enjoyable mix of textures and flavors.
-
Herbal Tea: A soothing cup of chamomile or mint tea adds warmth and elegance, making your dessert experience cozy and inviting.
With these thoughtful pairings, your Hippity Hop Bunny Cake will shine as the star of any celebration!
Hippity Hop Bunny Cake Recipe FAQs
What kind of oranges should I use for the orange curd?
Absolutely! I recommend using fresh, juicy oranges for the best flavor in your orange curd. Look for oranges that are firm and heavy for their size, which indicates juiciness. Avoid any with dark spots or blemishes.
How should I store the leftover Hippity Hop Bunny Cake?
You can store any leftover cake in an airtight container in the refrigerator for up to 3 days. If you want to keep it longer, wrap the individual cake layers tightly in plastic wrap followed by aluminum foil, then freeze for up to 2 months.
Can I freeze the Hippity Hop Bunny Cake?
Yes, you can! If you plan to freeze it, I suggest freezing the cake layers before frosting. Allow the layers to cool completely, then wrap them tightly and label them. When you’re ready to use them, thaw the layers in the refrigerator overnight before frosting and decorating.
What if my cake turns out dry?
If your cake ends up on the dry side, it may have been overbaked or not enough liquid was added. Make sure you’re monitoring the baking time closely, and for added moisture, consider brushing your cooled layers with simple syrup before frosting. This not only adds moisture but enhances flavor.
Are there any allergy considerations for this cake?
Yes! This cake contains eggs, dairy, and gluten. If you’re baking for someone with dietary restrictions, you can substitute aquafaba for egg whites for a vegan option, use non-dairy butter and milk alternatives, and opt for a gluten-free flour blend in place of cake flour. Always check labels for potential allergens!
How do I know when the cake is fully baked?
To check if your cake is done, insert a toothpick into the center. If it comes out clean or with a few moist crumbs (not wet batter), then it’s ready to come out of the oven. The edges should be lightly golden, and when you gently press the center, it should spring back.
Hippity Hop Bunny Cake: A Whimsical Delight for Every Occasion
Ingredients
Equipment
Method
- In a medium saucepan, combine 1 cup of sugar, 1/4 cup of cornstarch, and a pinch of salt. Gradually stir in 1 cup of freshly squeezed orange juice, then cook over medium heat until the mixture thickens, about 5-7 minutes. Remove from heat and whisk in 4 egg yolks, returning it to the stove until it reaches a gentle simmer. Stir in 1/4 cup of unsalted butter and 1 tablespoon of grated orange zest until melted and smooth. Transfer to a bowl, cover with plastic wrap, and refrigerate to cool.
- Preheat your oven to 350°F (175°C). While the oven heats, grease and flour two 9-inch round cake pans to prevent sticking. In a large mixing bowl, cream together 1/2 cup of unsalted butter and 1 1/2 cups of sugar until light and fluffy, about 3-5 minutes. Add in 4 egg whites, mixing until well incorporated, then blend in 1 teaspoon of clear vanilla extract and the zest from 1 orange.
- In a separate bowl, whisk together 2 cups of cake flour and 2 teaspoons of baking powder, then slowly add this dry mixture into the creamed butter and sugar. Mix until just combined. Gradually add 1 cup of 2% milk, mixing until the batter is smooth and well-blended. Pour the cake batter evenly into the prepared pans, smoothing the tops for even baking.
- Place the pans in the preheated oven and bake for 30-35 minutes, or until a toothpick inserted in the center comes out clean. Keep an eye on them; the edges should be lightly golden, and the center should spring back when gently pressed. Once baked, cool the cakes in the pans for 10 minutes, then transfer them to wire racks to cool completely.
- In a heatproof bowl, combine 4 egg whites and 1 cup of sugar. Set this bowl over a pot of simmering water, whisking continuously until the mixture reaches 160°F (70°C) to pasteurize the eggs, which takes about 5 minutes. Once heated, beat the mixture until it forms stiff peaks and is cool to the touch, about 10 minutes. Gradually add in 1 cup of softened unsalted butter and 4 ounces of melted white baking chocolate, beating until smooth and creamy.
- Place one cake layer on a serving plate. Spread a generous layer of the cooled orange curd on top, then carefully place the second cake layer on top of the curd. Use the buttercream to frost the top and sides of the entire cake, smoothing it out for a clean finish.
- To create the adorable bunny features, use assorted candies and fluffy decorations. Attach skewers for added stability if necessary while placing the candy to form eyes, nose, and whiskers. Finally, dust the top of the cake with coarse sugar for sparkle and texture.