
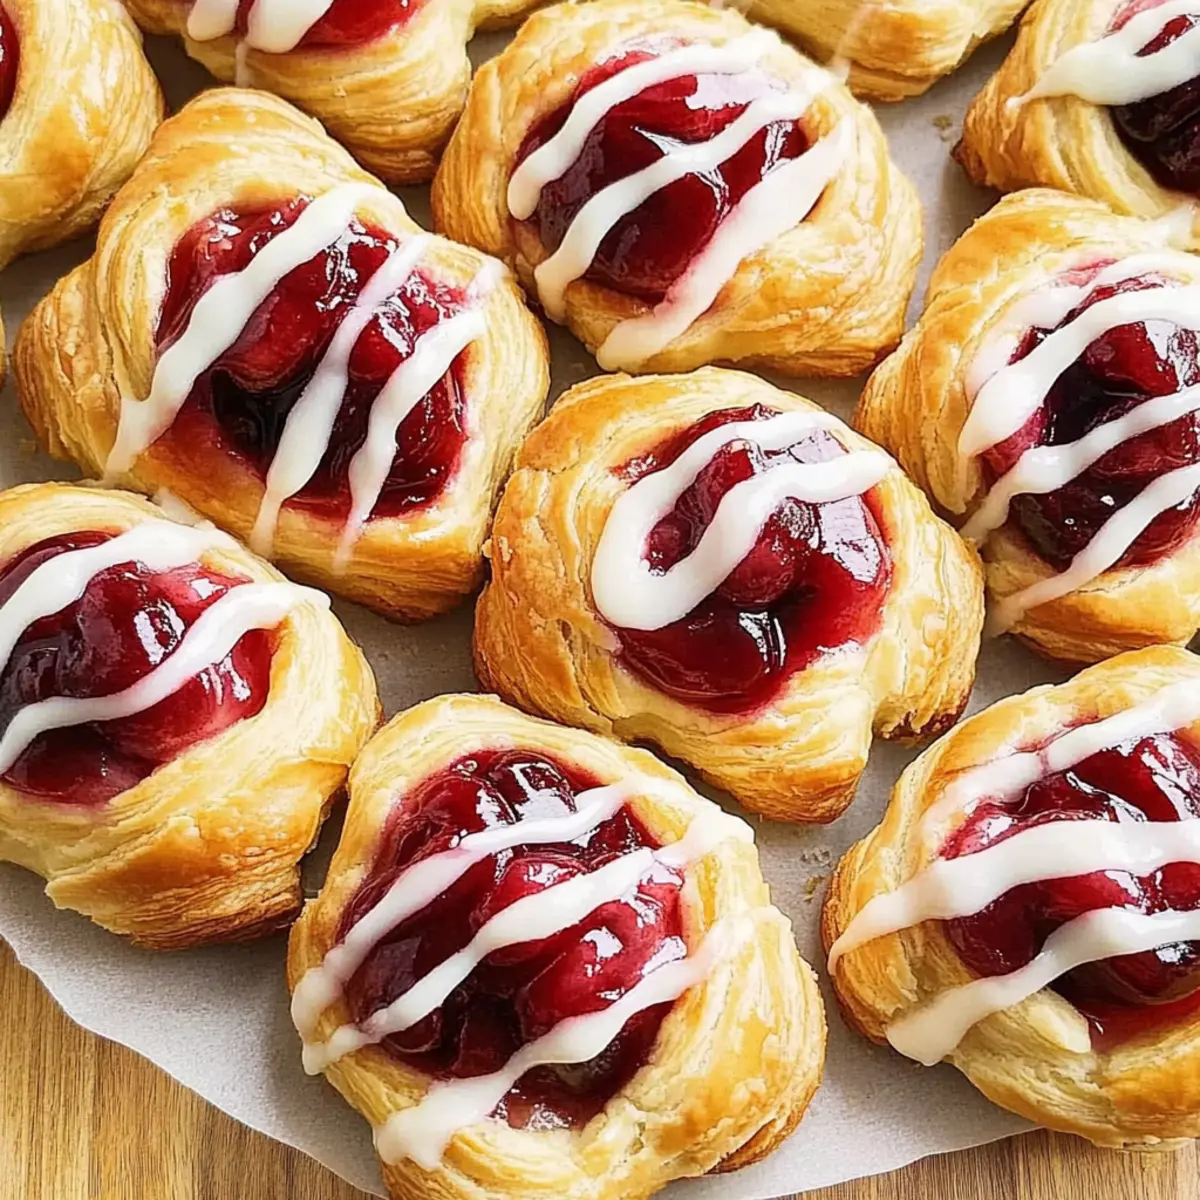
The smell of freshly baked pastries wafting through the kitchen instantly transports me to serene mornings spent enjoying warm treats with loved ones. Today, I’m thrilled to share my recipe for homemade cherry Danishes, a delightful breakfast treat that’s perfect for cozy gatherings or a sweet indulgence during your coffee break. Not only do these easy homemade cherry Danishes incorporate a luscious cherry filling, but they also require minimal effort thanks to an overnight rise that lets you wake up to freshly baked goodness. Imagine the joy of biting into a flaky, tender pastry with a burst of sweet cherry flavor that dances on your taste buds! Are you ready to elevate your baking game? Let’s dive into this delightful recipe and discover the magic of homemade pastries together.
Why Make Homemade Cherry Danishes?
Freshness Matters: There’s nothing quite like warm, flaky pastries pulled straight from the oven, filling your home with irresistible scents.
Simple Yet Impressive: With just a bit of patience and preparation, you can create sublime treats that rival any bakery.
Versatile Filling Options: Not only are these delicious cherry Danishes, but feel free to swap the filling. Blueberry or strawberry works just as well!
Perfect for Any Occasion: These pastries make an ideal breakfast treat or snack that will leave your guests raving. Imagine serving them alongside a cup of coffee or tea!
Time-Saving Delight: Thanks to the overnight rise, the work is done ahead of time, allowing you to wake up and enjoy the fruits of your labor with minimal fuss.
Now that you’re eager to start, don’t forget to check out my recipes for Homemade Ciabatta Rolls or get inspired by Samoa Cookies Homemade!
Homemade Cherry Danishes Ingredients
For the Dough
- Active Dry Yeast – Causes the dough to rise and creates a light texture; ensure it’s fresh for best results.
- Warm 2% Milk – Activates the yeast; it should be warm (110° to 115°F) but not hot.
- All-Purpose Flour – Provides structure; can be substituted with a gluten-free blend if needed.
- Sugar – Adds sweetness; feel free to reduce for less sweet pastries.
- Salt – Enhances flavor; essential for a balanced taste.
- Cold Butter (cubed) – Contributes to flakiness; must be cold to prevent melting during mixing.
- Warm Half-and-Half Cream – Adds richness; can substitute with whole milk or cream.
- Egg Yolks (room temperature) – Enrich the dough and improve texture.
For the Filling and Icing
- Cherry Pie Filling (canned) – The main filling; can replace with other pie fillings or jams for variety.
- Icing – A mix of confectioners’ sugar, butter, vanilla, and half-and-half for sweetness on top; adjust the consistency with cream.
Step‑by‑Step Instructions for Homemade Cherry Danishes
Step 1: Prep the Dough
Dissolve 1 packet of active dry yeast in 1 cup of warm 2% milk (110° to 115°F) and let it sit for about 5–10 minutes until frothy. In a large mixing bowl, whisk together 4 cups of all-purpose flour, 1/4 cup of sugar, and 1 tsp of salt. Cut in 1/2 cup of cold, cubed butter until the mixture resembles coarse crumbs, then combine with the yeast mixture, 1/2 cup of warm half-and-half cream, and 4 room-temperature egg yolks to create a sticky dough. Refrigerate overnight to allow the flavors to meld.
Step 2: Shape the Pastries
The next day, remove the dough from the refrigerator and divide it into four equal portions. On a lightly floured surface, roll each portion into a rectangle about 1/4-inch thick and cut the dough into long strips. Twist each strip and shape them into rings on greased baking sheets, ensuring the ends overlap slightly to maintain structure. This creative shaping will give your homemade cherry Danishes a delightful look.
Step 3: Second Rise
Cover the shaped pastries loosely with a clean kitchen towel and let them rise in a warm, draft-free place for about 45 minutes or until they have doubled in size. This crucial step helps develop a light and airy texture, perfect for indulging in those sweet cherry flavors later. While you wait, preheat your oven to 350°F to prepare for baking.
Step 4: Fill and Bake
Once the dough has risen beautifully, use your finger to create a small indentation in the center of each Danish. Spoon in a generous amount of cherry pie filling, filling each well to your desired taste. Carefully place the baking sheets in the preheated oven and bake for 14–16 minutes, or until the pastries are lightly golden brown and puffed. The aroma of your homemade cherry Danishes will be irresistible!
Step 5: Ice the Pastries
After baking, remove the Danishes from the oven and let them cool on wire racks. While they cool, prepare a simple icing by mixing 1 cup of confectioners’ sugar with 2 tbsp of softened butter, 1/2 tsp of vanilla extract, and enough half-and-half cream to reach your desired consistency. Drizzle the icing over the cooled Danishes once they’re set, adding a sweet finish to your delightful homemade cherry Danishes.
What to Serve with Easy Homemade Cherry Danishes
There’s something truly magical about enjoying flaky pastries with delightful companions that elevate your meal experience.
- Rich Coffee: A warm cup pairs beautifully with the Danishes, balancing the sweetness and enhancing the cherry flavors.
- Sweet Tea: The light, floral notes of sweet tea complement the cherry filling, making each bite feel refreshing and delightful.
- Creamy Yogurt: A dollop of vanilla yogurt adds a tangy contrast to the sweet pastries, perfect for breakfast or a light snack.
- Fresh Fruit Salad: Bright, juicy fruits bring a refreshing crunch that cuts through the richness, providing a vibrant side for your flaky Danishes.
- Scrambled Eggs: Soft, fluffy eggs provide a savory counterpoint, making for a well-rounded breakfast that feels indulgent yet satisfying.
- Savory Cheese Platter: A selection of cheeses, like brie or goat cheese, gives a sophisticated touch, inviting guests to enjoy unique flavor combinations.
- Chocolate Drizzle: For those with a sweet tooth, drizzling chocolate over your pastries adds an extra touch of decadence that makes any day special.
- Sparkling Water: Refreshing carbonation cleanses the palate between bites, offering a crisp contrast to the rich sweetness of the Danishes.
- Vanilla Ice Cream: Serve freshly baked Danishes warm with a scoop of vanilla ice cream, creating a dreamy dessert experience that is simply unforgettable.
Make Ahead Options
These Easy Homemade Cherry Danishes are perfect for meal prep enthusiasts looking to save time on busy mornings! You can prepare the dough up to 24 hours in advance by following the initial mixing instructions and refrigerating it overnight. Additionally, shape the pastries into rings and place them on a baking sheet before covering with plastic wrap and refrigerating for up to 3 days. When you’re ready to enjoy, simply let them rise for about 45 minutes at room temperature, fill them with cherry pie filling, and bake as directed. This way, you’ll have warm, flaky pastries ready to serve without the morning rush, ensuring they taste just as delicious as fresh-baked!
How to Store and Freeze Homemade Cherry Danishes
Room Temperature: Store at room temperature for up to 3 days, placing them in an airtight container to keep them fresh and prevent drying out.
Fridge: If you want to extend their shelf life, refrigerate the Danishes for up to a week; remember to lightly reheat them in the oven for the best texture before serving.
Freezer: For longer storage, freeze the baked Danishes for up to 3 months. Be sure not to frost them before freezing; thaw and ice just before serving.
Reheating: Reheat your homemade cherry Danishes in a 350°F oven for about 5–10 minutes to restore their flaky goodness.
Expert Tips for Homemade Cherry Danishes
Ensure Yeast Activation: Make sure your active dry yeast is fresh and bubbly after dissolving in warm milk; this is key for perfect homemade cherry Danishes.
Keep Ingredients Cold: Use cold butter and warm ingredients carefully. This ensures flakiness in the dough, making for a delightful texture.
Properly Shape Pastries: When twisting and shaping the dough strips, overlap the ends slightly to maintain structure. This technique creates eye-catching danishes.
Use Parchment Paper: Place parchment paper between layers of baked Danishes when storing to prevent them from sticking together.
Adjust Filling as Desired: Feel free to experiment with different canned fillings or jams, ensuring each batch of homemade cherry Danishes can be uniquely delicious.
Homemade Cherry Danishes: Variations & Substitutions
Feel free to let your creativity shine and customize these delightful pastries to suit your tastes!
- Different Fruit Fillings: Swap cherry pie filling with blueberry, raspberry, or apple filling for a unique twist. Each fruit brings its own burst of flavor!
- Gluten-Free Dough: Use a gluten-free all-purpose flour blend to cater to dietary preferences without compromising on taste or texture. It’s just as satisfying!
- Citrus Zest Icing: Add lemon or orange zest to your icing for a refreshing zest that elevates the sweetness and makes it unforgettable.
- Cardamom Spice: Incorporate ground cardamom into the dough for a warm, aromatic flavor that pairs beautifully with fruit fillings. A fragrant surprise in every bite!
- Nutty Crunch: Sprinkle chopped nuts, like almonds or pecans, on top of the icing for added texture and a delightful crunch. Perfect for nut lovers!
- Cream Cheese Filling: Mix softened cream cheese with a bit of sugar and vanilla for a rich, decadent filling that complements the fruit perfectly.
- Extra Sweetness: Drizzle with honey or maple syrup before serving for a touch of natural sweetness that harmonizes with the cherry filling.
- Savory Twist: Experiment with savory fillings like spinach and feta or ham and cheese to transform these pastries into a unique brunch option that delights everyone.
If you’re itching to try more delicious recipes, don’t forget to check out my Cherry Peanut Butter or the comforting Homemade Green Bean Casserole!
Homemade Cherry Danishes Recipe FAQs
How do I select the best cherries for filling?
Absolutely! If you’re opting for fresh cherries instead of canned filling, look for those that are firm and plump with a rich red color. Avoid cherries with dark spots or blemishes, as they can indicating overripeness. When picking cherries, aim for fruits that have a slight shine and a sweet aroma, ensuring they’re at their peak flavor for your Danishes.
What’s the best way to store leftover Danishes?
Very good question! Store your homemade cherry Danishes at room temperature for up to 3 days in an airtight container. If you’d like to keep them longer, refrigerate them for up to one week. To enjoy their flaky texture again, I recommend reheating them in a 350°F oven for about 5–10 minutes before serving—a warm Danish is a delight!
Can I freeze the cherry Danishes?
Definitely! To freeze your baked homemade cherry Danishes, do not ice them beforehand. Once cooled, place them in a single layer on a baking sheet and freeze until solid. Then transfer them to an airtight container or freezer bag, where they will keep well for up to 3 months. When you’re ready to enjoy them, thaw in the refrigerator overnight and ice just before serving!
What should I do if my dough isn’t rising properly?
It happens! If the dough doesn’t rise, ensure that your active dry yeast is fresh and that the warm milk you used was around 110° to 115°F; anything hotter can kill the yeast, while cooler temperatures won’t activate it. If you see no bubbles after 10 minutes, it might be necessary to start over with fresh yeast. Also, ensure your dough is kept in a warm, draft-free environment during the rise—this can be the difference between a good and great Danish!
Are there any allergy concerns with the ingredients?
Certainly! This recipe contains common allergens such as gluten (in all-purpose flour) and dairy (in milk, butter, and cream). For a gluten-free version, you can swap all-purpose flour for a gluten-free blend. Additionally, if you’re making these for someone with dairy allergies, consider using dairy-free alternatives, such as almond milk or coconut cream. Always check the labels to ensure they’re free from any allergens your guests may have.
Can I use a different filling besides cherry?
The more the merrier! I often switch it up depending on what I have on hand. You can easily use blueberry, strawberry, or any favorite jam in place of the cherry filling. Just make sure these alternatives are also thick enough to hold up during baking. Feel free to get creative with flavors and make your homemade cherry Danishes uniquely yours!
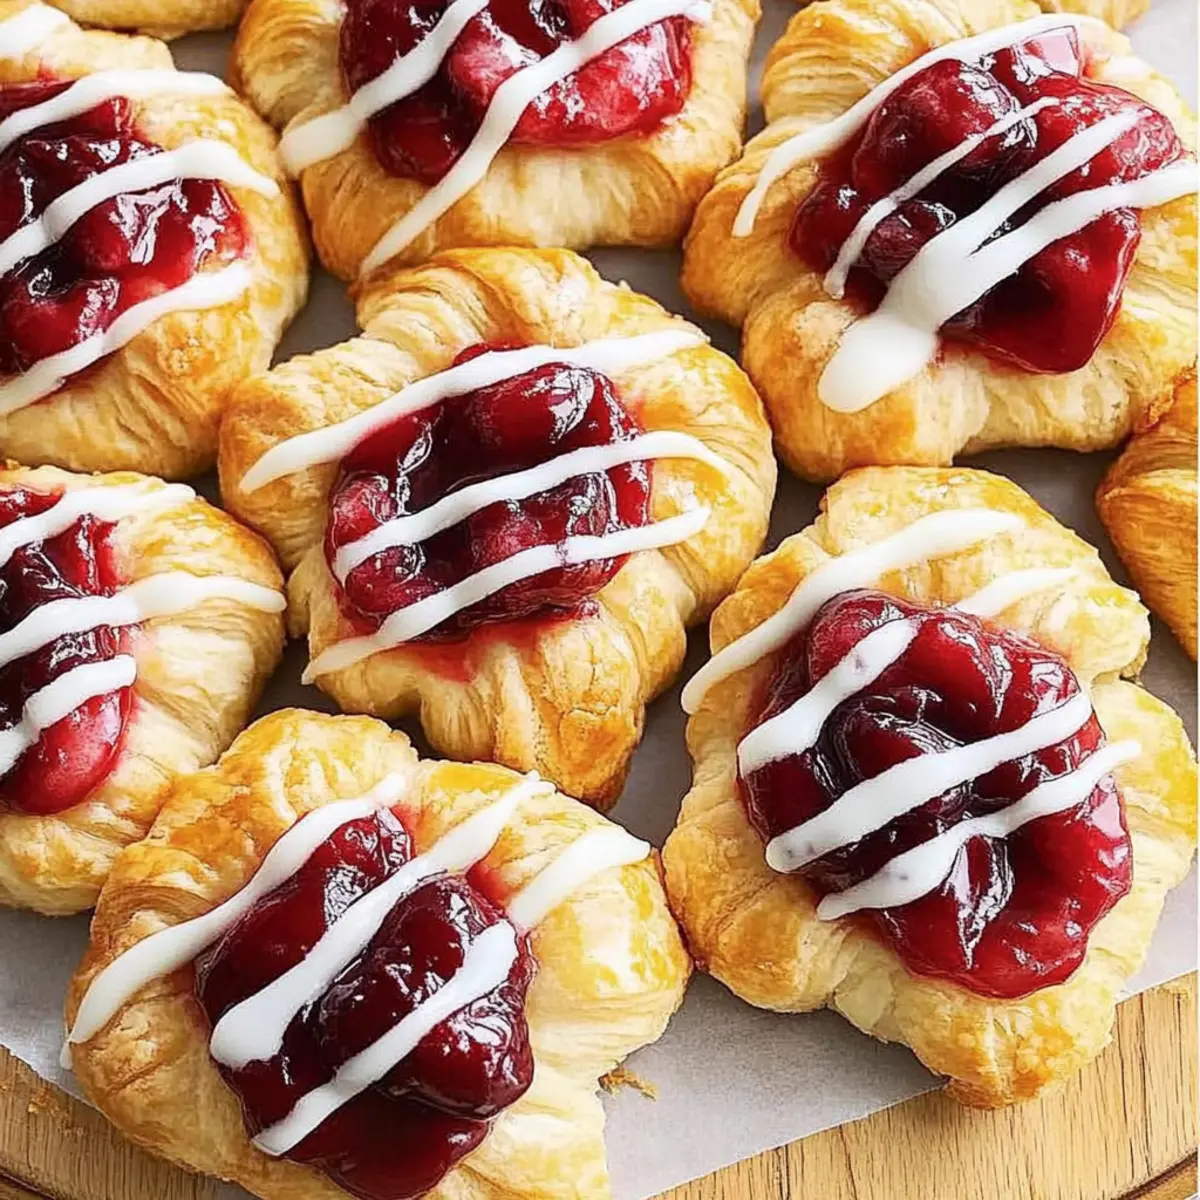
Flaky Homemade Cherry Danishes That Bring Joy to Breakfast
Ingredients
Equipment
Method
- Dissolve active dry yeast in warm 2% milk and let it sit for about 5–10 minutes until frothy.
- In a large mixing bowl, whisk together flour, sugar, and salt. Cut in cold butter until resembling coarse crumbs. Combine with the yeast mixture, warm half-and-half cream, and egg yolks to create a sticky dough. Refrigerate overnight.
- The next day, remove the dough, divide it into four portions, roll into rectangles about 1/4-inch thick, and cut into long strips. Twist and shape into rings on greased baking sheets.
- Cover the pastries loosely and let them rise in a warm place for about 45 minutes until doubled in size. Preheat oven to 350°F.
- After rising, create small indentations and fill with cherry pie filling. Bake for 14–16 minutes until lightly golden brown.
- Let the Danishes cool, then prepare icing by mixing confectioners’ sugar, softened butter, vanilla, and half-and-half. Drizzle over cooled pastries.