
There’s something truly magical about no-bake desserts that instantly whisk me back to carefree summers and family gatherings. These Irresistible No-Bake Chocolate Cream Pie Bars are no exception, offering a delightful escape with every creamy bite. Imagine a crispy Oreo crust filling your senses, supporting a rich chocolate filling that’s both indulgent and satisfying. One of the best parts? This easy recipe is perfect for busy home bakers like us, allowing you to prep ahead and have your sweet treat ready when cravings strike. Plus, with a gluten-free option, no one has to miss out on this nostalgic classic. Are you ready to bring a little joy into your kitchen? Let’s dive in!
Why Are These Bars So Special?
Irresistible flavors: The combination of rich chocolate and a crispy Oreo crust creates a dessert experience that’s hard to resist.
Effortless preparation: These no-bake bars save you time in the kitchen—perfect for busy days!
Make-ahead magic: Prepare them in advance, and they’ll be ready to impress your guests whenever you need a sweet surprise.
Dietary-friendly options: With gluten-free and dairy-free variations, everyone can indulge in this classic treat.
Crowd-pleaser: Whether for a family gathering or a cozy night in, these bars are sure to satisfy every chocolate lover.
Bring a taste of nostalgia to your gatherings, just like my Mini Banana Cream pies and Butterfinger Cheesecake Bars!
Chocolate Cream Pie Bars Ingredients
• Get ready to create a delightful dessert!
For the Crust
- Oreo cookie crumbs – Provides the crispy base for the dessert; substitute with gluten-free Oreos for a gluten-free version.
- Unsalted butter (5 tbsp) – Binds the cookie crumbs together, creating a solid crust; use vegan butter for a dairy-free option.
For the Filling
- Heavy whipping cream (1 cup) – Adds richness to the filling and is used for the whipped topping; dairy alternatives can be used for a non-dairy option.
- Semi-sweet chocolate chips (5 oz) – Key ingredient for the chocolate flavor; use high-quality brands for better taste. Dark chocolate can be substituted for a richer flavor.
- Full-fat cream cheese (6 oz) – Adds creaminess and a slight tang to the filling; Neufchâtel cheese can be used as a lighter option.
- Powdered sugar (1 ½ cups) – Sweetens the filling; can be reduced for less sweetness or substituted with a sugar alternative.
- Unsweetened cocoa powder (⅓ cup) – Enhances the chocolate flavor and contributes to the filling’s richness; Dutch-processed cocoa can be used for a milder flavor.
- Vanilla extract (2 tsp) – Adds depth of flavor; ensure it’s pure for the best taste.
- Salt (½ tsp) – Enhances sweetness and balances flavors.
For the Topping
- Heavy cream (for topping) – Whipped and spread on top adds a delightful finish; use a bit of sugar to sweeten the whipped cream if desired.
- Chocolate shavings – A beautiful garnish that elevates the presentation.
Get ready to experience the joy of creating these Chocolate Cream Pie Bars!
Step‑by‑Step Instructions for Chocolate Cream Pie Bars
Step 1: Preheat and Prepare
Preheat your oven to 350°F (175°C). While it warms up, line an 8×8 inch baking pan with parchment paper, allowing some overhang for easy removal later. This no-bake Chocolate Cream Pie Bars recipe will come together beautifully as you prepare each layer with care.
Step 2: Create the Crust
In a food processor, pulse the Oreo cookies into fine crumbs. Melt the unsalted butter and mix it thoroughly with the crumbs until well combined. Press this mixture firmly into the prepared pan, ensuring an even layer. Bake the crust for 10 minutes, then set it aside to cool completely before adding the filling.
Step 3: Whip the Cream
In a mixing bowl, beat 1 cup of heavy whipping cream with 1/2 cup of powdered sugar using a hand mixer on medium speed. Continue beating until firm peaks form; this usually takes about 3-5 minutes. Once ready, carefully transfer the whipped cream to the refrigerator to chill while you prepare the chocolate filling.
Step 4: Melt the Chocolate
Using a double boiler, combine 5 oz of semi-sweet chocolate chips and 5 tablespoons of unsalted butter. Stir gently until both the chocolate and butter melt into a smooth mixture. Remove it from heat and let it cool slightly; this will ensure your filling holds the right texture for the Chocolate Cream Pie Bars.
Step 5: Make the Filling
In a large mixing bowl, beat 6 oz of cream cheese until it’s smooth and creamy. Gradually mix in the remaining powdered sugar, ⅓ cup of cocoa powder, 2 teaspoons of vanilla extract, and ½ teaspoon of salt until perfectly blended. Then, gently fold in the cooled chocolate mixture until everything is well combined and smooth.
Step 6: Combine the Mixtures
Carefully take half of the chilled whipped cream from the refrigerator and fold it into the chocolate mixture. Use a gentle folding motion to preserve the light texture, then add the remaining whipped cream and fold until just incorporated. This fluffy filling is what makes your Chocolate Cream Pie Bars so deliciously dreamy.
Step 7: Assemble the Bars
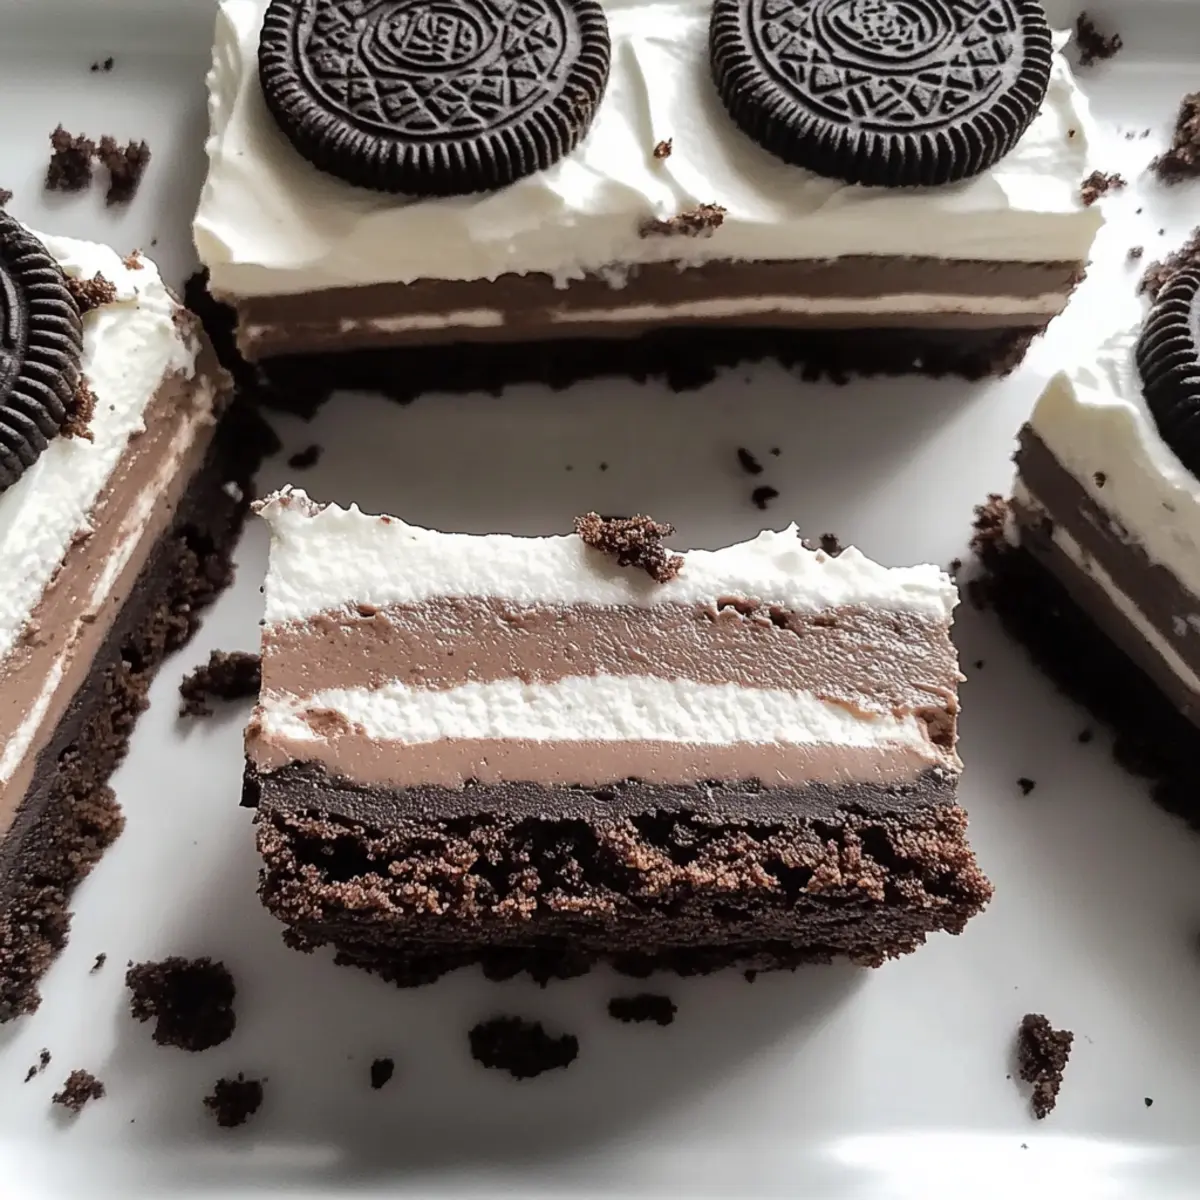
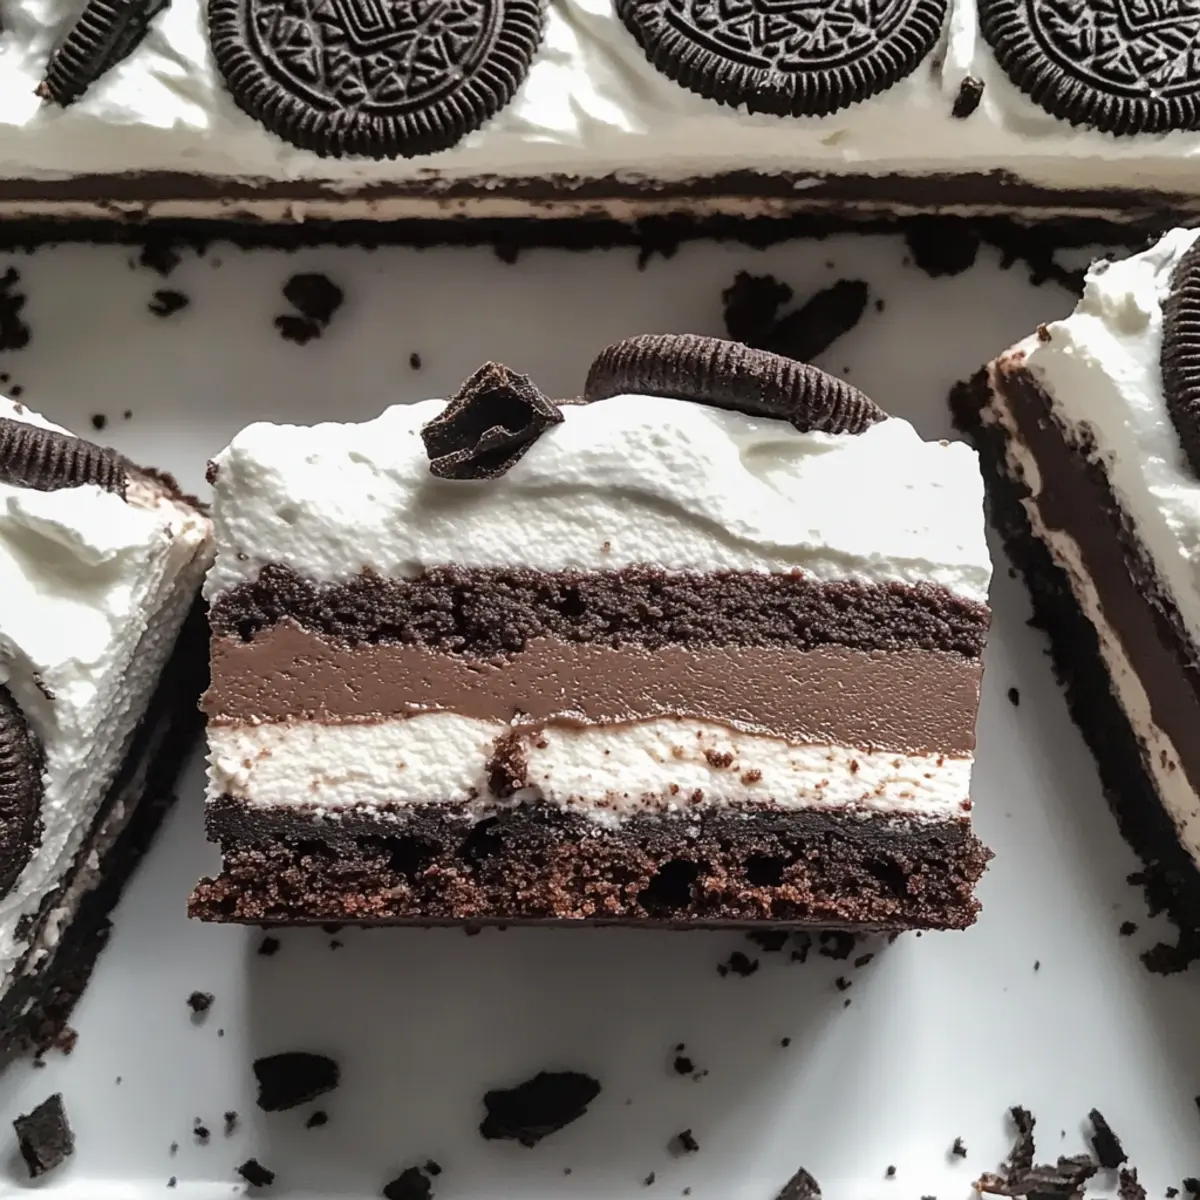
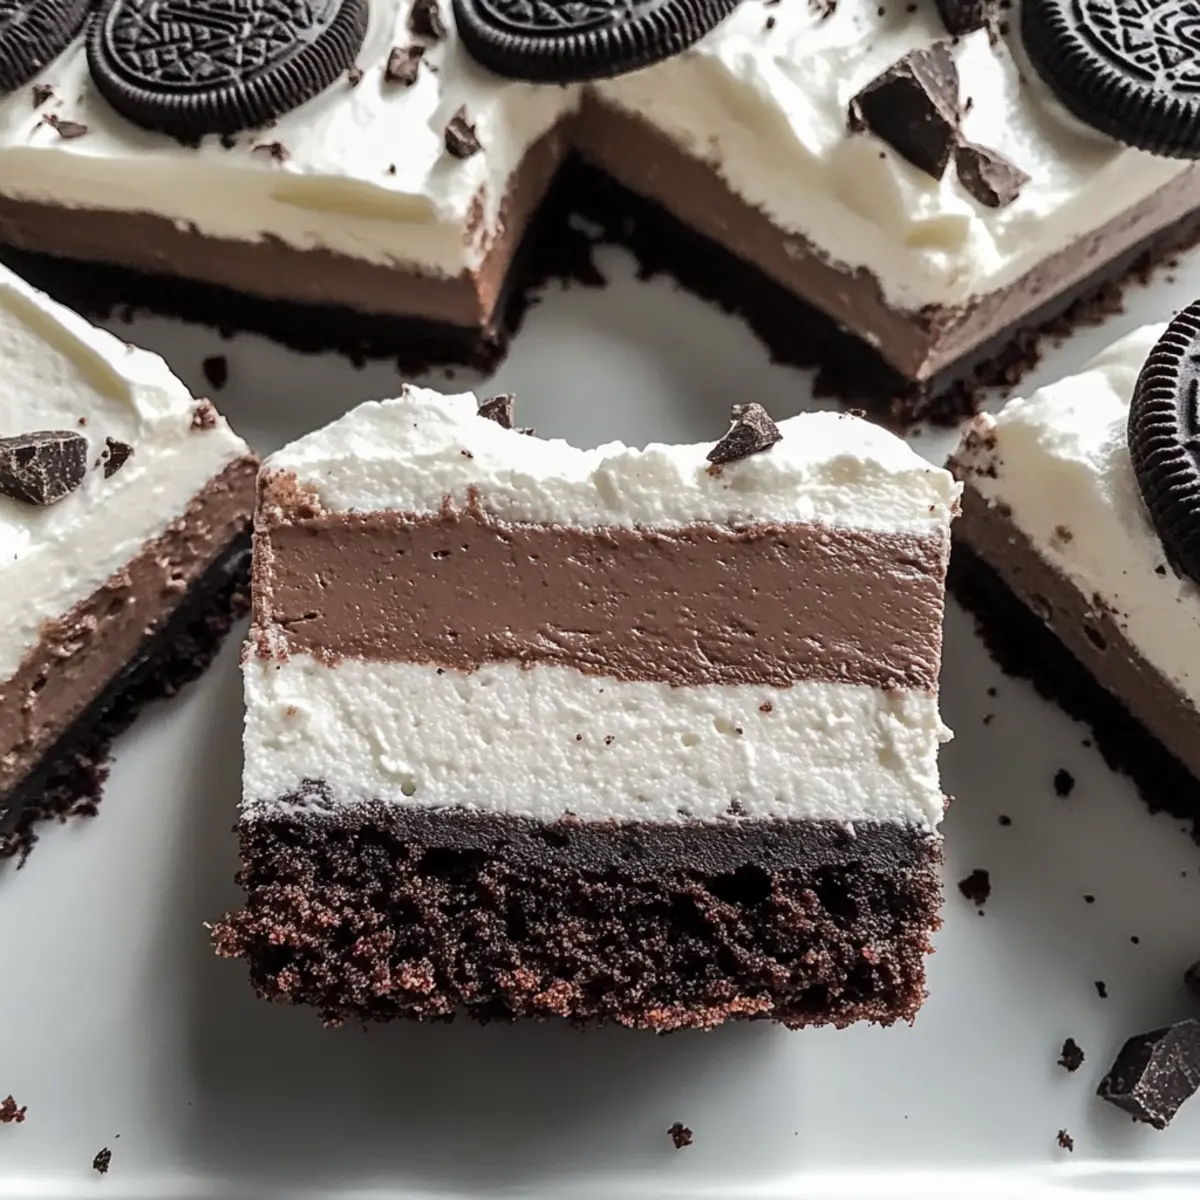
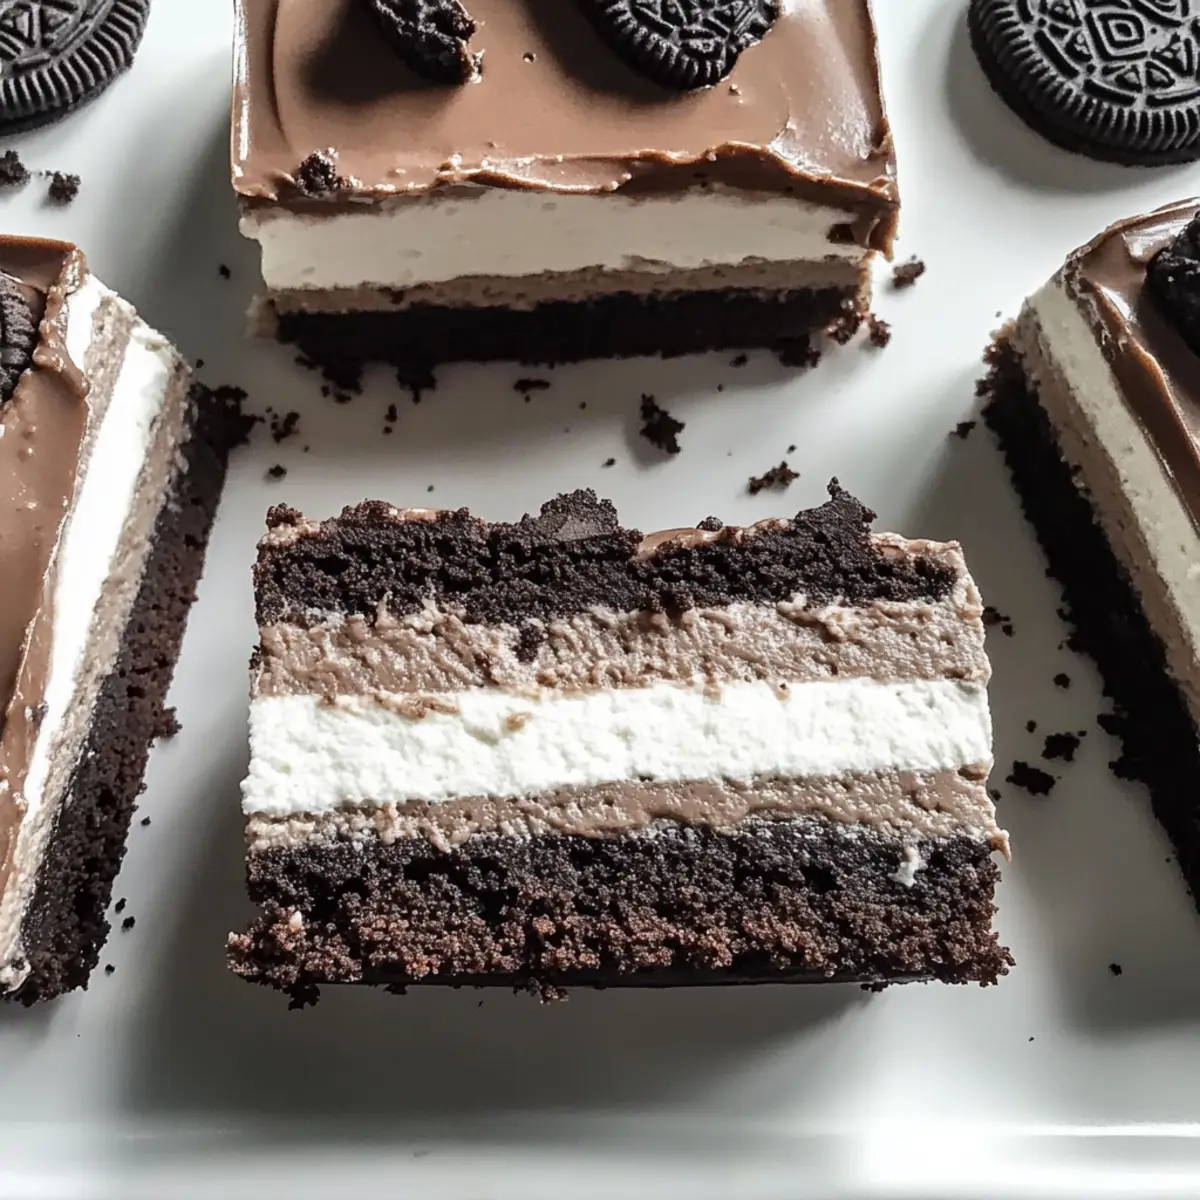
Spread the rich chocolate filling evenly over the cooled crust using a spatula, smoothing the top for a beautiful finish. Make sure to get into all corners of the pan. This step is crucial for ensuring every slice of your Chocolate Cream Pie Bars is packed with flavor.
Step 8: Chill
Cover the filled pan with plastic wrap and place it in the refrigerator to chill for at least 3 hours, or preferably overnight. This allows the bars to set properly, achieving the right texture and flavor balance for your decadent dessert.
Step 9: Add Topping
Before serving, whip additional heavy cream with a bit of sugar until light and fluffy. Spread this whipped cream on top of the chilled chocolate layer, creating a luscious finish. For an elegant touch, garnish with chocolate shavings to elevate the presentation of your Chocolate Cream Pie Bars.
Step 10: Serve and Enjoy
To serve, lift the bars out of the pan using the parchment paper overhang. Slice them with a hot knife for clean edges, and enjoy these delightful Chocolate Cream Pie Bars straight from the fridge for a cool and creamy treat!
What to Serve with Irresistible No-Bake Chocolate Cream Pie Bars
Imagine the bliss of pairing your decadent dessert with complementary flavors and textures that elevate the experience even further.
-
Fresh Berries: The tartness of raspberries or strawberries offers a bright contrast to the rich chocolate flavor, making each bite sensational.
-
Vanilla Ice Cream: A scoop of vanilla ice cream adds creaminess and a delightful cold element, enhancing the overall indulgence of the pie bars.
-
Chocolate Sauce: Drizzle warm chocolate sauce on top for an extra layer of decadence; it’s a chocolate lover’s dream come true!
-
Whipped Cream: A fluffy dollop on the side or on top provides a light balance to the dense chocolate filling, creating a heavenly texture contrast.
-
Mint Leaves: Fresh mint leaves as a garnish add a refreshing element that cuts through the richness, giving each bite a vibrant kick.
-
Coffee: A cup of freshly brewed coffee complements the chocolate nicely, enhancing the flavors and making this dessert feel like a special occasion.
-
Nutty Biscotti: Crunchy biscotti on the side gives a delightful texture contrast and is perfect for dipping alongside the smooth creaminess of the bars.
-
Dark Chocolate Shavings: Use as a garnish on top to intensify the chocolate experience without overpowering your dessert; it appeals to all the chocolate enthusiasts!
Make Ahead Options
These Irresistible No-Bake Chocolate Cream Pie Bars are a fantastic choice for meal prep enthusiasts! You can prepare the crust and filling up to 24 hours in advance by assembling them and keeping the bars covered in the refrigerator. Once you’ve spread the filling over the cooled crust, chill it overnight to ensure it sets beautifully. For best results, avoid adding the whipped cream topping until just before serving to maintain its light and fluffy texture. When ready to enjoy, simply whip the cream, spread it on top, and garnish with chocolate shavings for a show-stopping dessert that’s sure to impress!
Chocolate Cream Pie Bars Variations
Feel free to get creative and customize your delightful Chocolate Cream Pie Bars with these tempting twists!
- Gluten-Free: Substitute Oreo cookies with gluten-free Oreos for a safe and scrumptious treat everyone can enjoy.
- Dairy-Free: Use creamy coconut milk in place of heavy cream and vegan butter for a delicious dairy-free alternative.
- Mocha Flavor: Add a teaspoon of espresso powder to the filling for a rich, coffee-infused chocolate experience.
- Nutty Crunch: Mix in chopped walnuts or pecans into the crust for an added layer of crunch and flavor.
- Different Chocolates: Experiment with dark, milk, or even white chocolate chips to create a unique flavor profile.
- Minty Fresh: Stir in a few drops of mint extract for a refreshing twist that pairs beautifully with chocolate.
- Fruit Twist: Layer fresh raspberries or strawberries on top of the filling for a fruity contrast that brightens the dish.
- Spicy Kick: Incorporate a pinch of cayenne pepper into the filling for a surprising hint of heat that elevates the chocolate flavor.
Your culinary adventure doesn’t have to stop here! Consider pairing these bars with my creamy Peanut Butter Chocolate delight or the luxurious Pistachio Cream Cookies for a delicious spread!
Expert Tips for Chocolate Cream Pie Bars
-
Quality Ingredients: Always use high-quality chocolate chips for the best flavor. It makes a noticeable difference in these Chocolate Cream Pie Bars.
-
Cool the Chocolate: Ensure the melted chocolate is cooled slightly before adding to the cream cheese to avoid a soupy mixture that lacks structure.
-
Gentle Folding: When incorporating the whipped cream, fold gently to maintain that light and airy texture. This helps keep your filling creamy and fluffy.
-
Chill for Perfection: Let the chocolate bars chill overnight for optimal setting. This way, your bars will slice beautifully and have a perfect texture.
-
Hot Knife Slicing: For clean cuts, use a hot knife to slice through the bars. This technique prevents the filling from sticking and tearing apart.
How to Store and Freeze Chocolate Cream Pie Bars
Fridge: Store your Chocolate Cream Pie Bars in an airtight container in the fridge for up to 4 days to maintain their fresh taste and texture.
Freezer: You can freeze these bars for up to 2 months. Wrap them tightly in plastic wrap before placing them in a freezer-safe container to prevent freezer burn.
Thawing: When ready to enjoy, thaw the bars in the fridge for several hours or overnight. This will maintain their creamy consistency.
Reheating: There’s no need to reheat these bars—serve them cold, or bring them to room temperature for a softer bite.
Chocolate Cream Pie Bars Recipe FAQs
How do I choose the right Oreos for the crust?
Absolutely! For the best results, use classic Oreo cookies to create that signature crispy base. If you’re making a gluten-free version, simply substitute regular Oreos for gluten-free Oreos. Look for cookies that are firm without dark spots, indicating they’re fresh and at their peak quality.
What is the best way to store Chocolate Cream Pie Bars?
Very! Store your Chocolate Cream Pie Bars in an airtight container in the fridge for up to 4 days. This helps maintain their rich flavor and creamy texture. If you have leftovers, or if you want to make them ahead, you can freeze them for up to 2 months. Just wrap them tightly in plastic wrap and place them in a freezer-safe container.
Can I freeze these bars? If so, how?
Yes, indeed! To freeze your Chocolate Cream Pie Bars, first ensure they are fully chilled and set. Wrap each bar tightly in plastic wrap to keep air out, then place them in a freezer-safe container. When you’re ready to enjoy them, thaw the bars in the fridge for several hours or overnight. This will keep them beautifully creamy and tasty!
What should I do if my chocolate filling is too soupy?
Oh no! If your chocolate filling turns out soupy, it may be due to the chocolate being too warm when combined with cream cheese. To fix this, try these steps:
- Let the melted chocolate cool slightly (but not too much, or it will harden).
- Beat the cream cheese separately until smooth and fluffy.
- Gradually incorporate the cooled chocolate into the cream cheese, mixing thoroughly.
- If it still doesn’t thicken, refrigerate the mixture for about 30 minutes before folding in the whipped cream.
Are there any allergens I should be aware of?
Absolutely! This recipe contains dairy (cream, butter, and cream cheese), and gluten (from Oreos). For those with allergies, you can easily adjust the recipe: substitute unsalted butter with vegan butter for a dairy-free option, and use gluten-free Oreos for a gluten-free dessert. Always check the packaging of ingredients for potential allergens.
Decadent No-Bake Chocolate Cream Pie Bars You’ll Adore
Ingredients
Equipment
Method
- Preheat your oven to 350°F (175°C) and line an 8x8 inch baking pan with parchment paper.
- Pulse the Oreo cookies into fine crumbs, melt the unsalted butter, and mix it with the crumbs. Press it into the prepared pan and bake for 10 minutes. Cool completely.
- Beat 1 cup of heavy whipping cream with 1/2 cup of powdered sugar until firm peaks form. Refrigerate.
- Melt 5 oz of semi-sweet chocolate chips and 5 tbsp of unsalted butter in a double boiler until smooth and let cool slightly.
- Beat 6 oz of cream cheese until smooth, then gradually mix in remaining powdered sugar, cocoa powder, vanilla extract, and salt until blended. Fold in the cooled chocolate mixture.
- Gently fold half of the whipped cream into the chocolate mixture, then add the remaining whipped cream and fold until just incorporated.
- Spread the chocolate filling over the cooled crust with a spatula, ensuring an even layer.
- Cover with plastic wrap and chill in the refrigerator for at least 3 hours, or overnight.
- Before serving, whip additional heavy cream with sugar, spread on top, and garnish with chocolate shavings.
- Lift the bars out using the parchment paper, slice with a hot knife, and serve chilled.