
As the aroma of freshly squeezed lemons fills the air, I can’t help but be transported to a quaint patisserie in France, where the sun pours in through the windows and the sweetness of desserts dances on the breeze. Today, I’m excited to share my beloved Classic Lemon Tart Recipe—a delightful creation that pairs a buttery, crisp crust with a luscious, zesty lemon curd filling. The beauty of this tart lies not only in its exquisite taste but also in its versatility; it’s a perfect make-ahead dessert for both casual brunches and elegant dinner parties. Plus, the option to add heavy cream creates a rich twist that elevates this classic treat beyond the everyday. With just a few simple ingredients, you can craft a dessert that captures the heart of French culinary tradition. Are you ready to impress your loved ones with a slice of sunshine? Let’s dive in!
Why Is This Lemon Tart So Irresistible?
Zesty Goodness: The bright flavor of fresh lemons creates a tangy filling that perfectly balances sweetness.
Simple Yet Elegant: With only a few basic ingredients, this tart doesn’t require advanced baking skills, making it approachable for anyone.
Versatile Delight: Enjoy it as a refreshing dessert at summer gatherings, or impress guests at fancy dinners. Add a dollop of whipped cream or fresh berries for even more flair!
Make-Ahead Magic: You can prepare the lemon curd in advance and store it, saving you time on the day of your event. The tangy curd only gets better as it sets, enhancing the flavor.
Crowd-Pleaser: Whether serving family or friends, this delightful Classic Lemon Tart is sure to leave everyone asking for seconds—just like my other favorites such as Lemon Zucchini Heaven or Egg Salad Dish.
Get ready to brighten your day with this zesty goodness!
Classic Lemon Tart Recipe Ingredients
• Let’s gather everything we need for this zesty classic!
For the Tart Crust
• Fully Baked Tart Crust – A flaky, homemade crust provides a delightful base for the creamy filling.
For the Lemon Curd
• Large Eggs (2) plus Egg Yolks (2) or 3 Whole Eggs – The eggs create a rich, stable curd; using 3 whole eggs lightens the texture.
• Granulated Sugar (¾ cup | 150 g) – Adds the sweetness necessary to balance the tart lemon flavor; adjust for your desired tartness.
• Lemon Zest (1 tablespoon) – Freshly grated zest enhances the lemony aroma and flavor; always use fresh lemons for maximum brightness.
• Freshly Squeezed Lemon Juice (½ cup | 120 ml) – Essential for tartness; roughly 2-3 lemons should yield enough juice and zest.
• Heavy Cream (2 tablespoons, optional) – Adds an extra layer of richness and creaminess to the filling; substitute with mascarpone for a different twist.
• Unsalted Butter (½ cup | 115 g, cut into small pieces) – Improves the mouthfeel of the curd; ensure it’s at room temperature for easy blending.
This Classic Lemon Tart Recipe is a delightful way to transport your taste buds to France with every slice!
Step‑by‑Step Instructions for Classic Lemon Tart Recipe
Step 1: Prepare the Lemon Curd
In a heatproof bowl, combine 2 large eggs, 2 egg yolks, ¾ cup granulated sugar, 1 tablespoon lemon zest, and ½ cup freshly squeezed lemon juice. Place the bowl over a saucepan filled with simmering water (bain-marie). Whisk constantly for about 10–20 minutes until the mixture thickens and coats the back of a spoon, reaching a temperature of 170°F (75°C).
Step 2: Check Consistency
Keep whisking the lemon curd mixture as it cooks, ensuring that it doesn’t scramble. After about 15 minutes, check for the right consistency: the curd should leave a clear path when you run your finger through it. If using a thermometer, it should register 170°F (75°C) to confirm it’s thick enough for the next steps.
Step 3: Strain Mixture
Once thickened, carefully remove the bowl from the heat and strain the mixture through a fine mesh sieve into a clean bowl. This will remove any lumps or curdled bits, resulting in a silky-smooth lemon curd. Allow it to cool slightly for a few minutes before proceeding to the next step.
Step 4: Incorporate Butter
Gradually add ½ cup of cut, room-temperature unsalted butter pieces into the warm lemon curd while whisking continuously. This will enhance the creaminess and shine of your Classic Lemon Tart filling. Ensure the butter melts completely and the mixture is smooth and homogeneous.
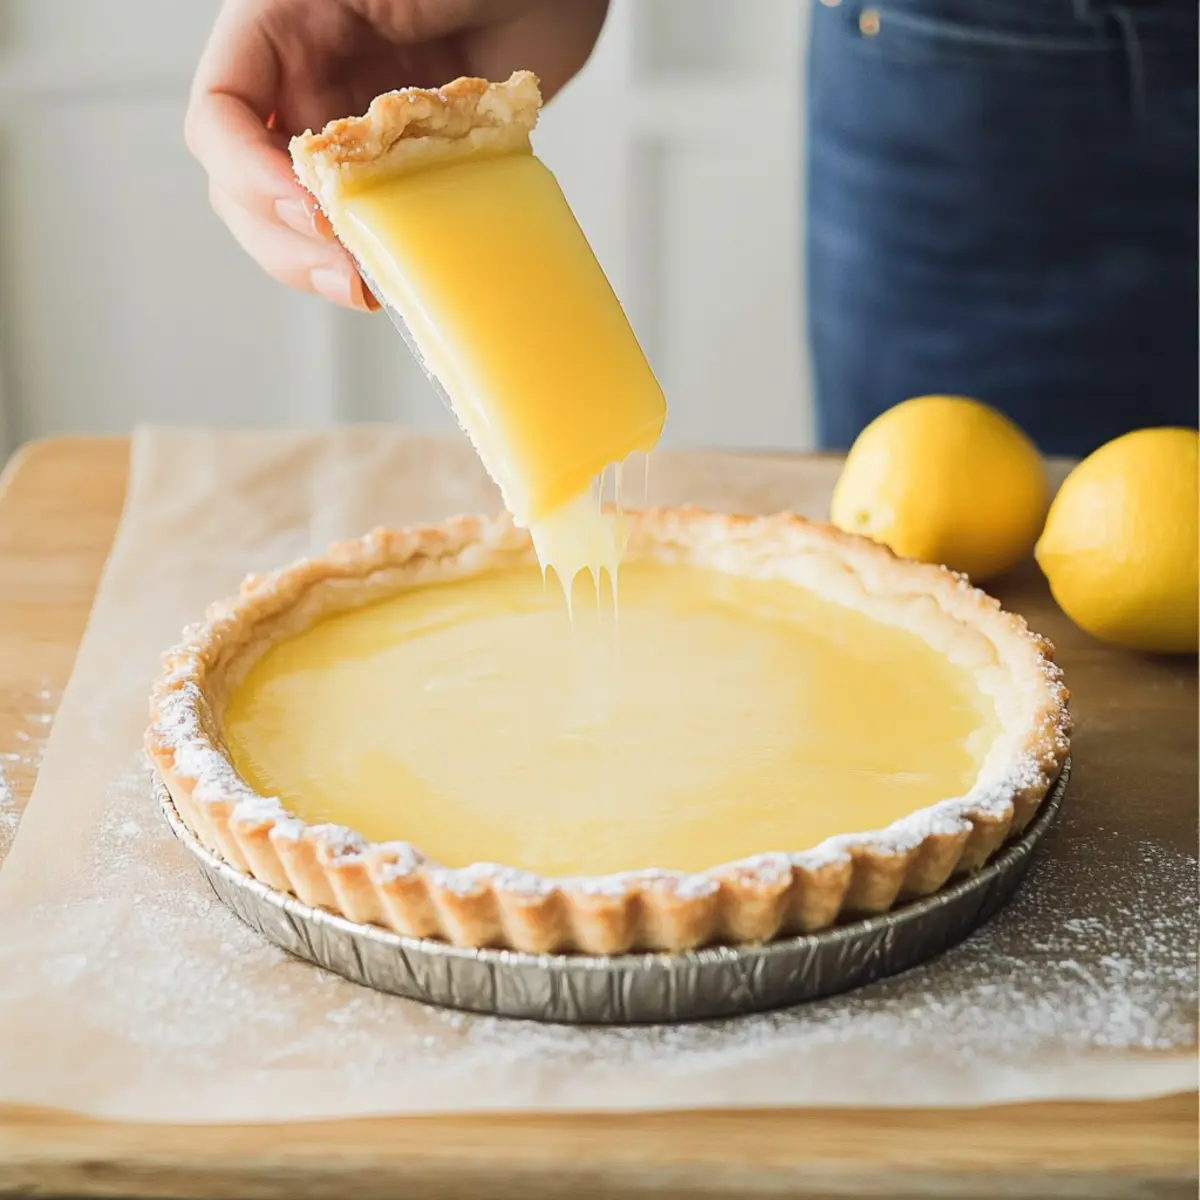
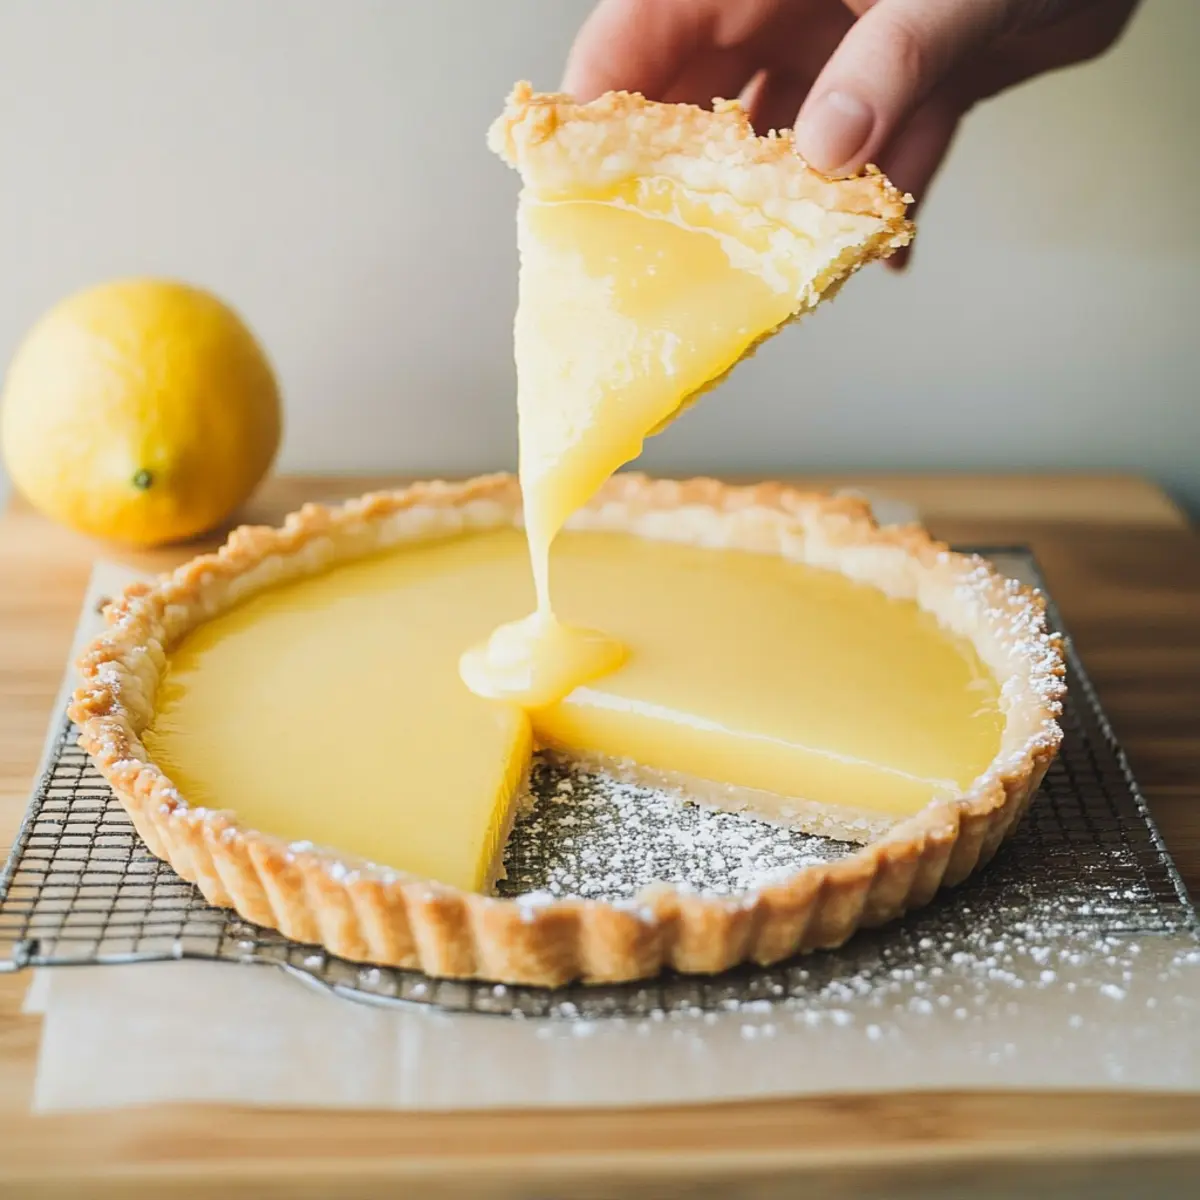
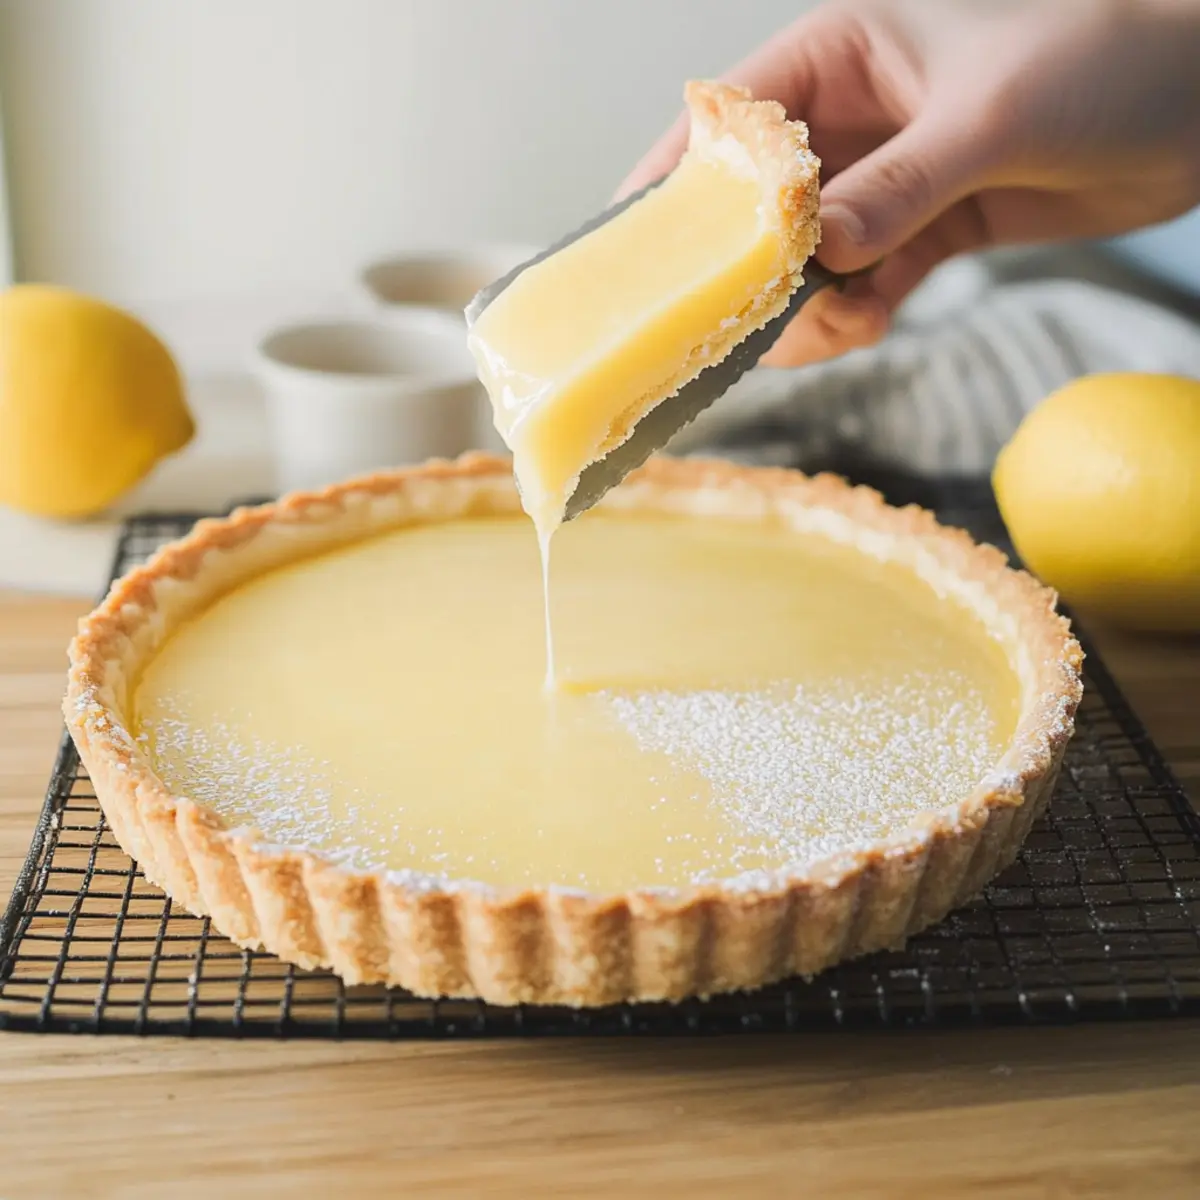
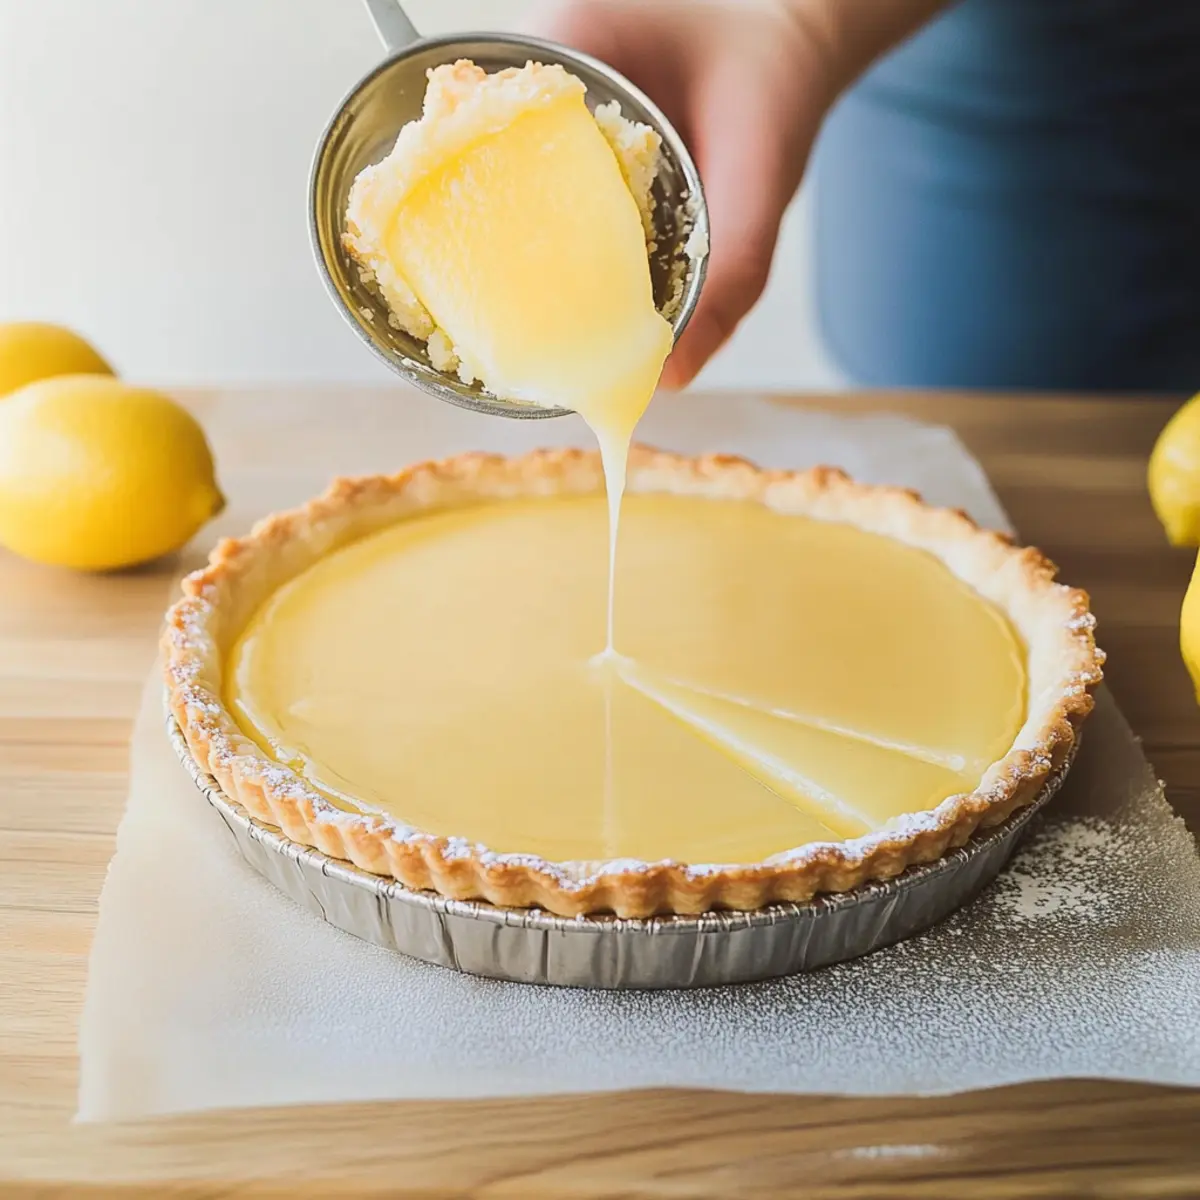
Step 5: Assemble the Tart
Pour the cooled lemon curd into your prepared fully baked tart crust. Use a spatula to smooth the filling evenly across the surface. Once filled, refrigerate the tart for at least 4 hours or overnight if possible. This chilling time allows the lemon curd to set properly and develop its flavors.
Step 6: Serve and Enjoy
After chilling, the Classic Lemon Tart is ready to be served! Slice into wedges and garnish with a light dusting of powdered sugar or fresh berries, if desired. The tart’s crisp shell and creamy lemon filling create a delightful treat that is sure to refresh and impress your family and friends.
How to Store and Freeze Classic Lemon Tart
Fridge: Store your Classic Lemon Tart covered in the refrigerator for up to one week to maintain its freshness and flavor.
Freezer: If you want to enjoy the tart later, freeze it for up to two months. Wrap the whole tart tightly in plastic wrap, then in foil, to prevent freezer burn.
Thawing: To thaw, move the tart from the freezer to the fridge and let it defrost overnight. Serve chilled for the best taste!
Refreezing: Avoid refreezing once thawed. Instead, it’s best to store any leftover pieces in the fridge for maximum flavor and texture.
Expert Tips for Classic Lemon Tart Recipe
• Continuous Whisking: Always whisk the lemon curd mixture continuously while cooking to avoid any egg scrambling. This step is crucial for a smooth texture.
• Chilling is Key: Allow the tart to chill for at least 4 hours or overnight. This chilling time is essential for the curd to fully set and enhances the flavor.
• Proper Straining: After cooking, be sure to strain the lemon curd through a fine mesh sieve to remove lumps. This will ensure a silky-smooth filling for your Classic Lemon Tart.
• Room Temperature Butter: Use room temperature butter when incorporating it into the lemon curd for better blending and a creamy consistency.
• Taste and Adjust: Don’t hesitate to taste your lemon curd before pouring it into the crust. Adjust the sweetness with more or less sugar to suit your taste.
Make Ahead Options
These Classic Lemon Tart Recipe components are perfect for meal prep enthusiasts! You can prepare the lemon curd up to three days in advance. To do this, cook the lemon curd as directed and allow it to cool completely before refrigerating it, ensuring it’s covered to maintain quality and freshness. The fully baked tart crust can also be stored in an airtight container at room temperature for up to 2 days. When you’re ready to serve, simply fill the cooled tart shell with the chilled lemon curd, smooth it out with a spatula, and refrigerate for the final set time of at least 4 hours. This make-ahead strategy not only saves you time on busy days but also allows the flavors to deepen beautifully!
Classic Lemon Tart Recipe Variations
Feel free to personalize this delightful tart with your favorite twists and substitutions that will tantalize your taste buds!
-
Dairy-Free: Substitute heavy cream with coconut cream for a vegan-friendly alternative that maintains rich flavors and creamy texture.
-
Herbal Infusion: Infuse your lemon curd with fresh rosemary or thyme for a fragrant twist that complements the zesty lemon beautifully. It’s like a secret garden in every bite!
-
Fruit Variation: Replace some lemon juice with fresh orange or lime juice for a citrus medley that brightens the traditional flavor profile of the tart.
-
Nutty Texture: Add finely chopped nuts like almonds or pistachios to the crust for an extra crunch and subtle flavor that enhances the tart experience.
-
Chocolate Lover’s Dream: Incorporate a layer of dark chocolate ganache on the bottom of the tart before adding the lemon curd for a luscious combination of sweet and tart.
-
Spicy Kick: Add a pinch of cayenne pepper to the lemon curd for an unexpected heat that surprises and delights on the palate.
-
Free-form Tart: If you’re short on time, pour the lemon curd directly into cute tartlet shells for individual servings, making them a perfect addition to any gathering or brunch!
-
Festive Flavors: For seasonal flair, mix in a splash of cranberry or pomegranate juice during the holidays to create a vibrant alternative that’s both festive and flavorful.
These variations are not just about changing the ingredients—it’s about exploring flavors that make your heart sing. Don’t forget, if you fall in love with this lemon tart, check out my other favorites like Lemon Zucchini Heaven for more sunshine on your table!
What to Serve with Classic French Lemon Tart
Indulging in a lovely lemon tart can transport you to a sunny French café, adorned with sweet bites that dance on your palate.
- Fresh Berries: The natural sweetness of strawberries or blueberries offsets the tart lemon flavor, adding brightness and texture.
- Whipped Cream: A dollop of lightly sweetened whipped cream brings a light, airy contrast to the rich, zesty filling—there’s nothing quite like it!
- Coconut Macaroons: These chewy treats offer a delightful taste of coconut that pairs beautifully with the citrus notes of the tart.
- Dark Chocolate Shavings: Rich, bittersweet chocolate crumbles enhance depth, creating a luxurious contrast that’ll leave your taste buds thrilled.
- Mint Leaves: Fresh mint adds a burst of freshness—perfect for garnishing the tart and adding an aromatic note.
- Earl Grey Tea: The delicate bergamot flavor in Earl Grey complements the lemon’s zestiness, making it an ideal pairing for tea lovers.
- Sparkling Water: A crisp, bubbly refreshment cuts through the creaminess of the tart, making every bite feel refreshed and light.
- Almond Biscotti: These crunchy cookies provide a satisfying texture, perfect for dipping or simply enjoying alongside your dessert.
- Lemon Sorbet: Enhance the lemon experience with a scoop of lemon sorbet; it’s a refreshing, palate-cleansing companion.
Classic Lemon Tart Recipe FAQs
What type of lemons should I use for the lemon tart?
Absolutely! For the best flavor, use fresh, juicy lemons. Look for lemons that are brightly colored and firm with a slight give. If there are dark spots all over the skin, it might indicate overripeness, affecting the flavor of your tart.
How should I store leftover lemon tart?
To keep your Classic Lemon Tart fresh, store it covered in the refrigerator. This way, it will remain delicious for up to one week. Make sure to cover the tart with plastic wrap or a suitable container to prevent it from absorbing any odors from the fridge.
Can I freeze the lemon tart?
Yes, you can! To freeze your tart, wrap it tightly in plastic wrap followed by aluminum foil to prevent freezer burn. It can be frozen for up to two months. When you’re ready to enjoy it, simply transfer the tart from the freezer to the fridge and let it thaw overnight.
What should I do if my lemon curd turns out lumpy?
No worries at all! If your lemon curd ends up lumpy, you can always strain it through a fine mesh sieve after cooking. This will remove any lumps and leave you with a silky-smooth filling. Also, ensure you are whisking continuously while cooking to prevent egg scrambling, which can contribute to that lumpy texture.
Is this tart suitable for people with allergies?
Great question! This recipe contains eggs, dairy (butter and optional cream), and gluten (from the crust). If you or your guests have specific allergies, consider alternatives like dairy-free butter, gluten-free crust options, or using egg substitutes. Always check food labels and consult with those who may have dietary restrictions.
Classic Lemon Tart Recipe: Brighten Your Day with Zesty Goodness
Ingredients
Equipment
Method
- Prepare the Lemon Curd: In a heatproof bowl, combine 2 large eggs, 2 egg yolks, ¾ cup granulated sugar, 1 tablespoon lemon zest, and ½ cup freshly squeezed lemon juice. Place the bowl over a saucepan filled with simmering water (bain-marie). Whisk constantly for about 10–20 minutes until thickened, reaching a temperature of 170°F (75°C).
- Check Consistency: Continue whisking as the curd cooks. After about 15 minutes, check that it leaves a clear path when you run your finger through it and registers 170°F (75°C).
- Strain Mixture: Once thickened, remove from heat and strain through a fine mesh sieve into a clean bowl to remove lumps.
- Incorporate Butter: Gradually whisk in ½ cup of room-temperature unsalted butter pieces until melted and smooth.
- Assemble the Tart: Pour the cooled lemon curd into the prepared tart crust and smooth the filling. Refrigerate for at least 4 hours or overnight.
- Serve and Enjoy: Once chilled, slice and garnish with powdered sugar or fresh berries as desired.