
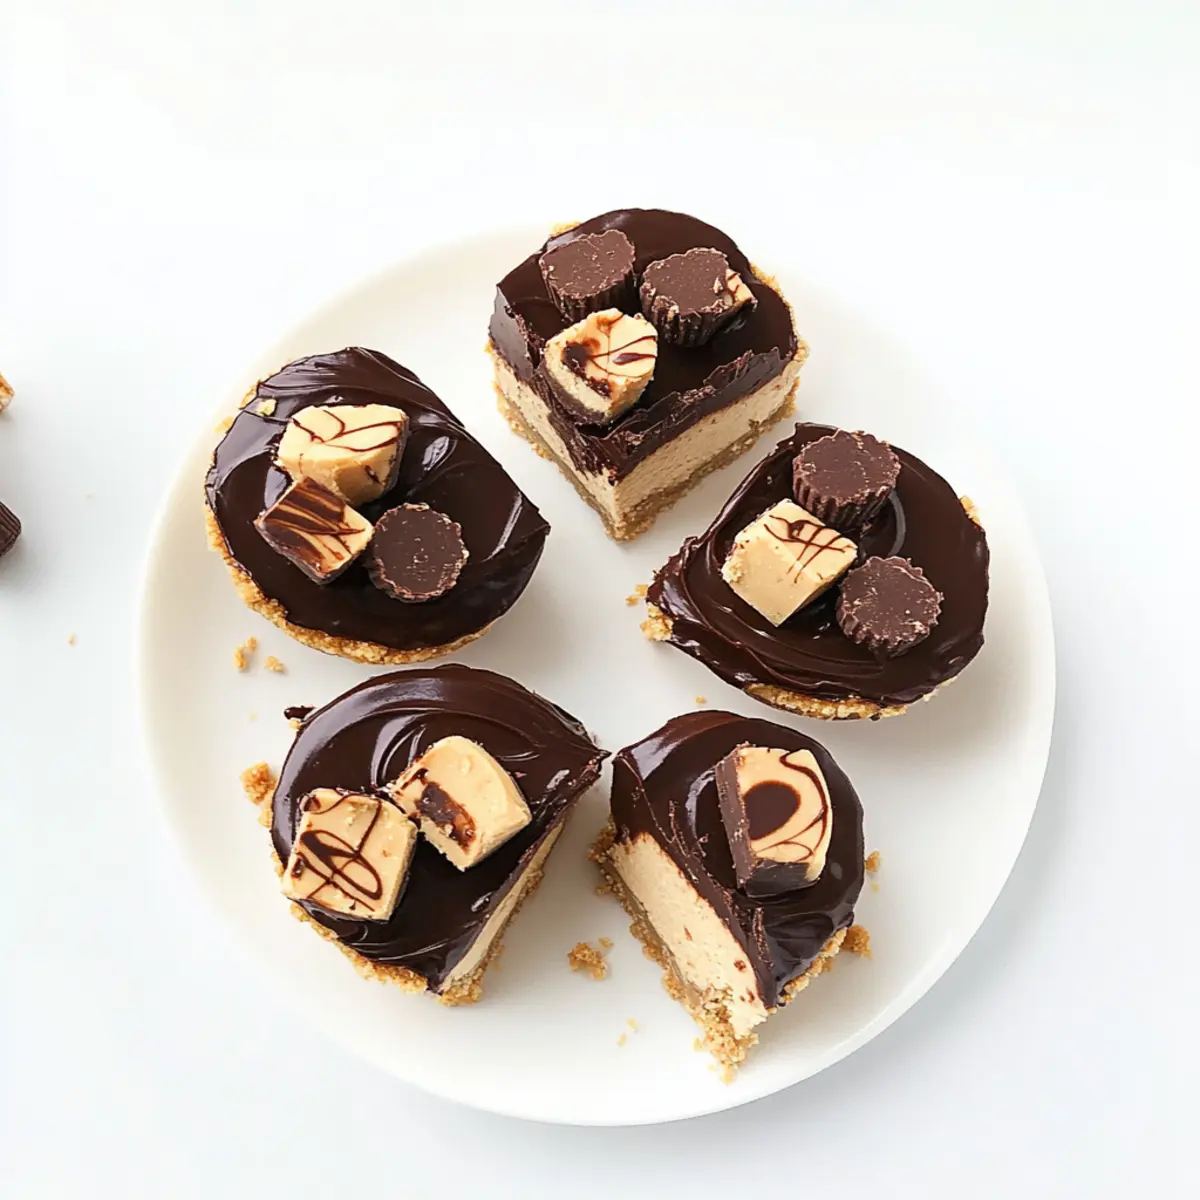
As I was rifling through my pantry, I stumbled upon a stash of creamy peanut butter and a few crumbled chocolate treats, igniting a delicious spark of inspiration. That’s how these No-Bake Peanut Butter Cup Cheesecakes were born! Combining the rich nuttiness of peanut butter with a velvety chocolate ganache, this dessert perfectly marries the simplicity of a quick recipe with maximum satisfaction. Best of all, this delightful treat is vegan, gluten-free, and can be whipped up in just 30 minutes, making it an ideal choice for busy weeknights or unexpected guests. Are you ready to create a heavenly indulgence that’s easy to love? Let’s dive in!
Why Are These Cheesecakes So Irresistible?
Creamy Delight: The creaminess of the cashew filling combined with the richness of peanut butter makes every bite a dreamy experience.
No-Bake Convenience: With only 30 minutes of prep time, these cheesecakes are the perfect solution for when you’re craving something indulgent but quick!
Vegan & Gluten-Free: Designed to please everyone, they’re vegan and gluten-free, allowing everyone to join in on the deliciousness.
Customizable Flavors: Feel free to experiment with different nut butters—or even add cocoa for a chocolate twist—to make this dessert uniquely yours.
Crowd-Pleasing Treat: Impress friends and family at any gathering with these delightful masterpieces—everyone will be coming back for seconds! If you enjoy these, you might also want to check out my equally satisfying Peanut Butter Cheesecakes or Peanut Butter Brownie Cups for more peanut butter goodness!
Peanut Butter Cup Cheesecakes Ingredients
For the Crust
- Crushed Oreo Cookies – Provides the crust structure; look for gluten-free varieties if needed.
- Coconut Oil – Used to bind the crust; melted vegan butter can be a substitution.
For the Filling
- Raw Cashews – Serve as the creamy base; soak for 4-6 hours before use for the best texture.
- Lemon Juice – Adds brightness and acidity; one large lemon will yield about 1/4 cup.
- Coconut Oil (melted) – Enhances the creaminess of the filling, creating a smooth texture.
- Full-Fat Coconut Milk – Contributes to the rich filling; use cream from the top for a denser result.
- Maple Syrup or Agave Nectar – Acts as the primary sweetener; honey can substitute for non-vegan options.
- Salted Natural Peanut Butter – Adds depth of flavor; both creamy and crunchy versions can be used.
For the Ganache
- Dairy-Free Semisweet Chocolate Chips – Essential for the optional chocolate ganache; adds a rich, luscious topping.
For Garnishing
- Mini Dark Chocolate Peanut Butter Cups – Chopped for a fun and decadent finish to your cheesecakes.
Enjoy these peanut butter cup cheesecakes as they come together in a delightful blend of flavors and textures!
Step‑by‑Step Instructions for Peanut Butter Cup Cheesecakes
Step 1: Prepare Oreo Crust
Start by preheating your oven to 350°F (176°C). In a food processor, blend the crushed Oreo cookies until they resemble a fine meal. Combine the cookie crumbs with melted coconut oil in a mixing bowl, ensuring everything is well incorporated and resembles wet sand.
Step 2: Shape Crust
Line a muffin tin with parchment paper or place paper liners into each cavity. Take generous spoonfuls of the crust mixture and press it into the bottom of each muffin slot, ensuring it’s tightly packed to create a solid foundation for your peanut butter cup cheesecakes.
Step 3: Bake Crust
Place the muffin tin in the preheated oven and bake the crusts for about 5 minutes. Once baking is complete, remove the pan from the oven and allow the crusts to cool completely in the tin before adding the filling.
Step 4: Make Filling
While the crust is cooling, prepare the cheesecake filling. In a high-speed blender, combine the soaked and drained cashews, fresh lemon juice, melted coconut oil, full-fat coconut milk, maple syrup, and salted natural peanut butter. Blend everything until completely smooth and creamy, scraping down the sides as needed.
Step 5: Pour Filling
Once the crusts have cooled, distribute the smooth filling evenly over them, filling each cavity almost to the top. Gently tap the muffin tin on the counter to help eliminate any air bubbles trapped within the filling, ensuring a creamy texture in your peanut butter cup cheesecakes.
Step 6: Prepare Ganache
For the optional chocolate ganache, heat the remaining coconut milk in a small saucepan until lightly simmering. Pour the hot coconut milk over the dairy-free semisweet chocolate chips in a bowl, adding a moment to let them sit for about 3 minutes, then stir until you achieve a velvety consistency.
Step 7: Garnish
Drizzle the silky ganache over the top of each cheesecake and use a toothpick to create swirls if desired. For an extra delicious touch, add a sprinkling of chopped mini dark chocolate peanut butter cups on top for an appealing and indulgent finish.
Step 8: Freeze
Carefully cover the muffin tin loosely with plastic wrap or a lid, and place it in the freezer. Allow the peanut butter cup cheesecakes to set for at least 3 hours, which will give them an optimal texture while maintaining their delightful flavors.
Step 9: Serve
When ready to serve, gently pull up the parchment tabs or use a knife to release the cheesecakes from the muffin tin. Serve them chilled, or let them sit at room temperature for a few minutes to soften slightly before enjoying these delectable peanut butter cup cheesecakes.
Expert Tips for Peanut Butter Cup Cheesecakes
- Soaking Cashews: Ensure cashews are soaked well for a creamy filling. If short on time, use boiling water and soak for 20-30 minutes.
- Use Full-Fat Coconut Milk: Opt for full-fat coconut milk for a rich and luscious texture. The cream from the top yields the best results.
- Adjust Sweetness: Feel free to modify the amount of maple syrup or agave nectar to suit your taste buds; sweetness can vary based on personal preference.
- Pack the Crust: Ensure to tightly pack the cookie crust into the muffin tin; this will provide a sturdy base that holds up during serving.
- Chill Before Serving: For the best experience, freeze the cheesecakes for at least 3 hours. This allows the flavors to meld and the texture to firm up perfectly.
- Experiment with Flavors: Don’t hesitate to switch nut butters or add extracts like vanilla or cocoa powder to enhance the flavor profile of your peanut butter cup cheesecakes.
Peanut Butter Cup Cheesecakes Variations
Feel free to get creative with this recipe by making delicious substitutions and twists that suit your taste buds!
- Nut Butter Twist: Replace peanut butter with almond or cashew butter for a unique flavor experience. Each nut brings its own character!
- Chocolate Fusion: Blend in cocoa powder into the filling for a chocolate peanut butter cheesecake that’s rich and delightful.
- Crust Change-Up: Swap the Oreo crust with crushed graham crackers for a different base, ensuring to use gluten-free options if needed.
- Fruit Infusion: Add a swirl of your favorite fruit puree, like strawberry or raspberry, to the filling for a fruity brightness in every bite.
- Sugar-Free Option: Use a sugar substitute like erythritol for those who prefer to keep things low in sugar without sacrificing taste.
- Spice It Up: A pinch of cinnamon or nutmeg can add a warm spice note to the cheesecake filling, enhancing the overall flavor foundation.
- Creamy Alternative: For a nut-free version, you can use silken tofu blended with the other ingredients to create a luscious and creamy filling.
- Heat Lover’s Delight: Incorporate a teaspoon of cayenne pepper or chili powder into the filling for a spicy kick that will surprise and delight your taste buds!
These variations can help you create a customized Peanut Butter Cup Cheesecake experience that will leave everyone smiling. If you love peanut butter, consider trying my Chewy Peanut Butter or dive into the world of Peanut Butter Chocolate for more sweet indulgence!
Make Ahead Options
These No-Bake Peanut Butter Cup Cheesecakes are a fantastic choice for meal prep, saving you significant time on busy days! You can prepare the crust and filling up to 24 hours in advance. For the crust, simply make and bake it, then store it in an airtight container at room temperature. The cheesecake filling can be blended and kept in the refrigerator for the same time, but remember to smooth it well before pouring it onto the crust to maintain its creamy texture. When you’re ready to serve, simply fill the crust with the mixture and freeze for at least 3 hours. The cheesecakes will be just as delicious and ready for that perfect moment of indulgence!
Storage Tips for Peanut Butter Cup Cheesecakes
- Fridge: Store uneaten cheesecakes in an airtight container in the refrigerator for up to 3 days. This helps maintain their creamy texture and flavor.
- Freezer: For long-term storage, freeze cheesecakes in an airtight container for up to 1 month. Make sure to separate layers with parchment paper if stacking, to avoid sticking.
- Thawing: To enjoy, remove them from the freezer and place them in the fridge for several hours to thaw, or leave at room temperature for about 15-20 minutes before serving.
- Reheating: These Peanut Butter Cup Cheesecakes are best served chilled; avoid reheating as it may affect their creamy consistency.
What to Serve with No-Bake Peanut Butter Cup Cheesecakes
Elevate your indulgent dessert experience with fantastic pairings that tantalize your taste buds and complement every bite!
- Fresh Berries: Juicy strawberries or raspberries sprinkle a burst of tartness, balancing the rich sweetness of the cheesecakes beautifully.
- Coconut Whipped Cream: Light, airy, and subtly sweet, this topping adds a creamy touch that enhances the already luscious textures.
- Crispy Rice Treats: The crunchiness provides a delightful contrast to the creamy cheesecakes while sharing a nostalgic feel of childhood treats.
- Chocolate Drizzle: A simple drizzle of melted dairy-free chocolate elevates the cheesecakes, adding an extra layer of indulgence.
- Chilled Almond Milk: This refreshing drink complements the cheesecakes perfectly, offering a nutty flavor that ties in with the peanut butter theme.
- Fruit Salad: A colorful medley of seasonal fruits refreshes the palate and adds a vibrant touch to your dessert spread.
- Coffee or Espresso: A bold coffee pairing intensifies the flavors, grounding the sweetness with its rich, robust notes.
- Vegan Ice Cream: Pairing with dairy-free ice cream creates a wonderfully creamy duo that turns your dessert into an unforgettable indulgence.
- Dark Chocolate Shavings: Garnishing with dark chocolate adds sophistication and a touch of bitterness to balance the delightful sweetness.
Enjoy these pairings that create a luscious feast for both the eyes and the palate!
Peanut Butter Cup Cheesecakes Recipe FAQs
How do I choose ripe ingredients for the filling?
When selecting raw cashews, look for ones that are firm and free from dark spots or shriveled appearances. For lemon juice, choose a firm lemon that feels heavy for its size; this usually indicates juiciness. As for peanut butter, opt for brands that contain minimal ingredients—just nuts and possibly salt for the best flavor.
How should I store my Peanut Butter Cup Cheesecakes?
You can keep these delightful cheesecakes in the refrigerator for up to 3 days in an airtight container. For longer storage, freeze them in an airtight container for up to 1 month, ensuring to separate layers with parchment paper to prevent sticking.
Can I freeze these cheesecakes, and how?
Absolutely! To freeze your cheesecakes, place them in a single layer in an airtight container, separating layers with parchment paper if necessary. Be sure to cover the container loosely with plastic wrap or a lid. When you’re ready to enjoy, let them thaw in the refrigerator for several hours or at room temperature for about 15-20 minutes before serving.
What if my cheesecake filling is grainy or not smooth?
If your filling turns out grainy, this typically means the cashews were not blended long enough. To fix this, continue blending the mixture, scraping down the sides as needed, until it reaches a creamy consistency. If you’re having difficulty, adding a small amount of coconut milk may help to achieve a smoother texture.
Are these cheesecakes suitable for those with allergies?
These Peanut Butter Cup Cheesecakes are vegan and gluten-free, making them suitable for a variety of diets. However, always double-check ingredients, especially the brand of peanut butter and chocolate chips you choose, as they may contain allergens like soy or tree nuts. If making for someone with severe allergies, consider using caution and consulting with them first.
Can I customize the nut butter used in the recipe?
Very! You can easily switch the salted natural peanut butter for almond butter, cashew butter, or even sunbutter for a nut-free option. Just note that this may change the flavor profile slightly, adding different nuances to your delicious cheesecakes!
Decadent Peanut Butter Cup Cheesecakes Made Easy
Ingredients
Equipment
Method
- Preheat your oven to 350°F (176°C). Blend the crushed Oreo cookies until they resemble a fine meal and combine with melted coconut oil until wet sand texture.
- Line a muffin tin with parchment paper or liners. Press the crust mixture into the bottom of each muffin slot tightly.
- Bake the crusts for about 5 minutes. Remove from oven and let cool completely in the tin.
- In a blender, combine soaked cashews, lemon juice, melted coconut oil, coconut milk, maple syrup, and peanut butter. Blend until smooth.
- Evenly distribute filling over crusts, filling each cavity almost to the top and gently tapping to remove air bubbles.
- Heat coconut milk until simmering and pour over chocolate chips. Let sit for 3 minutes, then stir until smooth.
- Drizzle ganache over each cheesecake and top with chopped chocolate peanut butter cups.
- Cover muffin tin loosely with plastic wrap and freeze for at least 3 hours.
- Release cheesecakes from the muffin tin and serve chilled or let sit at room temperature for a few minutes.