
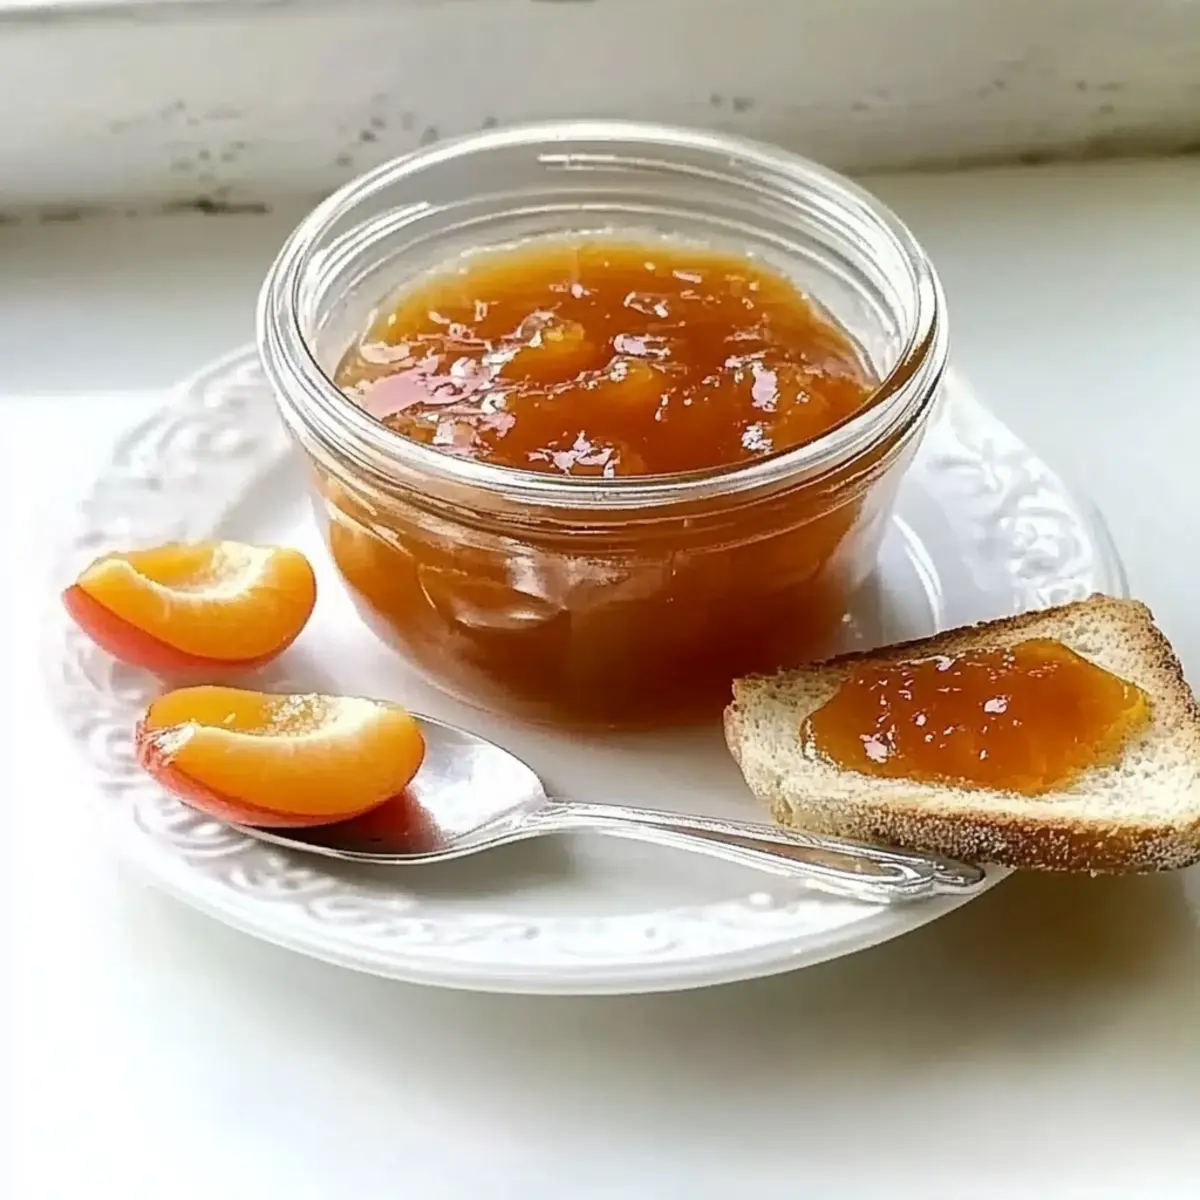
The vibrant orange hue of homemade apricot jam gleams like a sunset captured in a jar, tempting you to dip in a spoon. As I stirred this easy low-sugar recipe in my kitchen, I couldn’t help but think about how this simple spread transforms breakfast or dessert into something truly special. Crafted from ripe seasonal apricots and infused with a splash of apple juice, this jam showcases the fruit’s natural sweetness while keeping the sugar content low. Not only is this apricot jam a healthier twist on traditional recipes, but it also sparks creativity when layering flavors, making it the perfect companion for yogurt, toast, or even a dollop in your baking. Ready to bring a touch of sunshine to your pantry? Let’s dive into this delicious preservation journey together!
Why make homemade apricot jam?
Flavor Explosion: This jam bursts with the natural sweetness of ripe apricots, perfect for those who appreciate vibrant, fruity flavors.
Simple Process: With just a few ingredients and minimal effort, creating your own apricot jam will become a delightful routine.
Healthier Option: Enjoy a low-sugar treat that keeps guilt at bay, making it ideal for everyone looking to indulge healthily.
Versatile Uses: Spread it on fresh toast, or mix it into yogurt for a wholesome breakfast, just like with my Jambalaya Flavorful One.
Seasonal Delight: Capture the essence of summer while preserving seasonal fruit goodness.
Gift-Worthy: Homemade jam makes an appealing gift, adding a personal touch that store-bought just can’t match!
Apricot Jam Ingredients
• Get ready to capture the essence of homemade delight!
For the Base
- Apricot – The star of the show, use ripe, seasonal apricots for the best sweetness and flavor.
- Apple Juice – Adds a hint of natural sweetness and acidity; feel free to substitute with pear juice for a unique twist!
For Sweetening & Setting
- Preserving Sugar – This special sugar helps your apricot jam set while keeping it lower in sugar than store-bought versions; regular granulated sugar works too, but may alter texture.
- Lemon Juice – Provides essential acidity to enhance the apricot flavor; lime juice can be a refreshing alternative if you’re feeling adventurous.
For Cooking
- Butter – Helps minimize scum during cooking for a clearer jam; you can omit it if going dairy-free for a delicious low-sugar apricot jam!
Step‑by‑Step Instructions for Apricot Jam
Step 1: Prepare for Success
Start by placing a couple of small plates in the freezer. These will be your quick test for the apricot jam’s consistency later on. While they chill, gather your ingredients and equipment, including a large pan, a stirring spoon, and sterilized jars. Make sure everything is ready to embark on this delightful jam-making journey.
Step 2: Chop Those Apricots
Halve and stone about 2 pounds of ripe apricots, then chop the flesh into small pieces. In your large pan, combine the chopped apricots with a splash of apple juice. Ensure you mix everything well, and if desired, you can crack and add a few apricot kernels for an extra burst of flavor.
Step 3: Cook Until Softened
Place the pan over medium heat and bring the mixture to a gentle boil. Let it simmer away for about 10 minutes, stirring occasionally, until the apricots soften and release their juices. You’ll know it’s ready when the fruit becomes tender and fragrant, filling your kitchen with the sweetness of summer.
Step 4: Sweeten the Blend
Once the apricots are soft, stir in preserving sugar and fresh lemon juice. Continue heating the mixture until the sugar dissolves completely, which should take just a few minutes. After that, increase the heat and allow it to reach a rolling boil for 20 minutes, stirring frequently. You’ll see the jam thicken and bubble vigorously.
Step 5: Test for Jamming Success
Now, retrieve one of your chilled plates from the freezer. Spoon a small amount of the jam onto the plate and let it cool for a moment. Push it with your finger; if it wrinkles and holds its shape, your apricot jam is ready to be jarred. If not, boil for an additional 5 minutes before testing again.
Step 6: Final Touches
Once your jam has reached the desired consistency, remove it from the heat. Quickly skim off any scum that has formed on the surface for a cleaner look. Then, stir in a teaspoon of butter to give your low-sugar apricot jam a beautiful sheen. Allow it to cool for about 10 minutes before transferring to jars.
Step 7: Jar Your Jam
Ladle the warm apricot jam into your previously sterilized jars, filling them to about 1/4 inch from the top. Seal each jar tightly with lids. If you’re storing in the fridge, keep them as is for up to 4-6 weeks. For long-term storage, consider processing the jars in a water bath to keep your homemade apricot jam fresh for up to a year.
Apricot Jam Variations & Substitutions
Embrace your creative side by customizing your apricot jam with these delightful twists that add flavor, texture, and personality!
- Peachy Apricot: Mix in fresh peaches for a juicy, summer fruit blend that brings an extra layer of sweetness.
- Spiced Sensation: Add a dash of cinnamon or a hint of ginger while cooking for a warm, aromatic jam that dances on the palate.
- Citrus Burst: Substitute lemon juice with orange or lime juice for a refreshing zing that brightens every spoonful.
- Herb Infusion: Stir in fresh herbs like rosemary or thyme during the last few minutes of cooking for an elegant, savory twist.
- Low-Carb Delight: Use a sugar substitute like erythritol or stevia for a low-carb version that keeps the sweetness without the sugar highs.
- Nutty Crunch: Sprinkle some chopped almonds or walnuts into the jam just before jarring for a delightful crunchy texture and added nutrition.
- Berry Fusion: Blend in some fresh or frozen berries like strawberries or raspberries for a fruity medley that’s as colorful as it is tasty. Check out my post on Jambalaya Flavorful One for more vibrant recipes.
- Spicy Kick: For a adventurous flavor, add a pinch of crushed red pepper or jalapeño for a surprising hot twist that complements the sweetness beautifully.
Make Ahead Options
Making apricot jam is not only a rewarding culinary experience, but it also lends itself beautifully to meal prep! You can chop and combine the apricots with apple juice up to 24 hours in advance, then refrigerate the mixture to keep it fresh. This will save you time on busy mornings or when preparing for gatherings. Just before you’re ready to make the jam, bring the mixture to room temperature, and follow the cooking steps as outlined. To maintain quality, ensure your jars are properly sterilized and stored in a cool place; your homemade apricot jam can last up to 4-6 weeks in the fridge and up to a year if canned correctly. Enjoy the convenience of having sweet, vibrant apricot jam ready to elevate any meal!
What to Serve With Low-Sugar Apricot Jam
Elevate your meals with delightful pairings that enhance the natural sweetness of your homemade spread.
- Warm Scones: Light and fluffy scones create a comforting contrast to the vibrant jam, making every bite a tasty treat.
- Cream Cheese Toast: The creamy texture of cream cheese adds richness, perfectly balancing the fruity tang of apricot jam.
- Greek Yogurt: Tart yogurt blends wonderfully with the sweet jam, creating a nutritious breakfast or snack that’s as delicious as it is satisfying.
- Pancakes: Drizzling warm pancakes with apricot jam transforms a regular breakfast into a scrumptious experience. The flavors meld seamlessly!
- Pork Chops: A dollop of apricot jam on grilled pork adds a fruity twist that enhances the meat’s flavor, bringing your dish to life.
- Tea or Coffee: Pair your jam-filled treats with a soothing cup of tea or rich coffee, creating a delightful experience that warms the soul.
Expert Tips for Apricot Jam
• Test for Set: Always check your jam’s consistency using the chilled plate method to prevent disappointment with under- or overcooked apricot jam.
• Sterilization Matters: Ensure jars are properly sterilized before filling; this prevents spoilage and extends shelf life, allowing your jam to last up to a year when bottled correctly.
• Adjust Sweetness: If your jam isn’t setting as desired after boiling, add keep boiling for 5-minute intervals. Adjust the sugar if you prefer it sweeter while maintaining the low-sugar aspect.
• Flavor Infusion: For a unique twist, try adding spices like vanilla or ginger when cooking the apricots to enhance the flavor profile of your apricot jam.
• Use Seasonal Fruit: Opt for ripe, seasonal apricots for the best flavor; overripe fruit can lead to overly sweet or runny jam.
How to Store and Freeze Apricot Jam
Fridge: Store your homemade apricot jam in the refrigerator for up to 4-6 weeks. Ensure jars are tightly sealed to maintain freshness and prevent spoilage.
Freezer: For long-term storage, freeze the apricot jam in airtight containers for up to a year. Leave headspace in jars to allow for expansion while freezing.
Reheating: When ready to use frozen apricot jam, thaw it in the fridge overnight or place it in a warm water bath. Avoid reheating directly from the freezer to maintain texture.
Bottling: If you intend to keep your apricot jam outside the fridge, process jars in a boiling water bath for long-term shelf storage, ensuring a proper seal.
Apricot Jam Recipe FAQs
What is the best way to select ripe apricots?
Absolutely! When selecting apricots for your jam, look for fruits that are plump, slightly soft to the touch, and have a vibrant orange color. Avoid those with dark spots or overly mushy areas, as these may indicate overripeness. If they are firm but ripe, leave them at room temperature for a couple of days to soften before using them in your recipe.
How should I store my homemade apricot jam?
To keep your homemade apricot jam fresh, store it in the refrigerator for 4-6 weeks. Ensure the jars are tightly sealed to limit air exposure. If you want to extend its shelf life, process it in a boiling water bath, which allows it to be stored outside the fridge for up to a year in a cool, dark place.
Can I freeze apricot jam, and if so, how?
Very! To freeze your apricot jam, ladle it into airtight containers or freezer-safe jars, leaving about an inch of headspace to allow for expansion. Label the containers with the date, and your jam can be stored in the freezer for up to a year. When you’re ready to enjoy it, simply thaw it overnight in the refrigerator or place it in a warm water bath until it reaches your desired consistency.
What should I do if my apricot jam didn’t set properly?
If your apricot jam hasn’t set to your liking, don’t worry! Simply return it to a pot, add a little more preserving sugar (about 1/4 cup) and cook it down. Bring it back to a rolling boil for another 5-10 minutes. Afterward, check the texture again using the chilled plate method. Repeat the process if necessary, and soon you’ll have a beautifully set apricot jam.
Are there any dietary concerns with apricot jam for allergies?
Great question! This low-sugar apricot jam recipe is generally friendly for most diets. However, if someone has a known allergy to fruit or specific components like lemon or apple juice, be sure to substitute those ingredients accordingly. You can use lime juice instead of lemon and pear juice instead of apple juice without losing the flavor harmony of the jam. Always consider individual allergies before serving.
Homemade Apricot Jam: Sweeten Your Mornings Naturally
Ingredients
Equipment
Method
- Start by placing a couple of small plates in the freezer for testing the jam's consistency later.
- Halve and stone about 2 pounds of ripe apricots and chop the flesh into small pieces. Combine with a splash of apple juice in a large pan.
- Place the pan over medium heat and bring to a gentle boil, simmer for about 10 minutes, stirring occasionally.
- Once softened, stir in preserving sugar and lemon juice, heat until sugar dissolves completely, then bring to a rolling boil for 20 minutes.
- Retrieve a chilled plate from the freezer, spoon a small amount of jam onto it to test for consistency.
- If ready, remove from heat, skim off scum, and stir in butter. Cool for about 10 minutes.
- Ladle the warm jam into sterilized jars, seal tightly, and store in the fridge for 4-6 weeks or process for long-term storage.