
Introduction to Black Forest Cheesecake Recipe
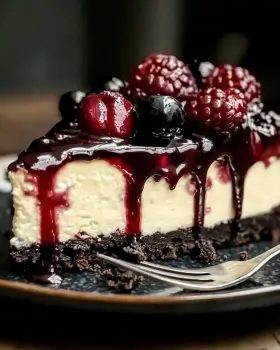
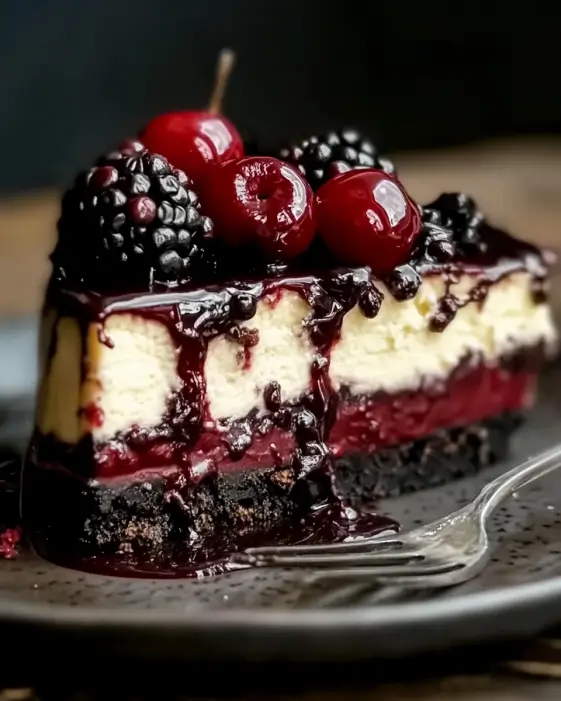
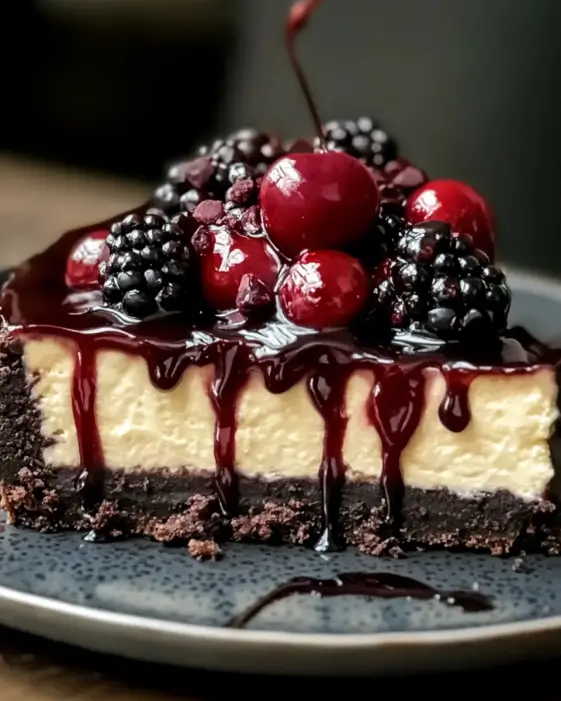
Welcome to the delightful world of desserts! Today, we’re diving into a classic treat that combines the rich flavors of chocolate and cherries: the Black Forest Cheesecake. This dessert is not just a feast for the eyes but also a celebration of taste. Imagine a creamy cheesecake layered on a chocolate graham cracker crust, topped with luscious cherry pie filling and garnished with chocolate shavings. It’s a dessert that brings joy to any occasion!
The Black Forest Cheesecake Recipe is perfect for gatherings, birthdays, or simply when you want to indulge yourself. It’s a wonderful blend of textures and flavors that will leave your guests asking for seconds. Plus, it’s surprisingly easy to make, even for those who may not consider themselves expert bakers. With just a few simple ingredients and steps, you can create a show-stopping dessert that looks and tastes like it came from a fancy bakery.
In this article, we’ll guide you through the ingredients, preparation steps, and even some variations to make this cheesecake your own. Whether you’re a seasoned chef or a beginner in the kitchen, you’ll find this Black Forest Cheesecake Recipe approachable and rewarding. So, let’s get started on this delicious journey!
Ingredients for Black Forest Cheesecake Recipe
To create the perfect Black Forest Cheesecake, you’ll need a selection of simple yet delicious ingredients. Each component plays a vital role in achieving that rich, creamy texture and delightful flavor. Here’s what you’ll need:
- 2 cups chocolate graham cracker crumbs
- 1/2 cup unsalted butter, melted
- 1/4 cup granulated sugar
- 3 (8-ounce) packages cream cheese, softened
- 1 cup powdered sugar
- 1 teaspoon vanilla extract
- 3 large eggs
- 1 cup sour cream
- 1 cup cherry pie filling
- 1/4 cup chocolate shavings (for garnish)
These ingredients come together to create a dessert that is both rich and refreshing. The chocolate graham cracker crumbs form a deliciously crunchy crust, while the cream cheese filling provides a smooth and creamy base. The cherry pie filling adds a burst of fruity flavor, making each bite a delightful experience.
Feel free to get creative! You can add a tablespoon of cocoa powder to the cream cheese mixture for an even deeper chocolate flavor. Additionally, if cherries aren’t your favorite, consider using fresh berries or other fruit toppings to customize your cheesecake. The possibilities are endless!
Step-by-Step Preparation of Black Forest Cheesecake Recipe
Now that you have all your ingredients ready, it’s time to dive into the fun part: preparing your Black Forest Cheesecake! Follow these simple steps to create a dessert that will impress everyone.
Step 1: Preparing the Crust
2 cups of chocolate graham cracker crumbs, 1/2 cup of melted unsalted butter, and 1/4 cup of granulated sugar. Mix everything together until it’s well combined. The mixture should look like wet sand.
Next, take your mixture and press it firmly into the bottom of a greased 9-inch springform pan. Make sure it’s even and compact. This will help create a sturdy base for your cheesecake. Bake the crust in the preheated oven for about 10 minutes. Once done, remove it from the oven and let it cool while you prepare the filling.
Step 2: Making the Cheesecake Filling
3 packages of softened cream cheese. Using an electric mixer, beat the cream cheese until it’s smooth and creamy. This step is crucial for a velvety texture.
1 cup of powdered sugar and 1 teaspoon of vanilla extract. Mix until everything is well combined. Next, add the 3 large eggs one at a time. Remember to mix on low speed after each addition. This helps prevent overmixing, which can lead to cracks in your cheesecake.
1 cup of sour cream until the mixture is smooth. Your cheesecake filling should be rich and creamy, ready to pour over the crust!
Step 3: Assembling the Black Forest Cheesecake
With your crust cooled and filling ready, it’s time to assemble your cheesecake. Pour the cream cheese mixture over the cooled crust in the springform pan. Spread it evenly with a spatula. This ensures every slice will have that delicious filling.
Now, it’s time to bake! Place the assembled cheesecake in the preheated oven and bake for about 55-60 minutes. The center should be set but still slightly jiggly. Once it’s done, turn off the oven and crack the door open. Let the cheesecake cool in the oven for about an hour. This gentle cooling helps prevent cracks.
Step 4: Chilling the Cheesecake
After the cheesecake has cooled in the oven, remove it and let it cool to room temperature. Once it’s cool, cover it and refrigerate for at least 4 hours, or overnight if you can wait! Chilling allows the flavors to meld and the cheesecake to set perfectly.
1 cup of cherry pie filling and sprinkle with 1/4 cup of chocolate shavings for that extra touch of elegance. Your Black Forest Cheesecake is now ready to be enjoyed!
Variation of Black Forest Cheesecake Recipe
While the classic Black Forest Cheesecake is a delightful treat on its own, there are many ways to add your personal touch. By experimenting with alternative ingredients and serving styles, you can create a unique dessert that suits your taste. Let’s explore some exciting variations!
Alternative Ingredients for a Unique Twist
One of the best parts about baking is the freedom to customize your recipes. Here are some alternative ingredients you can use to give your Black Forest Cheesecake a unique twist:
- Fruit Variations: Instead of cherry pie filling, try using fresh strawberries, blueberries, or raspberries. These fruits add a fresh flavor and vibrant color.
- Chocolate Options: For a richer chocolate flavor, consider using dark chocolate graham crackers for the crust. You can also melt dark chocolate and fold it into the cream cheese mixture.
- Nutty Crunch: Add crushed nuts, like walnuts or pecans, to the crust for an extra crunch. This adds texture and a nutty flavor that complements the cheesecake.
- Flavor Enhancements: Incorporate a splash of almond extract or a tablespoon of espresso powder into the filling for a deeper flavor profile.
These alternative ingredients can transform your cheesecake into something truly special. Feel free to mix and match to find your perfect combination!
Different Serving Styles for Black Forest Cheesecake
Presentation is key when it comes to desserts. Here are some creative serving styles for your Black Forest Cheesecake:
- Individual Servings: Instead of a whole cheesecake, consider making mini cheesecakes in muffin tins. This makes for easy serving and a fun presentation.
- Layered Parfaits: Layer cheesecake filling, cherry pie filling, and chocolate shavings in clear cups for a beautiful dessert parfait. This is perfect for parties!
- Chocolate Drizzle: Drizzle melted chocolate over the top of the cheesecake before adding the cherry filling. This adds a touch of elegance and extra chocolatey goodness.
- Garnish Ideas: Use whipped cream, fresh mint leaves, or even edible flowers to garnish your cheesecake. This adds a pop of color and makes it look even more inviting.
By trying out these different serving styles, you can impress your guests and make your Black Forest Cheesecake stand out. Remember, the way you present your dessert can enhance the overall experience!
Cooking Note for Black Forest Cheesecake Recipe
When it comes to baking a Black Forest Cheesecake, a few key cooking notes can make all the difference. Understanding these tips will help you achieve the best results and ensure your cheesecake turns out perfectly every time.
First, always use room temperature ingredients. This includes the cream cheese, eggs, and sour cream. Room temperature ingredients blend more easily, resulting in a smoother filling. If you forget to take them out ahead of time, you can place the cream cheese in a microwave for about 10-15 seconds to soften it slightly.
Next, be mindful of your mixing technique. When adding the eggs, mix on low speed and only until just combined. Overmixing can introduce too much air into the batter, which may cause cracks during baking. A smooth, creamy texture is what you’re aiming for!
Another important note is to avoid opening the oven door while the cheesecake is baking. Sudden temperature changes can lead to cracks. Instead, use the oven light to check on your cheesecake. If you need to open the door, do so gently and quickly.
Cooling is also crucial. After baking, let the cheesecake cool gradually in the oven with the door slightly ajar. This helps prevent cracks from forming due to rapid temperature changes. Once it’s at room temperature, refrigerate it for at least four hours. Overnight chilling is even better, as it allows the flavors to meld beautifully.
Lastly, when serving, use a sharp knife dipped in hot water to slice the cheesecake. This will give you clean, beautiful slices. Wipe the knife clean between cuts for the best presentation.
By following these cooking notes, you’ll be well on your way to creating a stunning and delicious Black Forest Cheesecake that will impress your family and friends!
Serving Suggestions for Black Forest Cheesecake Recipe
Now that your Black Forest Cheesecake is beautifully prepared and chilled, it’s time to think about how to serve it. Presentation can elevate your dessert from delicious to extraordinary. Here are some delightful serving suggestions to make your cheesecake shine:
- Classic Slice: Serve a generous slice of cheesecake on a dessert plate. Add a dollop of whipped cream on the side for a creamy contrast. A sprinkle of chocolate shavings on top enhances the visual appeal.
- Berry Compote: Drizzle a homemade berry compote over each slice. This adds a fresh, fruity flavor that complements the rich cheesecake beautifully. You can make a quick compote by simmering fresh berries with a bit of sugar.
- Chocolate Sauce: For chocolate lovers, drizzle warm chocolate sauce over the cheesecake. This adds an extra layer of indulgence and makes for a decadent treat.
- Garnished Plates: Create a beautiful plate by placing a slice of cheesecake in the center and surrounding it with fresh cherries or berries. This not only looks stunning but also adds a burst of flavor with each bite.
- Mini Cheesecake Bites: If you’re hosting a party, consider cutting the cheesecake into small squares or using a cookie cutter to create fun shapes. Serve these mini bites on a platter for easy sharing.
- Pair with Coffee: Serve your cheesecake alongside a cup of freshly brewed coffee or espresso. The rich flavors of the cheesecake pair wonderfully with the boldness of coffee.
These serving suggestions will not only enhance the taste of your Black Forest Cheesecake but also make it a centerpiece at any gathering. Remember, the way you serve your dessert can create a memorable experience for your guests. Enjoy every delicious bite!
Tips for Perfecting Your Black Forest Cheesecake Recipe
Creating the perfect Black Forest Cheesecake is an art that combines technique, patience, and a little bit of love. To help you achieve cheesecake perfection, here are some valuable tips that will elevate your baking game and ensure your dessert turns out beautifully every time.
First and foremost, always measure your ingredients accurately. Baking is a science, and even a small deviation can affect the final product. Use measuring cups and spoons for dry ingredients and a liquid measuring cup for wet ingredients. This attention to detail will help you achieve the right texture and flavor.
Next, consider using a water bath while baking your cheesecake. This method involves placing your springform pan in a larger pan filled with hot water. The steam from the water bath helps maintain a consistent temperature, preventing cracks and ensuring even baking. If you choose this method, wrap the bottom of your springform pan in aluminum foil to prevent water from seeping in.
Another important tip is to avoid overbaking your cheesecake. Keep an eye on the baking time, and remember that the center should still be slightly jiggly when you take it out of the oven. It will continue to set as it cools. Overbaking can lead to a dry texture, which is not what you want for a creamy cheesecake.
When it comes to cooling, patience is key. After baking, let your cheesecake cool gradually in the oven with the door ajar. This gentle cooling process helps prevent cracks from forming due to sudden temperature changes. Once it reaches room temperature, refrigerate it for at least four hours, or overnight for the best results.
Lastly, don’t forget about presentation! A beautifully garnished cheesecake can make a lasting impression. Use fresh fruits, whipped cream, or chocolate shavings to decorate your cheesecake before serving. A little creativity goes a long way in making your dessert look as good as it tastes.
By following these tips, you’ll be well on your way to mastering the art of Black Forest Cheesecake. With practice and attention to detail, you’ll create a dessert that not only tastes amazing but also wows your guests!
Breakdown of Time for Black Forest Cheesecake Recipe
Understanding the time required for each step of the Black Forest Cheesecake Recipe is essential for planning your baking session. Here’s a detailed breakdown of the time you’ll need to create this delicious dessert.
Prep Time
30 minutes. This includes gathering your ingredients, preparing the crust, and mixing the cheesecake filling. Make sure to have everything ready before you start, as this will make the process smoother and more enjoyable.
Cooking Time
55-60 minutes. During this time, the cheesecake will bake in the oven. Remember, it’s important to keep an eye on it to ensure it doesn’t overbake. After baking, allow the cheesecake to cool in the oven for an additional 1 hour with the door slightly ajar. This gentle cooling helps prevent cracks.
Total Time
5 to 6 hours from start to finish. This includes the prep time, cooking time, and the minimum chilling time of 4 hours in the refrigerator. For the best flavor and texture, consider chilling the cheesecake overnight. This allows the flavors to meld beautifully, making your dessert even more delightful!
By understanding the time breakdown, you can better manage your schedule and ensure that your Black Forest Cheesecake turns out perfectly every time. Happy baking!
Nutritional Information for Black Forest Cheesecake Recipe
When indulging in a delicious dessert like Black Forest Cheesecake, it’s helpful to know the nutritional content. This way, you can enjoy your treat while being mindful of your dietary choices. Below, we break down the key nutritional information for a serving of this delightful cheesecake.
Calories
400 calories. This calorie count includes the rich ingredients like cream cheese, butter, and chocolate, which contribute to its creamy texture and decadent flavor. While it’s a treat, enjoying it in moderation is key to balancing your diet.
Protein
6 grams per slice. The protein primarily comes from the cream cheese and eggs used in the filling. Protein is essential for building and repairing tissues, making this dessert a slightly more nutritious option compared to other sweets.
Sodium
300 milligrams of sodium. This sodium content is mainly from the cream cheese and butter. While sodium is necessary for bodily functions, it’s important to keep an eye on your overall intake, especially if you’re watching your salt consumption.
Overall, while Black Forest Cheesecake is a delightful indulgence, being aware of its nutritional information can help you enjoy it responsibly. Remember, balance is key, and treating yourself occasionally is part of a healthy lifestyle!
FAQs about Black Forest Cheesecake Recipe
What is the origin of Black Forest Cheesecake?
The Black Forest Cheesecake has its roots in the famous Black Forest region of Germany, known for its lush landscapes and delicious cherries. The traditional Black Forest cake, or Schwarzwälder Kirschtorte, features layers of chocolate cake, cherries, and whipped cream. The cheesecake version combines these beloved flavors into a creamy dessert that pays homage to the original cake. This delightful twist has become popular worldwide, making it a favorite for many dessert lovers.
Can I make Black Forest Cheesecake ahead of time?
Absolutely! In fact, making Black Forest Cheesecake ahead of time is a great idea. This dessert benefits from chilling in the refrigerator for at least four hours, but overnight is even better. Preparing it a day in advance allows the flavors to meld beautifully, resulting in a richer taste. Just be sure to cover it well to keep it fresh and prevent any odors from the fridge from affecting its flavor.
How do I store leftover Black Forest Cheesecake?
To store leftover Black Forest Cheesecake, first, make sure it’s completely cooled and set. Cover the cheesecake with plastic wrap or aluminum foil to keep it fresh. You can also place it in an airtight container. Store it in the refrigerator, where it will stay good for about 3 to 5 days. If you want to keep it longer, consider freezing individual slices. Just wrap them tightly in plastic wrap and then place them in a freezer-safe container. Thaw in the refrigerator before serving.
Can I use a different type of chocolate for the crust?
Yes, you can definitely use a different type of chocolate for the crust! While the recipe calls for chocolate graham cracker crumbs, you can experiment with other options. For a richer flavor, try using dark chocolate graham crackers or even crushed chocolate cookies. If you prefer a less sweet crust, consider using regular graham crackers and adding cocoa powder to the mixture. This flexibility allows you to customize the crust to your taste!
Conclusion on Black Forest Cheesecake Recipe
In conclusion, the Black Forest Cheesecake Recipe is a delightful blend of flavors and textures that brings joy to any dessert table. With its rich chocolate crust, creamy filling, and sweet cherry topping, this cheesecake is sure to impress your family and friends. Whether you’re celebrating a special occasion or simply treating yourself, this dessert is a perfect choice.
Throughout this article, we’ve explored the ingredients, preparation steps, and various ways to customize your cheesecake. From alternative ingredients to creative serving styles, the possibilities are endless. Remember, baking is not just about following a recipe; it’s about expressing your creativity and making something delicious.
As you embark on your baking journey, keep in mind the tips and cooking notes shared here. They will help you achieve a perfect cheesecake every time. Don’t hesitate to experiment and make this recipe your own. After all, the best part of baking is sharing your creations with loved ones.
So, gather your ingredients, roll up your sleeves, and get ready to create a stunning Black Forest Cheesecake that will leave everyone wanting more. Enjoy the process, and most importantly, enjoy every delicious bite of your homemade masterpiece!