
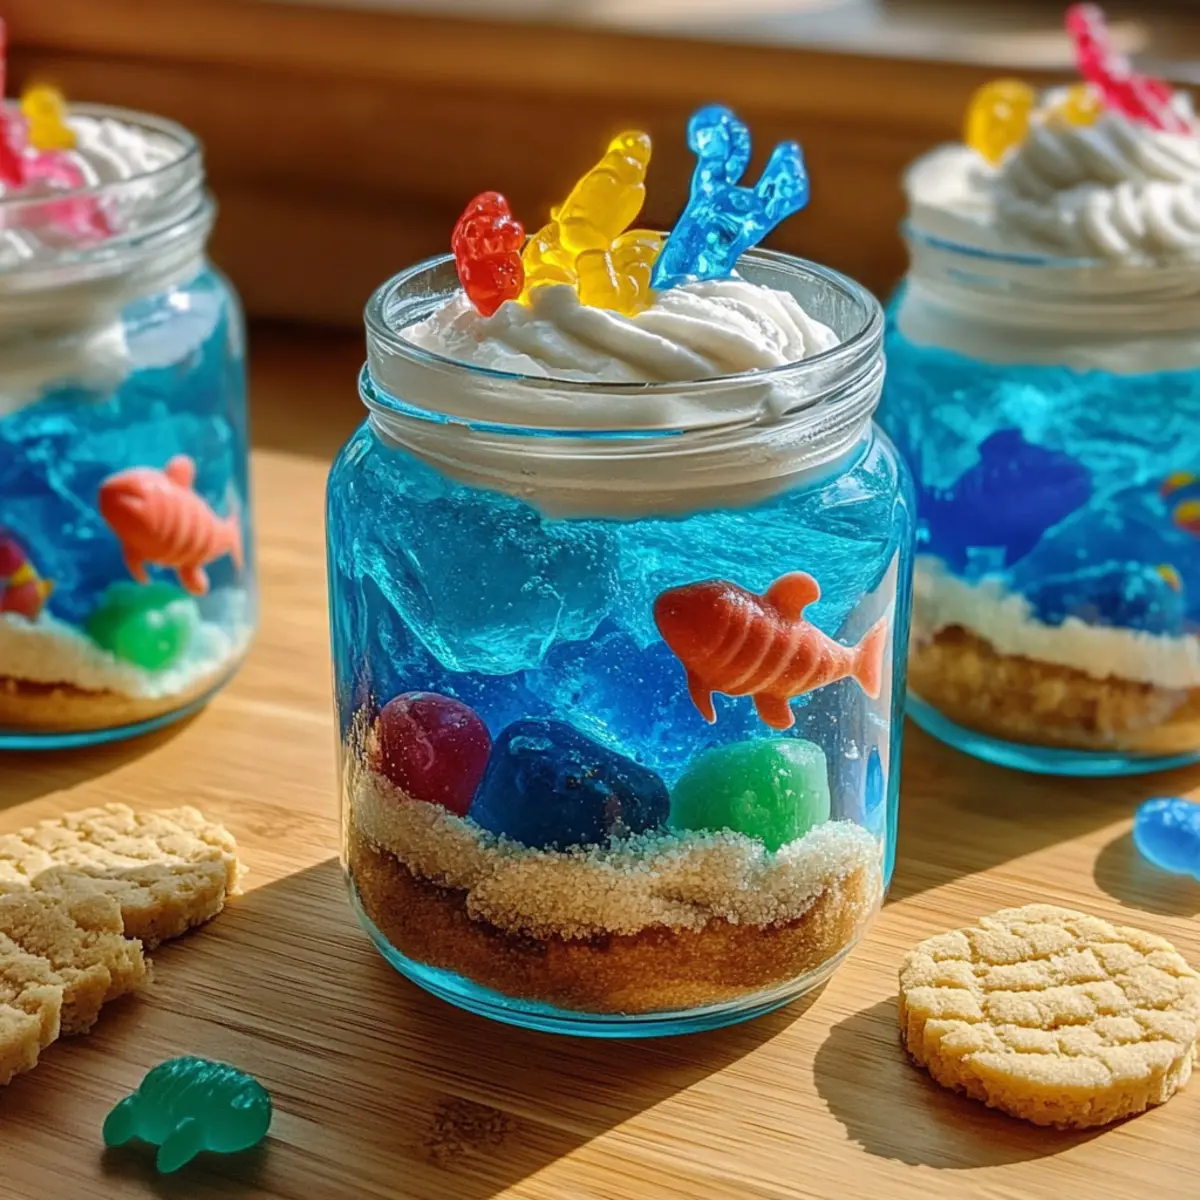
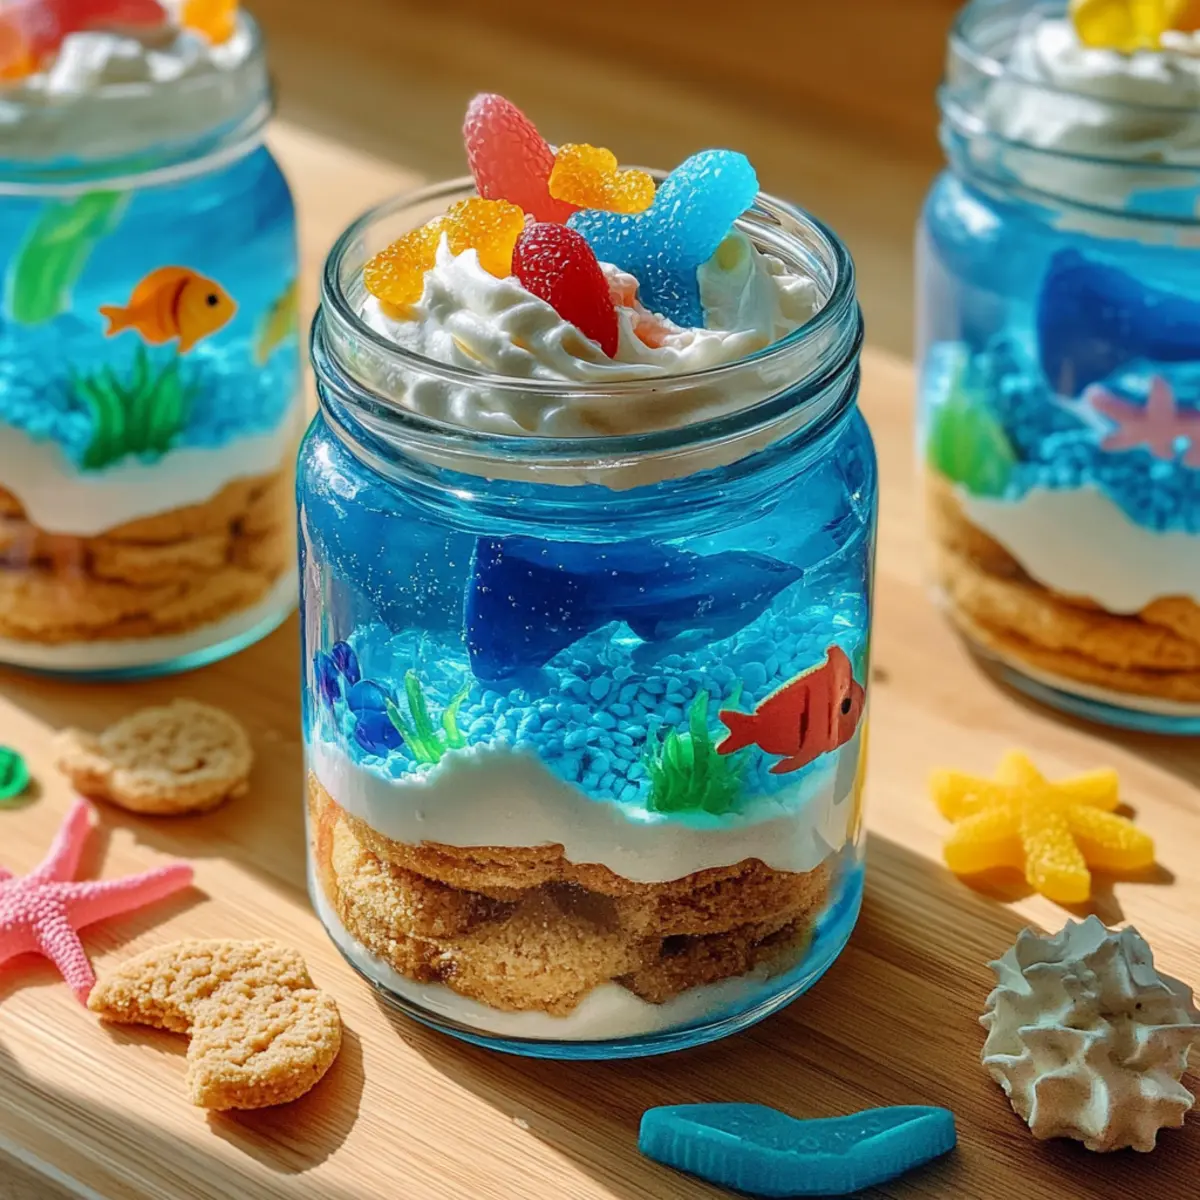
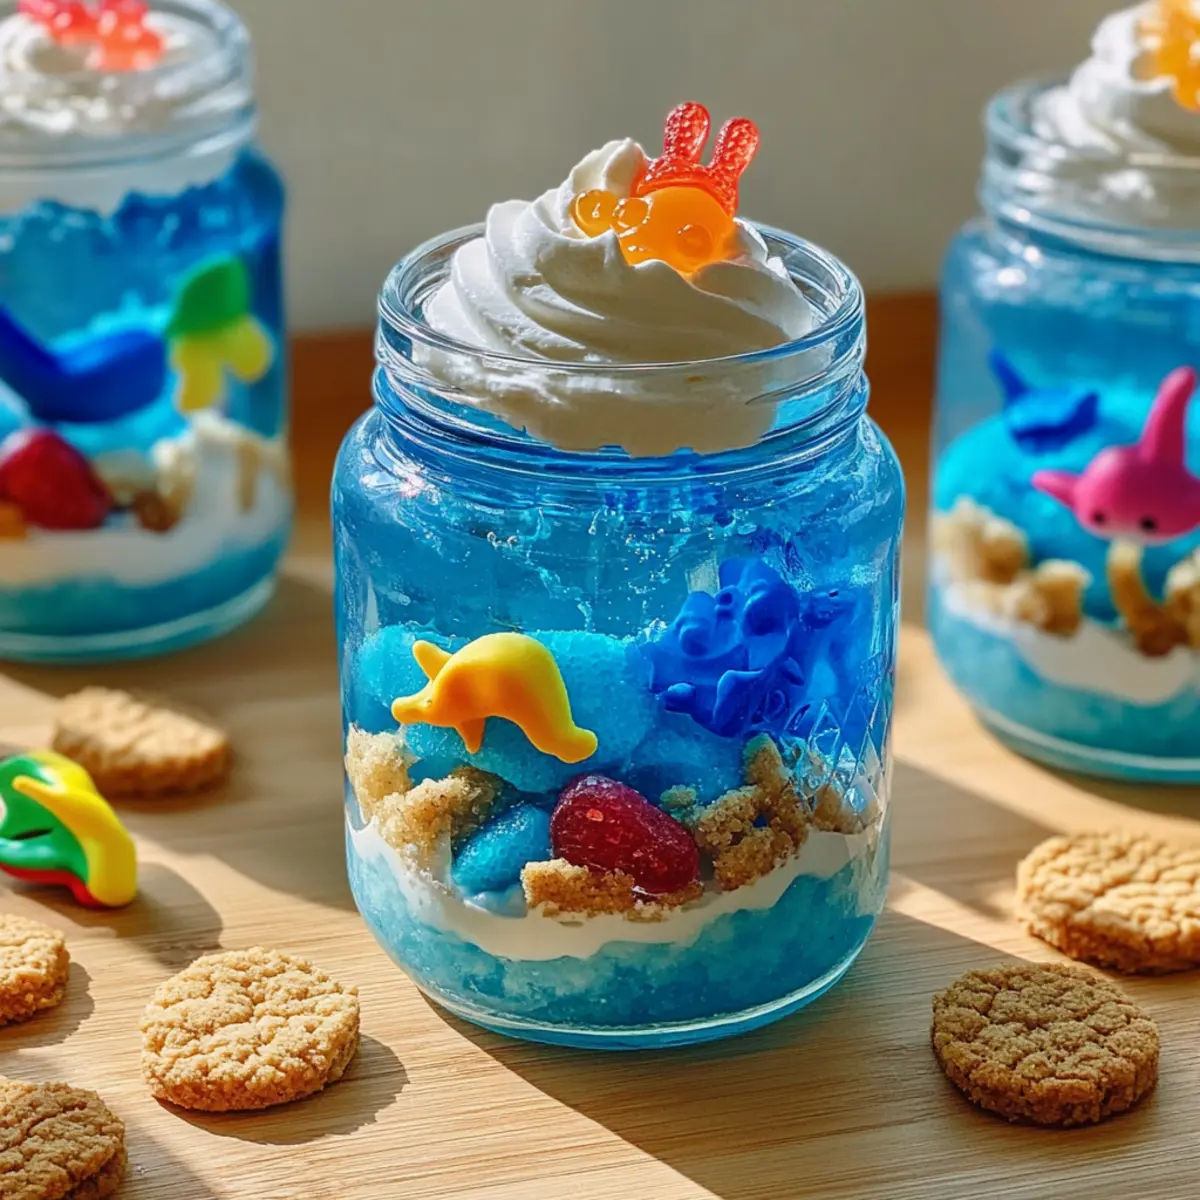
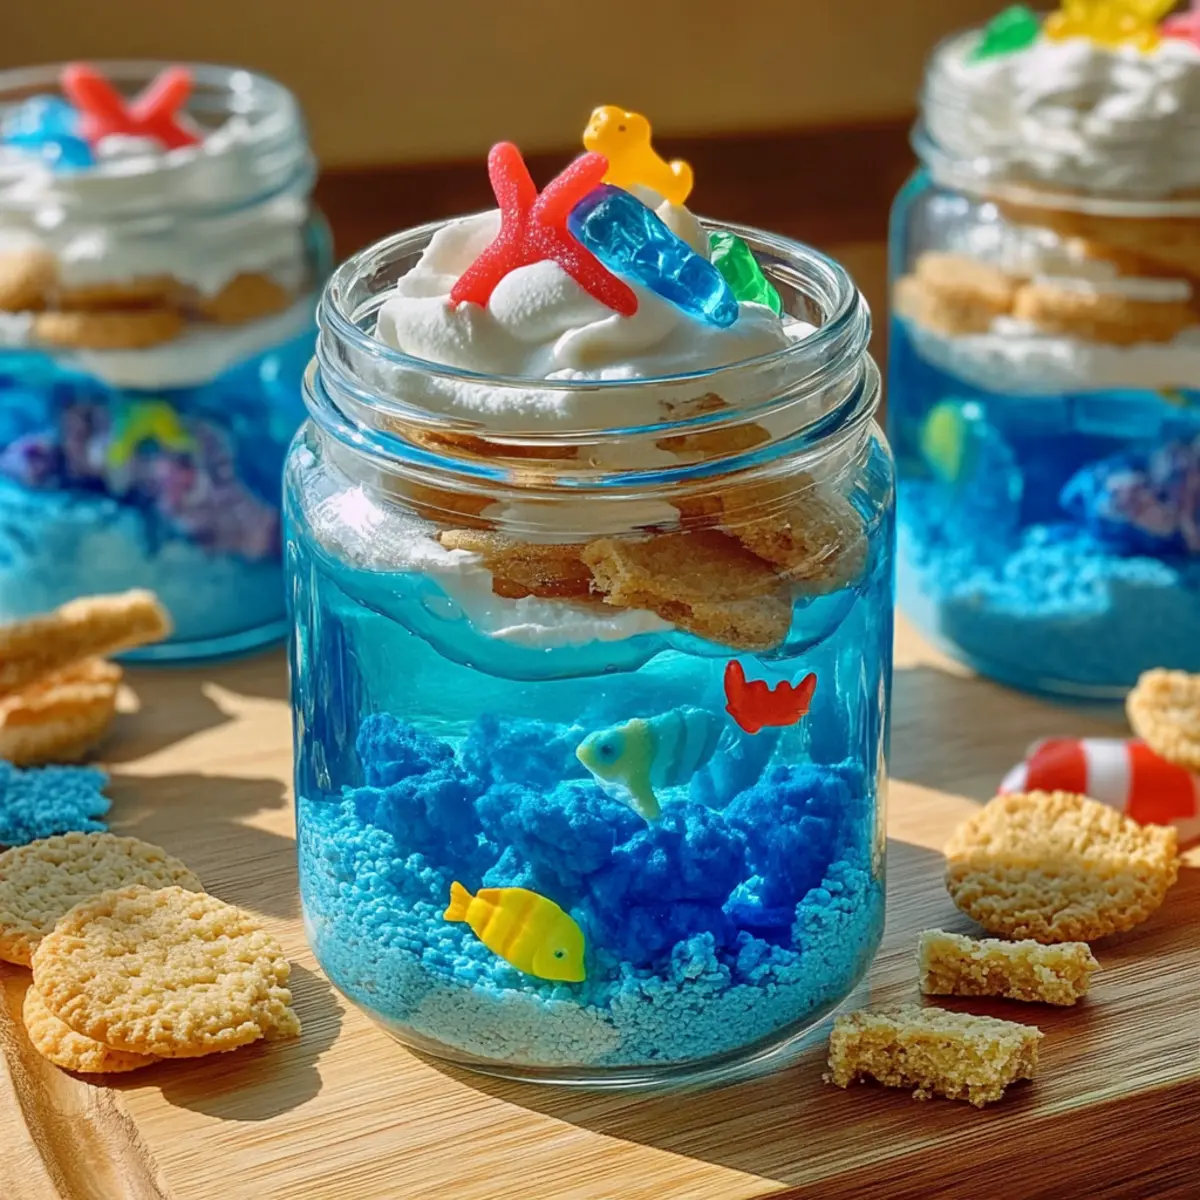
As I rummaged through my pantry one rainy afternoon, I stumbled upon a treasure trove of colorful ingredients that sparked a wave of inspiration. Suddenly, the idea for Edible Aquarium Terrariums washed over me like a tidal wave of creativity. This fun, no-bake dessert transports you and your loved ones to an underwater paradise with layers of vibrant blue gelatin, crunchy cookie “sand,” and playful gummy sea creatures. Not only is this recipe a visual feast, it’s also a terrific way to engage kids in the kitchen, making it perfect for family gatherings or educational projects. Imagine delighting your little ones as they construct their very own edible oceans—talk about a win-win! Ready to dive into this ocean of sweetness? Let’s make some edible magic together!
What makes this dessert so special?
Creative fun: Edible Aquarium Terrariums are not just a treat; they’re an interactive activity for the whole family. No-Bake Simplicity: No oven required, making it perfect for even the youngest chefs. Vivid Visions: The vibrant colors and playful shapes captivate both the eyes and taste buds. Customizable Delight: Swap out ingredients to suit your preferences—whether it’s gluten-free cookies or seasonal gummies, the possibilities are endless! Perfect for Gatherings: This dessert is sure to steal the show at any party, making it a crowd favorite. Dive deeper into creativity with more delicious recipes like Rainbow Fruit Cups or Layered Jello Cups that kids will love!
Edible Aquarium Terrariums Ingredients
Get ready to create this delightful treat!
For the Gelatin Layer
- Blue Gelatin – This serves as the ‘water,’ and ensure to use clear gelatin for the best visual effect. For variety, substitute with fruit-flavored gelatin!
For the Sand Layer
- Vanilla Cookies – These crumbled cookies create the ‘sand;’ you can swap them with graham crackers or even a gluten-free option if needed.
For the Decorative Elements
- Gummy Sea Creatures – A fun and playful component; feel free to substitute with fruit-shaped jellies or opt for sugar-free options to cater to dietary needs.
For the Topping
- Dairy Whipped Cream – This adds a creamy finish on top; for a dairy-free alternative, use coconut whipped topping or you can simply omit it.
Dive into this delightful recipe for Edible Aquarium Terrariums and let your creativity flow!
Step‑by‑Step Instructions for Edible Aquarium Terrariums
Step 1: Prepare the Gelatin
Begin by boiling 2 cups of water. Once boiling, remove it from heat and stir in one packet of blue gelatin until completely dissolved, creating a vibrant ‘water’ base. Allow the mixture to cool slightly, about 10 minutes, until it’s warm but not hot. This step ensures that your gelatin is clear and ready to layer without melting other ingredients.
Step 2: Layer the Gelatin in Jars
Once the gelatin is slightly set and has a jiggly texture, carefully pour about an inch of the mixture into clear jars or cups to form the first layer. This will act as the base of your Edible Aquarium Terrariums. Place the jars in the refrigerator for approximately 30 minutes, or until the gelatin firms up slightly, creating a stable base for the next layers.
Step 3: Add the Sand Layer
After the gelatin has set, remove the jars from the fridge. Crumble about two to three vanilla cookies into a fine texture to create the ‘sand’ layer. Gently sprinkle this cookie mixture on top of the slightly set gelatin, ensuring it covers the surface. Don’t press down too hard; you want the sand to remain fluffy and distinct to mimic a real aquarium bed.
Step 4: Decorate with Gummies
Next, it’s time to bring your Edible Aquarium Terrariums to life! Place gummy sea creatures gently into the jars, ensuring they sit atop the cookie sand but are partially submerged in the gelatin. This layering creates a fun visual; let your creativity shine by arranging the gummies in playful ways.
Step 5: Final Gelatin Layer
Pour additional blue gelatin over the cookies and gummies until they are completely submerged and your jars are nearly filled to the top. Be cautious when pouring to avoid disturbing the layers. Return the jars to the refrigerator for at least 4 hours, or until the gelatin is fully set and firm to the touch.
Step 6: Top with Whipped Cream
Just before serving your Edible Aquarium Terrariums, add a generous dollop of whipped cream on top to represent whimsical ocean waves. For a delightful twist, you can sprinkle a bit of crushed cookie on top of the whipped cream, mimicking frothy waves. Serve immediately, allowing everyone to dive into these delightful creations!
Make Ahead Options
These Edible Aquarium Terrariums are perfect for busy home cooks looking to save time during special occasions! You can assemble the gelatin and cookie layers up to 24 hours in advance. Simply prepare the blue gelatin and pour it into jars, allowing it to cool slightly before layering in crushed cookies. Refrigerate the jars until you’re ready to add the gummy sea creatures and top with additional gelatin. Doing this ensures the layers stay fresh and beautifully distinct. Just before serving, add the whipped cream for that whimsical ocean wave effect, keeping it light and fluffy. This way, your delicious creations will impress without the last-minute rush!
What to Serve with Edible Aquarium Terrariums
Dive into a delicious adventure with these playful treats, perfect for a full meal!
- Tropical Fruit Salad: A medley of fresh fruits like mango, pineapple, and kiwi enhances the fruity flavors, bringing a refreshing balance.
- Creamy Coconut Rice: This slightly sweet and creamy rice dish echoes the tropical theme and adds a comforting texture to your dessert party.
- Colorful Veggie Sticks with Hummus: Crunchy, colorful vegetables provide a healthy crunch, while hummus adds a savory dip that contrasts beautifully with the sweetness.
- Sparkling Lemonade: Bright and bubbly, this invigorating drink captures the zest of summer, tying together the festive oceanic vibe.
- Chocolate-Covered Pretzels: The sweet and salty combination offers a delightful crunch, perfectly balancing out the rich sweetness of the terrariums.
- Mini Cupcakes: These light and fluffy treats can come in fun flavors that mirror the playful nature of your aquarium dessert, making them a hit with kids!
- Berry-Infused Iced Tea: Lightly sweetened and served chilled, this refreshing beverage complements the flavors of the aquarium while adding a touch of elegance.
- Gummy Bear Parfaits: Layered with yogurt and granola, these mini parfaits keep with the fun theme and add some healthy elements alongside your dessert.
Expert Tips for Edible Aquarium Terrariums
- Cooling Gelatin: Allow gelatin to cool sufficiently before adding sugars to avoid them sinking; check for a jiggly consistency before layering.
- Layering Order: Always start with the gelatin layer first, ensuring it sets before adding cookies and gummies to maintain distinct layers in your Edible Aquarium Terrariums.
- Make-Ahead Magic: Prepare your terrariums a day in advance for freshness; just remember to add whipped cream just before serving!
- Gummy Choices: If using wooden skewers for presentation, ensure they don’t interfere with the gummies during layering for a balanced look.
- Creative Swaps: Feel free to experiment with different colors of gelatin for varied ocean depths or use fresh fruit for added flavor—and nutrition!
Edible Aquarium Terrariums Variations
Feel free to unleash your creativity and tailor these delightful Edible Aquarium Terrariums to your liking!
-
Fruit-Infused: Add small pieces of diced fruits like blueberries or kiwi between gelatin layers for a nutritious twist. They’ll provide bursts of flavor and vibrant color!
-
Colorful Gelatin: Swap out blue gelatin for green or purple to create a fantastical underwater scene, maybe even a magical swamp!
-
**Cookies: ** Use graham crackers for a more traditional beach look. The crumbly texture adds a fun crunch that kids will love.
-
Sugar-Free Option: Use sugar-free gelatin and sugar-free gummies. This way, everyone can celebrate the fun without compromising dietary choices.
-
Themed Gummies: Choose different gummy shapes based on seasons or holidays, like Halloween gummy worms or jelly fish, to keep it exciting all year round!
-
Chocolate Wave: Drizzle chocolate sauce over the whipped cream for an added layer of flavor, infusing a rich ocean taste into the sweet waves.
-
Coconut Whipped Cream: Make it dairy-free by using coconut whipped cream for a tropical flair that will complement the ocean theme beautifully.
-
Layered Jello Cups: Create a series of mini layered cups using different colored gelatins, making each bite a surprise with a mix of flavors.
Explore these variations as you embark on this whimsical adventure! For more fun treats, consider trying Layered Jello Cups that are as delightful to look at as they are to eat!
How to Store and Freeze Edible Aquarium Terrariums
Fridge: Keep assembled jars refrigerated for up to 2 days. This ensures optimal taste and texture before serving.
Sealing: Use airtight containers or cover jars with plastic wrap to prevent drying out and maintain freshness.
Make-Ahead Tips: You can prepare and layer the edible aquarium components a day in advance, but wait to add the whipped cream until just before serving.
Freezer: Freezing is not recommended for these Edible Aquarium Terrariums, as it may change the texture of the gelatin and whipped cream.
Edible Aquarium Terrariums Recipe FAQs
How do I select ripe ingredients for my Edible Aquarium Terrariums?
When choosing ingredients like gummy sea creatures or cookies, freshness is key! Look for gummies that are brightly colored and free from any dark spots or stickiness. For cookies, opt for those with good texture—no crushing or stale odors. If you’re substituting fruits for additional flavor or nutrition, pick ripe fruits that are sweet and firm to avoid any sogginess.
How should I store my Edible Aquarium Terrariums?
Absolutely! Keep your assembled jars refrigerated for up to 2 days to maintain the best quality and flavor. Seal them in airtight containers or cover them tightly with plastic wrap. This prevents drying out and ensures that your delightful dessert stays fresh for when you’re ready to serve it!
Can I freeze Edible Aquarium Terrariums?
I often get this question! Freezing is generally not recommended for Edible Aquarium Terrariums as the texture of the gelatin and whipped cream may change significantly when thawed, resulting in a less appealing dessert. If you have some components left over, you can freeze the gelatin in a container for up to 3 months but avoid freezing the layered jars entirely.
What are some common troubleshooting tips if my gelatin isn’t setting properly?
If your gelatin isn’t setting, it might be due to not enough boiling time during the dissolving process. Make sure to fully dissolve the gelatin in boiling water. Another tip: It’s best to cool the mixture properly (about 10 minutes) before adding to layers, as overheating can affect its setting ability. If you’re ever in doubt, you can always refer to the package instructions for precise ratios and guidance.
Are there any dietary considerations for my Edible Aquarium Terrariums?
Very! When making Edible Aquarium Terrariums, check whether the gelatin and gummies meet specific dietary needs. If you have guests who are vegan or have dietary restrictions, opt for plant-based gelatin alternatives and sugar-free or fruit-based gummies. Always double-check labels to cater to allergies, especially common ones like gluten or dairy!
Can I customize the elements in my Edible Aquarium Terrariums?
The more, the merrier! You can certainly mix and match ingredients to fit your family’s preferences. For example, use different flavored gelatins for a rainbow effect or swap in gluten-free cookies for those with dietary restrictions. Adding fresh fruits like blueberries or slices of kiwi can not only enhance flavor but also add a nutritious touch to your edible creations!
Create Edible Aquarium Terrariums for a Fun No-Bake Treat
Ingredients
Equipment
Method
- Begin by boiling 2 cups of water. Once boiling, remove it from heat and stir in one packet of blue gelatin until completely dissolved. Allow the mixture to cool slightly.
- Once the gelatin is slightly set, carefully pour about an inch of the mixture into clear jars or cups to form the first layer. Place the jars in the refrigerator for approximately 30 minutes.
- After the gelatin has set, crumble 2-3 vanilla cookies into a fine texture to create the 'sand' layer. Gently sprinkle this on top of the slightly set gelatin.
- Place gummy sea creatures gently into the jars, ensuring they sit atop the cookie sand but are partially submerged in the gelatin.
- Pour additional blue gelatin over the cookies and gummies until they are completely submerged. Return the jars to the refrigerator for at least 4 hours.
- Just before serving, add a generous dollop of whipped cream on top to represent whimsical ocean waves.