
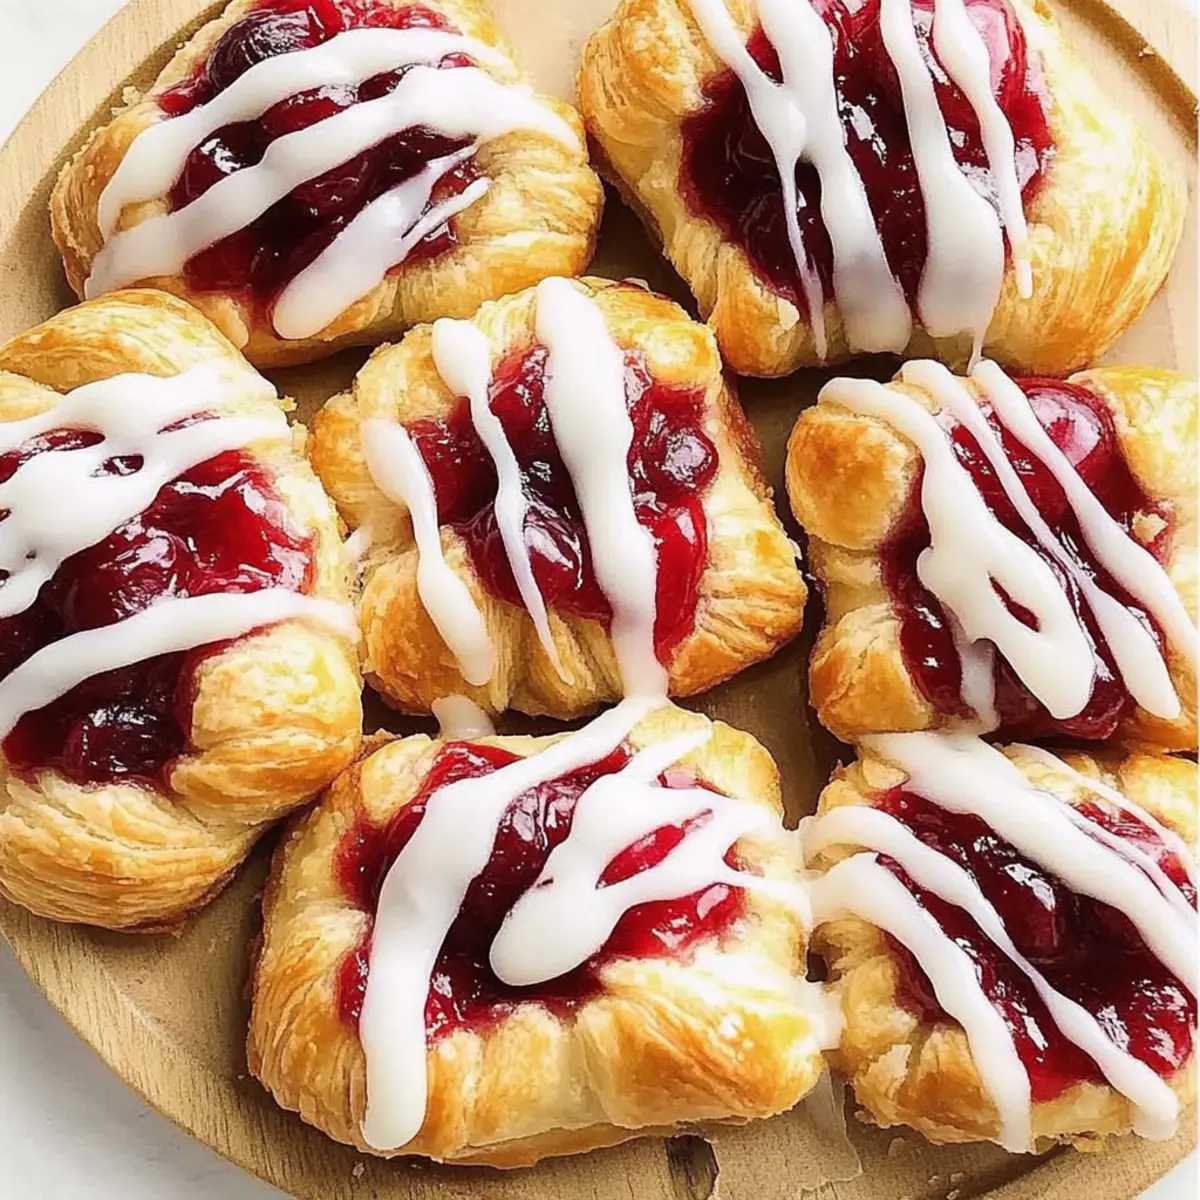
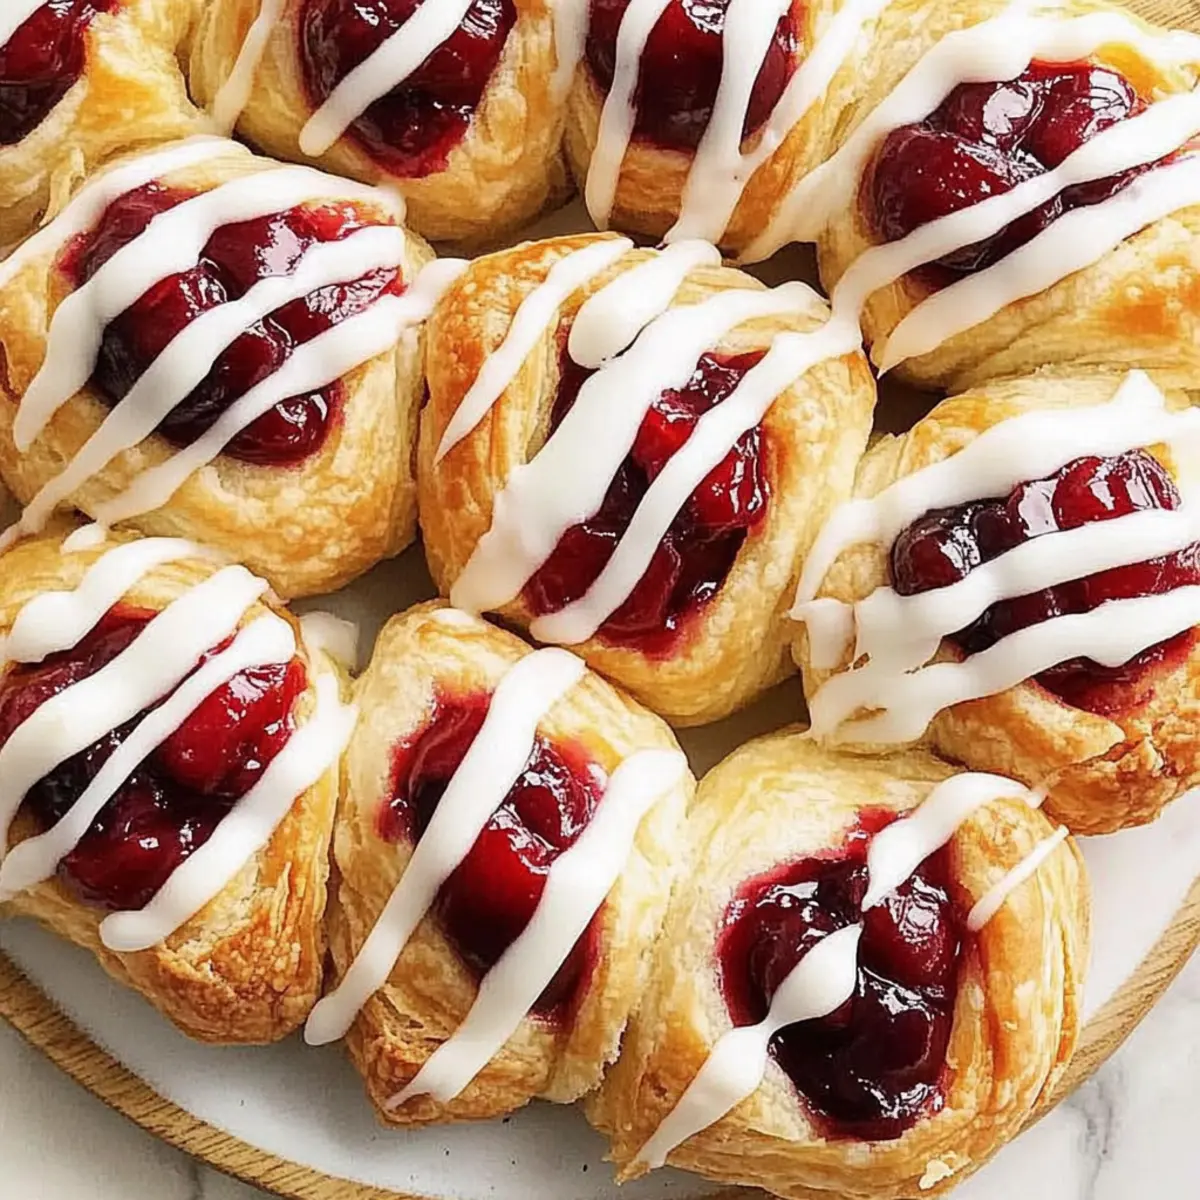
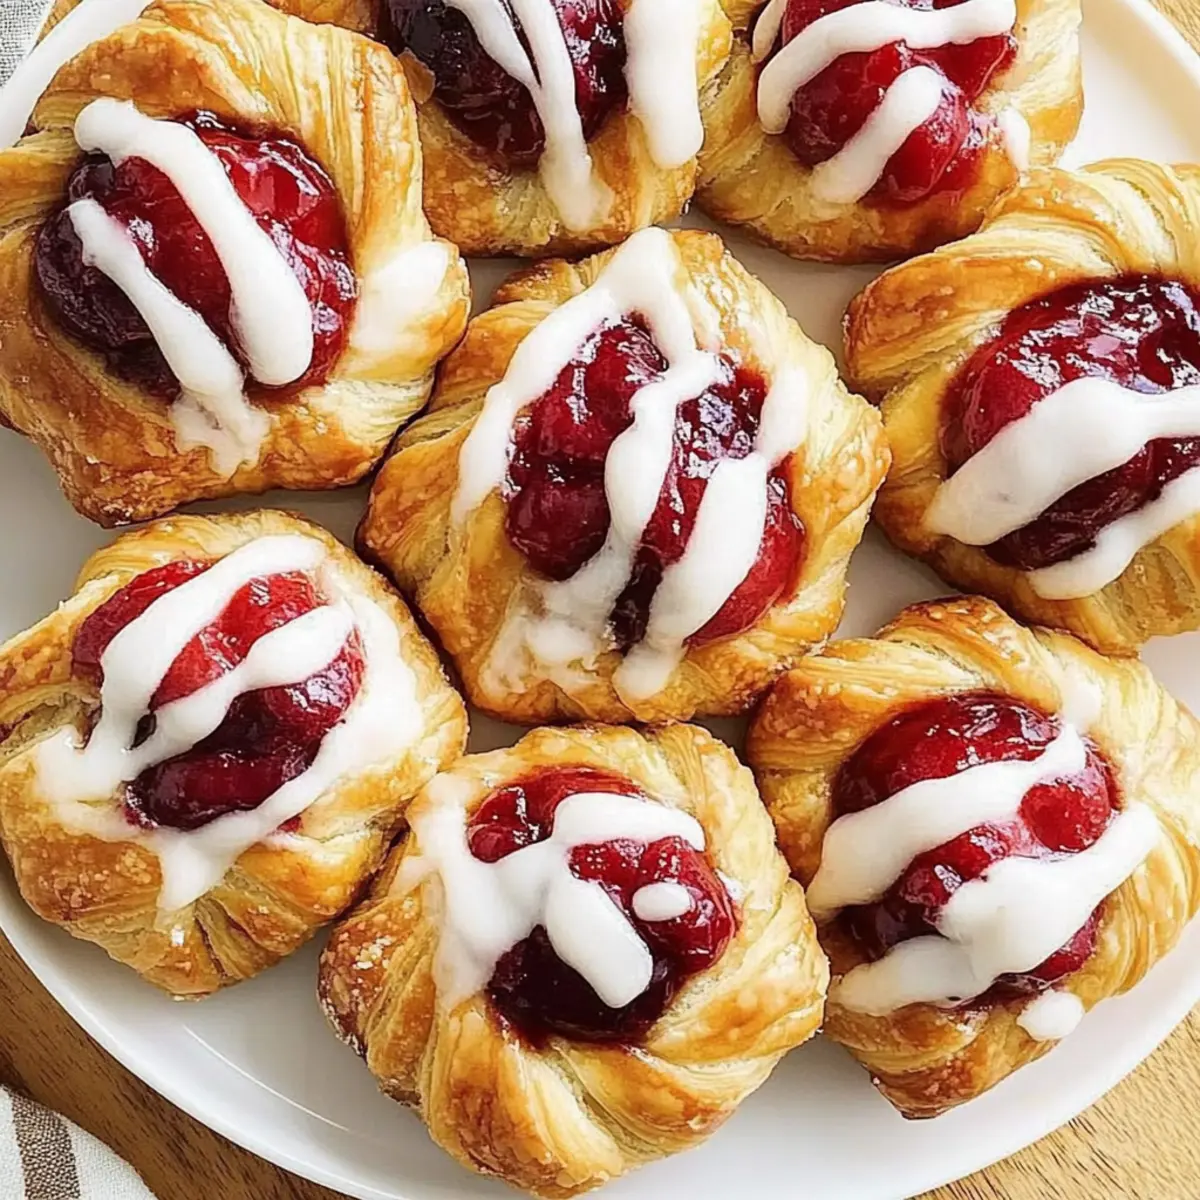
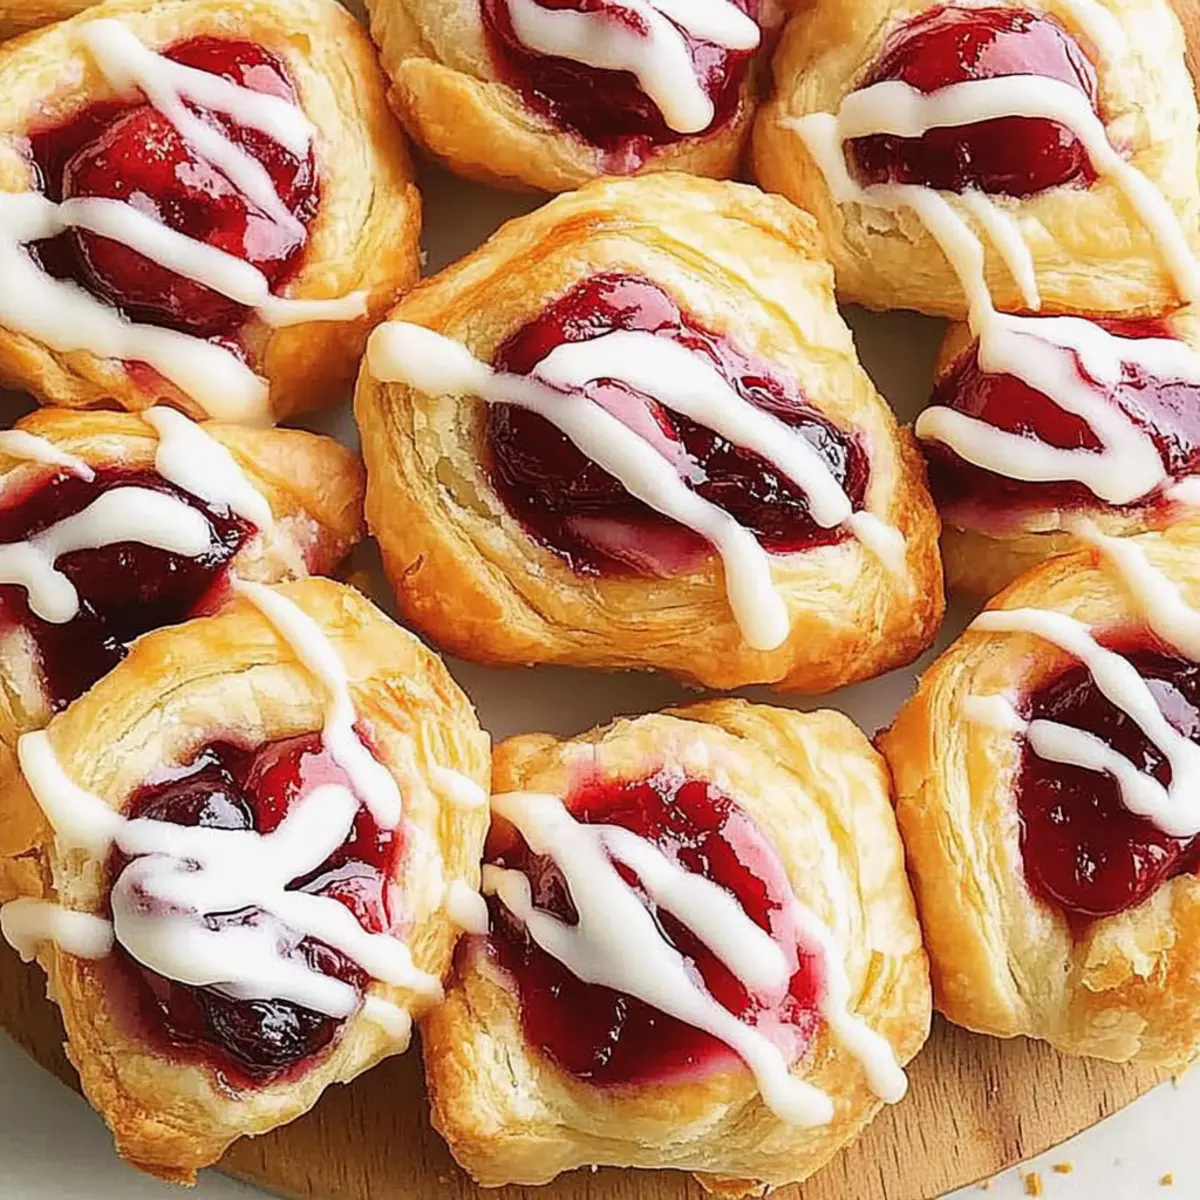
The aroma of freshly baked pastries wafted through my kitchen as I twisted together flaky strips of dough, each one steeped in memories of weekend mornings at my grandma’s house. While those carefree days may be gone, I can still recreate that bliss with my Homemade Cherry Danishes. These delightful treats boast a golden, flaky pastry enveloping a sweet cherry pie filling, making them the perfect accompaniment to your morning cup of coffee or a delectable afternoon snack. Plus, thanks to an overnight dough rise, this recipe combines convenience with that comforting homemade touch. Whether you’re baking for a brunch gathering or indulging in a sweet treat just for yourself, these Danishes will sweep you off your feet. Curious about how to bring this nostalgic delight to life? Let’s dive in!
Why Make Homemade Cherry Danishes?
Homemade Cherry Danishes are simply irresistible. Quick Preparation: With an overnight dough rise, you can whip these up without spending your whole morning in the kitchen. Delightful Flavor: The combination of sweet cherry filling and creamy icing creates a mouthwatering treat for any occasion. Versatile Filling Options: Swap cherries for blueberries or cream cheese for new flavor adventures! Golden and Flaky: Each bite offers a satisfying crunch, melting into soft sweetness. Plus, they make the perfect pair with a hot cup of coffee—just like at grandma’s! Enjoy the nostalgia and taste the magic in every bite!
Homemade Cherry Danishes Ingredients
For the Dough
- Active Dry Yeast – Ferments the dough, creating a light and airy structure; instant yeast can be used if preferred.
- Warm 2% Milk – Activates the yeast; ensure it’s between 110° to 115°F, or can be substituted with almond milk for a lactose-free option.
- All-Purpose Flour – Provides the bulk and structure of the pastry; consider using bread flour for a chewier texture.
- Sugar – Adds sweetness and aids in browning the pastry; you can swap in brown sugar for a richer flavor.
- Salt – Balances sweetness and enhances flavor; don’t skip this ingredient for a better overall taste.
- Cold Butter – Essential for creating flakiness in the dough; margarine is an option, but it may alter flavor.
- Warm Half-and-Half Cream – Enriches the dough for a tender pastry; whole milk or a non-dairy option can be used instead.
- Egg Yolks – Add richness and color; vital for texture and can be replaced with flax eggs for a vegan alternative.
For the Filling
- Cherry Pie Filling – The star ingredient providing sweet cherry goodness; feel free to substitute with any fruit pie filling you love.
For the Icing
- Confectioners’ Sugar – Adds sweetness and texture to the icing; for a lower-calorie option, powdered monk fruit sweetener works great.
- Butter (for icing) – Adds richness and ensures a smooth consistency; vegan butter can be used if desired.
- Vanilla Extract – Enhances flavor in the icing; almond extract can be a delightful alternative if you want to mix it up.
- Dash of Salt – Balances and enhances the sweetness in the icing; a necessary component for overall flavor harmony.
Embrace the joy of making Homemade Cherry Danishes and let your kitchen fill with the warmth of sweet nostalgia!
Step‑by‑Step Instructions for Homemade Cherry Danishes
Step 1: Dough Preparation
In a mixing bowl, dissolve active dry yeast in warm milk (between 110° to 115°F) for about 5 minutes, until frothy. Meanwhile, in a larger bowl, combine all-purpose flour, sugar, and salt; cut in cold butter until the mixture resembles coarse crumbs. Stir in the yeast mixture, warm half-and-half, and egg yolks until a sticky dough forms. Cover and refrigerate overnight.
Step 2: Shaping Pastries
The next day, punch down the chilled dough and divide it into four equal portions. Roll each portion into a rectangle about 18×4 inches in size. Cut each rectangle into 1-inch strips, then twist two strips together, shaping them into a ring. Place each ring on a greased baking sheet, leaving space for rising. Cover and allow to rise in a warm place for approximately 45 minutes, or until doubled in size.
Step 3: Baking
Preheat your oven to 350°F. After the pastries have risen, make an indentation in the center of each twisted Danish. Generously fill the indentation with cherry pie filling. Place the baking sheet in the oven and bake for 14-16 minutes, or until the Danishes are beautifully golden brown. Once baked, transfer them to wire racks to cool.
Step 4: Icing Preparation
While the Danishes cool, prepare the creamy icing by mixing confectioners’ sugar, softened butter, vanilla extract, a dash of salt, and warm half-and-half in a bowl. Whisk until the mixture is smooth and all ingredients are well combined. The icing should be thick yet pourable; add more half-and-half if necessary to achieve your desired consistency.
Step 5: Icing the Danishes
Once the Homemade Cherry Danishes are completely cool, take your icing mixture and drizzle it generously over each pastry. The icing will not only enhance the visual appeal but also add a luscious sweetness to the flaky pastries. Serve warm or at room temperature, and enjoy your delightful homemade treats!
Expert Tips for Homemade Cherry Danishes
-
Yeast Activation: Ensure the milk temperature is warm (110° to 115°F) to activate your yeast properly; too hot will kill it, stunting your dough rise.
-
Dough Development: Allowing the dough to refrigerate overnight not only enhances flavor but also makes it easier to handle when shaping your Danishes.
-
Rising Room: Create a warm, draft-free space for the pastries to rise. A cozy spot, such as near a preheated oven, helps achieve that perfect puffiness!
-
Filling Control: Avoid overfilling your Danishes with cherry pie filling; this keeps them from spilling during baking and maintains their beautiful shape.
-
Freshness Revival: To enjoy leftovers, gently reheat them in the oven for a few minutes. This restores the flaky texture of your Homemade Cherry Danishes, making them taste freshly baked again!
Homemade Cherry Danishes Variations
Feel free to get creative with your Homemade Cherry Danishes, customizing them to suit your taste buds and dietary preferences!
- Fruit Filling Swap: Replace cherry pie filling with blueberry, raspberry, or even peach for a delicious twist.
- Dairy-Free Dough: Use almond or oat milk instead of regular milk and vegan butter for a dairy-free treat.
- Cheesecake Style: Add a cream cheese filling before the cherry for a luscious, rich flavor that will delight every bite.
- Add Spice: Sprinkle some cinnamon or nutmeg in the dough for a warm, aromatic flavor that elevates your pastry experience.
- Whole Grain Boost: For added nutrition, use whole wheat flour to create a heartier dough without losing the flaky texture.
- Nutty Addition: Fold in some chopped pecans or walnuts for an extra crunch and depth of flavor in every delightful mouthful.
- Sweetener Choices: Try using honey or maple syrup as a natural sweetener alternative in the dough or icing.
- Bold Icing Flavor: Mix in a splash of almond extract or lemon juice to the icing for a refreshing zing that complements the sweetness perfectly.
After experimenting, you might find yourself loving the flavor of these Danish pastries paired with a warm cup of coffee or as a sweet finish to a delightful brunch. If you want to keep your baking inspiration flowing, check out these Samoa Cookies Homemade or try making Cherry Peanut Butter treats for a unique spin! Enjoy your culinary adventures in the kitchen!
What to Serve with Homemade Cherry Danishes
Indulging in golden, flaky pastries is only the beginning of your delightful culinary journey!
-
Rich Coffee: A freshly brewed cup complements the sweet cherry filling, heightening both flavors. The warmth of the coffee makes each bite even more satisfying.
-
Fresh Fruit Salad: Bursting with juicy berries and citrus, a light fruit salad offers a refreshing contrast to the Danishes’ sweetness. Vibrant colors add a beautiful touch to your table too.
-
Creamy Yogurt: A dollop of yogurt, whether plain or flavored, balances the richness of the icing while adding a creamy texture to each bite. It’s the perfect pairing for a brunch spread.
-
Herbal Tea: The earthy notes of chamomile or mint tea provide a soothing contrast, making it an ideal drink for an afternoon treat. The warmth enhances the pastries’ comforting flavors.
-
Scrambled Eggs: A side of fluffy, buttery scrambled eggs rounds out a breakfast spread beautifully, offering savory satisfaction alongside the pastries’ sweetness. It’s a classic combination!
-
Vanilla Ice Cream: For a dessert twist, serve a scoop of vanilla ice cream alongside warm Danishes. The melt-in-your-mouth experience is heavenly, marrying crisp pastry with creamy goodness.
-
Chocolate Drizzle: Enhance the icing by drizzling melted chocolate over the Danishes. The rich cocoa flavor adds depth and indulgence. Every bite becomes a luscious experience to savor!
-
Sparkling Water with Lemon: A refreshing glass of sparkling water with a slice of lemon cleanses the palate, making it a perfect drink to enjoy alongside these delightful pastries.
-
Almond Milk: For a dairy-free friendly option, serve chilled almond milk. Its subtle nuttiness complements the sweet cherry filling perfectly, keeping every bite light and enjoyable.
Each of these pairings not only elevates the Homemade Cherry Danishes experience but creates a heartwarming setting where cherished moments can be shared!
Make Ahead Options
These Homemade Cherry Danishes are a fantastic choice for busy home cooks looking to save time! You can prepare the dough up to 24 hours in advance by following the dough preparation steps and refrigerating it overnight. Additionally, you can fully assemble the pastries (twisting the strips and adding cherry filling) and keep them covered in the fridge for up to 3 days. To maintain their quality, ensure you place them in an airtight container or cover them tightly with plastic wrap. When you’re ready to bake, simply allow the Danishes to rise in a warm area for about 45 minutes, then pop them in the oven. This method ensures you’ll enjoy fluffy, fresh-baked Homemade Cherry Danishes with little effort when the craving strikes!
Storage Tips for Homemade Cherry Danishes
Room Temperature: Store unfrosted Danishes in an airtight container at room temperature for up to 3 days to keep them fresh and delicious.
Fridge: If you prefer, you can keep them in the refrigerator for about 4 days, but this might affect the flaky texture.
Freezer: For longer storage, freeze unfrosted Danishes in a tightly wrapped container or freezer bag for up to 3 months. Frost after thawing to preserve the creamy icing texture.
Reheating: To enjoy leftover Homemade Cherry Danishes, reheat them in a preheated oven at 350°F for 5-7 minutes for optimal freshness and flaky goodness.
Homemade Cherry Danishes Recipe FAQs
How do I select ripe cherries or cherry pie filling?
Absolutely! When choosing cherries, look for fruit that is firm and bright red, without any dark spots. If you’re using cherry pie filling, opt for brands that use real fruit and have no artificial flavors or preservatives for the best flavor.
What is the best way to store Homemade Cherry Danishes?
I recommend storing unfrosted Danishes in an airtight container at room temperature for up to 3 days. If you need them to last longer, keep them in the fridge for about 4 days, but this may affect their flakiness. For optimal freshness, freeze them unfrosted in a tightly wrapped container or freezer bag for up to 3 months.
Can I freeze my Homemade Cherry Danishes? How?
Certainly! To freeze, let your Danishes cool completely after baking. Place them in a single layer on a baking sheet and freeze for about an hour until solid. Then, transfer them to a tightly wrapped container or freezer bag. This helps prevent them from sticking together. For best results, frost the Danishes after thawing to maintain the creamy icing texture!
What should I do if my dough doesn’t rise properly?
If your dough hasn’t risen, it could be due to the yeast being inactive. Ensure your milk is warm (110° to 115°F) when activating the yeast; if it’s too hot, it can kill the yeast. If your kitchen is cold, try placing the dough in a warm spot, such as near a preheated oven or in a turned-off microwave with a cup of hot water—this creates a cozy environment that encourages rising.
Are Homemade Cherry Danishes safe for pets or anyone with allergies?
While cherries themselves can be safe for many pets in small amounts, the pastry contains ingredients like sugar and butter, which are not ideal for them. If you’re serving anyone with allergies, check all ingredient labels for potential allergens, especially for items like milk, eggs, and gluten in the pastry dough.
How can I adjust the recipe for dietary restrictions?
Very! For a dairy-free version, substitute warm half-and-half with almond milk or another non-dairy milk, and replace butter with a vegan butter alternative. To make them vegan, swap the egg yolks with flax eggs (1 tablespoon flaxseed meal mixed with 2.5 tablespoons water equals 1 egg) and use a vegan-friendly icing option, ensuring all ingredients are free from animal products.
Homemade Cherry Danishes That Melt in Your Mouth
Ingredients
Equipment
Method
- In a mixing bowl, dissolve active dry yeast in warm milk for about 5 minutes, until frothy.
- In a larger bowl, combine all-purpose flour, sugar, and salt; cut in cold butter until mixture resembles coarse crumbs.
- Stir in the yeast mixture, warm half-and-half, and egg yolks until a sticky dough forms. Cover and refrigerate overnight.
- Punch down the chilled dough and divide it into four equal portions. Roll each portion into an 18x4 inch rectangle.
- Cut each rectangle into 1-inch strips, then twist two strips together, shaping them into a ring. Place each ring on a greased baking sheet.
- Cover and allow to rise in a warm place for approximately 45 minutes, or until doubled in size.
- Preheat your oven to 350°F. After the pastries rise, make an indentation in each twisted Danish and fill with cherry pie filling.
- Bake for 14-16 minutes, or until the Danishes are golden brown. Transfer them to wire racks to cool.
- Prepare the creamy icing by mixing confectioners’ sugar, softened butter, vanilla extract, salt, and warm half-and-half.
- Drizzle the icing generously over each pastry once cooled. Serve warm or at room temperature.