
As the first eerie shadows of Halloween creep in, my kitchen transforms into a whimsical pumpkin patch, filled with the delightful scents of baking and creativity. You see, these Halloween Mini Pizzas are not just a treat; they’re an invitation for family and friends to unleash their inner artists. Each bite-sized wonder is a canvas ready for playful toppings—think spiders made from olives and jack-o’-lantern grins crafted from bell peppers! Not only are they incredibly quick to assemble, but these customizable pizzas are perfect for any gathering, ensuring everyone, even the pickiest eaters, is catered to. So grab your loved ones and let’s whip up some Spooktacular Halloween Mini Pizzas that will dazzle your dinner table and make this Halloween both memorable and mouthwatering. Who’s ready to get creative?
Why Are Halloween Mini Pizzas So Fun?
Creativity at Play: With colorful toppings, each mini pizza becomes a fun canvas for your Halloween imagination.
Quick Assembly: Ready in under 15 minutes, these pizzas make preparing spooky snacks a breeze.
Customizable Delight: Cater to every taste—whether you’re vegan, gluten-free, or a meat lover, there’s an option for everyone!
Kid-Friendly Fun: Letting children decorate their pizzas fosters creativity and makes family gatherings extra special.
Perfect for Any Event: From Halloween parties to casual movie nights, these mini pizzas are always a hit!
Elevate your Halloween snacks by pairing them with other treats like Mini Pecan Pie for an unforgettable feast.
Halloween Mini Pizzas Ingredients
For the Pizza Base
- Mini Pizza Crusts – These personal-size bases make it easy for everyone to enjoy their own spooky creation; gluten-free options are available!
- Pizza Sauce – 3/4 cup adds delicious flavor and moisture; any marinara will do.
For the Toppings
- Mozzarella Cheese – 1 cup, shredded, creates a gooey layer that melts perfectly for your Halloween mini pizzas.
- Black Olives – 1/4 cup, sliced, are used to craft fun spider decorations.
- Mini Pepperoni – 1/4 cup, optional, adds an extra savory kick to your pizzas.
- Orange & Green Bell Peppers – Use thin strips for creating adorable jack-o’-lantern faces.
- Part-Skim String Cheese – 4 sticks, pulled apart, make delightful mummy wrappings.
For the Garnish
- Fresh Basil – 2 tbsp, chiffonade, adds a fresh touch just before serving.
- Olive Oil Spray – A quick mist on the baking sheet prevents sticking and ensures a perfectly cooked crust.
Step‑by‑Step Instructions for Halloween Mini Pizzas
Step 1: Preheat Your Oven
Begin by preheating your oven to 425°F (220°C). While the oven warms up, lightly mist a baking sheet with olive oil spray to prevent sticking. This ensures that your Halloween mini pizzas will bake evenly and come off the sheet easily once they’re perfectly golden and bubbly.
Step 2: Spread the Pizza Sauce
Once your baking sheet is ready, take your mini pizza crusts and spread 1 to 2 tablespoons of pizza sauce onto each one, leaving a small border around the edges. The sauce adds delightful flavor and moisture, ensuring your pizzas are both tasty and satisfying.
Step 3: Add the Cheese
Next, it’s time to sprinkle shredded mozzarella cheese generously over half of the mini pizzas. For the other half, grab your part-skim string cheese and pull it apart to make mummy wrappings. Layer this cheese across the top to create adorable, cheesy faces that will ooze charm as they bake!
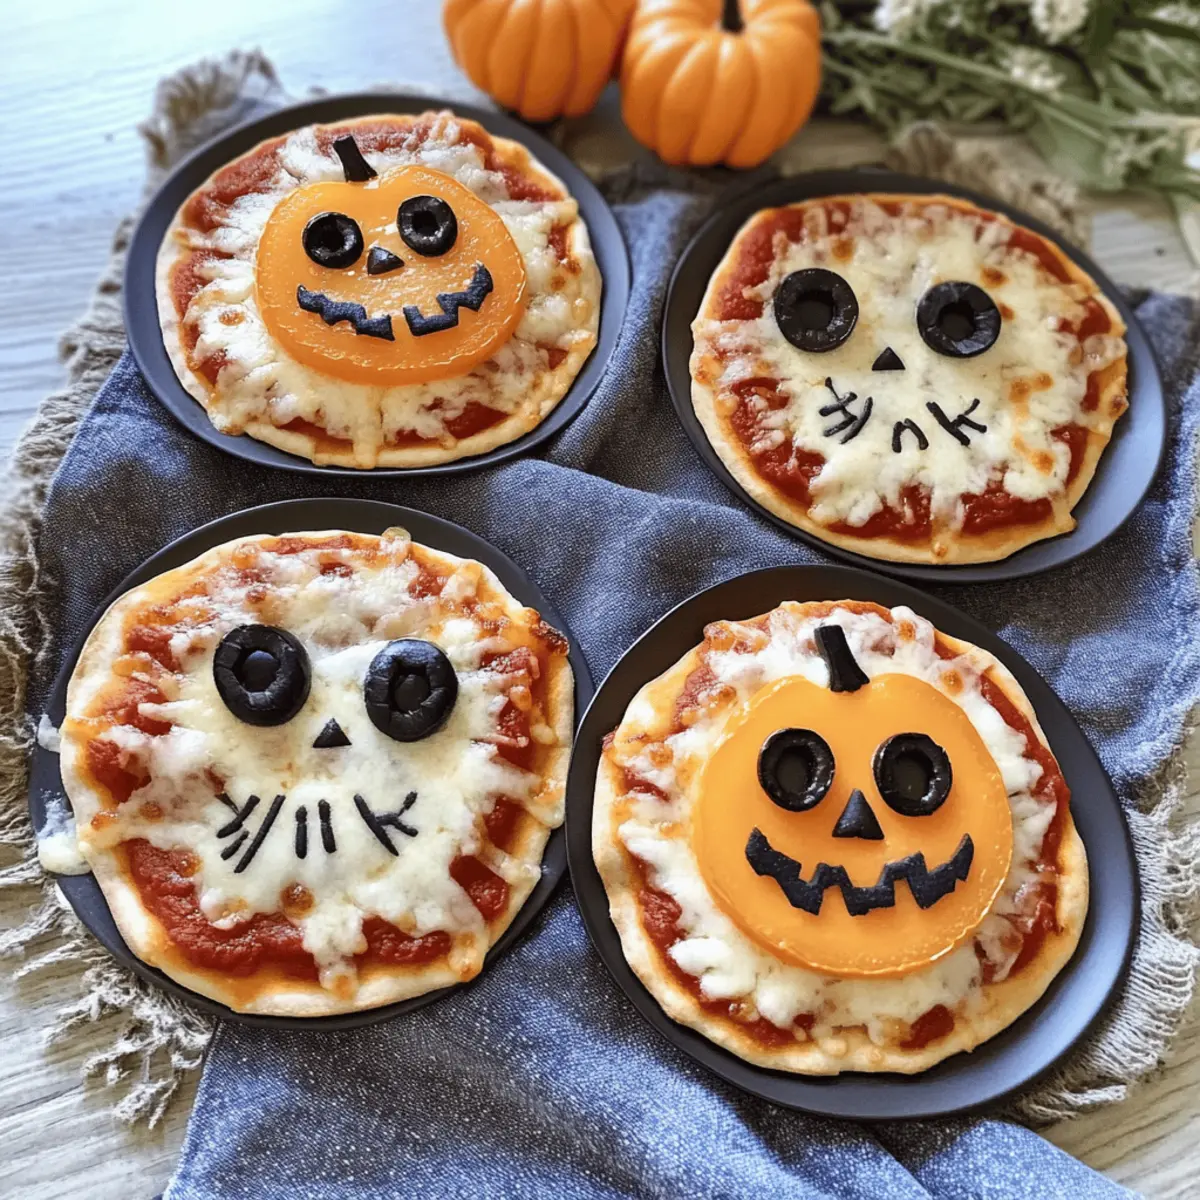
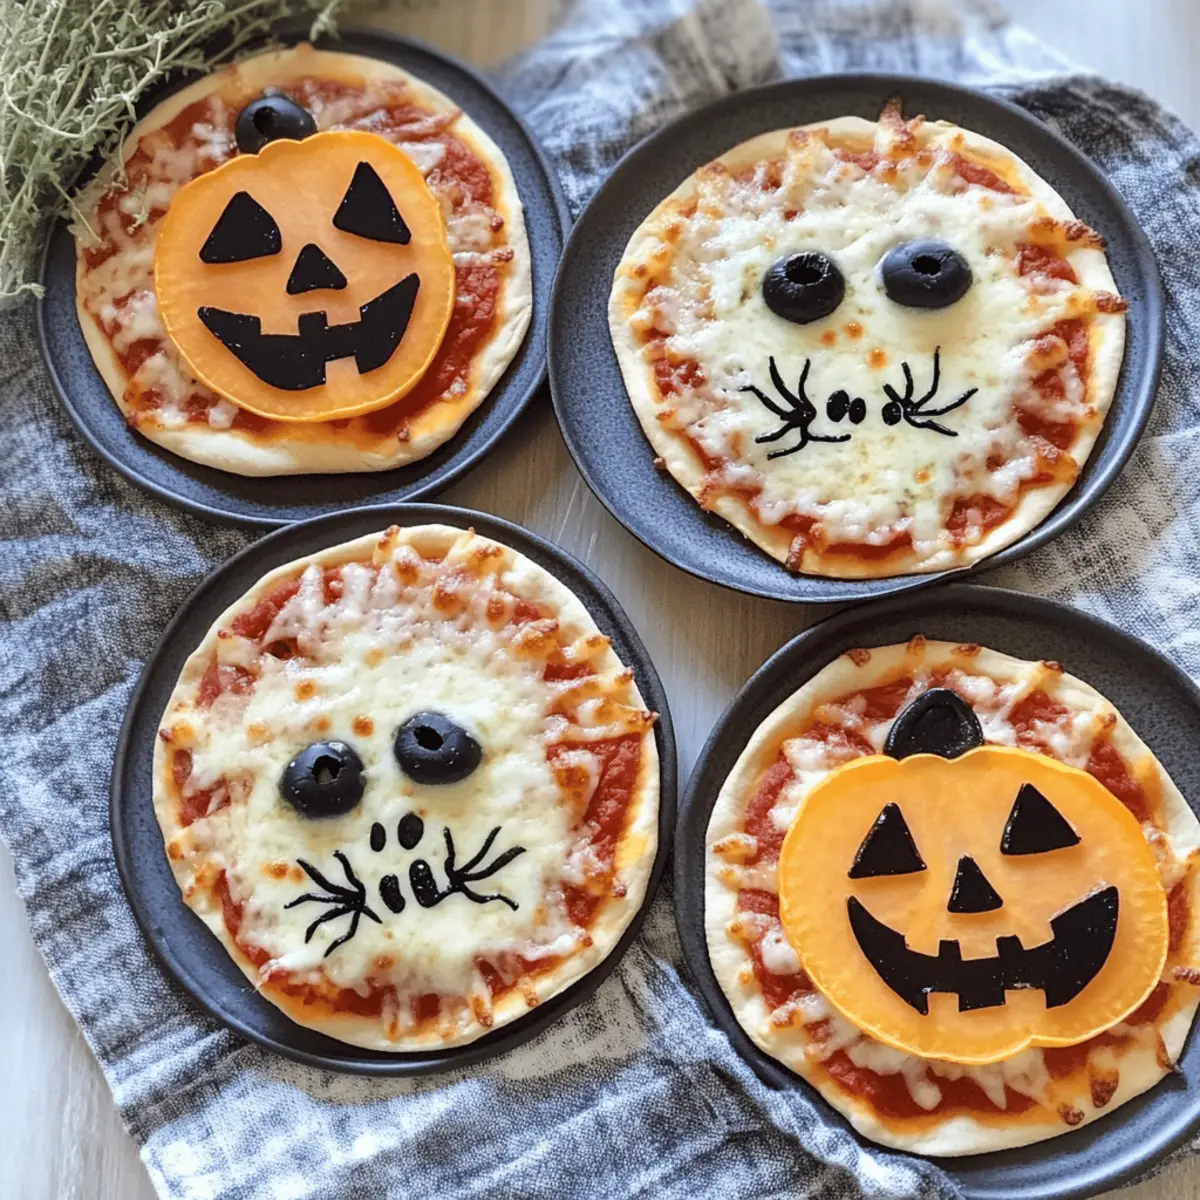
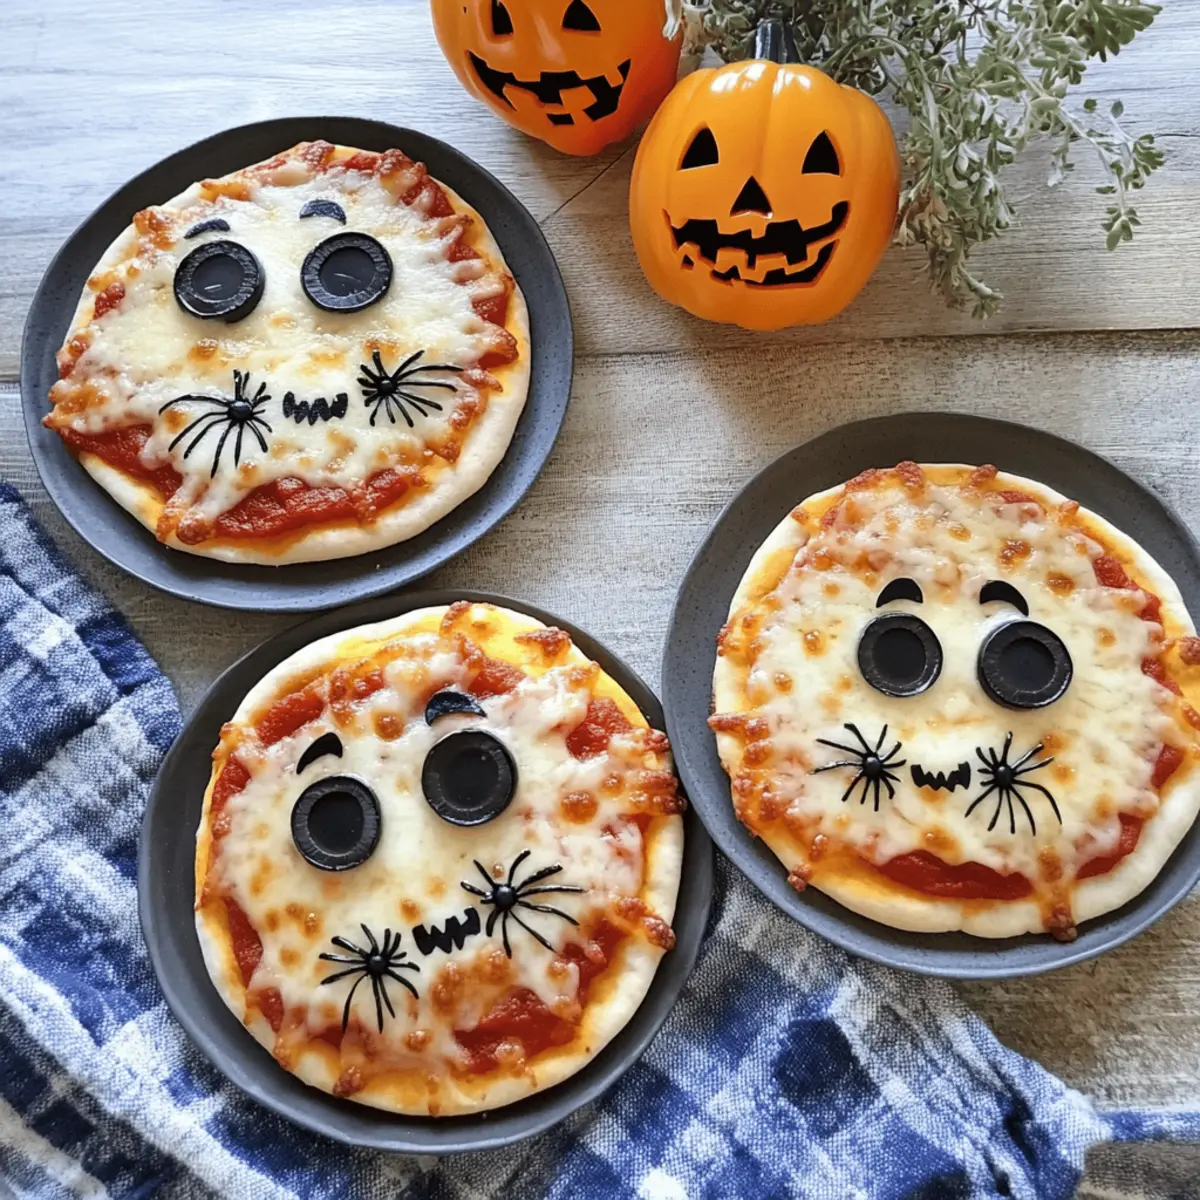
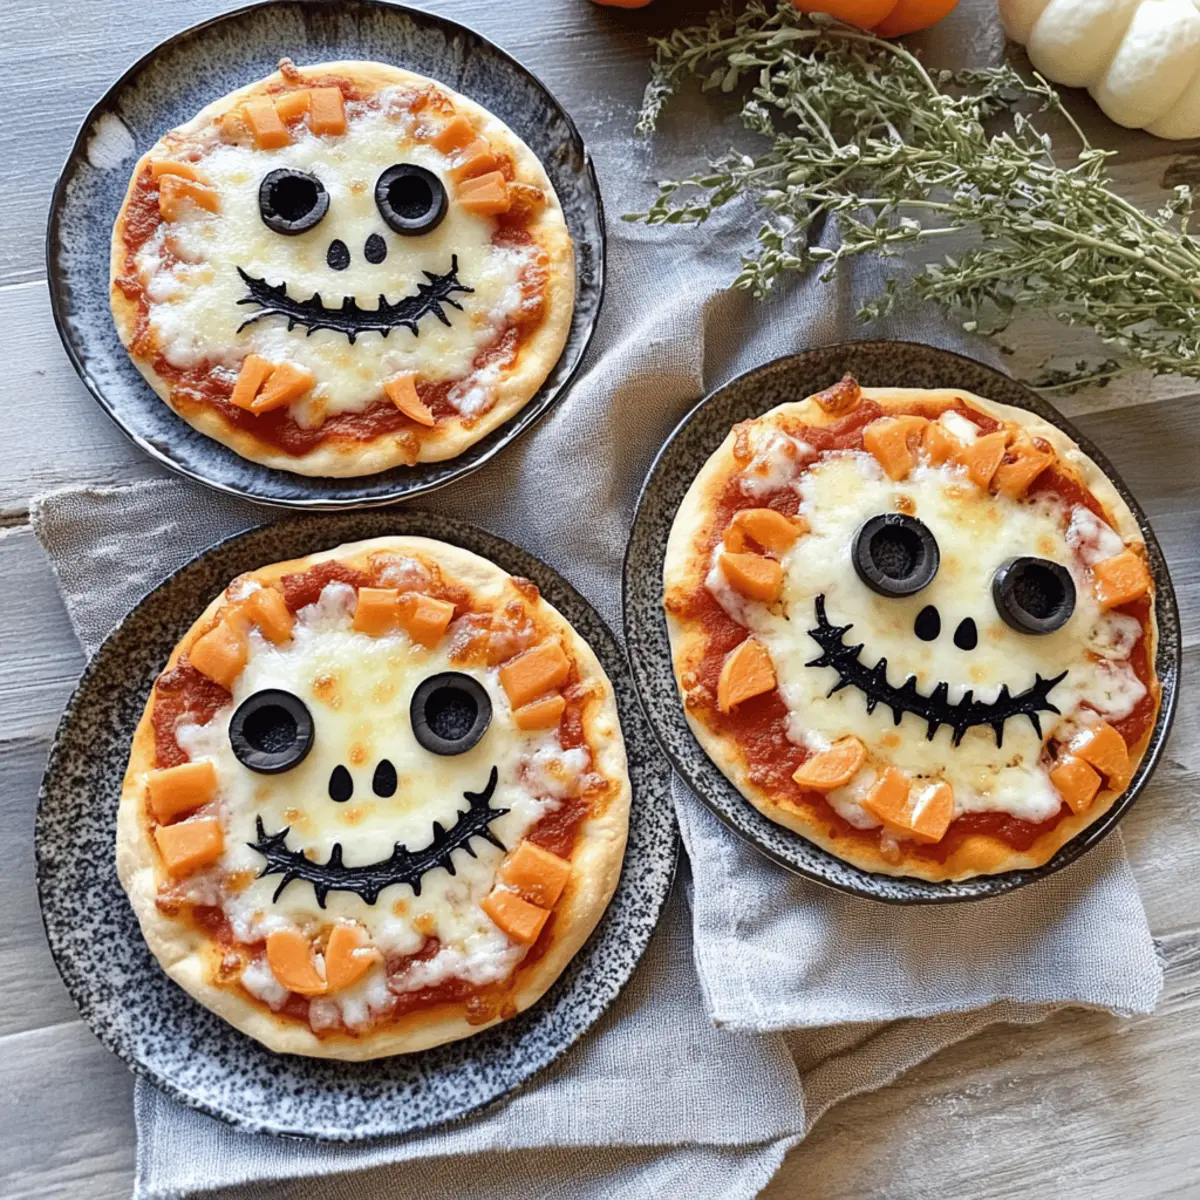
Step 4: Decorate Creatively
Get creative with your toppings! Use sliced black olives to craft spooky spider designs, while thin strips of orange and green bell peppers create cheerful jack-o’-lantern smiles. If desired, sprinkle some mini pepperoni to add a savory touch. Arrange these toppings artistically, letting your imagination run wild.
Step 5: Bake to Perfection
Once your Halloween mini pizzas are fully decorated, place the baking sheet in the preheated oven. Bake for 10 to 12 minutes, keeping a close eye on them. Look for golden brown crusts and bubbly cheese as signs that they’re ready to come out and be devoured!
Step 6: Cool and Garnish
After baking, allow the pizzas to cool for about 2 minutes on the baking sheet. This brief resting time helps firm up the crust and makes them easier to handle. Just before serving, sprinkle fresh basil chiffonade on top for a burst of color and flavor, enhancing the festive look of your mini pizzas.
Halloween Mini Pizzas Variations
Feel free to let your imagination run wild with these delightful twists on your Halloween Mini Pizzas!
-
Gluten-Free: Use gluten-free mini pizza crusts or even cauliflower crusts to accommodate gluten sensitivities without sacrificing taste.
-
Vegan Delight: Swap the mozzarella for a plant-based cheese alternative and skip the pepperoni to create a fully vegan option.
-
Spicy Kick: Add sliced jalapeños or a drizzle of sriracha to some pizzas for a spicy version that packs a flavorful punch.
-
Sweet Twist: Try using a drizzle of honey or balsamic glaze over the finished pizzas for a sweet and tangy contrast to the savory flavors.
-
Herb Infusion: Experiment by mixing dried herbs like oregano, basil, or garlic powder into your pizza sauce for an aromatic flavor boost.
-
Fruity Fun: Add slices of fresh pineapple or figs for a uniquely sweet and savory topping combination that surprises and delights!
If you’re inspired, consider making a festive spread with these creative ideas alongside your Halloween Mini Pizzas, like No-Bake Mini Banana Cream Pies to complement your spooky snacks.
Expert Tips for Halloween Mini Pizzas
• Engage the Kids: Let children take the reins in decorating their pizzas. It’s a fun, interactive way to spark their creativity and make lasting memories!
• Freezing Freshness: For convenience, freeze uncooked mini pizzas between layers of parchment paper. This way, you’ll have ready-to-bake snacks for spontaneous gatherings!
• Avoid Soggy Crusts: Ensure your pizza sauce isn’t too watery. A thick sauce keeps the crust crisp and delicious.
• Melted Cheese Mastery: For perfectly melted cheese, avoid overloading your pizzas. A balanced amount of toppings allows the cheese to bubble and brown beautifully.
• Experiment with Toppings: Don’t hesitate to try new toppings! Whether it’s different cheeses or veggies, every new combination brings a unique twist to your Halloween mini pizzas!
How to Store and Freeze Halloween Mini Pizzas
Fridge: Store leftover Halloween mini pizzas in an airtight container in the refrigerator for up to 3 days. Reheat in the oven for best results, maintaining their crispy texture.
Freezer: For longer storage, freeze uncooked mini pizzas between layers of parchment paper to prevent sticking. They can be kept in the freezer for up to 2 months.
Reheating: When ready to enjoy, bake frozen mini pizzas directly from the freezer at 425°F (220°C) for 12–15 minutes until heated through.
Make-Ahead Tips: Assemble and freeze the mini pizzas before baking for spontaneous spooky snacks that are quick to prepare for your gatherings!
Make Ahead Options
These Halloween Mini Pizzas are perfect for busy home cooks looking to save time during the spooky season! You can prepare the mini pizza crusts and instruct your family on their favorite decorations up to 24 hours in advance by assembling the crusts with sauce and cheese but leaving the toppings off. To maintain quality, store the prepared pizzas in an airtight container in the refrigerator. When it’s time to serve, simply add the decorative toppings and bake at 425°F (220°C) for 10-12 minutes until golden and bubbly. This way, you can enjoy a fun and delicious treat without the last-minute rush!
What to Serve with Halloween Mini Pizzas
As the aroma of fresh, cheesy goodness fills the air, let’s explore delightful pairings that will elevate your Halloween festivities.
- Crispy Salad: A light green salad with crunchy veggies adds refreshing contrast to the warm, cheesy pizzas.
- Garlic Breadsticks: These buttery, garlicky delights are perfect for dipping in extra pizza sauce, making them a savory complement.
- Spooky Fruit Platter: Create a colorful mix of seasonal fruits like oranges, grapes, and apples to provide a sweet and nutritious balance.
- Pumpkin Soup: This creamy, spiced soup serves as a cozy appetizer that beautifully mirrors the Halloween spirit and offers a comforting flavor.
- Halloween-Themed Drinks: Serve spooky punch or themed sodas to keep the celebratory spirit high while adding a festive touch to your table.
- Chocolate Spider Cupcakes: End the meal on a sweet note with these delightful treats that tie in perfectly with the Halloween theme, keeping everyone smiling!
Pair any of these alongside your Halloween Mini Pizzas for a truly memorable gathering that celebrates the season in delicious style!
Halloween Mini Pizzas Recipe FAQs
How do I know if my ingredients are ripe or fresh?
Absolutely! For the best results, ensure your bell peppers are firm, vibrant, and free from dark spots. Choose olives that are shiny and preserved in brine, and always check cheese for a fresh smell and smooth texture. In a pinch, assess your pizza sauce; it should have a rich color and not be overly watery.
How should I store leftover Halloween mini pizzas?
Leftover Halloween mini pizzas can be stored in an airtight container in the refrigerator for up to 3 days. To keep them fresh, let them cool before sealing. When ready to eat, reheat them in the oven at 375°F (190°C) for about 10 minutes for a crispy finish, or use an air fryer for 5-7 minutes.
Can I freeze my Halloween mini pizzas?
Very! For freezing, assemble your mini pizzas but leave off fresh ingredients like basil. Layer uncooked pizzas with parchment paper to prevent sticking and place them in a freezer-safe container. They will last up to 2 months in the freezer. When you’re ready to bake, preheat the oven to 425°F (220°C) and bake from frozen for about 12–15 minutes, or until golden and bubbly.
My mini pizzas ended up soggy. What did I do wrong?
Oh no! This can often happen due to overly watery sauce or too many toppings. Make sure your sauce is thick and spread it in moderation. If you’re using veggies, try to pat them dry with a paper towel before adding them to avoid excess moisture. Another tip is to bake the mini pizzas without sauce for a couple of minutes before adding the toppings, allowing the crust to firm up.
Are there any allergy concerns with this recipe?
Absolutely, it’s important to tailor the recipe to dietary needs! For those with gluten sensitivities, look for gluten-free mini pizza crusts. As for cheese, consider dairy-free alternatives for individuals with lactose intolerance. Always check labels on ingredients like pizza sauce and toppings to ensure they are suitable for everyone at your gathering, especially for kids.
Can I prepare these mini pizzas in advance?
Definitely! You can assemble your Halloween mini pizzas ahead of time and freeze them uncooked. This make-ahead method is perfect for last-minute snacks. Make sure to wrap them well and store them in the freezer, so they’re ready to bake when the spooky mood strikes!
Creative Halloween Mini Pizzas: Fun Treats for Your Spooky Night
Ingredients
Equipment
Method
- Preheat your oven to 425°F (220°C) and lightly mist a baking sheet with olive oil spray.
- Spread 1 to 2 tablespoons of pizza sauce on each mini pizza crust, leaving a small border.
- Sprinkle shredded mozzarella cheese on half of the mini pizzas; for the other half, use part-skim string cheese to create mummy wrappings.
- Decorate creatively with toppings like black olives for spiders and bell pepper strips for jack-o'-lantern faces.
- Bake for 10 to 12 minutes until crusts are golden brown and cheese is bubbly.
- Cool for 2 minutes, then garnish with fresh basil before serving.