
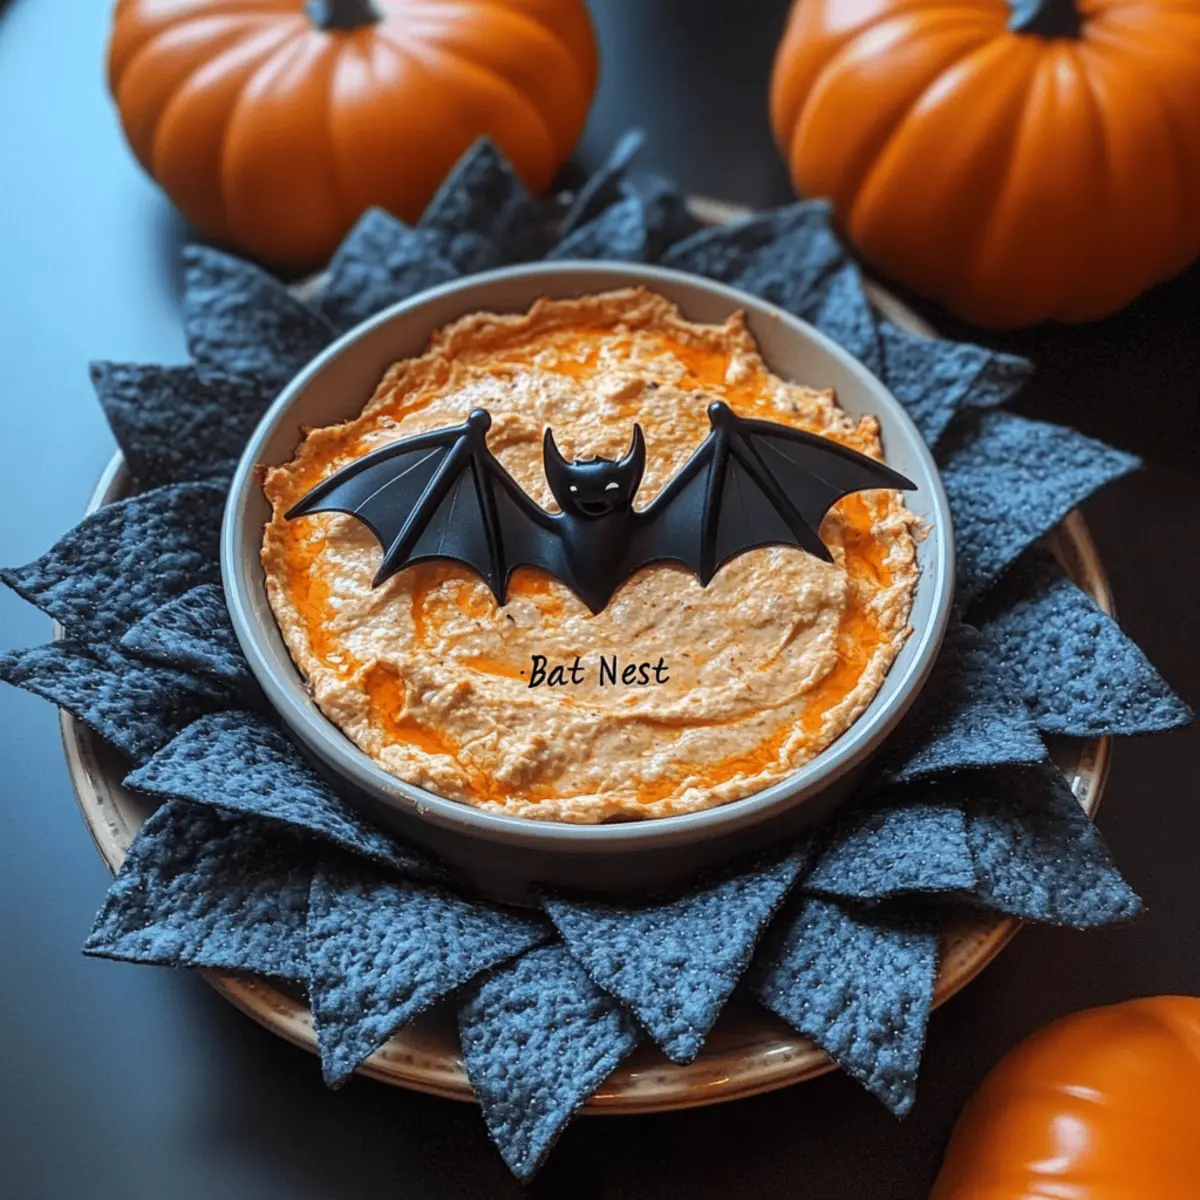
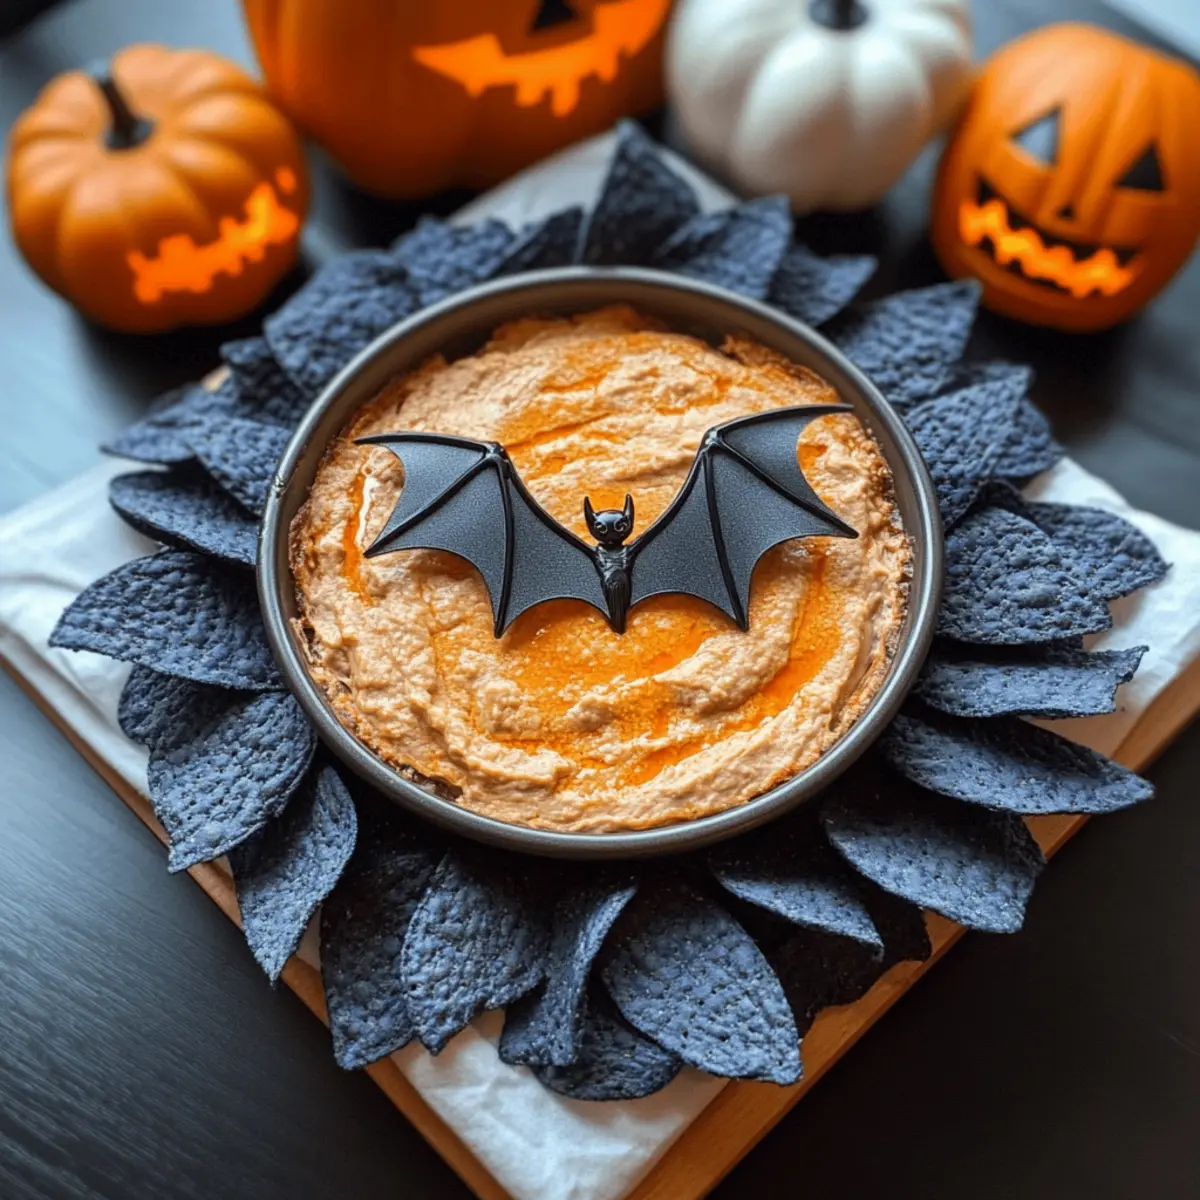
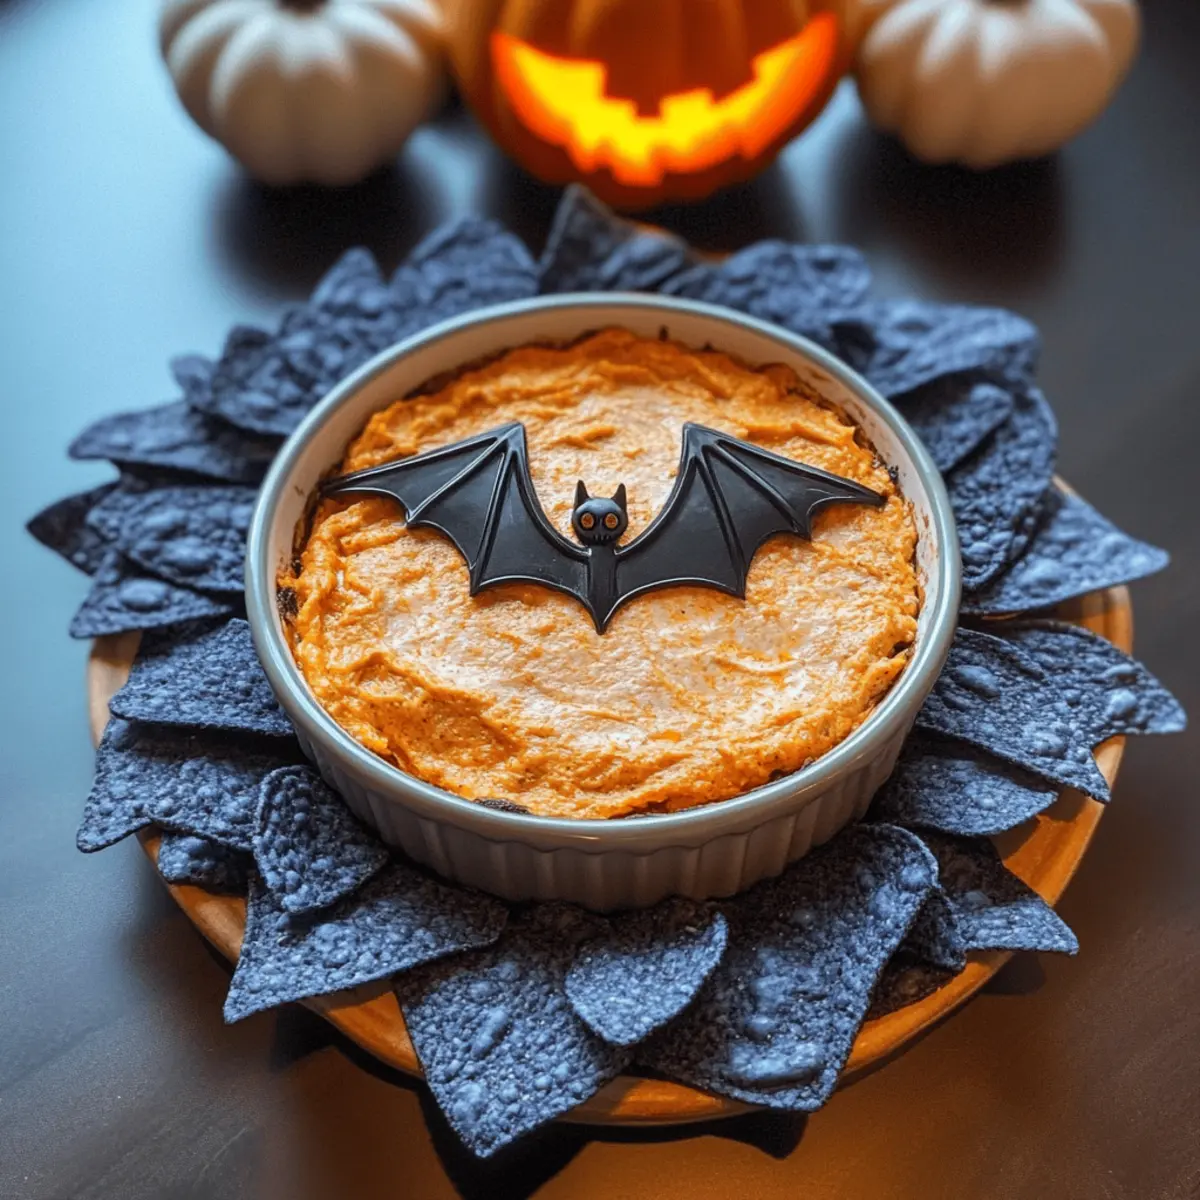
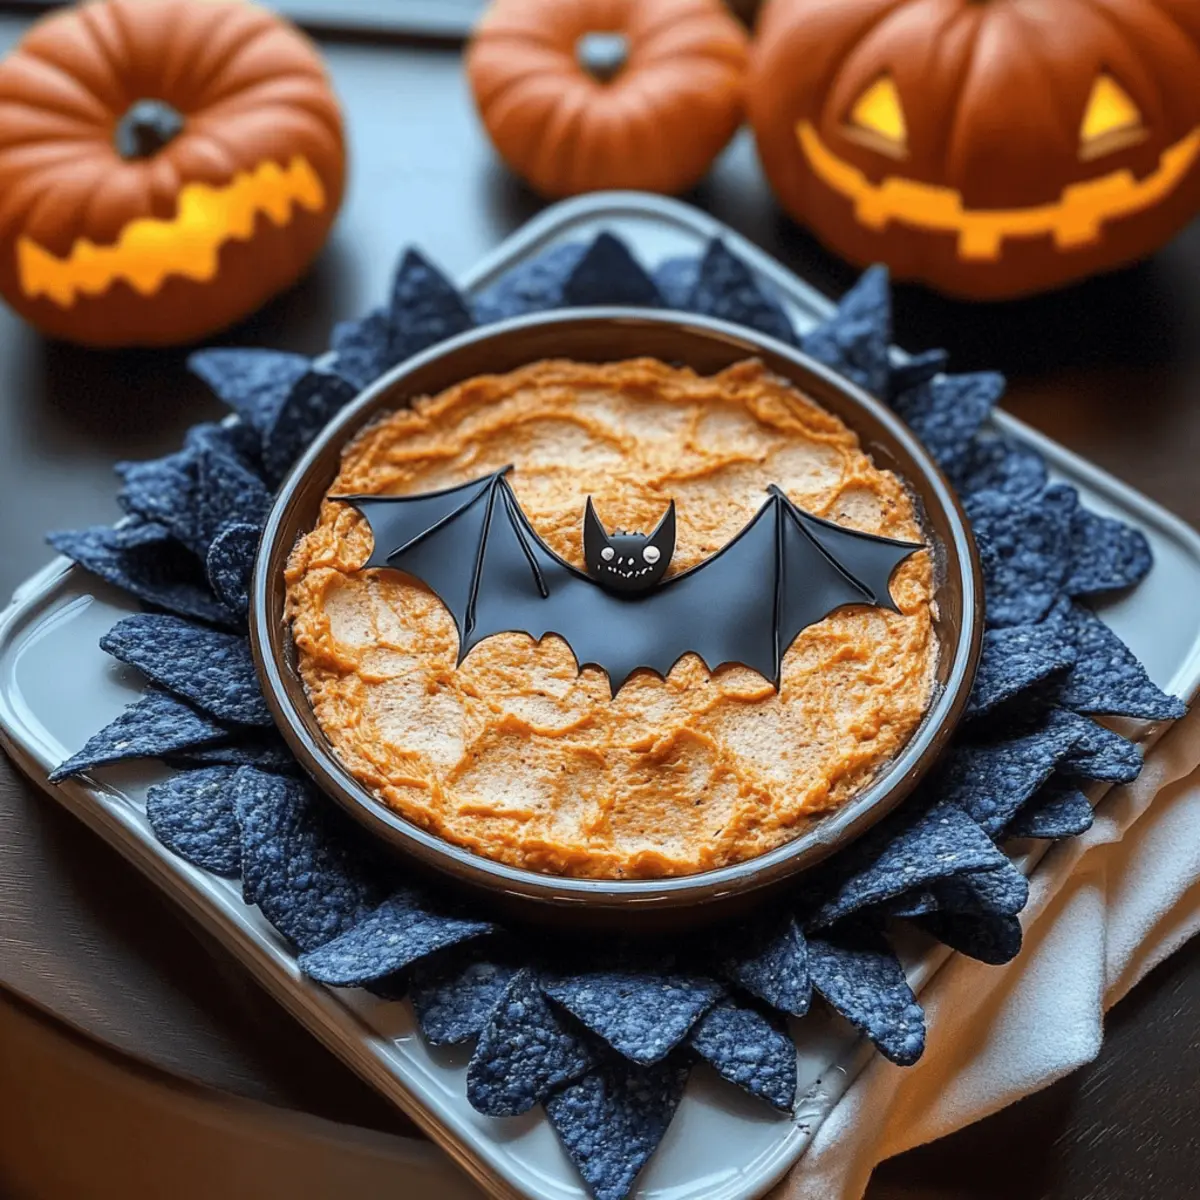
As the sun sets on Halloween night, the air fills with excitement and a hint of mischief. With friends gathered around and a cauldron of treats at the ready, one dish stands out among the tantalizing offerings: my Spooky Buffalo “Bat Nest” Dip. This Halloween twist on a beloved party classic combines creamy, cheesy goodness with just the right amount of spicy kick, making it an instant crowd-pleaser. The best part? It’s super easy to whip up, requiring minimal effort yet delivering show-stopping flair. Picture a ring of vibrant blue corn chips resembling bat wings, all crowned by a playful plastic bat—this festive dip is sure to elevate your gathering. Ready to impress your guests with the perfect Halloween appetizer? Let’s dive into this deliciously fun recipe!
Why is this dip a Halloween hit?
Spectacular Presentation: With its eerie bat decoration and vibrant blue corn chips, this dip is a showstopper that’ll grab attention at any Halloween party.
Easy to Make: You don’t need to be a culinary whiz to create this flavorful treat; it’s a simple mix-and-bake recipe that anyone can master.
Party Favorite: The deliciously creamy texture and the spicy buffalo flavor make this dip a guaranteed crowd-pleaser. Pair it with a bowl of crunchy chips or veggie sticks for the perfect serving experience!
Versatile Flavor: Customize the heat level by adjusting the buffalo sauce or substituting chicken for a heartier version, keeping your guests coming back for more.
Memorable Experience: It’s not just about the taste; serving this themed dip adds a festive, playful twist to your gathering, ensuring your Halloween celebration is unforgettable.
Buffalo “Bat Nest” Dip Ingredients
• Get ready to whip up some spooky deliciousness!
For the Dip
- Buffalo Sauce – Provides the spicy kick; adjust based on your heat preference for the perfect Buffalo “Bat Nest” Dip.
- Cream Cheese – Adds rich creaminess and structure; try low-fat cream cheese for a lighter version.
- Shredded Cheese (Cheddar or Monterey Jack) – Offers a melty texture and cheesy flavor; substitute with dairy-free options for a vegan treat.
- Sour Cream – Balances the spice with a tangy creaminess; Greek yogurt makes for a healthier swap.
For the Chips
- Blue Corn Chips – Creates the ‘wings’ and a crunchy vehicle for dipping; feel free to use regular tortilla chips if preferred.
For Decoration
- Plastic Bat – Optional, but it adds a fun touch to your Halloween presentation.
Step‑by‑Step Instructions for Buffalo “Bat Nest” Dip
Step 1: Preheat the Oven
Start by preheating your oven to 350°F (175°C). This temperature will ensure that the Buffalo “Bat Nest” Dip bakes evenly, creating a deliciously creamy and bubbly texture. While the oven heats up, gather your mixing bowl and a spatula, as you’ll need these for the next step.
Step 2: Mix the Dip Ingredients
In a large mixing bowl, combine the softened cream cheese, shredded cheese, buffalo sauce, and sour cream. Using your spatula, mix all the ingredients together until you achieve a smooth and creamy consistency. This step should take about 2-3 minutes, ensuring that all flavors meld beautifully for a zesty treat.
Step 3: Prepare the Baking Dish
Once your mixture is smooth, transfer it to a greased baking dish, spreading it evenly with your spatula. Aim for an even layer that’s about 1 inch thick to ensure it heats well. The Buffalo “Bat Nest” Dip needs to be set up properly so it can bubble up nicely as it bakes.
Step 4: Create the Nest
To create the fun “bat nest” effect, carefully arrange the blue corn chips around the outer edge of the baking dish, standing them upright in a circular pattern. This not only makes for a festive presentation but also provides crunchy dippers for your creamy dip. Make sure there is a good visual separation between the chips and the dip.
Step 5: Bake to Perfection
Place the assembled dish in your preheated oven and bake for 20-25 minutes. Keep an eye on the dip; it’s ready when the edges are bubbly and slightly golden brown. The aroma of spicy, cheesy goodness will fill your kitchen, creating excitement for the delicious appetizer ahead.
Step 6: Add the Finishing Touch
After baking, remove the Buffalo “Bat Nest” Dip from the oven and let it cool for a minute. To add an extra fun touch, place the plastic bat on top for decoration. This whimsical detail makes your dip an eye-catching centerpiece for your Halloween gathering.
Step 7: Serve Warm
Serve the dip warm, accompanied by extra blue corn chips or veggie sticks for dipping. Encourage everyone to dig in while it’s still hot and bubbly, ensuring they enjoy the creamy, spicy flavors of your Buffalo “Bat Nest” Dip right away. Enjoy the festive atmosphere as friends and family savor every bite!
Make Ahead Options
These Spooky Buffalo “Bat Nest” Dip components are perfect for make-ahead meal prep! You can mix the dip ingredients up to 24 hours in advance without losing any deliciousness—just refrigerate the mixture in an airtight container to keep it fresh. When you’re ready to bake, simply spread the mixture in your baking dish, arrange the blue corn chips around the edge as a “nest,” and pop it in the preheated oven. If you have leftovers, store them in the fridge for up to 3 days, and reheat in the oven for a second round of creamy, cheesy goodness. This approach not only saves you time but ensures your Halloween gathering is stress-free and filled with flavors!
What to Serve with Buffalo “Bat Nest” Dip
Imagine a fun-filled Halloween gathering bursting with spooky treats that delight the senses and warm the heart.
-
Veggie Sticks: Fresh carrot and celery sticks bring a crunchy, refreshing contrast, balancing the dip’s creamy and spicy richness. They create a colorful, healthy option for your guests.
-
Crispy Nachos: Serve with an extra bowl of crispy nachos for a delightful interplay of textures; the crunchy chips enhance each dip with satisfying support.
-
Garlic Breadsticks: Soft, buttery garlic breadsticks offer a comforting alternative for dipping; their savory flavor beautifully complements the zesty Buffalo “Bat Nest” Dip.
-
Cheesy Bread: Homemade cheesy bread can elevate your appetizer spread, providing a warm, gooey addition that pairs perfectly with spicy heat.
-
Fruit Platter: A sweet fruit platter with grapes and apple slices can cleanse the palate, providing a refreshing contrast to the dip’s bold flavors.
-
Sparkling Cider: For a festive beverage, serve sparkling cider; its bubbly sweetness will delight guests and add a celebratory touch to your Halloween festivities.
-
Pumpkin Spice Cookies: End on a sweet note with pumpkin spice cookies, offering a warm, spiced sweetness that echoes the fall season and rounds out your festive spread.
Storage Tips for Buffalo “Bat Nest” Dip
Fridge: Store leftovers in an airtight container for up to 3 days. Ensure it’s properly sealed to maintain its creamy texture and flavor.
Freezer: You can freeze this dip for up to 1 month. Let it cool completely, then pack in a freezer-safe container; just be aware that the texture may change upon thawing.
Reheating: For the best results, reheat in the oven at 350°F (175°C) for 15-20 minutes until warmed through and bubbly. Avoid microwaving as it can make the dip rubbery.
Serving: Always serve Buffalo “Bat Nest” Dip warm for that heavenly cheesy goodness, enhancing the dining experience for your guests.
Buffalo “Bat Nest” Dip Variations
Feel free to tweak this delicious dip and make it your own with these fun variations and substitutions!
-
Mild Heat: Reduce buffalo sauce for a milder flavor or swap it for a mild hot sauce. Perfect for those who prefer less spice.
-
Extra Protein: Add cooked shredded chicken or buffalo chicken to the dip for a heartier version. This twist not only boosts protein but also enhances the flavor.
-
Cheesy Swap: Use pepper jack cheese instead of cheddar for a spicy kick, or try mozzarella for a gooey, milder melt. Each cheese brings a unique profile to your dip.
-
Veggie Delight: Mix in finely chopped spinach or artichokes for a nutritious twist that adds color and flavor to your Buffalo “Bat Nest” Dip.
-
Creamy Choices: Substitute sour cream with Greek yogurt for a healthier option that still gives you that creamy texture. It’s a great way to sneak in protein without sacrificing taste.
-
Chip Alternatives: Try using pita chips or vegetable sticks for dipping instead of blue corn chips. This not only changes the flavor profile but also makes it a lighter snack option.
-
Spicy Boost: Add diced jalapeños to the mixture for an extra level of heat that spice lovers will adore. The added crunch and heat will have guests reaching for more!
-
Garnish Ideas: Top with chopped green onions or a sprinkle of paprika before serving for an added pop of color and flavor. These little touches can elevate your presentation beautifully.
Explore more stunning ideas and tips like how to create a vibrant Halloween-themed display with fun serving ideas. Try serving alongside some crunchy vegetable sticks or a luscious ranch dip to offer guests more variety!
Expert Tips for Buffalo “Bat Nest” Dip
-
Soften Cream Cheese: Make sure to soften your cream cheese before mixing; this helps achieve a creamy texture without lumps in your Buffalo “Bat Nest” Dip.
-
Uniform Baking: Spread the dip evenly in the baking dish to ensure it cooks consistently; uneven layers can lead to some parts being too hot while others remain cool.
-
Monitor Baking Time: Watch the dip closely towards the end of the baking time to prevent burning; it should be bubbly and golden, not overcooked.
-
Customize Heat Level: Adjust the buffalo sauce to suit your guests’ tastes; if unsure, start with less and provide extra on the side for those who enjoy a spicier kick.
-
Leftover Storage: If you have any leftover dip, store it in an airtight container in the refrigerator for up to 3 days; reheat gently in the oven to enjoy the creamy goodness again.
Buffalo “Bat Nest” Dip Recipe FAQs
How should I select the buffalo sauce for my dip?
Absolutely! When choosing buffalo sauce, look for one that matches your heat preference. Some brands pack a punch, while others are milder. Feel free to sample a bit before adding it to your mix, adjusting the quantity based on your desired spice level.
What is the best way to store the leftovers?
Very! Store any leftover Buffalo “Bat Nest” Dip in an airtight container in the refrigerator for up to 3 days. To keep the flavor intact, ensure the container is sealed tightly. When you’re ready to enjoy it again, you can easily reheat it in the oven.
Can I freeze Buffalo “Bat Nest” Dip?
Of course! This dip can be frozen for up to 1 month. Let it cool completely before transferring to a freezer-safe container. To reheat, simply thaw in the refrigerator overnight and bake at 350°F (175°C) for about 15-20 minutes until warmed through and bubbly. Just keep in mind that the texture may slightly change after freezing.
What do I do if my dip is too thick?
If your dip turns out thicker than expected, don’t worry! To loosen it up, you can stir in a couple of tablespoons of sour cream or a splash of milk until you reach your desired consistency. This will not only help with texture but also enhance the flavors.
Is this recipe suitable for guests with allergies?
Definitely! If you’re serving guests with dietary considerations, you can easily customize this recipe. Opt for low-fat cream cheese and dairy-free cheese alternatives to make it suitable for vegans. Always double-check the labels for potential allergens such as nuts or gluten, especially with store-bought sauces and chips.
Can I add protein to the dip?
Very much so! For an extra boost of flavor and heartiness, consider adding cooked shredded chicken or even ground turkey to the dip before baking. Mix it in with the other ingredients to create a deliciously satisfying dish that your guests will love!
Buffalo “Bat Nest” Dip: Spooky Cheesy Goodness for Halloween
Ingredients
Equipment
Method
- Preheat your oven to 350°F (175°C). Gather your mixing bowl and spatula.
- Combine cream cheese, shredded cheese, buffalo sauce, and sour cream in a mixing bowl. Mix until smooth and creamy.
- Transfer the mixture to a greased baking dish, spreading it evenly about 1 inch thick.
- Arrange blue corn chips around the edge of the baking dish, standing them upright.
- Bake the dip in the oven for 20-25 minutes until bubbly and slightly golden brown.
- Let cool for a minute, then place the plastic bat on top for decoration.
- Serve warm with extra blue corn chips or veggie sticks.