
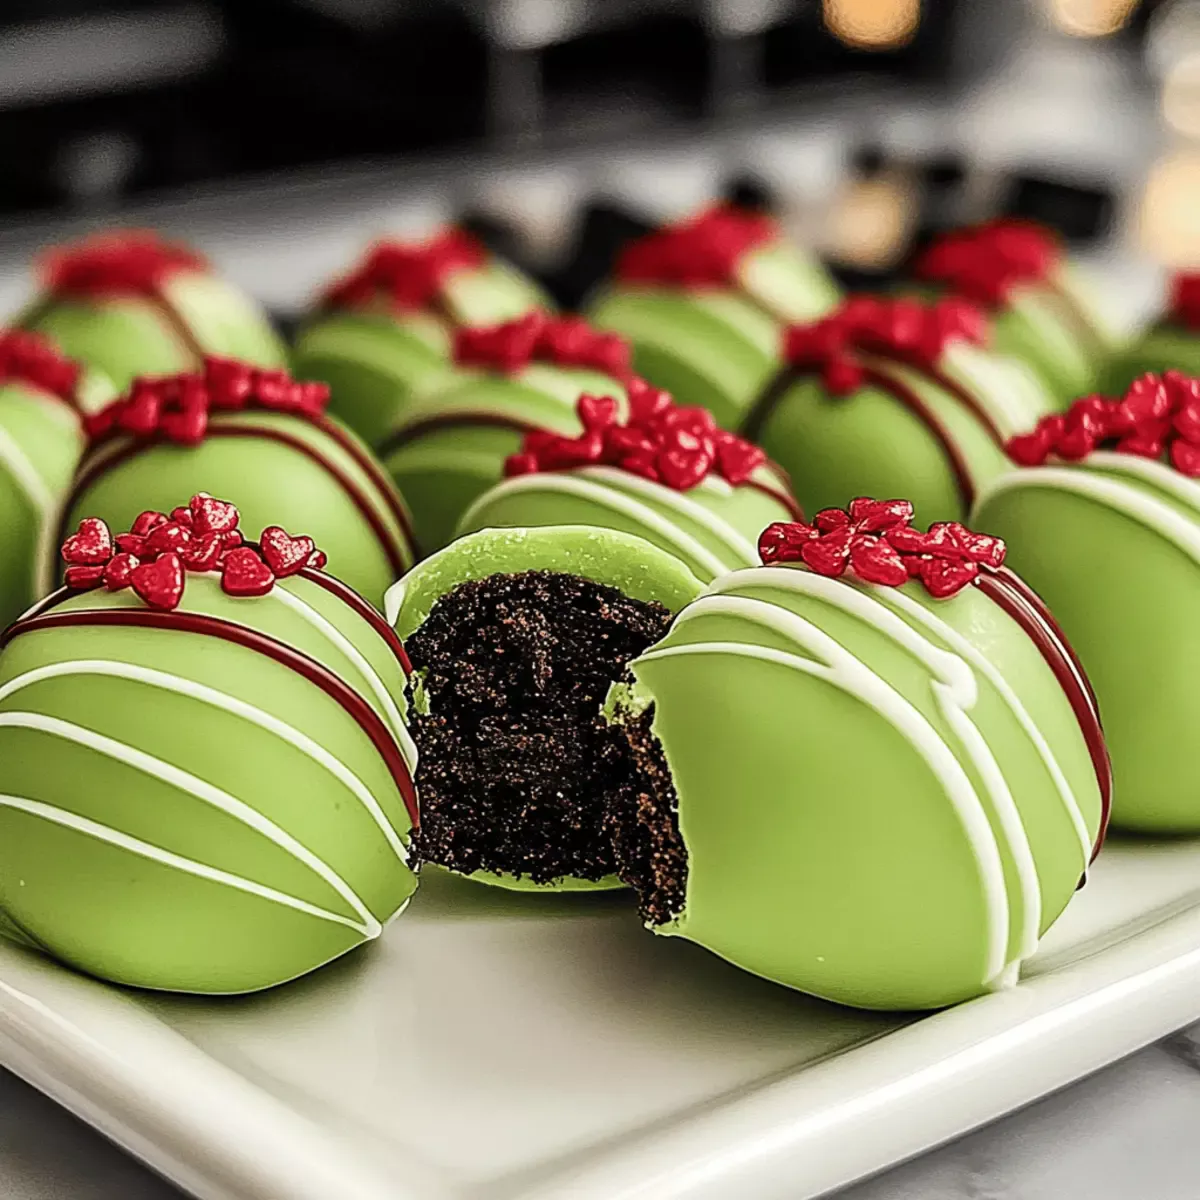
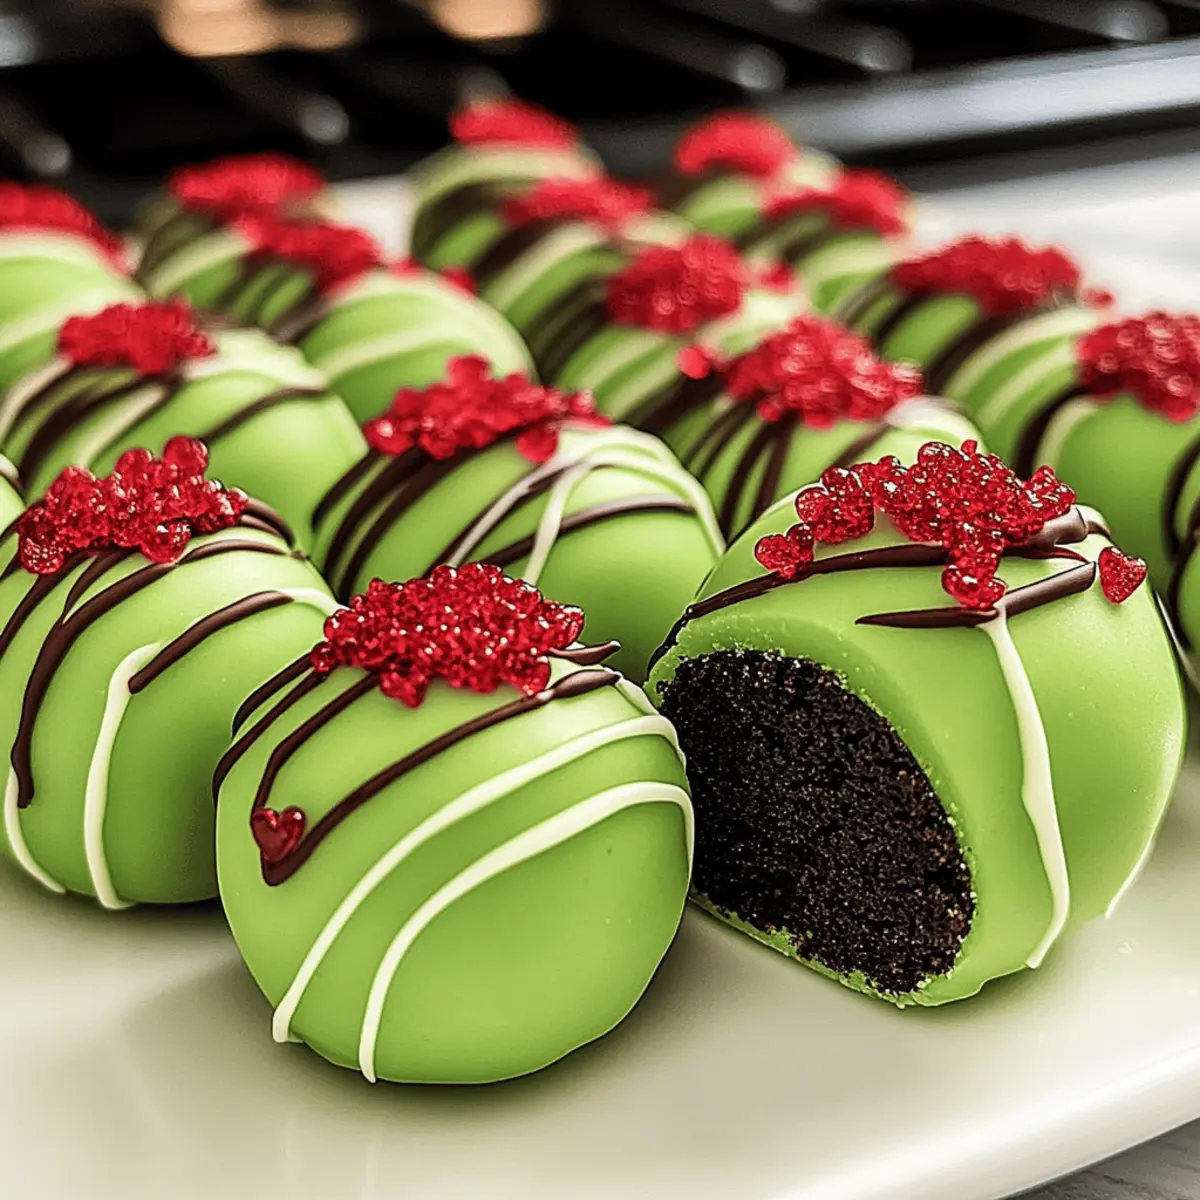
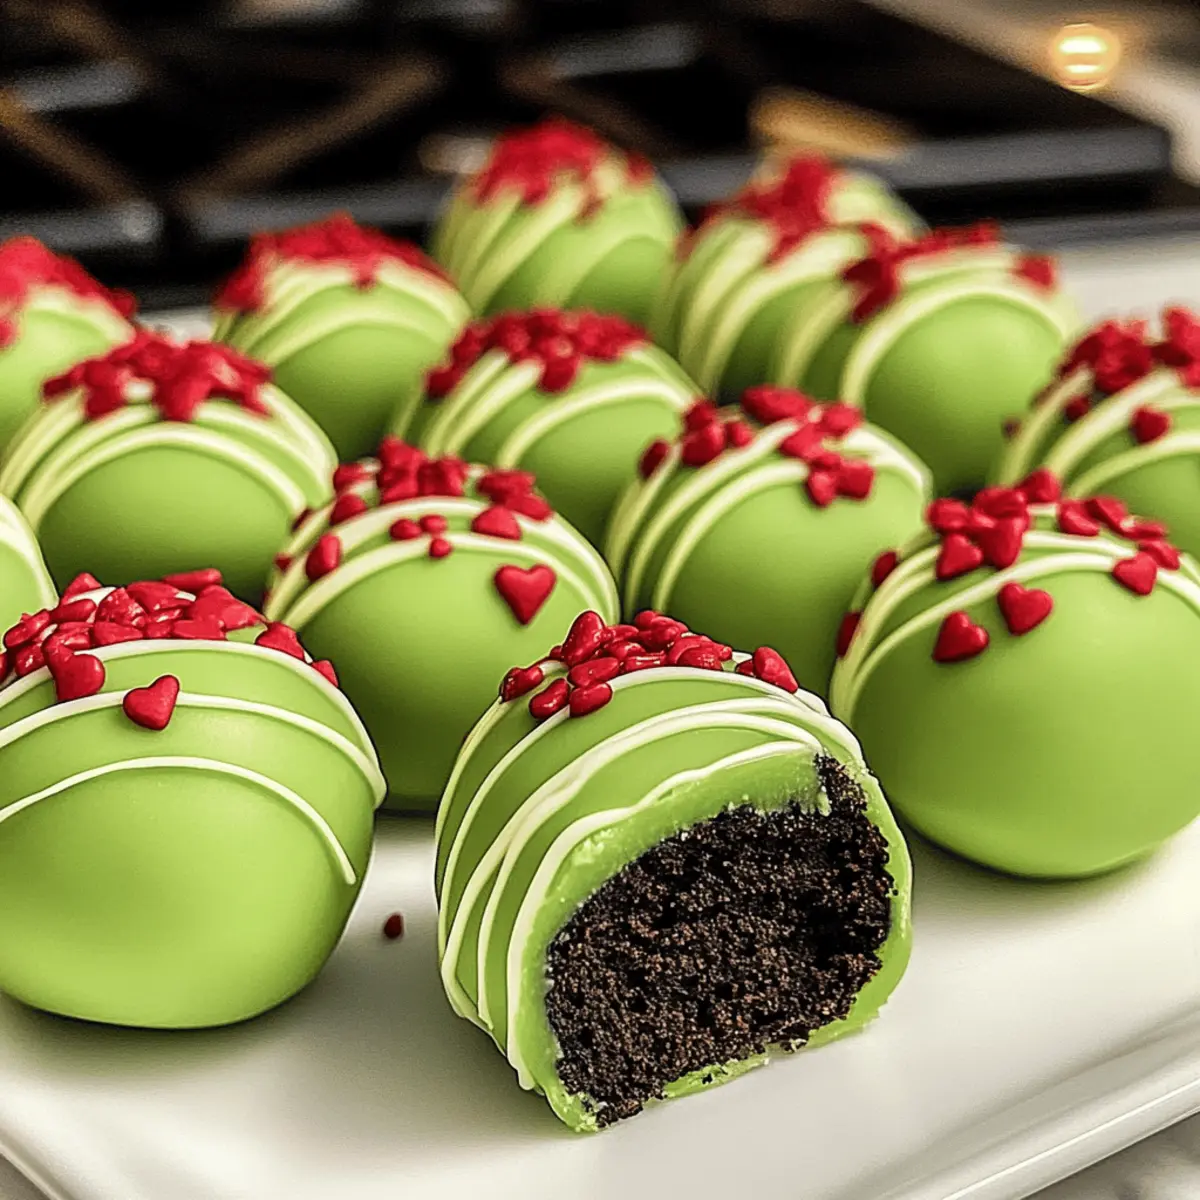
As I stood in my kitchen with the holiday spirit swirling around me, I stumbled upon a delightful idea that perfectly captures the essence of the season: Grinch Oreo Balls. These vibrant, no-bake treats are not only a feast for the eyes but also a dream for busy home chefs like us! Combining the rich flavors of Red Velvet Oreos and creamy cream cheese filling, then enrobing them in a playful green coating, they are bound to steal the show at any festive gathering. Whether you’re looking for a crowd-pleaser or simply a sweet indulgence that’s quick to whip up, these Grinch Oreo Balls tick all the boxes. Ready to make some unforgettable holiday memories? Let’s dive into the delicious details!
Why Are Grinch Oreo Balls Perfect for You?
Festive Cheer: These vibrant treats are perfect for celebrating the holiday season, bringing joy to every gathering with their whimsical design.
No-Bake Simplicity: They require no baking, making them a breeze to whip up even on your busiest days.
Delightful Flavor: The unique blend of Red Velvet Oreos and creamy filling creates a sweet indulgence that everyone will love.
Versatile Treat: Tailor them to your taste by trying different Oreo flavors or fun toppings, just like in my Chocolate Raspberry Cheesecake variation!
Impressive Presentation: Arranging these colorful balls on a platter ensures they’ll be the star of the dessert table.
Great for Gifting: Pack them in festive boxes for a sweet homemade gift that shows you care!
Grinch Oreo Balls Ingredients
-
For the Filling
• Red Velvet Oreos – Adds unique flavor and texture as the base for this delightful treat; feel free to swap with regular Oreos for a classic twist.
• Cream Cheese – Binds the cookie crumbs into a smooth, creamy mixture; make sure it’s softened to blend effortlessly. -
For the Coating
• Light Green Candy Melts – Provides a vibrant Grinch-inspired coating; if these are hard to find, you can use white chocolate mixed with green food coloring. -
For the Decoration
• Red Candy Hearts – These charming adornments symbolize the Grinch’s heartwarming transformation; any red candy can make a lovely alternative for added flair.
Step‑by‑Step Instructions for Grinch Oreo Balls
Step 1: Prepare Your Baking Sheet
Line a baking sheet with parchment paper to create a non-stick surface for your Grinch Oreo Balls. This will not only help maintain their shape but also make cleanup easier. Set it aside while you work on the filling, ensuring everything is within reach for a smooth process.
Step 2: Crush the Oreos
Using a food processor, finely crush the Red Velvet Oreos until they resemble a fine crumb. If you don’t have a processor, you can place the cookies in a zip-top bag and crush them with a rolling pin. The goal is to achieve about 2 cups of crumbs for a delightful base that will provide rich flavor in your truffles.
Step 3: Mix in the Cream Cheese
In a large mixing bowl, combine the crushed Red Velvet Oreos with softened cream cheese. Use a spatula or hand mixer to blend until the mixture is completely smooth and well-combined. This step should take about 3-5 minutes; the mixture should feel pliable yet not too sticky, forming the tasty filling for your Grinch Oreo Balls.
Step 4: Form the Oreo Balls
Using a 1.5-inch cookie scoop, measure and scoop the Oreo mixture into uniform balls. Place each ball on the prepared baking sheet, ensuring they are spaced apart to avoid sticking. Once all the balls are formed, refrigerate them for at least 2 hours to allow them to firm up, ensuring a perfect texture for coating.
Step 5: Melt the Candy Coating
While the Oreo balls chill, melt the light green candy melts. If using a microwave, heat them in 30-second intervals, stirring in between, until smooth. Alternatively, melt the candy using a double boiler. Ensure the mixture is completely melted and glossy, avoiding overheating to keep the candy from seizing.
Step 6: Coat the Oreo Balls
Remove the chilled Oreo balls from the fridge and dip each one into the melted green candy. Use a fork to ensure an even coating, tapping off any excess candy back into the bowl. Place the coated balls back onto the parchment-lined baking sheet, allowing the candy coating to harden and set properly.
Step 7: Add Decorative Touches
Once the candy coating has set slightly but is still tacky, drizzle any leftover melted candy on top of each ball for an artistic flair. Immediately press a red candy heart into the center of each ball, creating a festive decoration that symbolizes the Grinch’s bigger, warmer heart just in time for the holiday season.
Step 8: Final Chill Before Serving
Place the decorated Grinch Oreo Balls back into the refrigerator for at least 30 minutes to fully set the coating. This final chill will ensure they’re firm and ready for serving. Once set, arrange them on a festive platter to impress your guests or package them up as delightful homemade gifts!
How to Store and Freeze Grinch Oreo Balls
Fridge: Store your Grinch Oreo Balls in an airtight container in the refrigerator for up to one week. This keeps them fresh and ready for snacking!
Freezer: For longer storage, freeze uncoated balls for up to three months. When you’re ready to enjoy, simply thaw them in the fridge before coating.
Reheating: There’s no need to reheat these no-bake treats! Simply serve them chilled or at room temperature for the best experience.
Wrapping: If gifting, wrap the Oreo balls in decorative boxes or cellophane for an eye-catching presentation.
Expert Tips for Grinch Oreo Balls
-
Perfect Consistency: Ensure your cream cheese is softened; this helps achieve a smooth filling that binds nicely with the cookie crumbs.
-
Chill Thoroughly: Don’t skip the chilling step! Properly firm Oreo balls before coating prevents them from cracking, ensuring a polished finish.
-
Careful Melting: Melt the candy melts slowly on low heat to prevent seizing. Stir regularly for a smooth coating, enhancing the visual appeal of your Grinch Oreo Balls.
-
Substitution Smartness: If you can’t find light green candy melts, white chocolate colored with oil-based green food coloring works just as well for vibrant results.
-
Creative Toppings: Experiment with different decorations like crushed candy canes or sprinkles for extra festive flair, giving your Grinch Oreo Balls a personalized touch!
What to Serve with Grinch Oreo Balls
The holidays are all about gathering and sharing joy, so let’s make your festive table even sweeter!
- Rich Hot Cocoa: The warm hug of hot cocoa pairs perfectly with the sweet and creamy Grinch Oreo Balls, creating a cozy dessert experience.
- Gingerbread Cookies: The spiced flavor of gingerbread complements the sweetness of these treats, adding a delightful contrast that enhances the festive spirit.
- Whipped Cream Cheesecake: A smooth cheesecake draped in whipped cream mirrors the creamy filling of the Oreo balls, creating a harmonious blend of textures.
- Peppermint Bark: The minty freshness of peppermint bark balances the sweetness, adding a fun twist that’s sure to delight during holiday gatherings.
- Holiday Fruit Salad: Bright colors and fresh flavors from seasonal fruits provide a refreshing bite that balances the richness of the Grinch Oreo Balls.
- Eggnog Milkshake: Creamy and rich, a festive eggnog milkshake adds a nostalgic touch, enhancing the dessert experience with a festive twist.
Combine these cheerful pairings for a perfect holiday spread that will charm your guests and create unforgettable memories!
Make Ahead Options
These Grinch Oreo Balls are perfect for anyone wanting to save time during the busy holiday season! You can prepare the filling mixture and form the balls up to 24 hours in advance, simply storing them in an airtight container in the refrigerator to maintain their creamy texture. Additionally, you can freeze the uncoated Oreo balls for up to three months; just make sure to thaw them before dipping in the melted candy. When you’re ready to serve, follow the simple final steps of coating them with the green candy melt and adding the red candy hearts. This way, you can enjoy the festive fun without the last-minute rush!
Grinch Oreo Balls: Creative Twists
Ready to make these festive treats even more fun? Let your imagination run wild as you customize your Grinch Oreo Balls!
-
Peppermint Twist: Substitute the Red Velvet Oreos with Peppermint Oreos for a cool minty flavor that’s perfect for the holidays. The refreshing taste will harmonize beautifully with the creamy filling.
-
Add a Crunch: Roll the balls in finely crushed nuts or colorful sprinkles after coating them. This adds a delightful crunch and an eye-catching finish, inviting everyone to take a bite.
-
Golden Oreo Surprise: Swap Red Velvet Oreos for Golden Oreos and mix in a hint of vanilla to create a rich, cookie dough flavor. This variation provides a sweet contrast to the vibrant green coating.
-
Heat Things Up: For a spicy kick, incorporate a dash of cayenne pepper into the filling. This unexpected heat will delight adventurous eaters and elevate your treats to a whole new level.
-
Chocolate Lovers’ Dream: Drench the balls in dark chocolate instead of candy melts for a deep, rich flavor. This twist is sure to please chocolate lovers at your festive celebrations.
-
Dairy-Free Delight: Use dairy-free cream cheese and plant-based candy melts to create a vegan version of these treats. Enjoy the same delightful flavors while accommodating dietary needs.
-
Multicolor Magic: Mix and match various candy melt colors to create a vibrant platter. Use pink, blue, and orange for a playful take that’s sure to be a visual festival of colors!
-
Gifting Idea: Pack your Grinch Oreo Balls in decorative boxes with “Merry & Bright” tags. Add a personal touch by including a festive note, creating the perfect homemade gift as you would for sharing tasty Bake Cookie Balls this holiday season!
Grinch Oreo Balls Recipe FAQs
How do I select the best Red Velvet Oreos?
Absolutely! When picking Red Velvet Oreos, look for bright, intact packaging. Ensure there are no dark spots or dents on the cookies, as this can indicate age or damage. Fresh cookies will have a more pronounced flavor and better texture in your dessert.
What is the best way to store Grinch Oreo Balls?
Very! After preparing your Grinch Oreo Balls, store them in an airtight container in the refrigerator for up to one week. For longer freshness, you can freeze the uncoated balls for up to three months. Just remember to thaw them in the fridge before coating, so they don’t sweat and ruin that beautiful candy finish.
Can I freeze Grinch Oreo Balls?
Of course! To freeze your Grinch Oreo Balls, first, form the balls and then place them on a baking sheet lined with parchment. Freeze them for about 30 minutes until firm. Once set, transfer them to an airtight container or zip-top bag, separating layers with parchment paper. They’ll be good for up to three months—just thaw them in the fridge before coating!
What should I do if my candy melts are seizing?
Oh no! If your candy melts seize up while melting, you can save them! Add a teaspoon of vegetable oil and stir until smooth. This small amount of oil helps to loosen the chocolate without impacting the taste. Always melt on low heat and stir regularly to maintain that beautiful silky texture.
Can I make Grinch Oreo Balls allergy-friendly?
Absolutely! To make these treats allergy-friendly, look for gluten-free cookie options and vegan cream cheese substitutes, which are readily available. Always check labels to ensure safe ingredients, especially for those with nut allergies or dairy restrictions. You’ll still enjoy amazing flavors while being inclusive of everyone’s dietary needs!
What other toppings can I use for decoration?
Very much! Get creative with your Grinch Oreo Balls by using colorful sprinkles, crushed candy canes, or even festive edible glitter for a holiday flair. You can also try mini chocolate chips or festive colored dragees—there’s no limit to adding your personal touch, making the dessert even more special!

Delightful Grinch Oreo Balls for a Festive No-Bake Treat
Ingredients
Equipment
Method
- Line a baking sheet with parchment paper.
- Finely crush the Red Velvet Oreos until they resemble a fine crumb.
- Combine crushed Oreos with softened cream cheese until smooth.
- Using a cookie scoop, form uniform balls and place them on the baking sheet. Refrigerate for 2 hours.
- Melt the light green candy melts in the microwave or double boiler.
- Dip each chilled Oreo ball into the melted green candy and place back on the baking sheet.
- Drizzle with leftover melted candy and press a red candy heart into each ball.
- Chill again for at least 30 minutes before serving.