
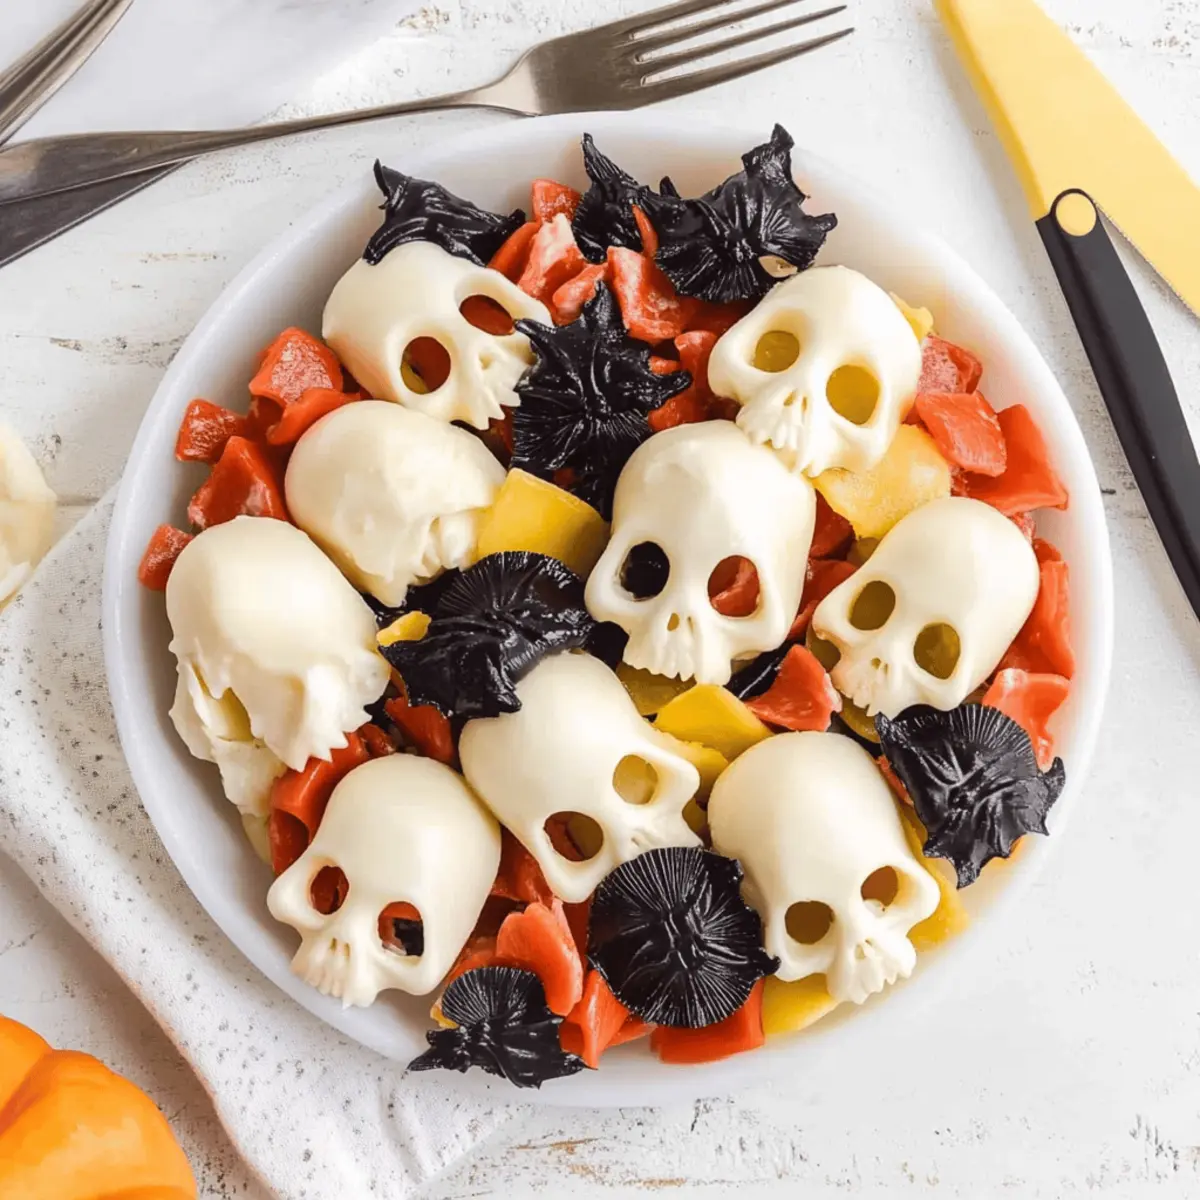
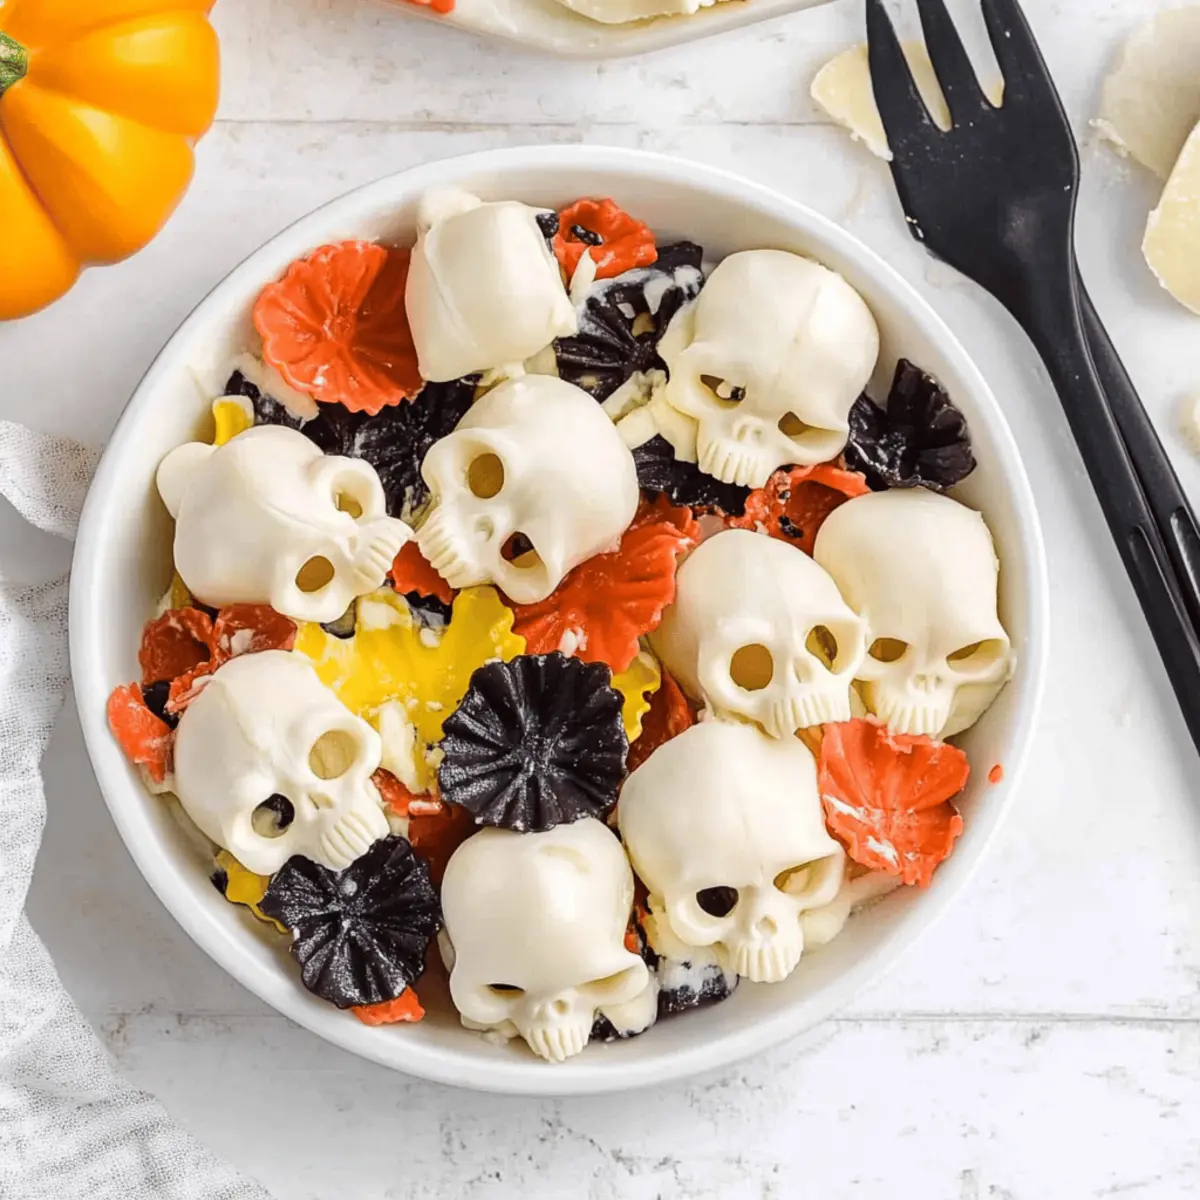
As the Halloween season creeps in, I can’t help but get excited about transforming everyday ingredients into something delightfully eerie. Enter the star of my spooky gatherings: Mozzarella Cheese Skulls. These charmingly creepy appetizers aren’t just perfect for your festive spread; they’re also incredibly simple to whip up, allowing you to impress your guests without hours spent in the kitchen. With their creamy texture and fun presentation, these cheese skulls make for a playful and crowd-pleasing addition to any charcuterie board or pasta salad. Whether you’re hosting a haunted soirée or adding flair to your dinner table, these little treats are just the ticket. Ready to conjure up some culinary magic? Let’s dive into the recipe!

Why Make Mozzarella Cheese Skulls?
Eerily Fun: These Mozzarella Cheese Skulls are the perfect conversation starter at any Halloween gathering, blending creativity with deliciousness!
Gooey Goodness: Enjoy the creamy texture of the mozzarella that pairs beautifully with any additional flavors or dips.
Quick and Simple: With just a few easy steps, you’ll have enticing appetizers ready in no time—perfect for busy hosts looking to impress!
Versatile Presentation: Whether served on a charcuterie board alongside crackers and olives, or floating in a Halloween-themed pasta salad, these skulls are bound to steal the show. Explore more ideas like pairing with Cream Cheese Squares for a delightful spread!
Crowd-Pleasing Appeal: Ideal for all ages, these spooky bites will have even the pickiest eaters coming back for seconds!
Mozzarella Cheese Skulls Ingredients
For the Skulls
- Mini Mozzarella Balls – Choose ciliegine for the best size and flavor that make perfect spooky details.
- Silicone Skull Mold – Opt for heat-safe molds to shape your mozzarella into these ghoulish delights.
Additional Ingredients for Serving
- Crackers – The perfect crunchy pair to balance the creamy mozzarella cheese skulls for a delightful texture experience.
- Olives – A savory addition that complements the cheese beautifully while enhancing the Halloween theme.
- Balsamic Glaze – Drizzle this over the skulls for a touch of sweetness and visual flair, elevating your platter.
These Mozzarella Cheese Skulls offer a fun and flexible way to create memorable Halloween appetizers!
Step‑by‑Step Instructions for Mozzarella Cheese Skulls
Step 1: Preheat the Oven
Begin by preheating your oven to 350°F (175°C). This prepares the perfect environment for your mozzarella cheese skulls to soften beautifully without becoming too runny. While the oven heats up, gather your silicone skull mold and ensure it’s clean and dry, ready to hold the charming cheese shapes.
Step 2: Prepare the Mozzarella Balls
Take your mini mozzarella balls (ciliegine are ideal) and pat them dry thoroughly using paper towels. This step is crucial as it removes excess moisture, allowing the cheese skulls to hold their shape better during baking. You should see a slight sheen on the mozzarella once it’s dry, indicating it’s ready for molding.
Step 3: Mold the Mozzarella
Carefully place one mozzarella ball into each cavity of your silicone skull mold. Ensure that they sit snugly within the molds but are not compressed. The key is to create a lasting spooky shape without squishing them too much. At this point, your mold should already start to resemble a ghoulish delight!
Step 4: Bake the Cheese Skulls
Transfer the filled silicone mold to the preheated oven and bake for 8-10 minutes. Keep an eye on the mozzarella; you want it to become soft and slightly melty without losing its shape. Look for a gentle puffiness on the cheese, indicating it’s achieved the right texture for your mozzarella cheese skulls.
Step 5: Press the Cheese
Once baked, remove the mold from the oven and use the back of a spoon to gently press each mozzarella ball into the mold. This step ensures that your cheese skulls maintain their spooky form. They should feel slightly firm yet tender; be careful not to press too hard and expose the cheese.
Step 6: Remove Excess Moisture
After pressing, check for any excess moisture that may have accumulated during baking. If needed, gently blot the surface of the mozzarella skulls again with a clean paper towel to remove any additional liquid. This will help in maintaining their delightful texture and shape when displayed.
Step 7: Cool and Unmold
Now, place the silicone mold in the refrigerator for about 10 minutes to cool off. This step allows the mozzarella cheese skulls to firm up slightly, making them easier to unmold. Once cooled, carefully invert the mold and gently pull away the silicone to reveal your beautifully crafted mozzarella cheese skulls, ready to impress your guests!
Mozzarella Cheese Skulls Variations
Feel free to unleash your creativity and make these spooky mozzarella cheese skulls uniquely yours with a few fun twists!
-
Flavor Infusion: Mix in some dried herbs or spices, like oregano or garlic powder, before molding to add a savory boost. This will tantalize your taste buds and elevate the flavor profile to delightful new heights.
-
Alternative Shapes: Use other silicone molds, such as pumpkins or ghosts, for a festive array of Halloween-themed cheese. This twist is perfect for adding variety to your spooky spread and will surely capture your guests’ attention!
-
Colorful Aesthetic: Dip the cooled mozzarella skulls in melted dark chocolate, or paint them with natural food coloring for a colorful, spooky flair. Your guests will be thrilled by the unexpectedly sweet presentation!
-
Vegan Option: Substitute the mini mozzarella balls for vegan mozzarella made from cashews or almond milk. This way, you can create a spooky treat that caters to all dietary preferences while still keeping it delicious.
-
Serve with Style: Skewer the mozzarella skulls with toothpicks and drizzle with balsamic glaze or pesto for a more refined presentation. They’ll transform into elegant appetizers perfect for any gathering!
-
Ice Cream Surprise: As a fun twist, try stuffing the skulls with a dollop of herb-infused cream cheese before baking for a zesty center. This unexpected flavor burst will leave a lasting impression on your guests!
-
Charcuterie Board Charm: Incorporate these skulls into a delightfully creepy charcuterie board alongside options like Blue Cheese Walnut for a rich flavor duo or a serving of cured meats for a non-traditional twist on classic appetizers!
Embrace your inner chef and have fun experimenting with these variations to make your Halloween celebrations memorable!
How to Store and Freeze Mozzarella Cheese Skulls
Room Temperature: Serve freshly baked mozzarella cheese skulls immediately for the best taste. They can be left at room temperature for up to 2 hours during your Halloween gathering.
Fridge: Store leftover mozzarella cheese skulls in an airtight container in the refrigerator for up to 3 days. This keeps them fresh and ready to enjoy later.
Freezer: For longer storage, freeze the mozzarella cheese skulls in a single layer on a baking sheet until firm, then transfer to a freezer-safe bag for up to 2 months. Thaw in the fridge before serving.
Reheating: Reheat cheese skulls gently in the oven at 350°F (175°C) for about 5-7 minutes. This will restore their creamy goodness without making them too runny.
What to Serve with Spooky Mozzarella Cheese Skulls?
Elevate your Halloween spread with delightful accompaniments that complement these creamy, spooky bites.
- Crunchy Crackers: Perfectly crisp, they provide a satisfying contrast to the soft mozzarella skulls. Opt for flavored varieties for added zest!
- Savory Olives: The briny punch of olives enhances the cheesy richness, making for an irresistible appetizer platter. A blend of green and black olives adds vibrancy and variety!
- Balsamic Glaze: Drizzling this sweet and tangy reduction enhances the skulls’ flavor and adds an elegant touch to your presentation. It’s a simple way to elevate your dish!
- Herbed Pesto: A fresh, herby drizzle brings a burst of flavor, balancing the creaminess of the mozzarella. Serve it on the side for a dipping option that your guests will love!
- Spooky Themed Pasta Salad: Mix together colorful pasta shapes with seasonal veggies; it’s a whimsical side that ties beautifully into the Halloween theme while offering great texture!
- Chilled White Wine: A crisp, refreshing wine pairs well, enhancing the appetizer experience with every sip. Opt for a Sauvignon Blanc or Pinot Grigio for brightness!
- Pumpkin Spice Dessert: For a sweet finish, serve bite-sized pumpkin spice treats. The autumnal flavors provide a delightful contrast to the savory cheese skulls, creating harmony on your table!
These pairings will not only enhance the enjoyment of your mozzarella cheese skulls but create a dining experience that captivates and delights your guests.
Expert Tips for Mozzarella Cheese Skulls
-
Choose Quality Cheese: Opt for high-quality mini mozzarella balls for the best flavor and texture in your skulls. Freshness is key for that creamy bite!
-
Drying Matters: Be sure to thoroughly pat the mozzarella balls dry to prevent excess moisture, which can cause your mozzarella cheese skulls to lose shape while baking.
-
Prepping the Mold: Lightly grease your silicone mold or choose non-stick versions to ensure easy unmolding and to keep your shapes intact.
-
Watch Baking Time: Keep a close eye on your mozzarella while baking; it should be soft but not fully melted. Overbaking can lead to a runny texture and misshapen skulls.
-
Cooling Trick: Refrigerating the skulls post-baking for about 10 minutes is crucial. This helps them set up for a clean release from the mold, ensuring a spooky presentation!
Make Ahead Options
These Mozzarella Cheese Skulls are a fantastic option for meal prep, allowing busy home cooks to save time before Halloween parties! You can prepare the cheese skulls up to 24 hours in advance and store them in an airtight container in the refrigerator, which helps maintain their delightful creaminess. To keep them fresh, ensure they are well-blotted for moisture and lightly greased in the mold. When you’re ready to serve, simply bake them for the recommended time (8-10 minutes at 350°F) until they’ve softened, and they’ll emerge just as delicious as if freshly made! Enjoy the ease of having these spooky treats ready to go, freeing up your time for more Halloween fun!
Mozzarella Cheese Skulls Recipe FAQs
How do I choose the right mozzarella balls?
Absolutely! For the best results, look for mini mozzarella balls known as ciliegine. They are cherry-sized and have a fresh, creamy flavor that works perfectly for creating your spooky skulls. Ensure the mozzarella is firm and free of any excess liquid, allowing them to hold their shape well during baking.
What’s the best way to store leftover mozzarella cheese skulls?
You can store leftover mozzarella cheese skulls in an airtight container in the refrigerator for up to 3 days. Just be sure to keep them covered to prevent them from drying out. When you’re ready to enjoy them again, you can serve them cold or gently reheat them in the oven to restore that delightful gooey texture.
Can I freeze mozzarella cheese skulls for later use?
Very! To freeze mozzarella cheese skulls, first place them in a single layer on a baking sheet and freeze until firm. Then, transfer them to a freezer-safe bag or container, where they can be stored for up to 2 months. When you’re ready to serve, thaw them in the fridge overnight and reheat gently in the oven.
What should I do if the mozzarella skulls are too runny?
If your mozzarella skulls turn out too runny, it’s likely due to excess moisture. In the future, make sure to thoroughly pat the mozzarella balls dry before molding them. Additionally, keep an eye on the baking time; they should be softened but not completely melted. Make sure to press them into the molds gently, as over-compressing could also affect their texture.
Are mozzarella cheese skulls safe for vegetarians?
Absolutely! Mozzarella cheese skulls are vegetarian-friendly and can be easily customized to accommodate various dietary needs. Consider using lactose-free mozzarella or incorporating herbs and spices for added flavor if you’re looking for a twist! Always check ingredients to ensure they align with your dietary preferences.

Ghoulishly Good Mozzarella Cheese Skulls for Halloween Fun
Ingredients
Equipment
Method
- Preheat your oven to 350°F (175°C) and gather your silicone skull mold.
- Pat the mini mozzarella balls dry with paper towels.
- Place one mozzarella ball into each cavity of the silicone skull mold.
- Bake the filled silicone mold for 8-10 minutes until soft and slightly melty.
- Press each mozzarella ball gently into the mold using the back of a spoon.
- Blot any excess moisture from the mozzarella skulls.
- Refrigerate the mold for about 10 minutes to cool and firm the skulls.