
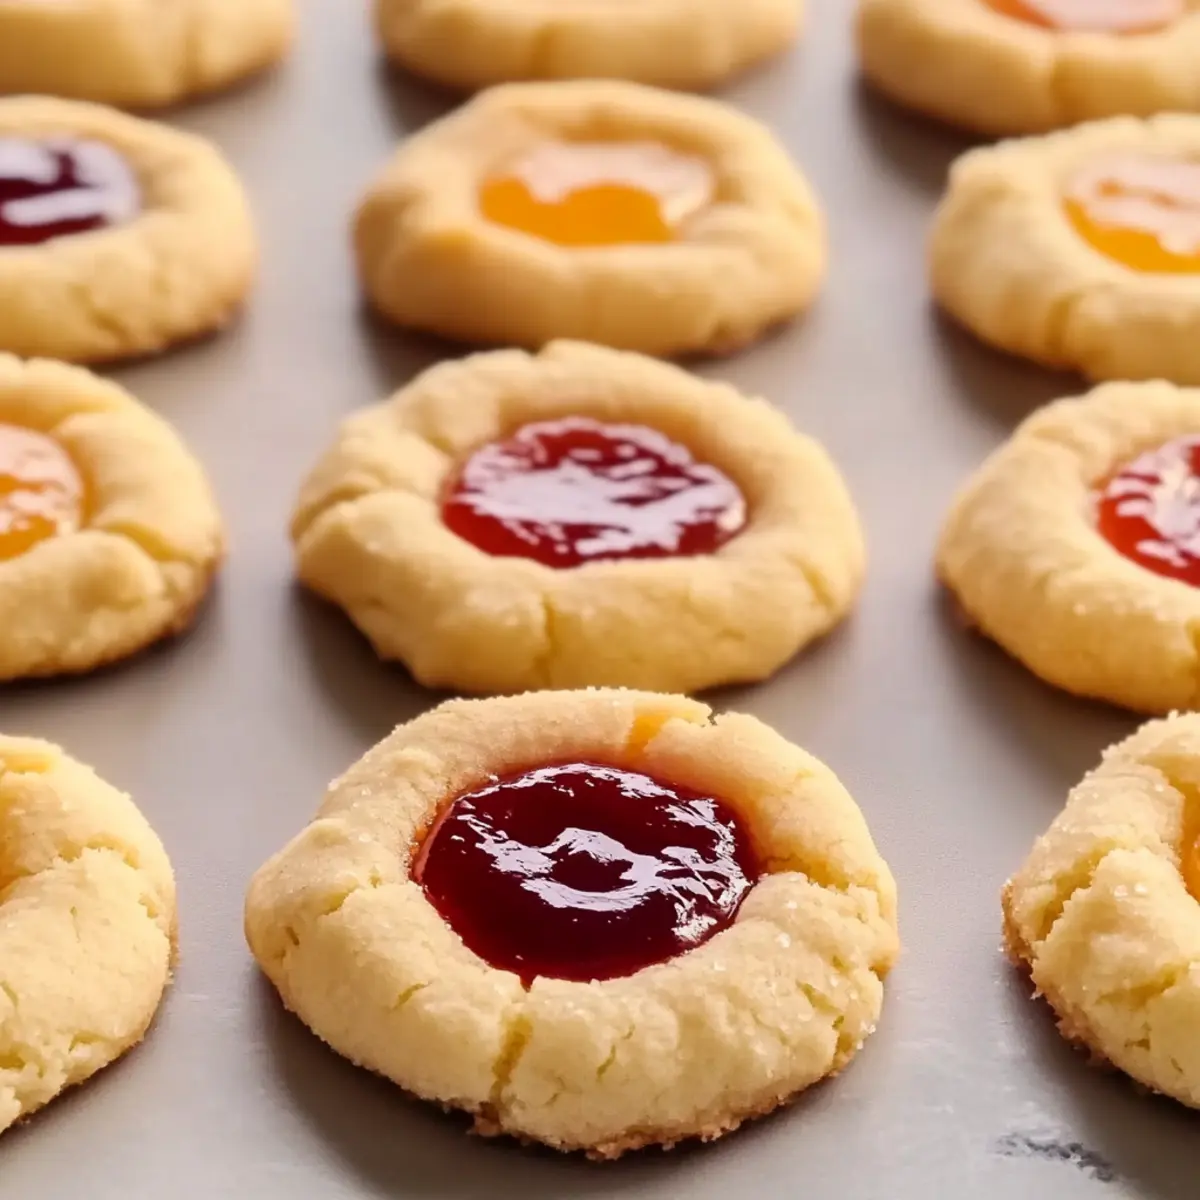
As I rolled the dough between my hands, a sense of nostalgia washed over me—Classic Thumbprint Cookies, a family favorite that had graced our holiday table for years. These delightful treats not only look charming with their signature thumbprint design but also offer a world of flavor opportunities, thanks to customizable fillings like fruit preserves or silky chocolate ganache. What I love most about this recipe is its versatility; whether you need a cozy snack or an extravagant dessert for a gathering, these cookies fit the bill perfectly. Plus, they come together quickly, making them an ideal choice for impromptu baking sessions. With their buttery texture and a hint of sweetness, aren’t you curious to see how you can make these little wonders your own?
Why Are Classic Thumbprint Cookies So Special?
Nostalgic Bite: Each cookie takes you back to cherished memories, evoking the warmth of home-baked goodness.
Customizable Options: Whether you choose berry preserves or chocolate ganache, the filling possibilities let you tailor these treats to your taste.
Quick Prep: With only a few simple steps, these cookies come together in no time, perfect for spontaneous baking.
Visual Appeal: Their delightful thumbprint design not only looks charming but also invites curiosity at gatherings.
Versatile Treat: These cookies shine as a festive dessert, cozy snack, or accompaniment to coffee, satisfying everyone at the table.
Don’t forget to explore variations like using seasonal fruit preserves for an extra flair or making them dairy-free with coconut oil! Try these alongside my Raspberry Cookies Sweet for a cookie platter that celebrates diversity in flavors.
Classic Thumbprint Cookies Ingredients
For the Cookies
- Butter – Provides richness and moisture. Ensure it is softened for easy creaming with sugar.
- Granulated Sugar – Adds sweetness. Do not substitute with brown sugar for best texture.
- Egg Yolk – Contributes to the richness and binding of the cookie. Do not use egg whites as they can alter the texture.
- Vanilla Extract – Enhances flavor. Artificial vanilla can be substituted, but pure extract is recommended for depth.
- All-Purpose Flour – Forms the structure of the cookies. Can be substituted with gluten-free flour blends.
- Salt – Balances sweetness. Use fine salt for better distribution.
For the Filling
- Fruit Preserves or Chocolate Ganache – Filling options that add flavor and moisture. Feel free to experiment with different fillings for variety in your Classic Thumbprint Cookies.
Step‑by‑Step Instructions for Classic Thumbprint Cookies
Step 1: Prepare the Dough
In a large mixing bowl, cream together softened butter and granulated sugar until the mixture is light and fluffy, about 2-3 minutes. Next, incorporate the egg yolk and vanilla extract, mixing until fully combined. In a separate bowl, whisk together the all-purpose flour and salt, then gradually add it to the butter mixture until a cohesive dough forms. Cover the dough with plastic wrap and refrigerate for at least 30 minutes to firm up.
Step 2: Preheat the Oven
While the dough chills, preheat your oven to 350°F (175°C) and line a baking sheet with parchment paper. This step ensures that the Classic Thumbprint Cookies bake evenly and do not stick to the pan. Make sure to gather any tools you will need, including a cookie scoop or tablespoon, which will help in shaping the cookies with ease.
Step 3: Shape and Fill Cookies
After the dough has chilled, scoop tablespoon-sized portions and roll them into balls, placing them about 2 inches apart on the prepared baking sheet. Use your thumb or the back of a spoon to create an indentation in the center of each ball. Gently fill each thumbprint with your choice of fruit preserves or chocolate ganache, ensuring the filling is slightly heaped for that delicious burst of flavor in every bite.
Step 4: Bake
Place the baking sheet in the preheated oven and bake the cookies for 12-15 minutes, or until their edges are lightly golden. Keep a close eye on them as they bake, as you want the centers to remain soft while the edges develop a slight crispness. The delightful aroma of the Classic Thumbprint Cookies will fill your kitchen, inviting everyone to gather around.
Step 5: Cool and Serve
Once baked, remove the cookies from the oven and let them cool on the baking sheet for about 5 minutes. This time allows them to set properly. Then, gently transfer the cookies to a wire rack to cool completely. For an extra touch of sweetness, consider dusting them with powdered sugar before serving. They’re perfect for enjoying with a warm drink or sharing at your next gathering.
What to Serve with Classic Thumbprint Cookies?
Creating a delightful cookie platter? Pairing your Classic Thumbprint Cookies with the right accompaniments makes for an inviting experience.
- Creamy Mashed Potatoes: Perfectly smooth and buttery, this side adds a comforting contrast to the sweetness of the cookies.
- Fresh Fruit Salad: A burst of colorful, juicy berries complements the cookies while enhancing their homemade charm. The brightness of the fruit balances the rich flavors.
- Decadent Hot Chocolate: Rich and creamy, this drink enhances the buttery cookie experience, making each bite feel like a warm hug.
- Artisan Cheese Board: A selection of soft cheeses can introduce a savory element to balance the cookies’ sweetness, creating a sophisticated treat. Fresh herbs or nuts on the board add more texture.
- Brewed Coffee: The rich, slightly bitter notes of coffee will elevate the sweet, buttery cookies, making each sip and bite a perfect match.
- Vanilla Ice Cream: A scoop of vanilla ice cream alongside the cookies adds creaminess while enhancing the flavors of the preserves or ganache.
- Holiday Punch: Fruity and festive, this drink is a refreshing complement to the rich flavors of the cookies and perfect for gatherings.
- Chocolate Dipped Strawberries: For an extra indulgence, pairing your cookies with chocolate-dipped strawberries elevates the dessert experience while adding freshness.
Gather your favorite treats and drink from this list to create beautiful moments that celebrate sweet nostalgia!
How to Store and Freeze Classic Thumbprint Cookies
- Room Temperature: Store cookies in an airtight container at room temperature for up to 1 week. This keeps them soft and fresh, maintaining their delicious buttery texture.
- Fridge: For longer freshness, refrigerate the cookies in an airtight container for up to 2 weeks. This helps to preserve the flavor and texture, especially if they are filled with fruit preserves.
- Freezer: Freeze Classic Thumbprint Cookies in a single layer with parchment paper between layers in an airtight container for up to 2 months. To enjoy, simply thaw at room temperature before serving.
- Reheating: To restore warmth, pop cookies in a preheated oven at 300°F (150°C) for about 5-7 minutes. This will bring back their freshly baked feel!
Make Ahead Options
These Classic Thumbprint Cookies are an excellent choice for busy home cooks looking to save time! You can prepare the dough up to 24 hours in advance; simply follow the dough preparation steps and refrigerate it tightly wrapped in plastic. The cookie dough can also be frozen for up to 3 months; just ensure it’s in an airtight container. If you’re using fruit preserves or chocolate ganache, prep those ahead too—fillings can be stored in the refrigerator for up to 1 week. When you’re ready to bake, scoop and shape the refrigerated or thawed dough, make your thumbprints, and fill them before baking. This way, you can enjoy freshly baked cookies with minimal last-minute effort, just as delicious as if made from scratch that day!
Expert Tips for Classic Thumbprint Cookies
-
Butter Temperature: Ensure your butter is softened but not overly melted for the best texture. Cold butter can lead to dense cookies.
-
Chill the Dough: Don’t skip refrigerating the dough! This step helps the cookies maintain their shape and achieves that delightful texture.
-
Indentation Depth: Make a deep enough thumbprint to hold the filling without overflowing. Too shallow won’t catch enough flavor during baking.
-
Filling Variations: Feel free to mix and match fillings! Experiment with seasonal fruit preserves or flavored ganache for unique twists on your Classic Thumbprint Cookies.
-
Baking Time: Keep an eye on baking times as ovens can vary. Cookies should be lightly golden at the edges but still soft in the center upon removal.
Classic Thumbprint Cookies Variations & Substitutions
Feel free to let your creativity shine by customizing your Classic Thumbprint Cookies with exciting twists!
-
Seasonal Preserves: Use fruit preserves like cranberry or orange for a festive flair that brightens your cookies. Their vibrant colors and rich flavors will add a delightful holiday touch.
-
Dairy-Free Delight: Swap butter for coconut oil to create dairy-free thumbprint cookies. This substitution not only caters to dietary needs but also adds a subtle coconut flavor that complements the sweet filling beautifully.
-
Flavored Extracts: Experiment with unique extracts such as almond or lemon for a fresh twist. These flavors can transform your cookies into an enticing sensory experience, making every bite unforgettable.
-
Chocolate Lovers: Fill your thumbprints with a rich chocolate ganache for an indulgent treat. The luxurious chocolate will melt in your mouth, curating a sweet escape with every bite.
-
Nutty Crunch: Add finely chopped nuts to the cookie dough to introduce a delightful texture contrast. Think walnuts or pecans for an earthy, crunchy element that enhances the classic recipe beautifully.
-
Spiced Twist: Mix in warm spices like cinnamon or nutmeg into the dough for a cozy touch. With each bite, you’ll experience the comforting aroma of freshly baked cookies that evoke memories of family gatherings.
-
Gluten-Free Option: Substitute all-purpose flour with a gluten-free flour blend to accommodate dietary restrictions. This variation ensures everyone can enjoy these classic cookies without sacrificing taste.
-
Zesty Infusion: Grate some lemon or orange zest into the dough for a refreshing citrus zing. The added brightness will elevate your Classic Thumbprint Cookies and leave guests smiling.
For even more delicious ideas, explore my delightful Raspberry Sugar Cookies and Chocolate Blossom Cookies for a truly inspired cookie platter!
Classic Thumbprint Cookies Recipe FAQs
What type of butter should I use for Classic Thumbprint Cookies?
You should use unsalted butter that is softened to room temperature for the best results. This ensures that it creams well with the sugar, resulting in a light and fluffy cookie texture. Avoid using melted butter, as it can lead to dense cookies.
How should I store Classic Thumbprint Cookies?
Store your Classic Thumbprint Cookies in an airtight container at room temperature for up to 1 week. For longer-lasting freshness, you can refrigerate them for up to 2 weeks. Just make sure they are fully cooled before storing to prevent moisture accumulation.
Can I freeze Classic Thumbprint Cookies, and how?
Absolutely! To freeze your Classic Thumbprint Cookies, first arrange them in a single layer with parchment paper in between to prevent sticking. Place them in an airtight container and freeze for up to 2 months. When you’re ready to enjoy, let them thaw at room temperature, and they’ll taste just as delightful as when they were first baked.
What should I do if my dough is too sticky?
If your dough is too sticky to work with, don’t worry! You can add a little more flour, a tablespoon at a time, until it reaches a manageable consistency. Make sure to refrigerate the dough as recommended, as this also helps firm it up and makes shaping easier.
Are there any allergy considerations for Classic Thumbprint Cookies?
Yes! This recipe contains butter, which has dairy. If you’re accommodating someone with lactose intolerance, consider using dairy-free butter or coconut oil. Additionally, always check for gluten-free flour options if you’re catering to someone with gluten allergies, ensuring that all other ingredients also meet these dietary needs.
Classic Thumbprint Cookies: A Delightful Treat to Customize
Ingredients
Equipment
Method
- In a large mixing bowl, cream together softened butter and granulated sugar until light and fluffy, about 2-3 minutes. Incorporate egg yolk and vanilla extract until combined.
- In a separate bowl, whisk together the all-purpose flour and salt, then gradually add it to the butter mixture until a cohesive dough forms. Cover and refrigerate for at least 30 minutes.
- Preheat your oven to 350°F (175°C) and line a baking sheet with parchment paper.
- Scoop tablespoon-sized portions, roll them into balls, and place them 2 inches apart on the baking sheet. Create an indentation in each ball and fill with your choice of filling.
- Bake for 12-15 minutes until edges are lightly golden. Let cool for 5 minutes on the baking sheet, then transfer to a wire rack.
- Consider dusting with powdered sugar before serving. Enjoy with a warm drink or share at gatherings.