
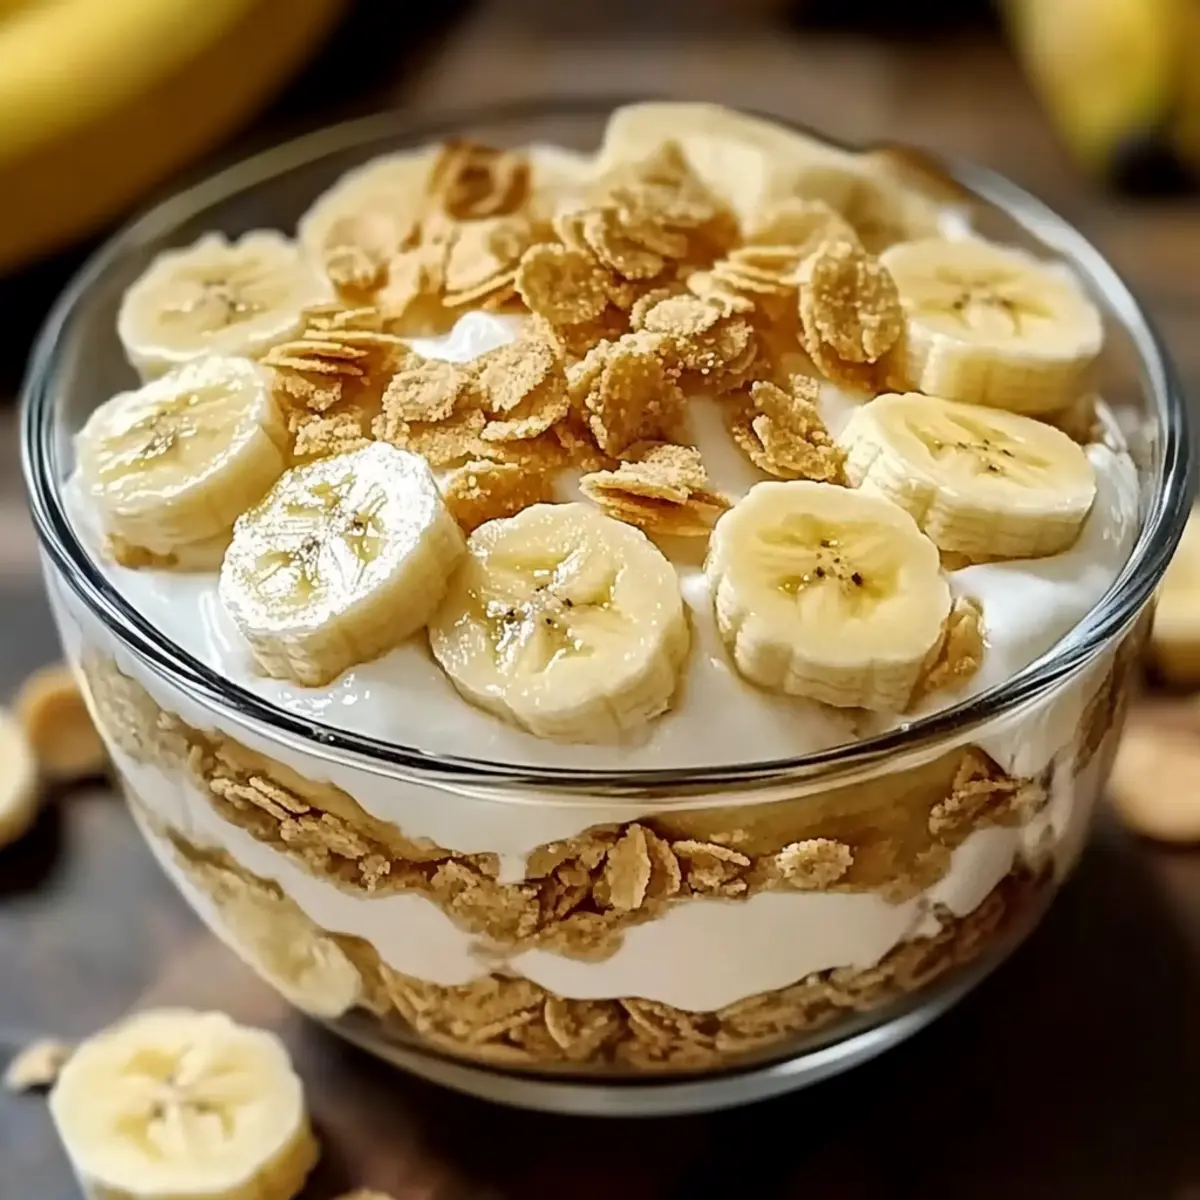
As I scoured my grandmother’s recipe box last weekend, I stumbled upon a handwritten note that instantly brought a smile to my face. It was her Old-Fashioned Homemade Banana Pudding recipe, a classic dessert that has warmed hearts and filled bellies for generations. This delightful treat is not just a sweet indulgence; it’s a lovely reminder of cozy family gatherings and laughter around the table. With its creamy custard, ripe bananas, and crunchy vanilla wafers, this nostalgic pudding is both a comforting staple and a crowd-pleaser, ideal for any occasion. Plus, it’s easily adaptable, offering gluten-free options for those who need them! Ready to create a dessert that wraps you in a warm hug? Let’s get started on this delicious journey together!
Why is Banana Pudding a Classic?
Nostalgic Comfort: This Old-Fashioned Homemade Banana Pudding brings back fond memories of family gatherings, making it a beloved dessert.
Richly Creamy: Each spoonful delivers a velvety custard complemented by fresh bananas, offering a delightful balance of flavors.
Easy Preparation: With just a few simple ingredients, you can whip this dessert up effortlessly, even if you’re short on time.
Versatile Appeal: Feel free to experiment with variations, like adding crushed cookies or other fruits, to keep things exciting.
Crowd Favorite: Whether it’s a holiday celebration or just a comforting weeknight treat, this pudding is sure to please everyone at the table.
Let’s dive into the details of creating this unforgettable dessert that’s sure to be a hit just like my other favorites, like Hawaiian Banana Bread or Banana Pudding Tiramisu.
Old-Fashioned Homemade Banana Pudding Ingredients
For the Custard
- Milk – Adds creaminess; for a richer flavor, opt for whole milk instead of low-fat.
- Sugar – Sweetens the pudding; adjust to your desired level of sweetness.
- Eggs – Provide structure and richness; use large eggs for the best results.
- Vanilla Extract – Enhances flavor; substitute with vanilla bean paste for even more depth.
For the Layering
- Bananas – Offers natural sweetness and texture; ensure they are ripe for optimal flavor.
- Vanilla Wafers – Add crunch and flavor contrast; choose gluten-free wafers if necessary or omit for a gluten-free version.
- Lemon Juice – Used on banana slices to prevent browning; optional but recommended for a beautiful presentation.
This delightful mix of ingredients is what makes the Old-Fashioned Homemade Banana Pudding a truly comforting classic. Let’s get cooking!
Step‑by‑Step Instructions for Old-Fashioned Homemade Banana Pudding:
Step 1: Prepare Custard
In a medium saucepan, combine 4 cups of milk, 1 cup of sugar, 4 large eggs, and 1 tablespoon of vanilla extract. Cook the mixture over medium heat, stirring constantly with a whisk to prevent sticking. Continue cooking until it thickens to the consistency of heavy cream, approximately 10-12 minutes. You’ll know it’s ready when it coats the back of a spoon and slightly bubbles at the edges.
Step 2: Cool Custard
Once thickened, remove the saucepan from the heat and let the custard cool slightly at room temperature for about 15 minutes. This step is essential; allowing the custard to cool helps develop its flavor and prevents the bananas from cooking when layered. Stir occasionally to prevent a skin from forming on the surface as it cools.
Step 3: Layer Ingredients
In a large serving dish or individual cups, begin layering the homemade banana pudding. Start with a layer of custard, followed by a layer of sliced ripe bananas, and then a generous sprinkle of vanilla wafers. Repeat the process until you run out of ingredients, finishing with a final layer of custard. This layering ensures that every bite is a perfect combination of creamy custard, soft bananas, and crunchy wafers.
Step 4: Chill
Cover the dish with plastic wrap and place it in the refrigerator for at least 4 hours, preferably overnight. Chilling allows the flavors of the Old-Fashioned Homemade Banana Pudding to meld beautifully, creating a deliciously cool treat. The vanilla wafers will soften, balancing the dessert’s texture with the creamy layers.
Step 5: Serve
When ready to serve, scoop out portions of your lovingly prepared Banana Pudding. It’s best served chilled, so take it straight from the fridge. For an elegant touch, garnish with additional banana slices and whipped cream, if desired. Enjoy the delightful contrast of texture and flavor as you savor this classic dessert!
How to Store and Freeze Old-Fashioned Homemade Banana Pudding
Fridge: Store covered in the refrigerator for up to 3 days. It’s best enjoyed within two days to maintain the crunch of the vanilla wafers.
Freezer: Freezing is not recommended for this pudding due to the creamy texture; however, you can freeze the custard separately for up to 2 months and reheat gently.
Reheating: If using frozen custard, thaw in the fridge overnight, then gently reheat in a saucepan over low heat, stirring until smooth before layering.
Presentation Tip: For the best presentation, assemble the pudding just before serving, keeping the vanilla wafers crunchy and the bananas fresh.
Make Ahead Options
These Old-Fashioned Homemade Banana Pudding layers are perfect for meal prep enthusiasts! You can prepare the custard up to 24 hours in advance, allowing it to chill and develop flavor in the fridge. To maintain the pudding’s delightful texture, layer the sliced bananas and vanilla wafers right before serving; this helps keep the wafers crunchy and prevents the bananas from browning too soon. If you’d like to make the entire dish ahead, store it covered in the refrigerator for up to 3 days, though it’s best enjoyed within two days for optimal freshness. When ready to serve, simply scoop out portions, and you’ll have a wonderfully nostalgic dessert ready to enjoy with minimal fuss!
Old-Fashioned Homemade Banana Pudding Variations
Feel free to explore different twists and adaptations of this classic dessert, making it truly your own!
- Chocolate Twist: Add a layer of chocolate pudding between custard layers for a rich and indulgent touch.
- Fruit Fiesta: Swap out bananas for seasonal fruits like strawberries or peaches to brighten up your pudding.
- Nutty Crunch: Sprinkle crushed nuts, such as walnuts or pecans, on each layer for added texture and flavor.
- Dairy-Free: Use almond or coconut milk in place of regular milk, and enjoy a delicious dairy-free version of this pudding.
- Flavor Boost: Infuse the custard with a splash of rum or bourbon for a delightful flavor kick that adults will adore.
- Whipped Extravagance: Top your finished pudding with fluffy whipped cream for an airy finish that elevates every spoonful.
- Caramel Drizzle: Drizzle caramel sauce atop the layered pudding to add a delectable sweetness and unique flair to traditional flavors.
- Zesty Surprise: Add a hint of orange or lemon zest to the custard for a refreshing citrus twist.
Each of these variations can breathe new life into your Old-Fashioned Homemade Banana Pudding, ensuring it stays a beloved favorite for years to come! You might also enjoy trying other recipes like Chocolate Covered Banana or Almond Crust Banana.
What to Serve with Old-Fashioned Homemade Banana Pudding
Indulging in this creamy dessert invites a full spread of delightful pairings to enhance your meal experience.
- Fresh Fruit Salad: A colorful mix of seasonal fruits adds brightness and freshness, balancing the richness of the pudding.
- Chocolate Chip Cookies: Their crispness and sweetness complement the nostalgia while providing a delightful contrast in textures.
- Classic Lemonade: The tartness of lemonade pairs beautifully, providing a refreshing contrast to the creamy sweetness of the pudding.
- Coffee or Espresso: A warm cup brings out the flavors of the banana pudding, creating a cozy and comforting finish to your meal.
- Coconut Whipped Cream: Light and airy, this topping can add a tropical twist that perfectly complements the banana elements.
- Almond Joy Brownies: Rich and chewy, these brownies pack a flavorful punch, echoing the chocolate and coconut notes to create harmony.
Each pairing adds its own unique element, turning simple dessert time into a comforting celebration of tastes and textures.
Expert Tips for Old-Fashioned Homemade Banana Pudding
-
Continuous Stirring: Always stir the custard mixture while cooking to prevent it from sticking to the bottom of the pan and forming lumps.
-
Make-Ahead Magic: Consider chilling the pudding overnight for enhanced flavor; it allows the ingredients to meld beautifully and develop a richer taste.
-
Layer Wisely: For optimum presentation, layer the pudding components just before serving. This keeps the vanilla wafers crunchy and the bananas fresh.
-
Choosing Bananas: Select ripe but firm bananas; overly brown bananas can make your pudding visually unappealing while sacrificing texture.
-
Adjusting Sweetness: Taste your custard as you make it; you can always adjust the sugar to suit your preference, ensuring your Old-Fashioned Homemade Banana Pudding remains just the right level of sweetness.
Old-Fashioned Homemade Banana Pudding Recipe FAQs
What kind of bananas should I use for Old-Fashioned Homemade Banana Pudding?
Absolutely! For the best flavor and texture, use ripe bananas that are slightly speckled with brown spots. Overly brown bananas can make the pudding look unappealing and may lead to a mushy texture. Aim for bananas that are firm but sweet for the perfect balance in your dessert.
How should I store Old-Fashioned Homemade Banana Pudding?
Store your banana pudding covered in the refrigerator for up to 3 days. It’s best enjoyed within the first two days to keep the vanilla wafers crunchy. If left too long, the wafers can become soggy, diminishing that delightful crunch!
Can I freeze Old-Fashioned Homemade Banana Pudding?
Not really! Freezing the complete pudding is not recommended due to the creamy texture, which can separate when thawed. However, you can freeze the custard separately for up to 2 months. To do this, let the custard cool completely, then pour it into an airtight container. When you’re ready to use it, thaw it in the fridge overnight and gently reheat it in a saucepan over low heat, stirring until smooth.
What should I do if my custard doesn’t thicken correctly?
No worries! If your custard hasn’t thickened after the recommended cooking time, continue to cook it over medium heat while stirring constantly for a few more minutes. Make sure you’re using medium heat and not too high, as this could scorch the mixture. It should eventually thicken to the consistency of heavy cream, which will coat the back of a spoon.
Are there any dietary considerations for Old-Fashioned Homemade Banana Pudding?
Absolutely! If you need a gluten-free option, simply choose gluten-free vanilla wafers or leave them out entirely. Additionally, monitor for any allergies; this recipe contains dairy (milk and eggs). For a vegan option, you can replace milk with a plant-based alternative and use a vegan egg substitute, though it may alter the final texture.
Can I make Old-Fashioned Homemade Banana Pudding ahead of time?
Very! In fact, making it ahead of time is highly recommended. Preparing it the night before allows the flavors to meld beautifully, enhancing the overall taste. Just be sure to layer the vanilla wafers right before serving to keep them crunchy and fresh!
Old-Fashioned Homemade Banana Pudding
Ingredients
Equipment
Method
- In a medium saucepan, combine 4 cups of milk, 1 cup of sugar, 4 large eggs, and 1 tablespoon of vanilla extract. Cook over medium heat, stirring constantly until thickened, about 10-12 minutes.
- Once thickened, remove from heat and let cool for about 15 minutes.
- In a serving dish, layer custard, sliced bananas, and vanilla wafers. Repeat until ingredients are used up, finishing with custard.
- Cover and refrigerate for at least 4 hours or overnight.
- Serve chilled, optionally garnished with banana slices and whipped cream.