
In a world full of quick fixes and fast food, there’s a sweet satisfaction in crafting something wholesome right at home. Enter my deliciously addictive Chocolate Covered Chickpea Protein Balls! These little gems not only emulate the irresistible taste of cookie dough but also bring an unexpected protein punch to your snacking routine. They’re the perfect solution for anyone needing a quick, no-bake energy boost, making them a great choice for busy days or post-workout pick-me-ups. Plus, they’re vegan, gluten-free, and incredibly versatile; you can easily swap out ingredients to cater to your pantry’s whims. Who knew a snack could be so delightful and healthy at the same time? Ready to dive into a recipe that will revolutionize your snacking game? Let’s get started!
Why are these protein balls a game-changer?
Satisfying Crunch: With a texture that mimics cookie dough, these balls are chewy yet surprisingly hearty.
Nutritious Boost: Packed with protein from chickpeas and nut butter, they provide energy without the crash.
Quick and Easy: No baking means you can whip them up in minutes—ideal for busy lifestyles!
Versatile Ingredients: Tailor the recipe with your favorite nut butter or add-ins for the ultimate flavor experience.
Guilt-Free Indulgence: Enjoy the rich chocolate drizzle without compromising on your health goals. Perfect as a post-workout treat or a midday snack! Explore similar delights like Chocolate Covered Banana or Chocolate Marshmallow Swirl to keep your sweet tooth satisfied!
Chocolate Covered Chickpea Protein Balls Ingredients
For the Base
• Chickpeas – They serve as the primary base, providing protein and fiber; use canned or cooked chickpeas that are well-drained.
• Almond/Peanut Butter – This adds creaminess and healthy fats; feel free to swap in your favorite nut or seed butter.
• Unsweetened Applesauce – Acts as a natural sweetener and moisture booster; mashed bananas or yogurt can be used instead.
• Vanilla Protein Powder – Increases the protein content, making these balls even healthier; choose your preferred plant-based option for best results.
For Sweetening & Flavor
• Maple Syrup or Stevia – Provides sweetness; honey or agave syrup can also be a great alternative.
• Vanilla Extract – Enhances the flavor profile with a sweet aroma; omit if you prefer, but it’s recommended for the best taste.
For the Chocolate Drizzle
• Cocoa Powder – Used for drizzling to achieve that chocolatey goodness; melted dark chocolate can offer a richer flavor if desired.
• Coconut Oil – Helps achieve that smooth consistency for your drizzle; canola oil or butter work well in its place.
These Chocolate Covered Chickpea Protein Balls are not just a treat; they’re a fulfilling snack that perfectly blends health and indulgence!
Step‑by‑Step Instructions for Chocolate Covered Chickpea Protein Balls
Step 1: Blend Ingredients
In a food processor, combine the drained and rinsed chickpeas, almond or peanut butter, unsweetened applesauce, vanilla protein powder, sweetener, and vanilla extract. Pulse until the mixture is creamy and smooth, stopping occasionally to scrape down the sides. This should take about 1-2 minutes, creating a dough-like consistency that resembles cookie dough.
Step 2: Taste and Adjust
After blending, taste your mixture to determine its sweetness. If you prefer a sweeter flavor profile, feel free to add a bit more maple syrup or stevia. Blend again for a few seconds until combined, ensuring your Chocolate Covered Chickpea Protein Balls will have just the right amount of sweetness for your liking.
Step 3: Form Balls
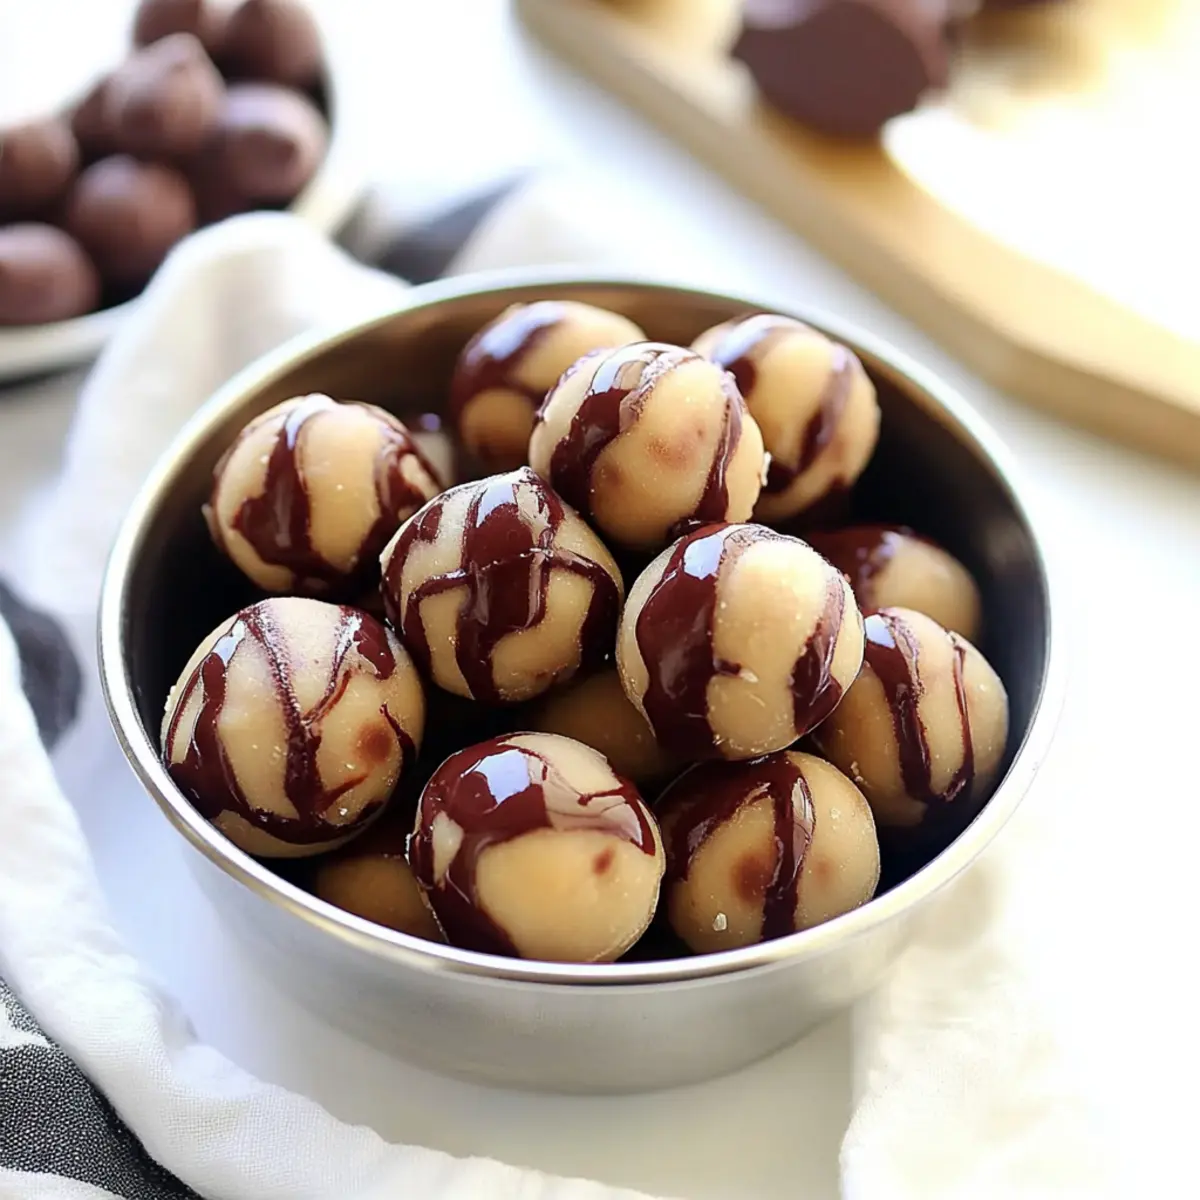
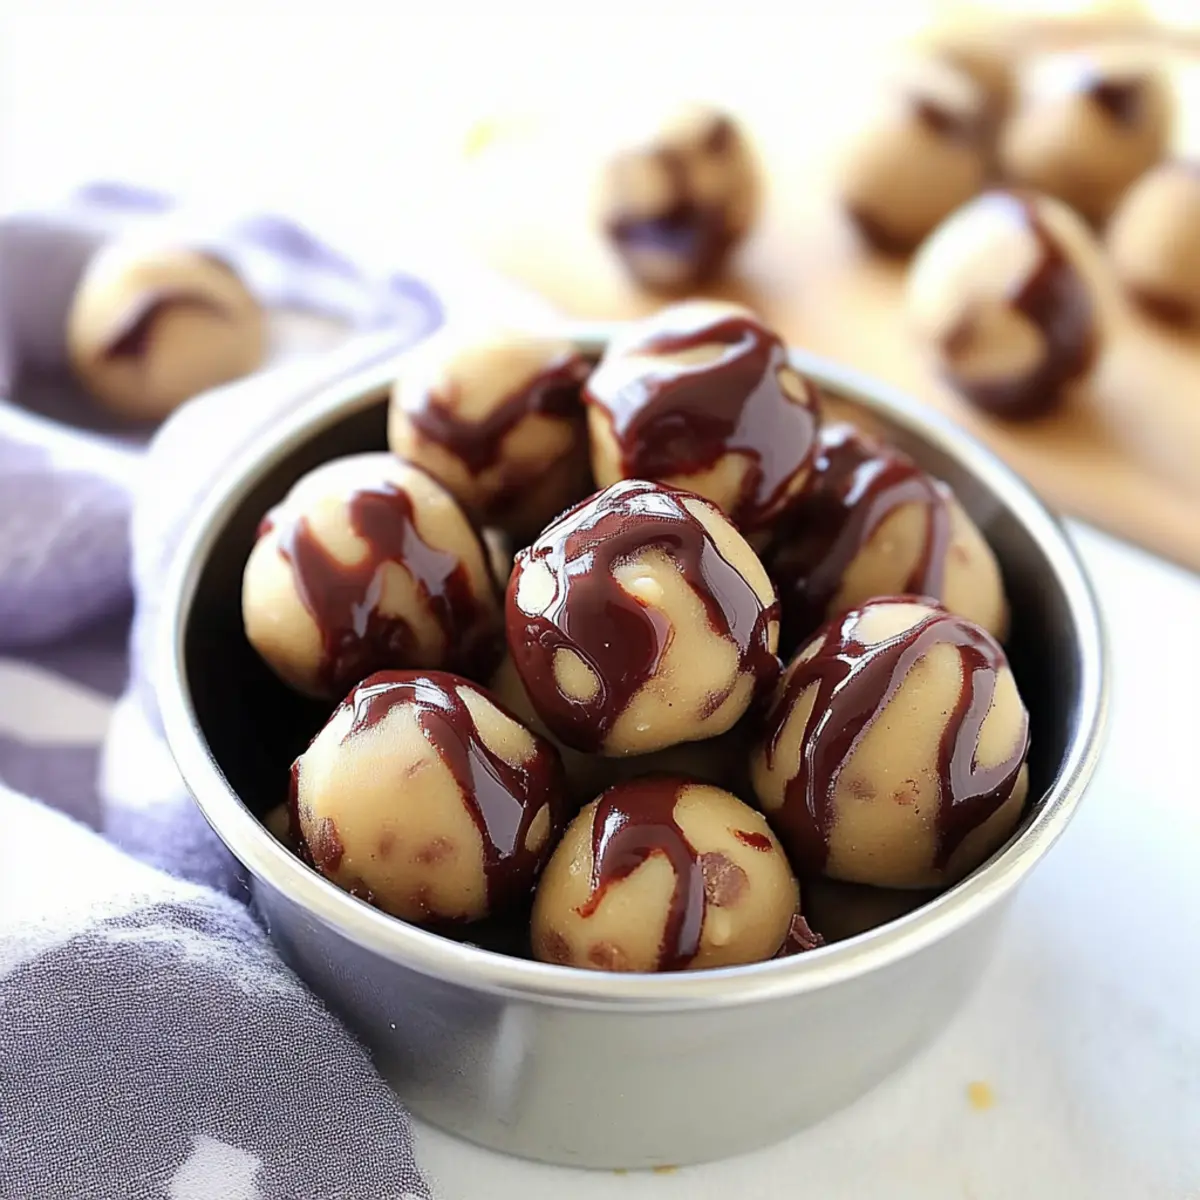
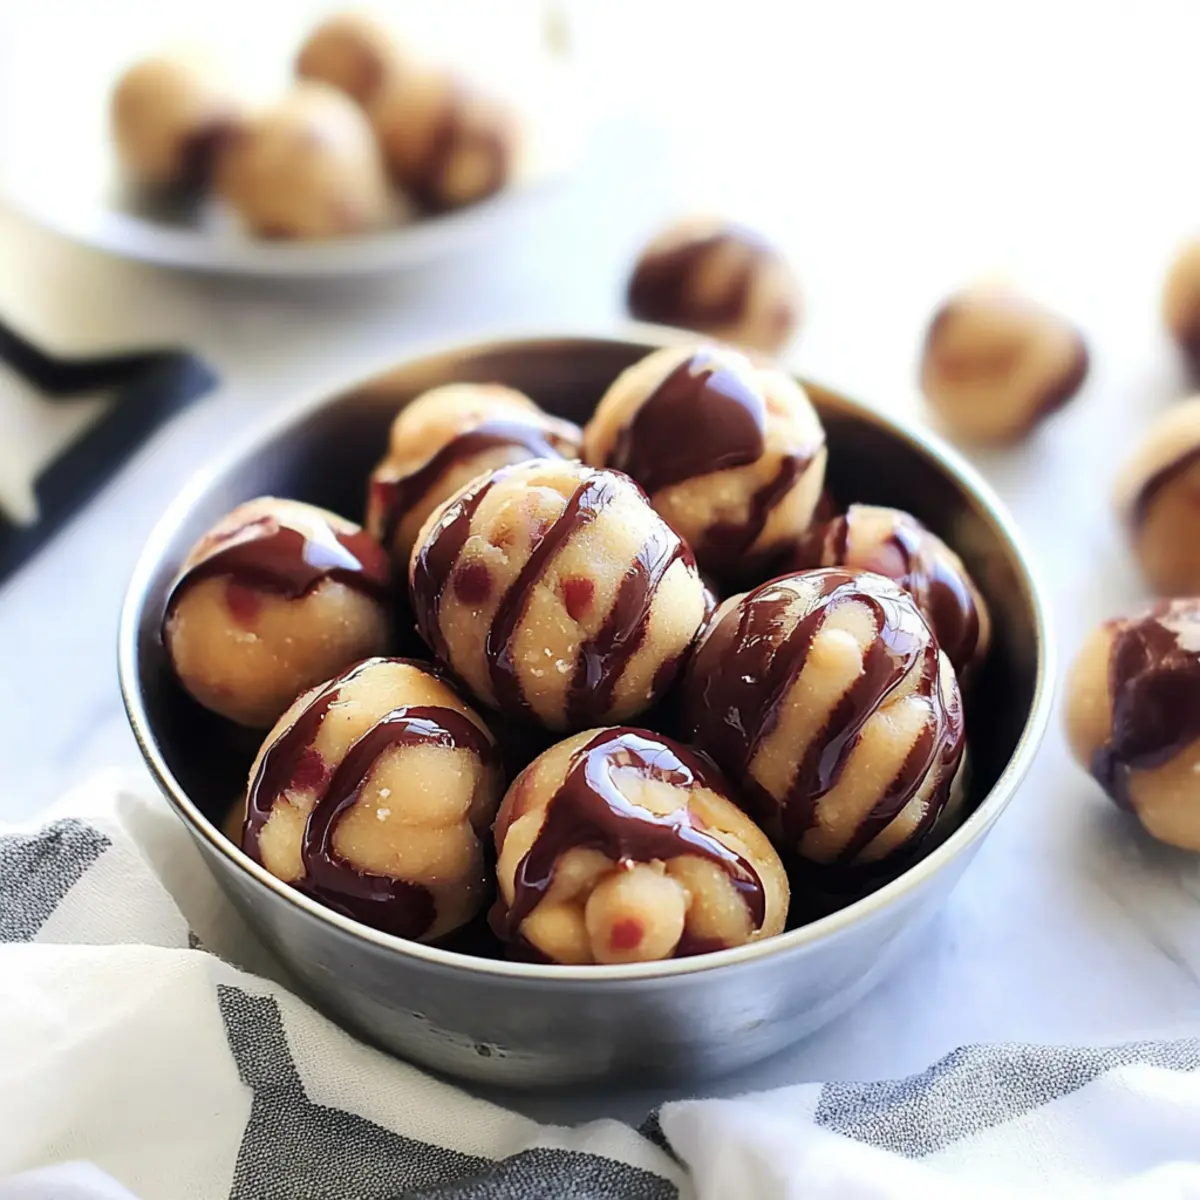
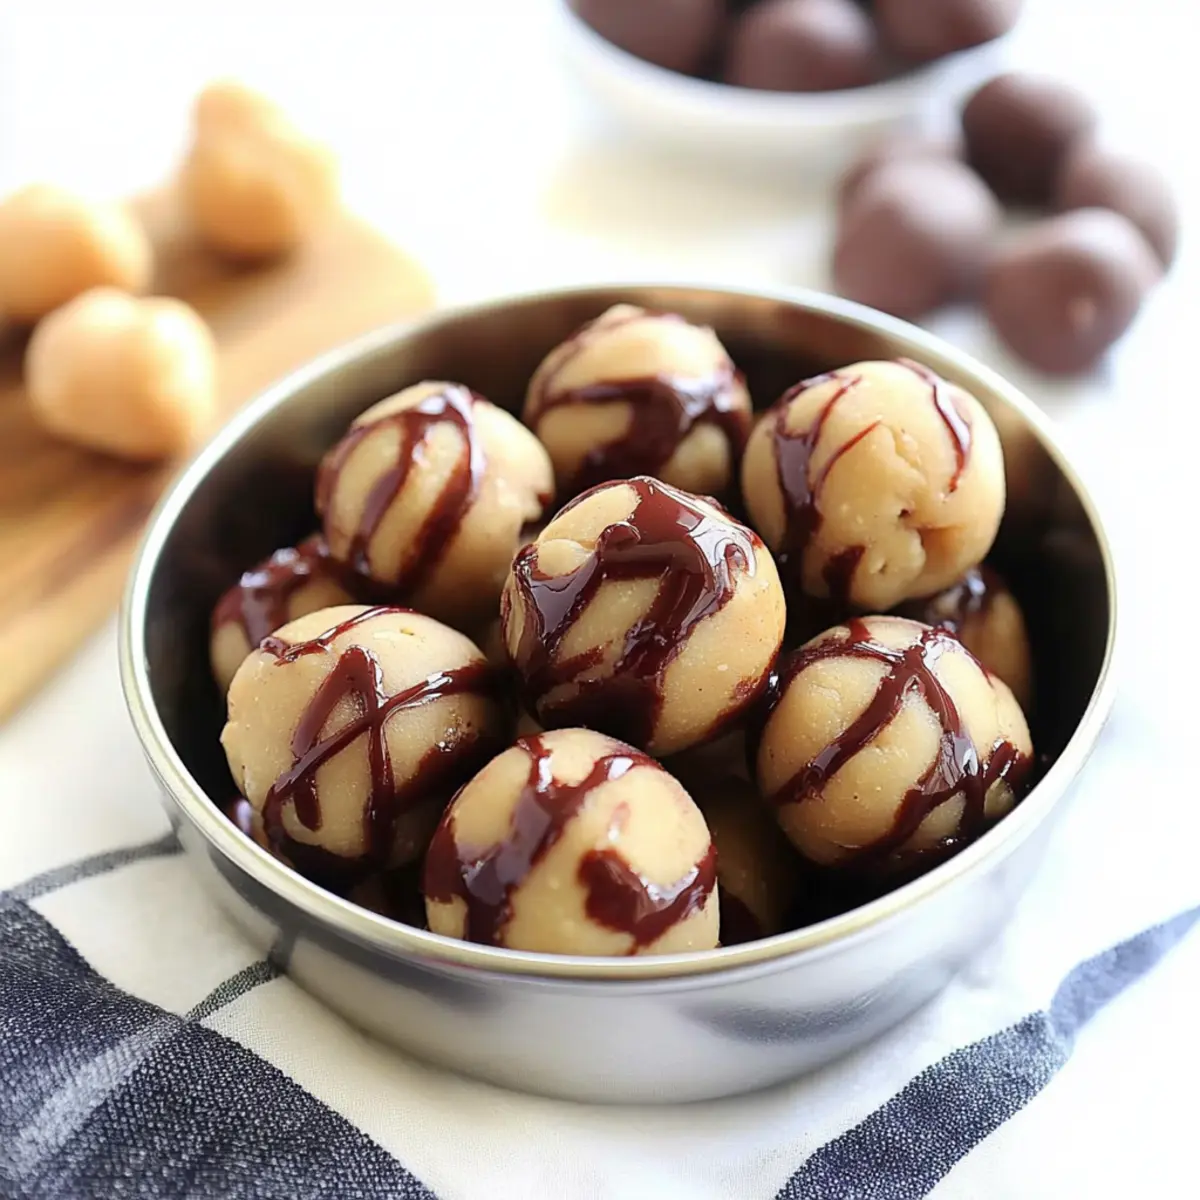
Once you’re satisfied with the flavor, scoop out tablespoon-sized portions of the mixture and roll them into balls, about 1 inch in diameter. Place each ball on a parchment-lined baking sheet. This step is essential for shaping your protein balls into perfect bite-sized treats that will be both delightful and nutritious.
Step 4: Make Chocolate Drizzle
In a small saucepan over low heat, melt together cocoa powder and coconut oil until smooth and glossy. This process will only take 2-3 minutes, so keep an eye on it to prevent burning. Once melted, remove from heat and let cool slightly before drizzling over your protein balls for that rich chocolate flavor.
Step 5: Chill
Finally, place the baking sheet with the rolled balls in the refrigerator for at least 30 minutes. This chilling step allows the Chocolate Covered Chickpea Protein Balls to firm up and makes them easier to handle. After chilling, you can serve these delightful treats cold or store them in an airtight container for an on-the-go snack.
Chocolate Covered Chickpea Protein Balls Variations
Feel free to get creative and make these Chocolate Covered Chickpea Protein Balls your own by experimenting with different ingredients!
-
Nut-Free: Swap nut butter for sunflower seed butter to keep it allergy-friendly while still adding creaminess and flavor.
-
Banana Boost: Replace the applesauce with mashed bananas for a sweeter, fruitier taste and extra moistness in every bite. They will be delightful, just like a banana treat!
-
Higher Fiber: Mix in ground flaxseed or chia seeds for an extra nutritional boost that enhances fiber content while adding a slight crunch.
-
Spicy Kick: Add a dash of cayenne or chili powder to the chocolate drizzle. This will give your protein balls a surprising spicy twist that lingers with each bite.
-
Mini Chocolate Chips: For an extra indulgence, fold in mini chocolate chips into the base mixture before forming the balls. It’s the perfect treat for chocolate lovers!
-
Dried Fruit Delight: Incorporate some dried cranberries or cherries for added sweetness and chewy texture—these will burst with flavor and color!
-
Coconut Dream: Roll the balls in shredded coconut before chilling for a tropical twist. The coconut enhances the flavor while adding a delightful chewiness.
-
Full-On Chocolate: Go all out by coating your protein balls in melted dark chocolate instead of just drizzling. This will elevate your snack into dessert territory!
Whether you’re looking to cater to dietary needs or just wish to mix things up, these variations will keep your snacking fresh and exciting! For more chocolatey inspiration, try out White Chocolate Raspberry or even White Chocolate Toffee recipes that bring a new sweet twist to your kitchen adventures!
Make Ahead Options
These Chocolate Covered Chickpea Protein Balls are a fantastic choice for meal prep, making your busy days a breeze! You can prepare the chickpea mixture and roll the balls up to 24 hours in advance; just store them in an airtight container in the refrigerator. For the chocolate drizzle, it’s best to keep it separate until you’re ready to serve, ensuring it stays fresh and glossy. When you’re ready to enjoy, simply drizzle the melted chocolate over the protein balls and chill for an additional 30 minutes. This way, you’ll have an irresistibly delicious and nutritious snack ready to go whenever you need that pick-me-up!
How to Store and Freeze Chocolate Covered Chickpea Protein Balls
Fridge: Store your protein balls in an airtight container in the refrigerator for up to 1 week to keep them fresh and delicious.
Freezer: For longer storage, freeze the balls in a single layer on a baking sheet, then transfer to an airtight container for up to 3 months.
Thawing: When you’re ready to enjoy, simply remove from the freezer and allow them to thaw in the fridge for a couple of hours before serving.
Reheating: There’s no need to reheat these chocolate covered chickpea protein balls! Enjoy them cold for the best flavor and texture.
What to Serve with Chocolate Covered Chickpea Protein Balls
Looking to create the perfect spread to accompany your delicious snacks? Discover these delightful pairings that will elevate your experience!
-
Fresh Fruit Salad: A colorful mix of seasonal fruits adds brightness and acidity, balancing the rich chocolate flavor beautifully. The natural sweetness enhances the whole meal.
-
Crunchy Veggies and Hummus: Pairing with crisp veggies provides a refreshing crunch that contrasts the soft texture of the protein balls while offering more nutrients.
-
Spiced Nuts: A handful of spiced or roasted nuts adds an extra crunch and savory depth, turning your snack time into a satisfying experience.
-
Oatmeal Cookies: These chewy treats make a sweet duo with the protein balls. Enjoy the harmonious balance of flavors that both baked goods provide!
-
Dark Chocolate Almond Milk: A glass of this creamy, velvety drink is perfect for a cozy complement, naturally enhancing the chocolate indulgence.
-
Coconut Yogurt: Creamy and slightly tangy, coconut yogurt balances the sweetness of the balls, offering a refreshing contrast and a satisfying texture.
-
Matcha Green Tea: This earthy drink introduces a unique flavor profile, making each bite of the protein balls feel even more decadent while also being energizing.
-
Dark Chocolate Dipped Strawberries: For those with a sweet tooth, this pairing takes the chocolate experience to a whole new level! The fresh berries keep everything bright and juicy.
-
Trail Mix: A handful with dried fruits, seeds, and nuts brings in varying textures and flavors that create a deliciously sustaining snack combination.
Expert Tips for Chocolate Covered Chickpea Protein Balls
-
Well-Drained Chickpeas: Ensure chickpeas are thoroughly rinsed and drained to prevent a gritty texture in your protein balls.
-
Taste Test: Don’t skip the tasting step! Adjust sweetness with more maple syrup or stevia to ensure your Chocolate Covered Chickpea Protein Balls are just right for your palate.
-
Texture Balance: If the mixture is too sticky, incorporate a little ground oats or additional protein powder. This keeps their texture consistent and moldable.
-
Chill Time: Allow your protein balls to chill for at least 30 minutes. This helps them firm up and creates that perfect bite-sized treat you desire.
-
Customize the Drizzle: Experiment with different drizzles using melted dark chocolate or even a sprinkle of sea salt for a gourmet touch!
Chocolate Covered Chickpea Protein Balls Recipe FAQs
What type of chickpeas should I use?
Absolutely, you can use either canned or cooked chickpeas for your protein balls! If you’re using canned chickpeas, make sure to rinse and drain them thoroughly to avoid any gritty texture. This step is essential for achieving that creamy, cookie dough-like consistency.
How should I store my Chocolate Covered Chickpea Protein Balls?
For fresh and delicious snacking, store the protein balls in an airtight container in the refrigerator, where they will keep for up to a week. Just ensure they’re properly sealed to maintain their soft texture.
Can I freeze these protein balls?
Very! To freeze, place the rolled protein balls in a single layer on a baking sheet and pop them in the freezer until solid. Once they’re firm, transfer them to an airtight container or freezer bag; they can last for up to 3 months. When you’re ready to enjoy, let them thaw in the fridge for a few hours before digging in.
What if my mixture is too sticky?
If you find the mixture is too sticky to roll into balls, don’t worry! Simply add a tablespoon of ground oats or more vanilla protein powder until you reach a moldable consistency. This adjustment keeps your Chocolate Covered Chickpea Protein Balls perfectly shaped and easy to handle.
Are these protein balls safe for those with nut allergies?
While this recipe includes nut butter, you can easily modify it for nut allergies by substituting it with a seed butter, like sunflower seed butter. This makes the recipe safe for those with nut allergies while still providing the necessary creaminess and flavor!
How do I achieve a beautiful chocolate drizzle?
To make the chocolate drizzle shine, make sure to melt the cocoa powder and coconut oil together over low heat until smooth and glossy. Be attentive during this process—should it burn, it can compromise the taste. Cool it slightly before drizzling over the balls to create that perfect, artistic touch!
Delicious Chocolate Covered Chickpea Protein Balls You’ll Love
Ingredients
Equipment
Method
- In a food processor, combine the drained chickpeas, almond or peanut butter, unsweetened applesauce, vanilla protein powder, sweetener, and vanilla extract. Pulse until creamy and smooth, about 1-2 minutes.
- Taste the mixture and adjust sweetness if needed with more maple syrup or stevia, then blend again briefly.
- Scoop out tablespoon-sized portions and roll into balls, placing them on a parchment-lined baking sheet.
- In a small saucepan over low heat, melt together cocoa powder and coconut oil until smooth, about 2-3 minutes.
- Remove from heat and drizzle over the protein balls. Place the sheet in the refrigerator for at least 30 minutes to firm up.