
A Family Tradition Wrapped in Flaky, Cheesy Goodness
Some of the best recipes are the ones that bring people together—the kind that fill a kitchen with warmth, laughter, and the irresistible aroma of freshly baked bread. For me, baked cheese buns are more than just a recipe; they are a memory, a tradition that started in my grandmother’s kitchen.
I remember sitting at her kitchen counter as she kneaded the dough, the rhythmic motion of her hands pressing and folding, while the scent of warm milk and butter filled the air. She would let me sprinkle the cheese, watching as I piled on more than necessary, unable to resist the temptation of an extra-cheesy bite. When they came out of the oven, golden and steaming, we would tear into them immediately, ignoring her gentle warnings to let them cool.
Now, I carry on the tradition, making these buns for family gatherings, weekend breakfasts, and cozy evenings when only something warm and cheesy will do. They are simple, comforting, and endlessly adaptable—perfect on their own, alongside a hearty soup, or as a snack with a cup of tea. Every bite is a reminder that the best meals aren’t just about taste but about the memories they create.
Why You’ll Love These Cheese Buns
1. The Perfect Combination of Soft and Cheesy
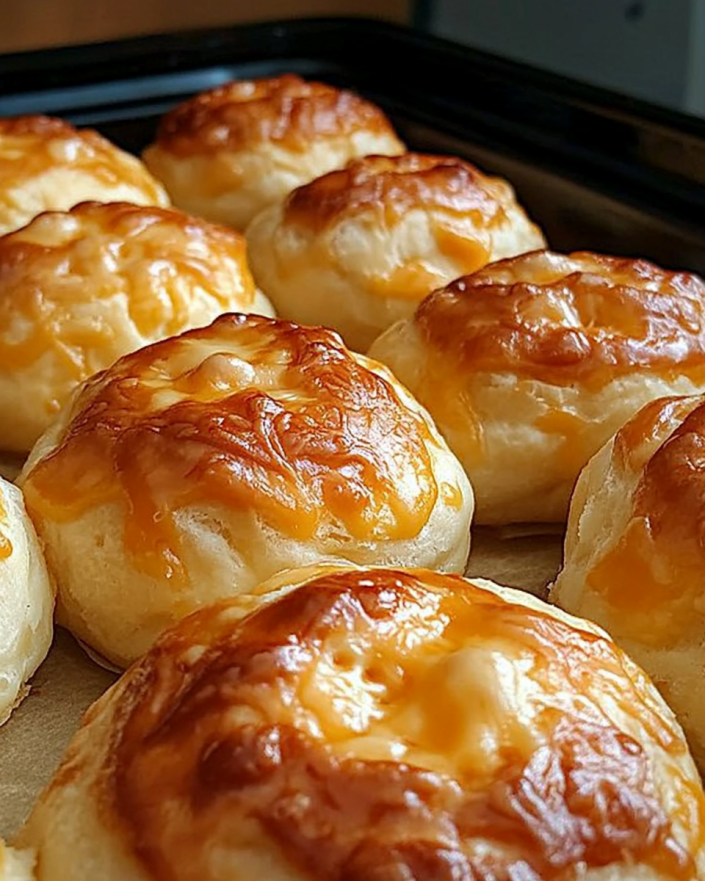
These buns have a light, fluffy texture with a golden crust, encasing a gooey, melted cheese center. Whether you use mozzarella, cheddar, or a mix of both, the cheese oozes out with every bite, making them impossible to resist.
2. Great for Any Meal or Snack
- Breakfast: Pair them with eggs and coffee for a delicious morning treat.
- Lunch or Dinner: Serve with a bowl of soup or salad for a balanced meal.
- Snack Time: Enjoy them on their own as a quick and satisfying bite.
3. A Fun and Easy Baking Project
Making these buns is a rewarding baking experience that doesn’t require advanced skills. If you love working with dough, the process of kneading, shaping, and watching them rise will be incredibly satisfying.
4. Completely Customizable
- Add fresh herbs like rosemary or thyme for extra flavor.
- Mix in garlic powder or chili flakes for a bit of spice.
- Swap in different cheeses like Gruyère, Parmesan, or gouda for a new twist.
Ingredients – A Simple Yet Irresistible Treat
- Warm Milk (1 cup, 110°F) – Activates the yeast and keeps the dough soft
- Active Dry Yeast (2 ¼ teaspoons) – Helps the buns rise beautifully
- Sugar (1 tablespoon) – Adds a hint of sweetness to balance the flavors
- All-Purpose Flour (3 cups) – The base for a light, fluffy dough
- Salt (1 teaspoon) – Enhances the flavor of the buns
- Unsalted Butter (4 tablespoons, melted) – Adds richness to the dough
- Egg (1 large) – Provides structure and moisture
- Grated Cheese (2 cups, mozzarella, cheddar, or a mix) – The gooey, melty heart of these buns
Directions – From Dough to Golden Perfection
1. Activate the Yeast
Mix warm milk, sugar, and yeast in a bowl. Let it sit until frothy (about 5-10 minutes).
2. Prepare the Dough
In a large mixing bowl, combine flour and salt. Make a well in the center and add yeast mixture, melted butter, and egg. Mix until a soft dough forms.
3. Knead and Rise
Knead on a floured surface for 8-10 minutes until smooth. Transfer to a greased bowl, cover, and let rise in a warm spot for 1 hour until doubled in size.
4. Shape the Buns
Punch down the dough and divide it into 12 equal pieces. Flatten each, add a tablespoon of cheese, and shape into a bun.
5. Second Rise and Bake
Place buns on a parchment-lined baking sheet, cover, and let rise for 30 minutes. Brush with milk or egg wash, then bake at 375°F (190°C) for 15-20 minutes until golden brown.
6. Cool and Enjoy
Let the buns rest for a few minutes before serving for the ultimate melty, cheesy experience.
Nutritional Snapshot – A Savory Indulgence
- Calories: ~210 per bun
- Protein: 7g
- Carbohydrates: 24g
- Fat: 9g
- Calcium: High, thanks to the cheese
Serving Suggestions: How to Enjoy Cheese Buns to the Fullest
1. Fresh from the Oven
The best way to enjoy these buns is warm, straight out of the oven, when the cheese is still soft and gooey.
2. With Soup or Stew
Dip them into a bowl of hot soup—whether it’s tomato, creamy potato, or a hearty beef stew, these buns soak up all the flavors while adding a cheesy bite.
3. As a Side for Breakfast
Slice them in half and toast them slightly, then spread with butter or pair with scrambled eggs and bacon for a satisfying morning meal.
4. As a Sandwich Base
Use them as a base for mini sandwiches, adding ham, turkey, or avocado for an upgraded lunch.
5. With a Glass of Wine
Pair with a glass of white wine for an elegant snack, especially if using sharp cheddar or Gruyère in the filling.
Frequently Asked Questions (FAQs)
1. Can I Use Instant Yeast Instead of Active Dry Yeast?
Yes! Instant yeast can be substituted in equal amounts, and you can skip the proofing step. Just mix it directly with the dry ingredients.
2. How Can I Make the Buns Extra Fluffy?
The key to fluffy buns is proper kneading and rising time. Make sure to knead the dough for at least 8-10 minutes and allow it to rise in a warm place until it doubles in size.
3. What’s the Best Cheese to Use?
Mozzarella gives a classic stretchy, gooey texture, while cheddar adds a sharp, tangy bite. A mix of Parmesan and Gruyère creates a rich, nutty flavor.
4. Can I Freeze These Buns?
Absolutely! You can freeze them before or after baking:
- Before Baking: Shape the buns, then freeze them on a baking sheet. Once solid, transfer them to a freezer bag. Let them thaw and rise before baking.
- After Baking: Let them cool completely, then store in an airtight container. Reheat in an oven at 350°F for 5-7 minutes.
5. Can I Make These Without Eggs?
Yes! Replace the egg with ¼ cup of Greek yogurt or sour cream for a similar texture.
6. How Can I Keep the Cheese from Leaking Out?
Make sure to seal the dough well around the cheese when shaping the buns. Pinch the seams tightly to prevent melting cheese from escaping.
7. Can I Use Whole Wheat Flour Instead of All-Purpose Flour?
Yes, but keep in mind that whole wheat flour makes the dough denser. For a fluffier texture, use half whole wheat and half all-purpose flour.
8. What’s the Best Way to Reheat Leftover Buns?
For best results, warm them in a 350°F oven for 5-10 minutes. Avoid microwaving, as it can make the texture chewy instead of crispy.
9. Can I Add Toppings to the Buns?
Definitely! Before baking, brush the buns with egg wash or milk and sprinkle with:
- Sesame or poppy seeds for crunch
- Garlic butter for a savory touch
- Extra cheese for a golden, crispy top
10. Can I Make These Buns Gluten-Free?
Yes, but you’ll need a gluten-free flour blend with xanthan gum to ensure they hold their structure. The dough may be slightly more delicate, so handle with care.
Final Thoughts: The Comfort of Homemade Cheese Buns
Baked cheese buns are one of those rare treats that bring instant comfort—a perfect balance of soft, pillowy dough and melted, gooey cheese in every bite. Whether you’re making them for a cozy weekend breakfast, a family gathering, or just because you’re craving something warm and savory, they are guaranteed to be a hit.
The best part? These buns are versatile, customizable, and easy to make. They invite creativity—whether you experiment with different cheeses, herbs, or even a spicy kick. They freeze well, reheat beautifully, and fill your kitchen with the irresistible aroma of freshly baked bread.
So, the next time you want to bake something delicious, satisfying, and filled with cheesy goodness, give these buns a try. And maybe, just maybe, they’ll become a beloved tradition in your home, just like they did in mine.
Print
Baked Cheese Buns: A Warm, Cheesy Delight for Every Occasion
- Total Time: ~2 hours
- Yield: 12 buns
Description
Soft, fluffy, and filled with melty cheese, these Baked Cheese Buns are a comforting treat perfect for any meal. Whether enjoyed fresh from the oven, dipped in soup, or paired with coffee, they bring warmth and nostalgia to every bite.
Ingredients
- 1 cup warm milk (110°F)
- 2 ¼ teaspoons active dry yeast
- 1 tablespoon sugar
- 3 cups all-purpose flour
- 1 teaspoon salt
- 4 tablespoons unsalted butter, melted
- 1 large egg
- 2 cups grated cheese (mozzarella, cheddar, or a mix)
Instructions
- Activate the Yeast: In a bowl, mix warm milk, sugar, and yeast. Let sit until frothy (about 5-10 minutes).
- Prepare the Dough: In a large bowl, combine flour and salt. Make a well and add the yeast mixture, melted butter, and egg. Mix until a soft dough forms.
- Knead & Rise: Knead on a floured surface for 8-10 minutes until smooth. Place in a greased bowl, cover, and let rise for 1 hour until doubled in size.
- Shape the Buns: Punch down the dough and divide into 12 pieces. Flatten each, add a tablespoon of cheese, and shape into a bun.
- Second Rise & Bake: Place buns on a parchment-lined baking sheet, cover, and let rise for 30 minutes. Brush with milk or egg wash, then bake at 375°F (190°C) for 15-20 minutes until golden brown.
- Cool & Enjoy: Let rest for a few minutes before serving warm.
Notes
- Use a mix of cheeses for extra flavor.
- Add herbs or garlic powder for a savory twist.
- Store in an airtight container or freeze for later use.
- Prep Time: 15 minutes
- Rise Time: 1.5 hours
- Cook Time: 20 minutes
- Category: Bread
- Method: Baked
- Cuisine: Comfort Food