
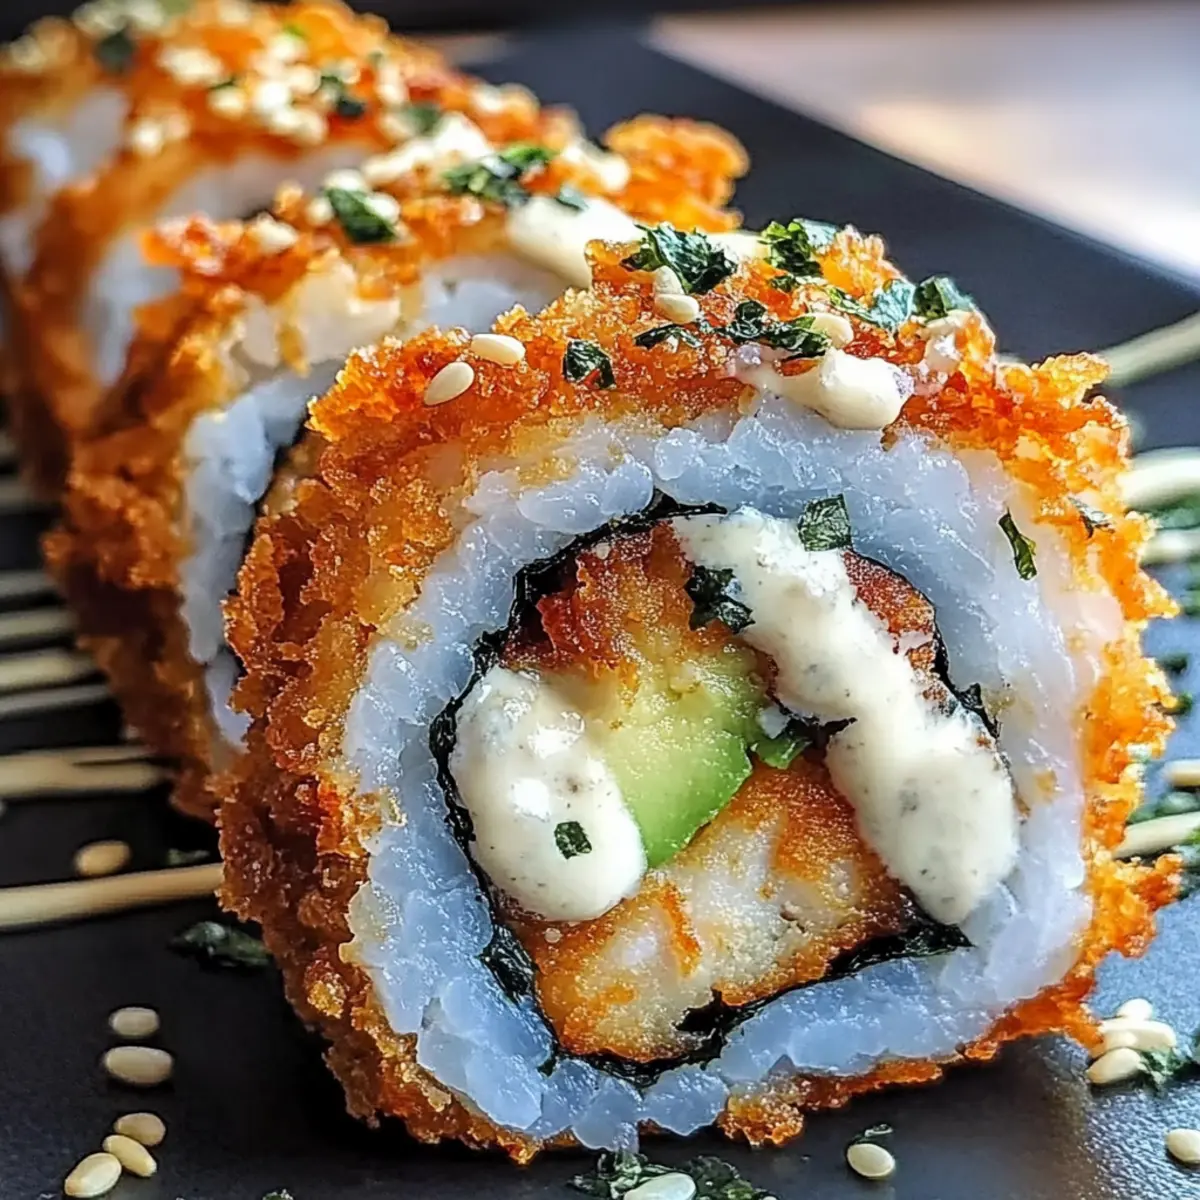
The sizzling sound of frying chicken and the enticing aroma of seasoned rice transported me to a cozy Japanese eatery the moment I began crafting my Crispy Chicken Tempura Roll. This delightful fusion of crispy fried chicken wrapped in tender sushi rice and nori isn’t just a treat for the taste buds—it’s also an effortless way to bring a restaurant experience to your home in just 30 minutes! Not only does this recipe deliver a satisfying crunch, but it also makes for a quick meal perfect for busy weeknights or special gatherings with friends. You’ll love the simplicity of homemade sushi that doesn’t skimp on flavor. So, are you ready to roll into this delicious adventure?
Why You’ll Crave This Chicken Tempura Roll?
Simplicity made elegant: With just a few ingredients, you can create a stunning dish that feels gourmet yet is easy enough for a weeknight dinner.
Crispy perfection: The contrast of the crunchy fried chicken with the softness of the seasoned rice and creamy avocado makes each bite a delightful experience.
Versatile fillings: Feel free to customize this roll with your favorite ingredients or even try different proteins like shrimp or tofu for a twist!
Time-saving: In just 30 minutes, you can serve up these tempting rolls, making them a fantastic option for quick meals or easy entertaining.
Crowd-pleaser: Impress your family and friends with this delicious fusion of flavors that brings the best of Japanese cuisine right to your kitchen. Pair them with a bowl of miso soup for a complete meal or try the Crockpot Chicken Nachos for another crowd-pleasing dish!
Chicken Tempura Roll Ingredients
For the Sushi Rice
• Short-grain rice – Provides sticky texture essential for sushi rolls; use sushi rice varieties for authentic flavor.
• Cold water – Used for cooking rice; ensures proper texture.
• Rice vinegar – Adds a tangy flavor to sushi rice; apple cider vinegar can be a mild substitute.
• Sugar – Balances the acidity of the vinegar; honey works as an alternative for sweetness.
• Salt – Enhances overall flavor; adjust according to taste.
For the Chicken Tempura
• Chicken breast (about 8 oz) – The main protein, diced into strips for tempura; dark meat offers a juicier alternative.
• Plain flour – Forms part of the batter; gluten-free flour can be used for a gluten-free version.
• Corn flour (cornstarch) – Creates a crispy coating; consistent texture is key.
• Seasoning mix (salt & black pepper) – Provides flavor to the chicken; adjust to personal preference.
• Neutral cooking oil (1½ cups) – Used for frying; ensure a high smoke point with vegetable or canola oil as substitutes.
For Assembly
• Nori sheet – Wraps the sushi and holds the roll together; available at most grocery stores.
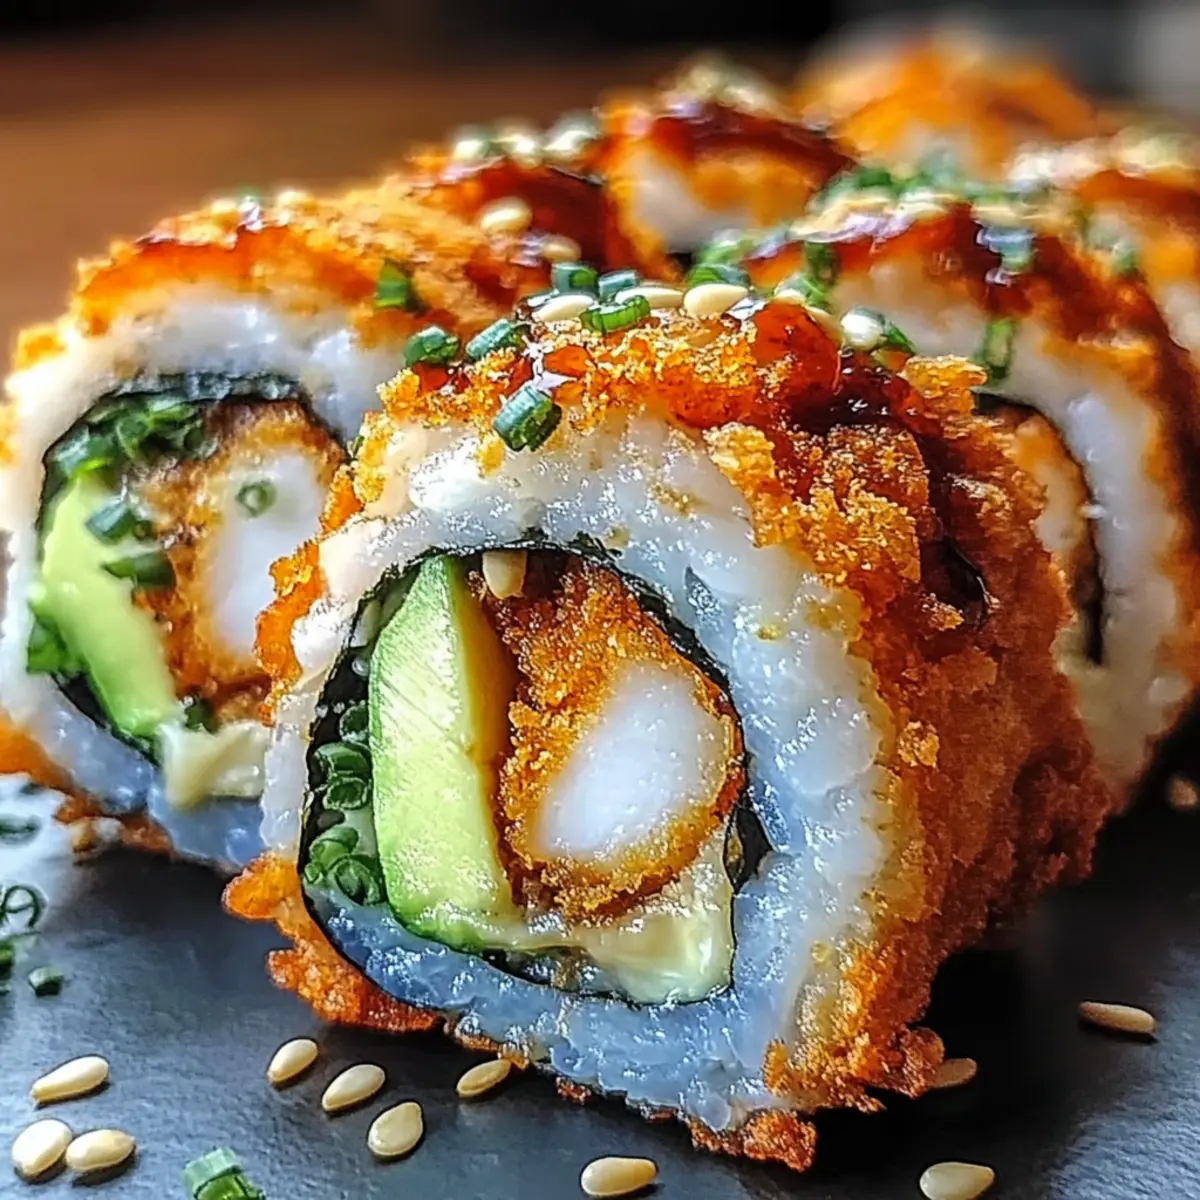
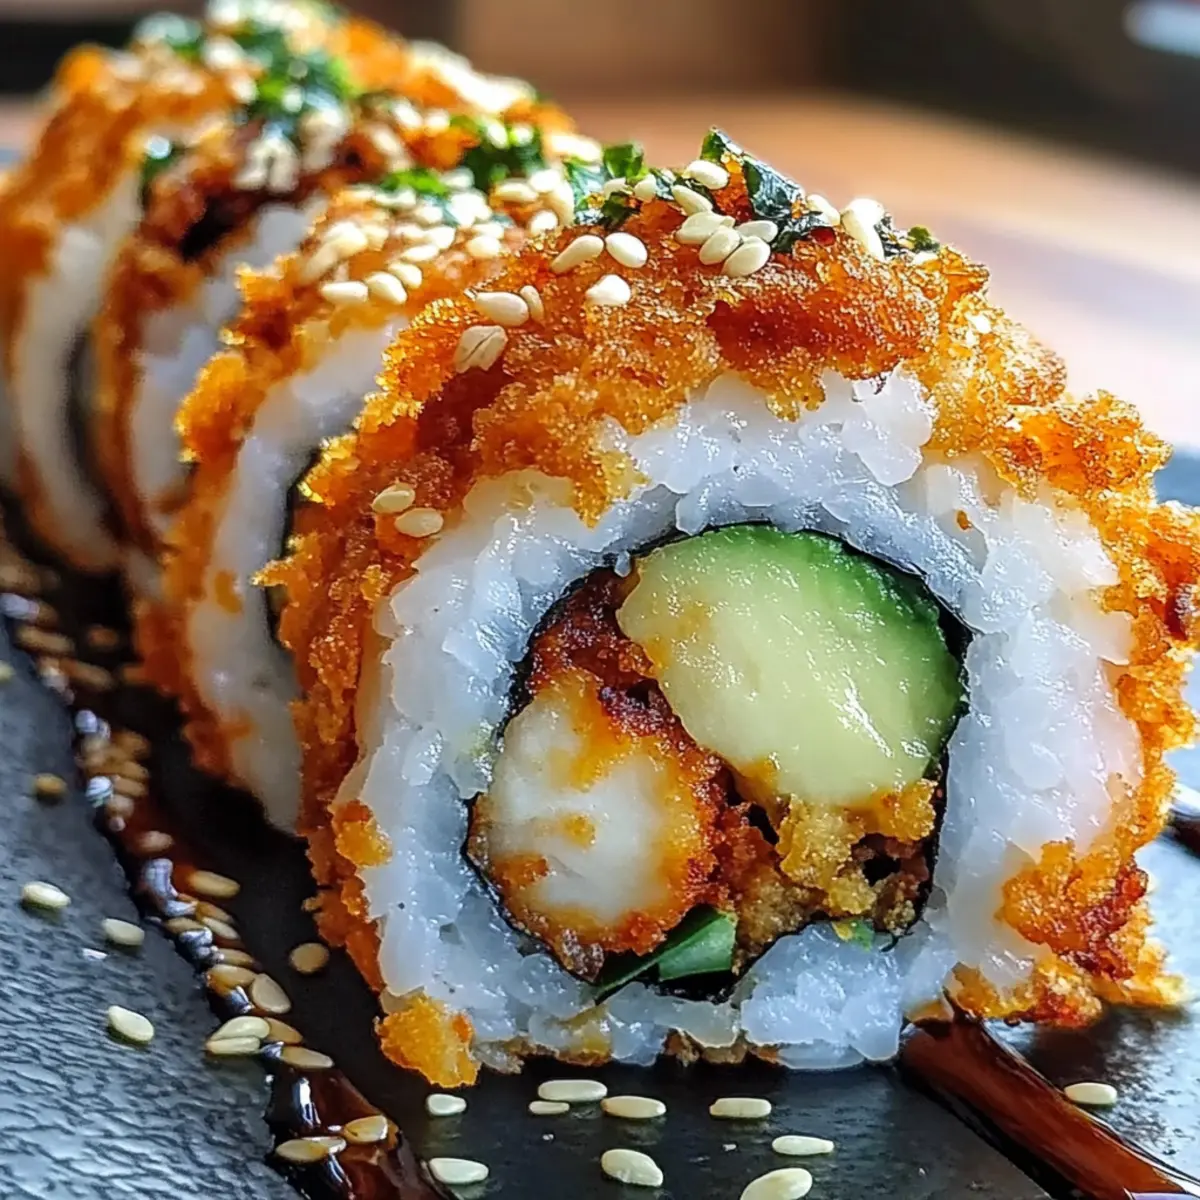
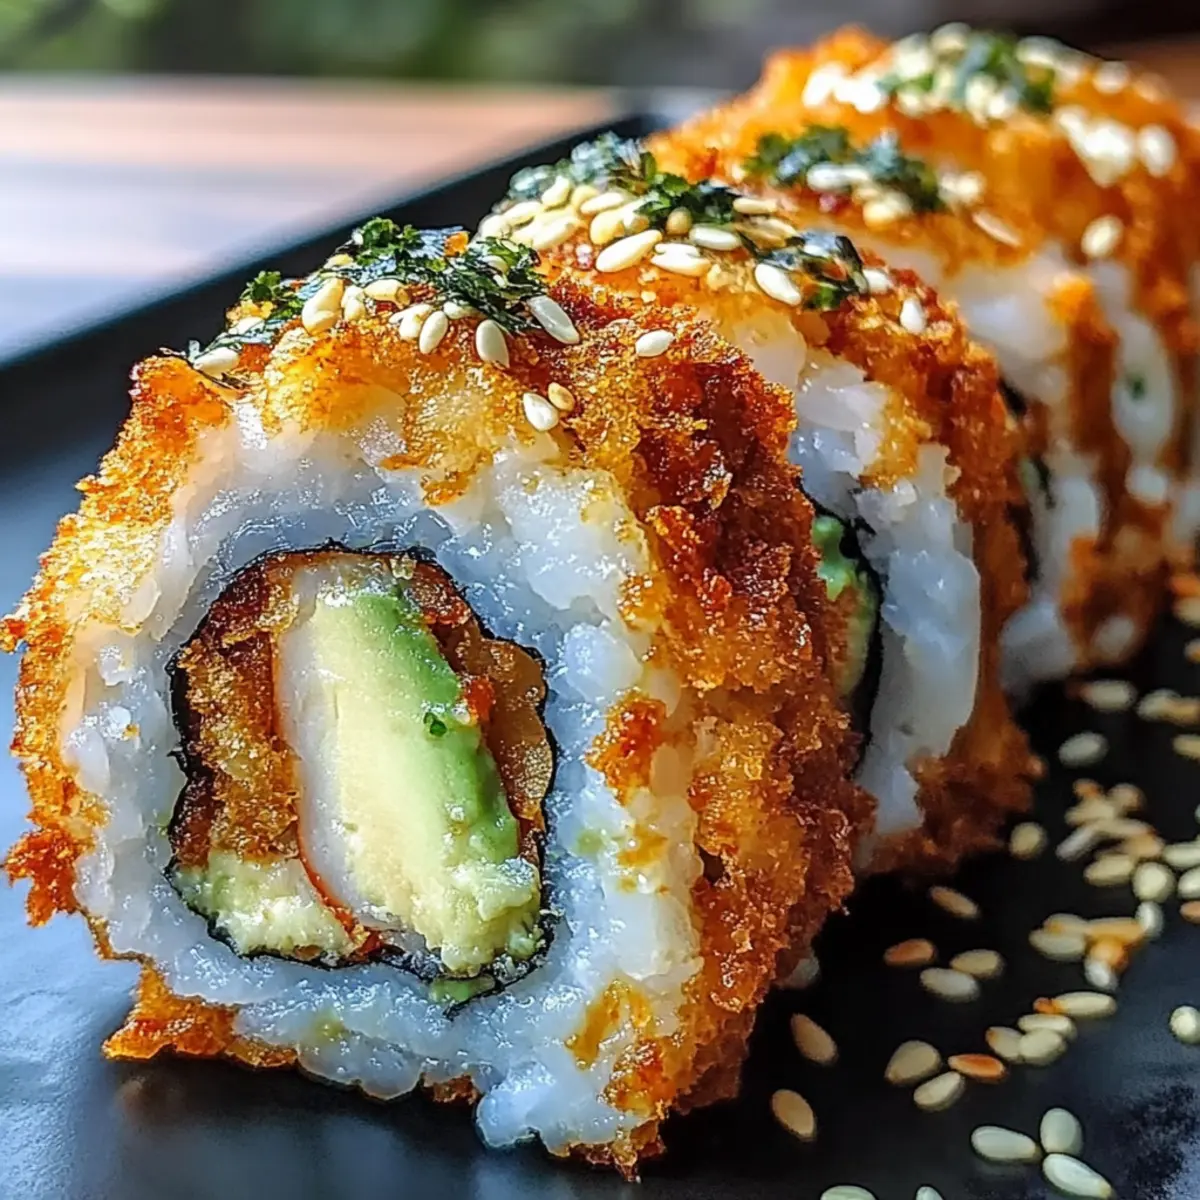
• Ripe avocado – Adds creaminess and flavor; consider cucumber or cream cheese as substitutes.
• White and black sesame seeds – For garnish, enhancing visual appeal and adding a light nuttiness.
Get ready to roll your very own Chicken Tempura Roll and enjoy a bit of Japanese comfort food right in your kitchen!
Step‑by‑Step Instructions for Crispy Chicken Tempura Roll
Step 1: Rinse the Rice
Begin by rinsing 1 cup of short-grain rice under cold water until the water runs clear. This process removes excess starch to ensure your sushi rice has the perfect sticky texture. After rinsing, drain the rice well, and set it aside to prepare for cooking.
Step 2: Cook the Rice
In a medium pot, combine the rinsed rice with 1¼ cups of cold water and bring it to a boil over medium-high heat. Once boiling, reduce the heat to low, cover the pot, and let it simmer for 12 minutes. You will know it’s done when the water is absorbed and the rice appears fluffy.
Step 3: Let the Rice Steam
Once the timer goes off, remove the pot from heat but keep it covered. Allow the rice to steam for an additional 10 minutes; this step is crucial to achieving the right texture. After steaming, transfer the rice to a large bowl to cool slightly while you prepare the sushi seasoning.
Step 4: Season the Rice
In a small bowl, mix together 2 tablespoons of rice vinegar, 1 tablespoon of sugar, and a pinch of salt until dissolved. Gently fold this mixture into the warm sushi rice using a wooden spatula, being careful not to squish the grains. This step gives your rice the flavorful kick essential for your Chicken Tempura Roll.
Step 5: Prepare the Chicken
Slice about 8 oz of chicken breast into ½-inch strips against the grain, ensuring even cooking. Set up two shallow bowls: one with plain flour combined with half the seasoning mix, and the other with corn flour combined with the remaining seasoning. This dual-breading technique contributes to that desired crispy texture.
Step 6: Heat the Oil
In a deep pan, pour in 1½ cups of neutral cooking oil and heat it to 350°F (175°C). Use a kitchen thermometer for accuracy. When the oil is shimmering, it’s ready for frying. Maintaining the correct temperature is key to achieving that perfect golden finish on the chicken strips.
Step 7: Coat and Fry the Chicken
Take each chicken strip and first coat it in the flour mixture, then dip it into the corn flour mixture for that extra crunch. Carefully place the coated strips into the hot oil and fry for about 3-4 minutes until they turn a deep golden brown and float to the top. Watch them closely to prevent burning.
Step 8: Drain the Chicken
Once golden, remove the chicken strips with a slotted spoon and place them on a wire rack to drain excess oil. This ensures your chicken stays crispy as it cools. Now, you’re ready to roll your Chicken Tempura Roll with all those delicious elements you’ve prepared.
Step 9: Assemble the Roll
On a bamboo mat, lay a sheet of nori shiny side down. Spread a thin layer of the seasoned rice evenly over the nori, leaving about a 1-inch border at the top. This will help keep your roll secure as you start adding your filling.
Step 10: Add Fillings
Line the center of the rice with the crispy chicken strips and thinly sliced avocado. Feel free to customize with additional fillings if desired. Now, it’s time to roll! Gently lift the bamboo mat and start rolling the sushi away from you, tucking in the filling as you go.
Step 11: Roll and Slice
Continue to roll tightly but gently until you reach the exposed edge of the nori. Use a little water to seal the edge. With a sharp, wet knife, slice the roll into bite-sized pieces in one clean motion. This gives you clean-cut pieces of your Chicken Tempura Roll ready to serve.
Step 12: Garnish and Enjoy
Sprinkle white and black sesame seeds over the top for a beautiful presentation. Arrange your crispy Chicken Tempura Roll on a plate and serve immediately, perhaps with a side of soy sauce or spicy mayo. Enjoy your homemade sushi experience!
Expert Tips for Chicken Tempura Roll
• Crispiness Boost: Dip chicken in ice water before frying for extra crunch; this technique locks in moisture and ensures a delightful texture.
• Clean Slices: Wet your knife before cutting the rolls; this will help prevent squishing and give you clean, beautiful slices of your chicken tempura roll.
• Store Wisely: Keep rolls in airtight containers to maintain freshness for up to 24 hours; they’re best enjoyed fresh for optimal flavor.
• Reheat Right: If you need to reheat, use an air fryer set to 350°F for 3-4 minutes; avoid microwaving to keep the crispy texture intact.
• Flavor Balance: Adjust seasoning in both the tempura batter and rice to suit your taste; don’t forget to taste as you go for a perfect chicken tempura roll!
Chicken Tempura Roll Variations
Feel free to play around with these variations and make this delightful roll your own! Your taste buds will thank you.
-
Vegetarian Delight: Substitute chicken with crispy tofu or tempura-fried vegetables for a delicious plant-based option. You can pack this roll full of flavor while keeping it meat-free—it’s so satisfying!
-
Seafood Twist: Swap the chicken for shrimp or crab for a seafood version. The delicate flavors of seafood complement the texture of rice beautifully, bringing a whole new experience to your sushi.
-
Spicy Kick: Add sriracha or spicy mayo to the fillings for a fiery twist. A little heat can elevate the entire roll, making it an exciting option for spice lovers!
-
Satisfying Creaminess: Try substituting the avocado with cream cheese for a creamy texture. It adds richness and a comforting creaminess that balances the crispiness of the tempura perfectly.
-
Quinoa Roll: Replace sushi rice with quinoa for a nutritious grain option. Quinoa provides a hearty texture and is a great source of protein, making your roll wholesome yet still delicious.
-
Pickled Veggies: Incorporate pickled vegetables like daikon or cucumber for a tangy crunch. This addition not only enhances flavor but also introduces a delightful contrast of textures.
-
Herbed Infusion: Add fresh herbs like cilantro or basil for a bright and fresh flavor profile. This simple twist can lift your roll and make it feel even more vibrant!
-
Tropical Vibes: Replace avocado with pineapple or mango for a sweet tropical flavor. The sweetness adds an unexpected twist that will surprise and delight your guests!
For a delightful pairing, consider serving your Chicken Tempura Roll with a warm bowl of miso soup or even a light cucumber salad for a complete, comforting meal. You might also enjoy exploring other tasty dishes like Crockpot Chicken Nachos or Lazy Chicken Parmesan!
Make Ahead Options
These Chicken Tempura Rolls are perfect for meal prep enthusiasts! You can prepare the seasoned sushi rice and fry the chicken up to 24 hours in advance, ensuring that you have time to savor a homemade meal without the last-minute rush. After cooling, simply refrigerate the rice in an airtight container to maintain its texture. For the chicken, allow it to cool on a wire rack before storing it, which helps keep it crispy. When it’s time to assemble, just spread rice on your nori, add the crispy chicken strips and avocado, then roll tightly. With these make-ahead options, you can enjoy restaurant-quality chicken tempura rolls with minimal effort, making busy weeknights a breeze!
How to Store and Freeze Chicken Tempura Roll
Airtight Container: Store leftover chicken tempura rolls in an airtight container in the fridge for up to 24 hours; they are best enjoyed fresh to maintain flavor and texture.
Freezing: For longer storage, wrap each roll tightly in plastic wrap and then place them in a freezer bag. They can be frozen for up to 1 month without losing too much quality.
Reheating: To reheat, use an air fryer set to 350°F for 3-4 minutes to restore crispiness. Avoid microwaving, as it can make the rolls soggy.
What to Serve with Crispy Chicken Tempura Roll?
The delightful crunch of the crispy chicken tempura roll makes it a perfect centerpiece for a cozy meal, inviting you to explore flavors that complement its savory profile.
- Miso Soup: A warm bowl of miso soup provides a comforting contrast, adding soothing umami notes that enhance the overall dining experience.
- Edamame: These lightly salted green soybeans offer a fresh, crunchy bite that beautifully balances the richness of the tempura.
- Cucumber Salad: A light and zesty cucumber salad adds refreshing textures. Its crisp vegetables and tangy dressing are perfect for cleansing the palate.
- Pickled Ginger: Offering a sharp yet sweet bite, pickled ginger not only adds acidity but also enhances the flavors of the sushi.
- Wasabi: For those who like some heat, a dab of wasabi elevates each bite of your chicken tempura roll with a spicy kick.
- Sake or Green Tea: A chilled glass of sake or a warm cup of green tea can perfectly complement the meal, providing a delightful beverage pairing.
Incorporating these side dishes turns your crispy chicken tempura rolls into a full-fledged dining experience that everyone will love!
Crispy Chicken Tempura Roll Recipe FAQs
How do I choose ripe avocados for my chicken tempura roll?
Look for avocados that yield slightly to gentle pressure; they should be firm yet have a little give when you squeeze. Dark, bumpy skin often indicates ripeness. If they have dark spots all over, they may be overripe, so it’s best to choose a smooth-skinned, slightly soft avocado for that creamy texture in your roll.
What is the best way to store leftover chicken tempura rolls?
To keep your rolls fresh, wrap each chicken tempura roll tightly with plastic wrap to prevent them from drying out. Store them in an airtight container in the refrigerator, and they should stay nice for up to 24 hours. However, to savor the peak flavor and crispy texture, enjoy them fresh on the same day if you can!
Can I freeze chicken tempura rolls for later?
Absolutely! To freeze your chicken tempura rolls, tightly wrap each roll in plastic wrap, then place them in a freezer-safe bag or container. These can be stored in the freezer for up to 1 month. When you’re ready to enjoy them, simply reheat using an air fryer set to 350°F for 3-4 minutes to ensure they regain their crispy goodness!
What should I do if my tempura batter isn’t crispy enough?
If your tempura batter isn’t turning out as crispy as you’d like, ensure your oil is hot enough—350°F (175°C) is ideal. Consider dipping the chicken in ice water before applying the batter; this helps create a crunchier texture. If the batter is too thick, lightly adjust with additional cornstarch to improve the coating.
Are there any dietary considerations for chicken tempura roll?
For those with gluten sensitivities, use gluten-free flour and make sure your seasoning mix doesn’t contain any gluten ingredients. To make this dish vegetarian or suitable for those avoiding meat, substitute the chicken with tofu or your favorite vegetables. Always check for personal allergies to specific ingredients like sesame seeds or avocados before serving.
How long can I keep leftover chicken tempura batter?
I recommend using any leftover tempura batter immediately for best results, but if you have some left, store it in the fridge for no more than 24 hours. When ready to use, give it a gentle stir and watch the consistency; if it’s thickened too much, you can thin it slightly with cold water.
Crispy Chicken Tempura Roll - 30-Minute Sushi Delight
Ingredients
Equipment
Method
- Begin by rinsing 1 cup of short-grain rice under cold water until the water runs clear. This process removes excess starch to ensure your sushi rice has the perfect sticky texture. After rinsing, drain the rice well, and set it aside to prepare for cooking.
- In a medium pot, combine the rinsed rice with 1¼ cups of cold water and bring it to a boil over medium-high heat. Once boiling, reduce the heat to low, cover the pot, and let it simmer for 12 minutes.
- Once the timer goes off, remove the pot from heat but keep it covered. Allow the rice to steam for an additional 10 minutes; this step is crucial to achieving the right texture.
- In a small bowl, mix together 2 tablespoons of rice vinegar, 1 tablespoon of sugar, and a pinch of salt until dissolved. Gently fold this mixture into the warm sushi rice using a wooden spatula.
- Slice about 8 oz of chicken breast into ½-inch strips against the grain. Set up two shallow bowls: one with plain flour combined with half the seasoning mix, and the other with corn flour combined with the remaining seasoning.
- In a deep pan, pour in 1½ cups of neutral cooking oil and heat it to 350°F. When the oil is shimmering, it’s ready for frying.
- Take each chicken strip and first coat it in the flour mixture, then dip it into the corn flour mixture. Carefully place the coated strips into the hot oil and fry for about 3-4 minutes until they turn a deep golden brown.
- Once golden, remove the chicken strips with a slotted spoon and place them on a wire rack to drain excess oil.
- On a bamboo mat, lay a sheet of nori shiny side down. Spread a thin layer of the seasoned rice evenly over the nori, leaving about a 1-inch border at the top.
- Line the center of the rice with the crispy chicken strips and thinly sliced avocado. Gently lift the bamboo mat and start rolling the sushi away from you, tucking in the filling as you go.
- Continue to roll tightly but gently until you reach the exposed edge of the nori. Use a little water to seal the edge. With a sharp, wet knife, slice the roll into bite-sized pieces.
- Sprinkle white and black sesame seeds over the top for a beautiful presentation. Arrange your crispy Chicken Tempura Roll on a plate and serve immediately.