
A sudden whisper drifted through the kitchen: “Can we really eat a cauldron?” You bet! These Cute Cauldron Cookie Cups are a charming twist on traditional Halloween treats, combining soft, chewy chocolate cookies with delectable green buttercream that looks just like a bubbling potion. They’re quick to whip up, making them the perfect choice for busy home chefs who want to delight kids and adults alike at festive gatherings. Plus, with endless customization options, these edible cauldrons invite everyone to join in on the fun. Ready to cast a sweet spell in your kitchen? Let’s get baking!
Why Make These Cute Cauldron Cookie Cups?
Whimsical Appeal: These cookies are not only delicious but also a feast for the eyes, bringing a sprinkle of magic to your Halloween celebrations.
Kid-Friendly Fun: Perfect for little hands, kids will love both making and devouring these adorable treats.
Quick and Easy: With minimal prep time, you can satisfy your sweet tooth in no time—ideal for busy days or last-minute party preparations!
Customizable Treats: Switch it up with your choice of fillings or decorations, from Samoa Cookies Homemade to colorful sprinkles, making each cookie unique.
Perfect for Gatherings: Impress your guests at Halloween parties, school events, or bake sales with these show-stopping treats that will have everyone raving!
Cute Cauldron Cookie Cups Ingredients
For the Cookie Cups
• Devil’s Food Cake Mix – Provides a rich chocolate flavor as the base of the cookie cups; substitute with gluten-free for dietary needs.
• Large Eggs – Acts as a binding agent, giving structure and moisture to the cookies.
• Canola or Vegetable Oil – Adds a delightful richness and moisture to the dough.
• Black Food Coloring (optional) – Enhances the spooky visual appeal, perfect for Halloween vibes.
For the Buttercream Frosting
• Unsalted Butter – Essential for a creamy, luscious buttercream consistency.
• Powdered Sugar – Sweetens the frosting while helping it achieve that perfect fluffy texture.
• Vanilla Extract – Adds depth and warmth to the frosting’s flavor.
• Salt – A pinch helps to balance the sweetness beautifully.
• Milk – Adjusts the consistency, making the frosting easy to pipe into the cookie cups.
• Green Food Coloring – Needed to tint the frosting to look like bubbling “witches’ brew.”
For Decoration
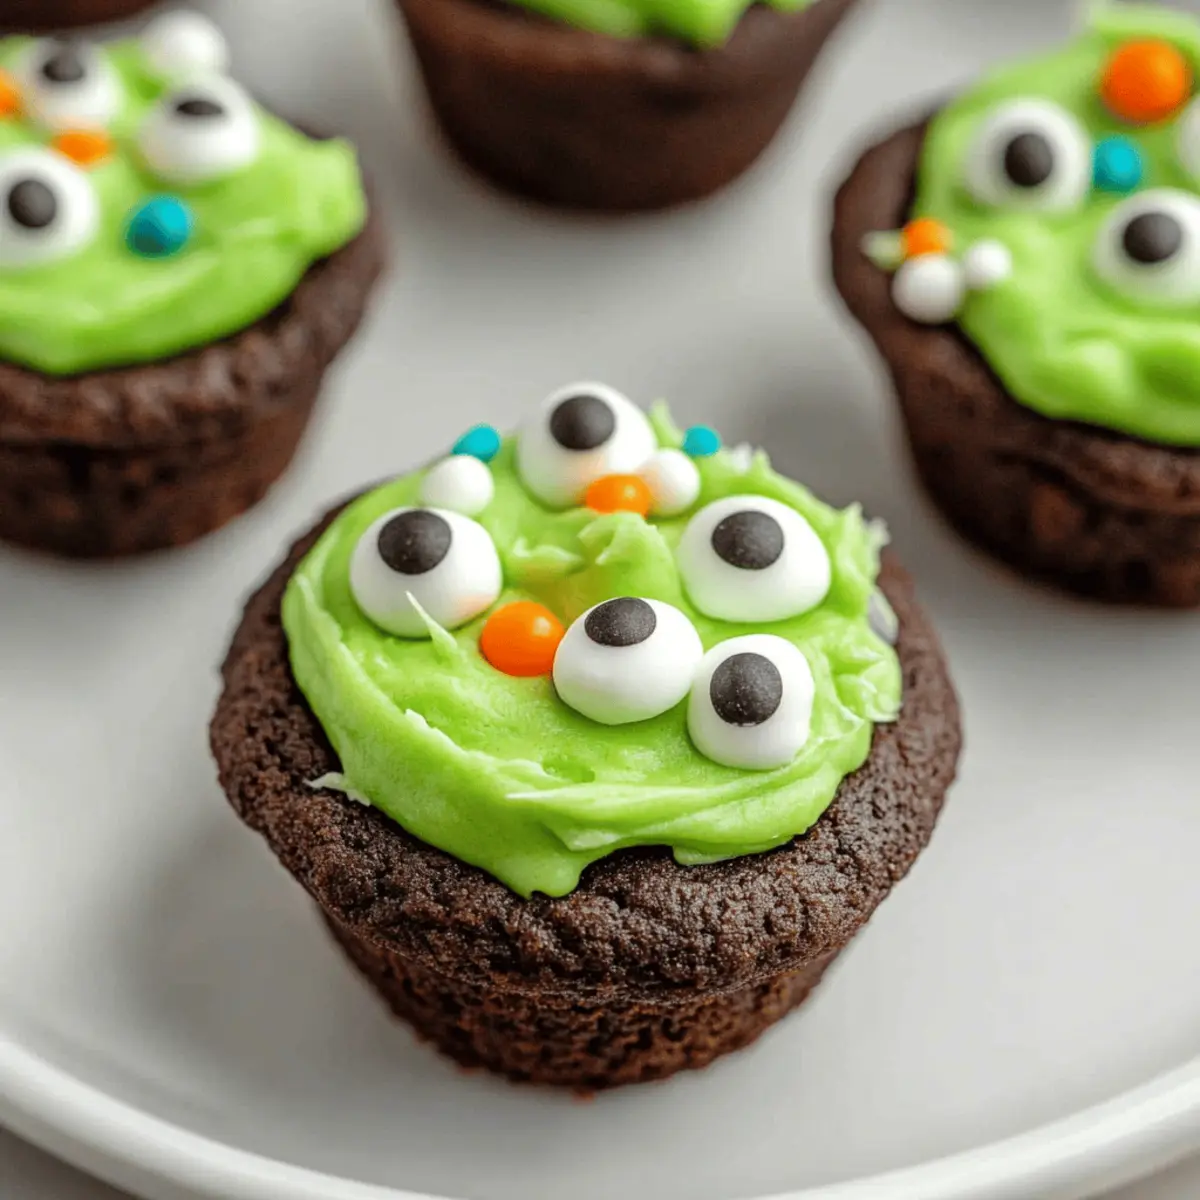
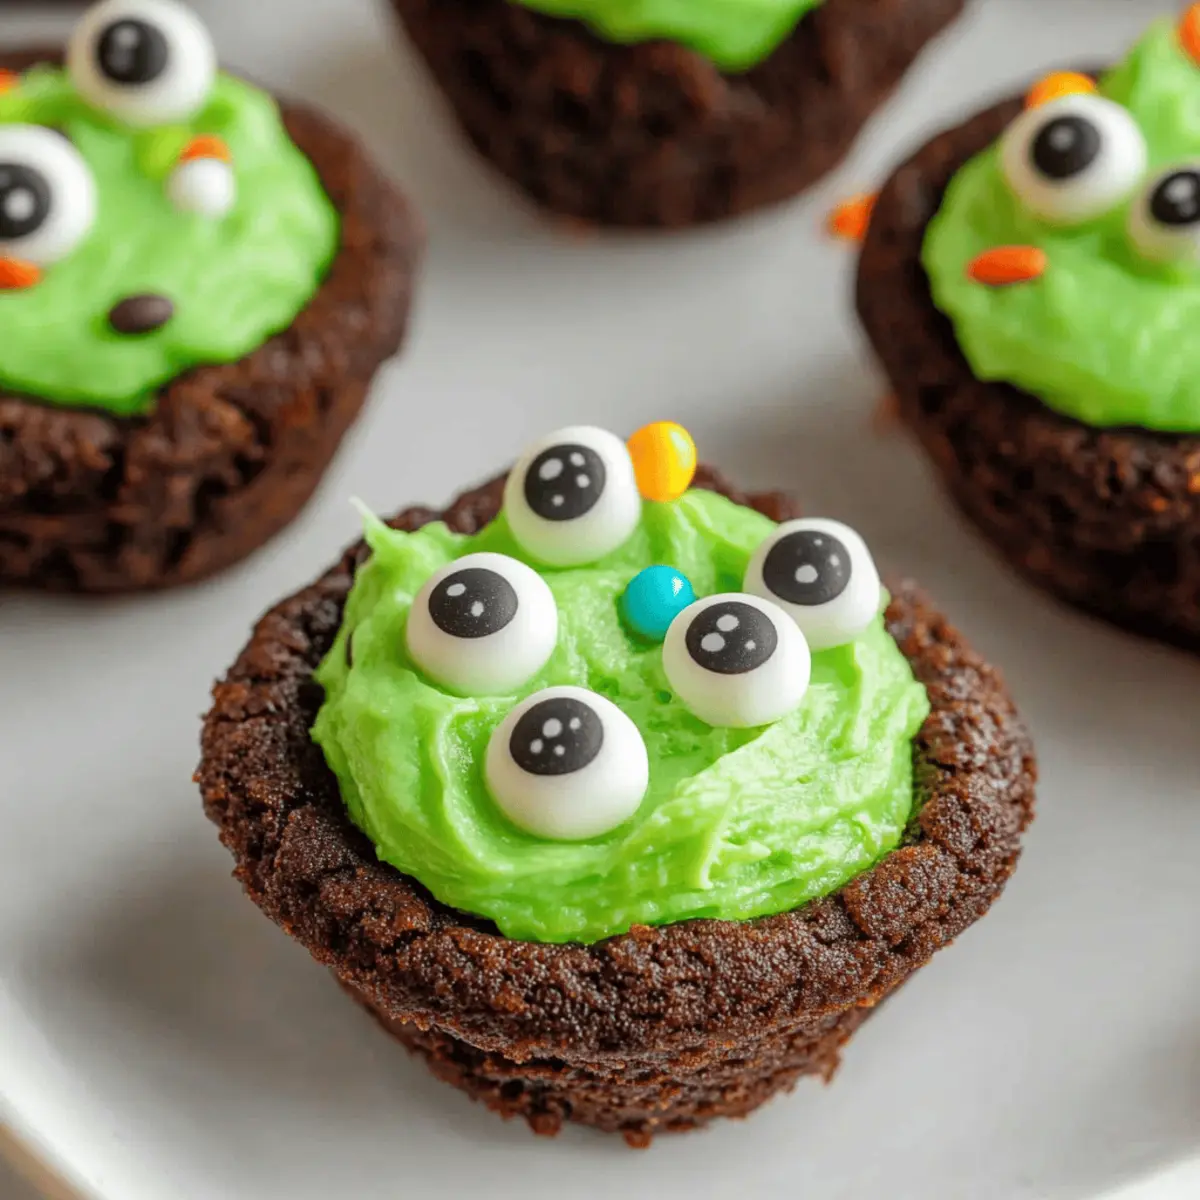
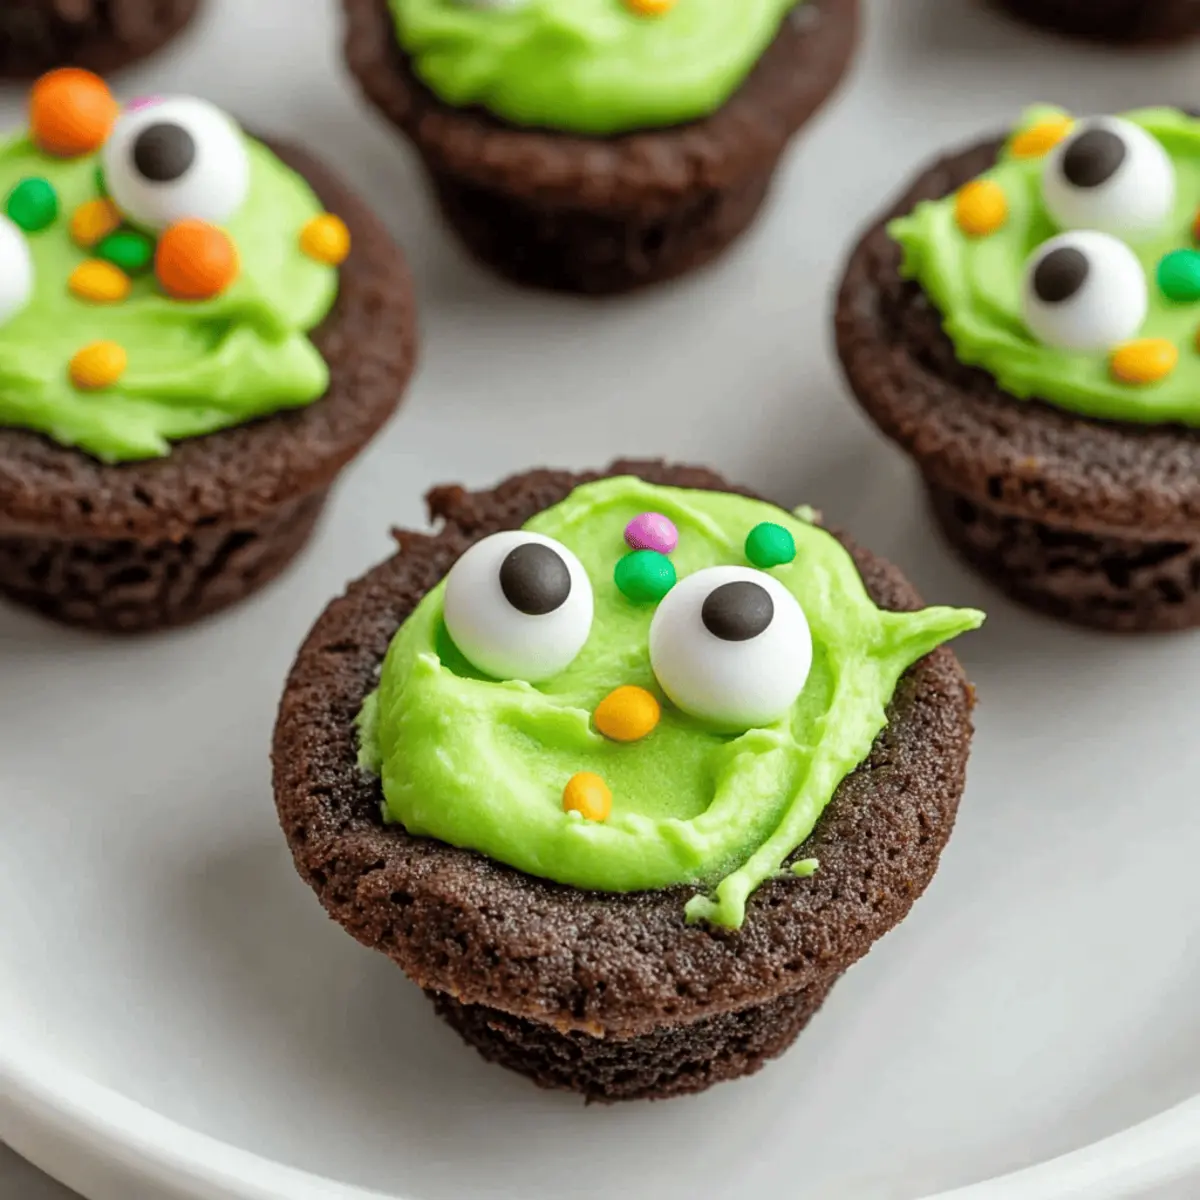
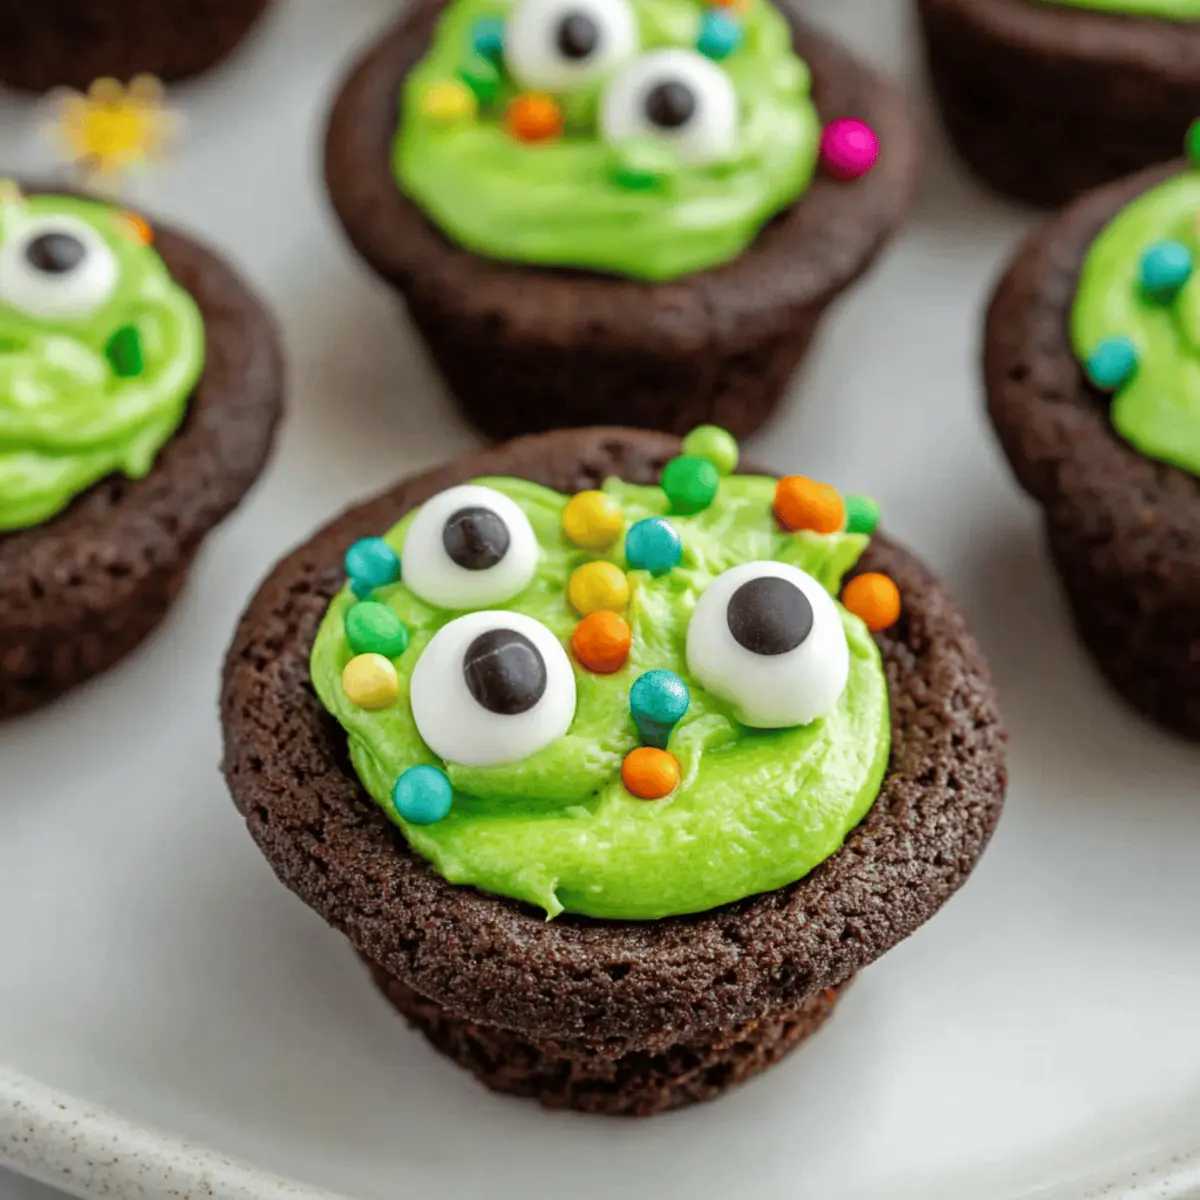
• Decorating Sprinkles – A perfect way to add some festive flair on top of the buttercream.
• Candy Eyeballs – Fun and spooky embellishments that enhance the Halloween theme.
• Pretzel Sticks – Serve as whimsical “stir sticks” for that added touch of playful creativity.
These cute cauldron cookie cups are sure to be a hit, drawing everyone’s attention at your next gathering!
Step‑by‑Step Instructions for Cute Cauldron Cookie Cups
Step 1: Preheat and Prepare
Begin by preheating your oven to 350°F (175°C). While the oven heats, grab your mini muffin pans and lightly grease them with non-stick cooking spray or butter. This will ensure that your Cute Cauldron Cookie Cups release easily once baked.
Step 2: Mix the Ingredients
In a large mixing bowl, combine the Devil’s Food Cake Mix, large eggs, canola or vegetable oil, and optional black food coloring. With an electric mixer, blend the ingredients until they form a smooth, well-combined dough. The mixture should be thick and fully blended, signaling it’s time to move on.
Step 3: Scoop and Shape
Using a tablespoon, scoop about 1/2 tablespoon of the cookie dough into each greased muffin cup. Gently flatten each scoop slightly to create a base. This shaping will ensure that your Cute Cauldron Cookie Cups have a nice form when baked. Aim for a uniform look across all the cups for even baking.
Step 4: Bake the Cookie Cups
Place the muffin pan into the preheated oven and bake for 8-10 minutes. Watch for the edges to set and the tops to appear slightly puffed but soft. The centers should not be overdone, as you will create indentations later. Remove the pan when done, and let it cool slightly before moving to the next step.
Step 5: Create Indentations
While the cookie cups are still warm, use the back of a measuring spoon to press down gently in the center of each cookie, forming a small well. This is where your creamy buttercream will go, transforming them into delightful Cute Cauldron Cookie Cups. Allow the cookie cups to cool completely in the pan.
Step 6: Make the Buttercream Frosting
In a separate mixing bowl, beat the unsalted butter until creamy. Gradually incorporate the powdered sugar, vanilla extract, salt, and milk until you achieve a smooth, spreadable consistency. The frosting should be fluffy and rich in texture, ready for the vibrant green coloring.
Step 7: Color and Pipe the Frosting
Add green food coloring to the buttercream until you reach your desired shade of “witches’ brew.” Transfer the tinted frosting into a piping bag fitted with a star tip. Once the Cute Cauldron Cookie Cups are completely cooled, pipe the green buttercream into the indentations, filling them generously.
Step 8: Decorate Your Cauldrons
Finish off your Cute Cauldron Cookie Cups by sprinkling festive decorating sprinkles on top of the buttercream. Add a candy eyeball or two for a fun, spooky look, and stick a half pretzel into each cauldron as a whimsical “stir stick.” Your delightful Halloween treats are now ready to impress!
Make Ahead Options
These Cute Cauldron Cookie Cups are perfect for busy home cooks looking to save time during the Halloween rush! You can prepare the cookie cups up to 24 hours in advance by baking them, then allowing them to cool completely before storing them in an airtight container to maintain freshness. The buttercream can also be made up to 3 days ahead; just keep it in the fridge—when you’re ready to serve, let it come to room temperature and re-whip it for a perfect texture. Simply pipe the frosting into the cooled cookie cups and add your delightful decorations right before your gathering, ensuring they will be just as delicious and festive as if made that day!
What to Serve with Cute Cauldron Cookie Cups?
Create a delightful Halloween spread that pairs perfectly with these adorable treats!
- Pumpkin Patch Hummus: This creamy dip, colored with pumpkin puree, adds a festive touch and pairs well with the cookie’s sweetness.
- Spooky Fruit Medley: Use blackberries, orange slices, and kiwi to create a vibrant, healthy counterpoint to the cookie cups. The colors really pop!
- Witch’s Brew Punch: A fun and fizzy drink featuring lime sherbet and sparkling water will bring a refreshing contrast to the sweet cookies.
- Chocolate-Dipped Pretzels: The salty-sweet combination enhances the cookie experience, while also echoing the “stir sticks” in your cauldron cookies.
- Ghostly Marshmallow Pops: Easy to make and visually fun, these pops balance the cookie’s richness with a fluffy treat for the kids.
- Cauldron Cake Pops: For an extra thematic dessert, add cake pops decorated like cauldrons to your spread, completing your Halloween-themed sweets!
- Bubbling Cauldron Chili: A hearty dish like chili adds savory depth to the sweet finale of your cookie cups, making for a balanced meal.
- Warm Apple Cider: Serve this seasonal favorite as a cozy beverage option that pairs beautifully with every spooky bite.
These pairings will ensure your Halloween gathering is a magical success!
Expert Tips for Cute Cauldron Cookie Cups
• Cool Completely: Allow the cookie cups to cool fully before frosting; otherwise, the buttercream may melt into a puddle instead of holding its cute shape.
• Choose the Right Filling: Experiment with different frostings like cream cheese for a tangy twist; it complements the chocolate cookie beautifully.
• Use Quality Food Coloring: Invest in high-quality food coloring for vibrant, spooky shades; this will make your cute cauldron cookie cups visually appealing.
• Airtight Storage: Store leftover cookies in an airtight container to maintain their freshness and prevent the frosting from becoming crusty.
• Indention Trick: If your cookie cups puff up too much while baking, gently press the indentations back into shape with a spoon before they cool fully.
Cute Cauldron Cookie Cups Variations
Feel free to let your imagination run wild and customize these delightful cookies for a unique twist that tantalizes the taste buds!
-
Gluten-Free: Replace the Devil’s Food Cake Mix with a gluten-free alternative to cater to dietary needs while maintaining delicious flavors.
-
Filling Swap: Instead of buttercream, try a layer of flavored cream cheese frosting for a zesty twist. Cream cheese pairs wonderfully with chocolate!
-
Posh Chocolate: For a more luxurious treat, fill the cookie cups with colored chocolate ganache. The glossy finish adds an elegant touch.
-
Easy Pre-Made Frosting: Short on time? Opt for store-bought frosting, and simply tint it green to keep the fun alive without the fuss.
-
Mini Brownie Cauldrons: Use brownie mix instead of cake mix for denser, fudgy cauldron treats. These are a chocolate lover’s dream!
-
Spicy Kick: Add a dash of cinnamon or cayenne pepper to the cookie mix for a warm and spicy flavor. It’s an unexpected surprise that intrigues the palate.
-
Fruit Burst: Incorporate some finely chopped fruits, like raspberries or cherries, into the buttercream for a fruity contrast that brightens every bite.
-
Decorating Choices: Switch up the toppings by using gummy worms or edible glitter for a more playful Halloween effect that kids will adore.
Remember, whether you’re whipping up a batch for a party or just a cozy night in, there’s no right or wrong way to make these Cute Cauldron Cookie Cups! Enjoy experimenting, and if you’d like more inspiration, consider making some fabulous Raspberry Cookies Sweet as a colorful addition or indulge in the luxurious flavors of White Chocolate Cookie. Happy baking!
Storage Tips for Cute Cauldron Cookie Cups
Room Temperature: Store these delightful cookie cups in an airtight container at room temperature for up to 3-4 days to maintain their softness and taste.
Fridge: If you prefer a firmer buttercream, you can refrigerate them for up to a week; just ensure they are covered to prevent drying out.
Freezer: For longer storage, freeze the un-decorated cookie cups for up to 3 months. Thaw at room temperature before frosting to keep them fresh.
Reheating: If you like warm cookies, pop them in the microwave for 5-10 seconds before frosting; this keeps the Cute Cauldron Cookie Cups soft and scrumptious!
Cute Cauldron Cookie Cups Recipe FAQs
How do I select the right Devil’s Food Cake Mix?
Absolutely! When choosing a Devil’s Food Cake Mix, look for one that has a rich chocolate flavor and a simple ingredients list. If you’re gluten-sensitive, you can easily substitute it with a gluten-free cake mix to ensure everyone can enjoy these delicious treats.
What are the best storage methods for these cookie cups?
For the utmost freshness, store your Cute Cauldron Cookie Cups in an airtight container at room temperature for about 3-4 days. If you wish to enjoy them longer, pop them in the fridge for up to a week. Just be sure to keep them covered to avoid drying out!
Can I freeze these cauldron cookie cups?
Absolutely! You can freeze the un-decorated cookie cups for up to 3 months. To do this, let them cool fully, then place them in a freezer-safe container or bag. When you’re ready to enjoy, simply thaw them at room temperature, and they’ll be as good as fresh for decorating!
What should I do if my cookie cups puff up too much while baking?
Very important! If you notice that your cookie cups puff up during baking, gently press down the centers with the back of a measuring spoon as soon as they come out of the oven while they’re still warm. This will create the perfect little well for your buttercream without them losing shape.
Are there any dietary considerations for pets or allergies?
Definitely! These Cute Cauldron Cookie Cups contain common allergens such as eggs and dairy, so ensure that no one has allergies to those ingredients before sharing. As for pets, it’s best to keep these sweets away from them, especially the candy eyeballs or any chocolate ingredients, as chocolate can be toxic to dogs and cats.
Cute Cauldron Cookie Cups That Spark Halloween Joy
Ingredients
Equipment
Method
- Preheat the oven to 350°F (175°C) and grease mini muffin pans.
- Mix Devil's Food Cake Mix, eggs, oil, and optional black food coloring until a smooth dough forms.
- Scoop 1/2 tablespoon of dough into each muffin cup, flattening slightly.
- Bake for 8-10 minutes until edges set and tops are slightly puffed.
- Create indentations in the centers with the back of a spoon while warm.
- In a separate bowl, beat unsalted butter and gradually add powdered sugar, vanilla, salt, and milk until smooth.
- Color the buttercream with green food coloring to desired shade.
- Pipe the frosting into the indentations once the cookie cups are cool.
- Decorate with sprinkles, candy eyeballs, and pretzel sticks.