
As I scrolled through my calendar, a delightful realization hit me: Easter is just around the corner! This season isn’t just about colorful eggs and blooming flowers; it’s also the perfect opportunity to whip up some fun treats. That’s where my favorite recipe, Easter Peanut Butter Balls, comes into play. These bite-sized delights come together in no time, making them an ideal choice for those busy holiday schedules. With minimal fuss and no baking required, they quickly become a family favorite. Plus, involving the kids in the preparation adds an extra layer of joy to our kitchen adventures. Are you ready to bring some festive cheer to your celebrations? Let’s dive into this deliciously easy recipe!

Why Make These Peanut Butter Balls?
Easy to Prepare: These Easter Peanut Butter Balls are a breeze to whip up, requiring no baking and simple ingredients that you likely already have at home.
Kid-Friendly Fun: Involve your little ones during preparation and watch their excitement grow as they dip and decorate these delightful treats.
Festive Presentation: With colorful candy melts, these treats aren’t just delicious; they also add a vibrant touch to your Easter table.
Versatility: Customize your Peanut Butter Balls by swapping peanut butter for almond or cashew butter, or add mini chocolate chips for an extra crunch! You might also love making Peanut Butter Chocolate for another sweet indulgence.
Crowd-Pleaser: Perfect for gatherings, these bite-sized delights are sure to be a hit among both kids and adults alike! Don’t forget to check out the Chewy Peanut Butter recipe for another delicious option!
Easter Peanut Butter Balls Ingredients
For the Batter
- Melted Butter – Adds richness and helps bind the ingredients together; use unsalted for balanced flavor.
- Creamy Peanut Butter – Provides the main flavor; consider natural peanut butter with fewer additives for a healthier option.
- Powdered Sugar – Sweetens the mixture and creates a smooth texture; substitute with coconut sugar for a less refined sweetener.
- Crisped Rice Cereal – Adds crunch and texture; crushed graham crackers can also be used for a different flavor experience.
For Coating and Decoration
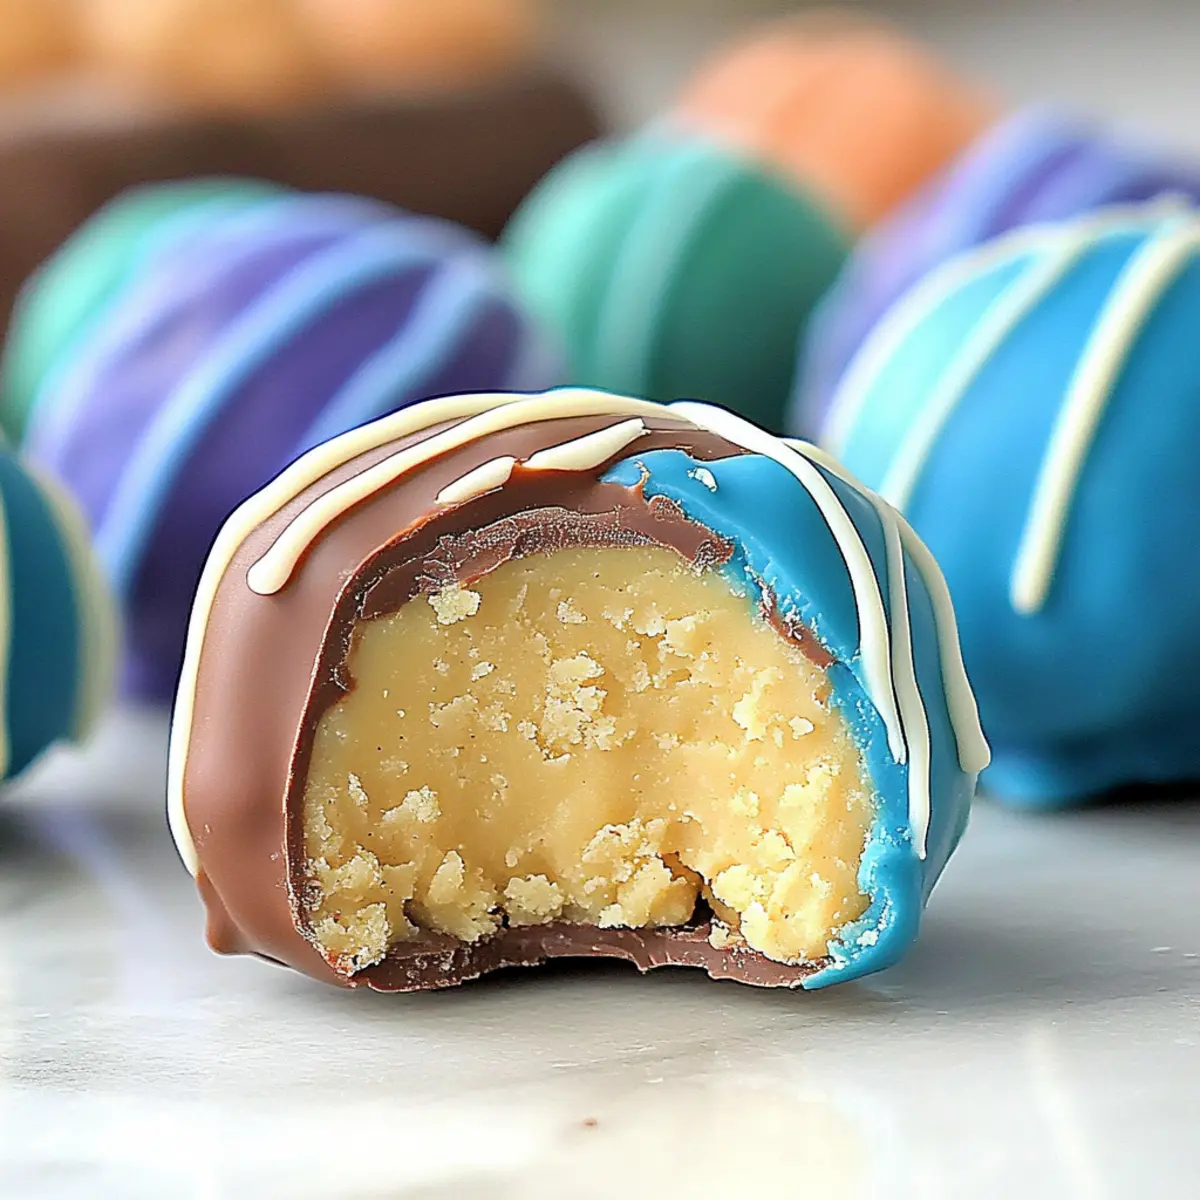
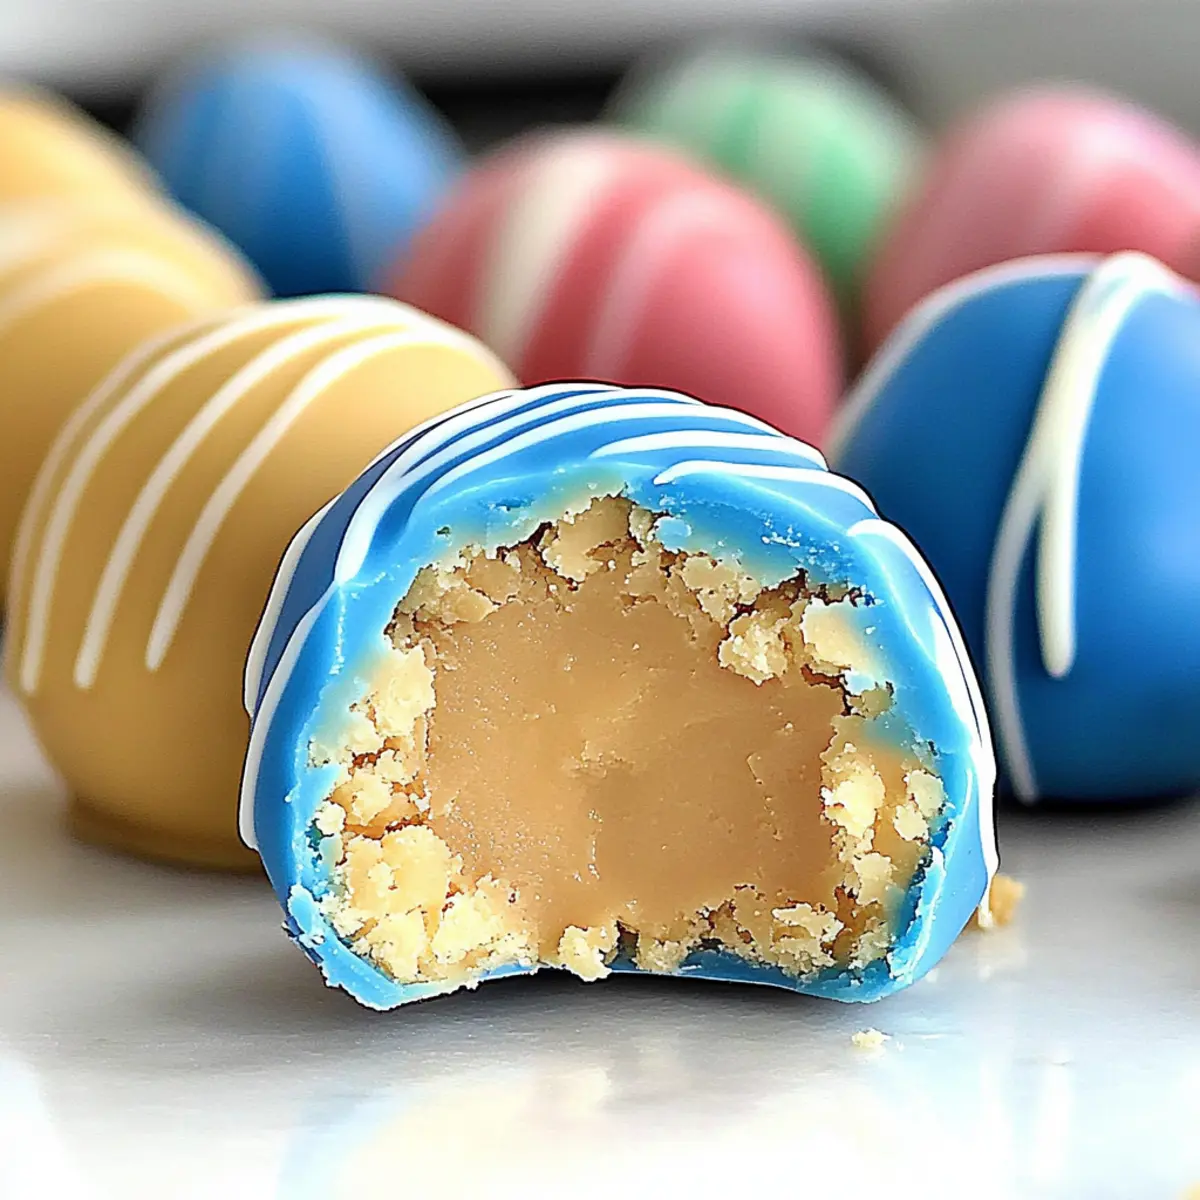
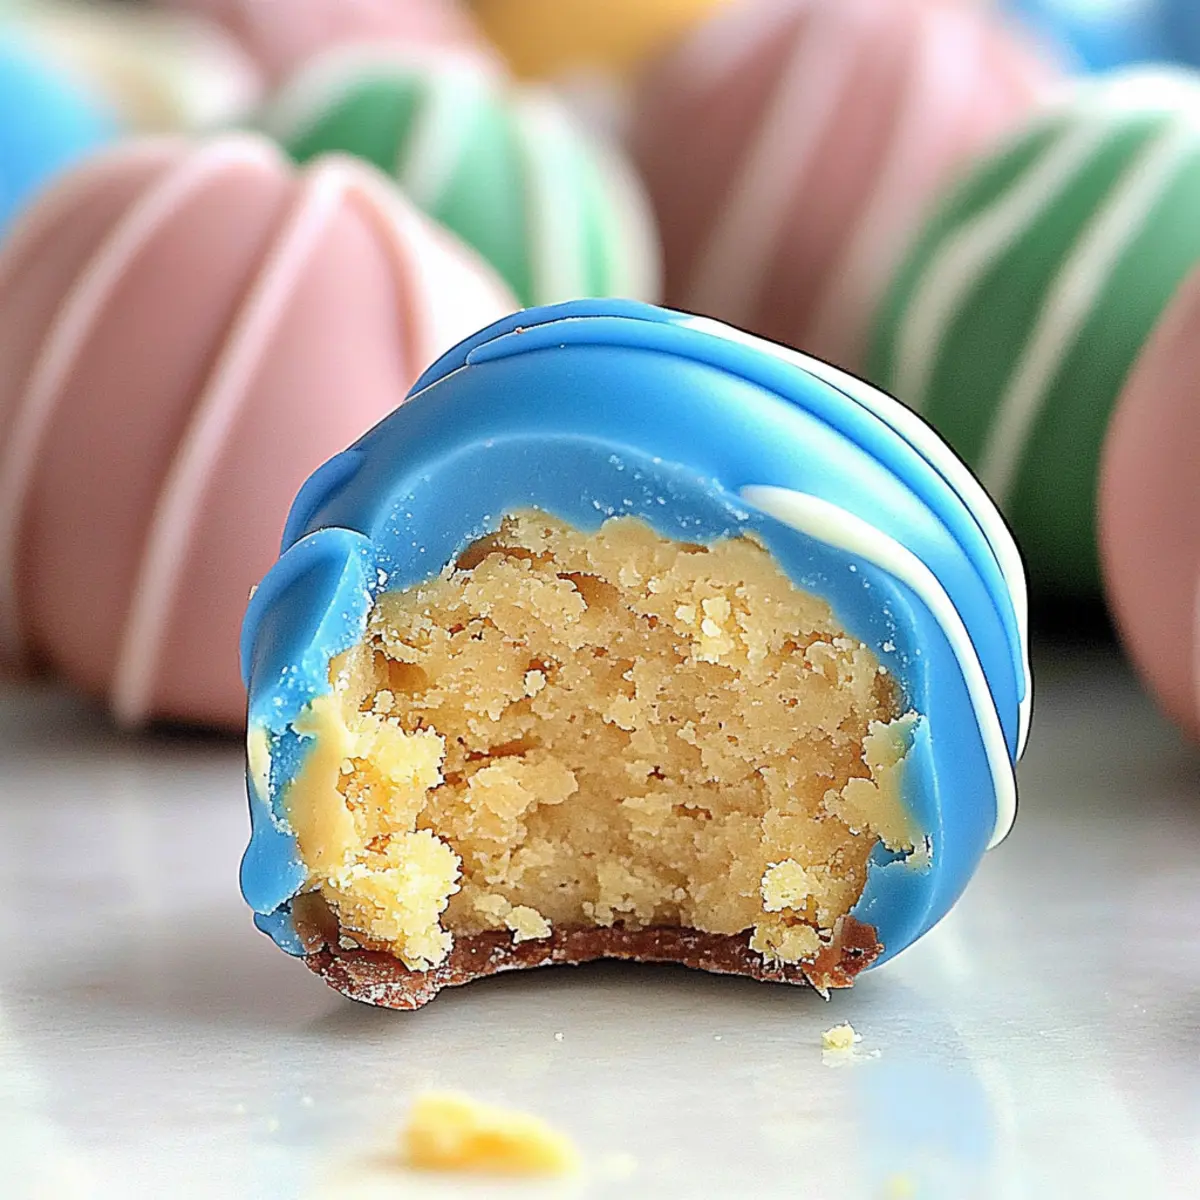
- Colored Candy Chocolate Melts – Perfect for coating and decorating the balls; choose your favorite pastel colors to match the festive Easter theme.
These Easter Peanut Butter Balls are not only delectable but also easy to prepare, making them a fantastic treat for family gatherings!
Step‑by‑Step Instructions for Easter Peanut Butter Balls
Step 1: Mix the Base
In a large mixing bowl, combine ½ cup of melted unsalted butter with 1 cup of creamy peanut butter. Use a spatula to stir these ingredients together until you achieve a smooth and well-blended mixture. This combination should be thick and creamy, so ensure there are no lumps of peanut butter remaining.
Step 2: Sweeten the Mixture
Gradually add 2 cups of powdered sugar to the peanut butter mixture. Stir continuously until the sugar is fully incorporated, and the batter is thick and cohesive. It should take about 3–5 minutes of mixing to reach the desired consistency, which should be soft but moldable—if it’s too sticky, add a bit more powdered sugar.
Step 3: Incorporate Crunch
Now, fold in 1 ½ cups of crisped rice cereal gently into the mixture. Use a spatula to ensure the cereal is evenly distributed without crushing it. The added crunch will give the Easter Peanut Butter Balls a delightful texture. Once combined, the mixture should resemble a thick dough that holds together when pressed.
Step 4: Shape the Balls
With clean hands, scoop out portions of the mixture and roll them into 1-inch balls. Place each ball on a wax paper-lined cookie tray, spacing them about an inch apart. As you shape the Easter Peanut Butter Balls, they should feel firm yet slightly sticky, ready for chilling.
Step 5: Chill for Firmness
Refrigerate the tray of peanut butter balls for at least 30 minutes, allowing them to firm up. This step is crucial as it helps the balls hold their shape when coated. You’ll know they are ready when they are cool to the touch and feel solid when gently pressed.
Step 6: Prepare the Coating
While the peanut butter balls chill, melt 1 ½ cups of colored candy melts according to the package instructions. Use a microwave-safe bowl, heating in 30-second intervals and stirring until completely smooth and melted. The vibrant colors will add a festive touch to your Easter Peanut Butter Balls.
Step 7: Dip and Coat
Once the balls are chilled and the candy melts are ready, dip each peanut butter ball into the melted chocolate using a fork or a toothpick. Ensure each ball is fully coated, then let the excess chocolate drip off before placing them back on the parchment paper. This step adds a beautiful, smooth shell to each treat.
Step 8: Final Touches
After coating, sprinkle with additional decorations if desired or drizzle extra melted chocolate over the top for a fancy finish. Leave the candy-coated Easter Peanut Butter Balls to set at room temperature until the chocolate hardens completely, which should take about 15–20 minutes.
Step 9: Store with Care
To keep your delicious Easter Peanut Butter Balls fresh, store them in an airtight container in the refrigerator for up to a week. For a firmer texture, feel free to freeze them. When ready to enjoy, simply take out a few pieces and let them sit for a few minutes before indulging.
Easter Peanut Butter Balls Variations
Feel free to customize these delightful treats to suit your taste buds and dietary needs!
-
Nut-Free: Substitute peanut butter with sunflower seed butter for a deliciously nut-free alternative that everyone can enjoy.
-
Vegan: Use vegan butter and a plant-based creamy peanut butter, while opting for agave syrup instead of powdered sugar for a sweet touch.
-
Chocolate Lovers: Fold in mini chocolate chips into the mixture for extra bursts of chocolatey goodness in every bite.
-
Crunchy Delight: Add crushed pretzels or toffee bits for an exciting mix of sweet and salty flavors that elevate the texture.
-
Flavor Twist: Swap out the peanut butter for almond or cashew butter for a unique flavor twist that’s equally creamy and sweet. You might also want to try making Peanut Butter Brownie cups for another fun treat!
-
Colorful Fun: Use colorful sprinkles or edible glitter on top of the chocolate coating to make these treats stand out on your holiday table.
-
Spicy Kick: For those who enjoy a bit of heat, sprinkle a touch of cayenne pepper into the peanut butter mixture for a surprising yet delightful twist.
-
Fruit Infusion: Mix in some dried cranberries or raisins for a fruity flavor and chewy texture that complements the creamy peanut butter perfectly.
Get creative and enjoy the process—these Easter Peanut Butter Balls are all about making moments memorable!
What to Serve with Easter Peanut Butter Balls?
As you prepare these delightful sweet treats, think about delightful side dishes that will elevate your holiday gathering.
- Fresh Fruit Salad: A bright and fruity accompaniment that adds a burst of color and freshness, balancing out the sweetness.
- Creamy Vanilla Ice Cream: Perfect alongside the rich peanut butter flavor, this classic dessert brings a pleasing contrast to enjoy after a bite.
- Chocolate-Covered Strawberries: These succulent berries pair beautifully with the peanut butter balls, enhancing the festive chocolate theme.
- Carrot Sticks and Hummus: For a savory twist, serve crunchy carrots with creamy hummus; it adds a refreshing element to the sweet side.
- Chilled Lemonade: Light and refreshing, this drink perfectly complements the rich flavors of the candies, keeping everyone cool during holiday festivities.
- Mini Cupcakes: Add a whimsical touch to your dessert table with colorful mini cupcakes, inviting folks to indulge in more sweet bites.
- Hot Chocolate with Whipped Cream: Cozy and comforting, it rounds off the meal perfectly, especially for those Easter chills.
- Easter-themed Cookie Platter: Offer an assortment of cookies in fun shapes to delight both kids and adults, keeping the festive spirit alive.
How to Store and Freeze Easter Peanut Butter Balls
Fridge: Store your Easter Peanut Butter Balls in an airtight container in the refrigerator for up to 1 week. This keeps them soft and chewy for your snacking pleasure.
Freezer: For longer storage, freeze the balls in a single layer on a baking sheet, then transfer to an airtight container. They can be kept frozen for up to 2 months.
Reheating: When you’re ready to enjoy, simply let the frozen balls sit at room temperature for about 5-10 minutes. This softens them slightly without compromising their delicious texture.
Firmness Tip: If you prefer a firmer texture, keep the Easter Peanut Butter Balls in the freezer until just before serving.
Expert Tips for Easter Peanut Butter Balls
-
Mix Thoroughly: Ensuring the peanut butter and melted butter are well combined before adding powdered sugar helps achieve a smooth and cohesive mixture.
-
Chill Time Matters: Refrigerating the shaped balls for at least 30 minutes not only helps them hold their shape but also eases the coating process.
-
Dipping Made Easy: Use a fork or a toothpick for dipping the balls in melted chocolate to avoid messy fingers and achieve a smooth coating each time.
-
Customize Wisely: Experimenting with different nut butters or adding mini chocolate chips can create unique flavors for your Easter Peanut Butter Balls. Just be mindful of allergies!
-
Storage Tips: For long-lasting freshness, store the coated treats in an airtight container in the fridge, or freeze them for a firmer texture ready for snacking.
Make Ahead Options
These Easter Peanut Butter Balls are perfect for meal prep, allowing you to enjoy the festive treats without the last-minute rush! You can prepare the peanut butter mixture and shape the balls up to 24 hours in advance; simply chill them in the refrigerator to firm up before coating. To maintain their quality, store the shaped balls in an airtight container. When you’re ready to serve, just dip them in the melted chocolate, allow them to set, and they’ll be just as delicious as if freshly made! These make-ahead steps save you time, making your celebrations stress-free and enjoyable!
Easter Peanut Butter Balls Recipe FAQs
How do I choose the right peanut butter for Easter Peanut Butter Balls?
Absolutely! When selecting peanut butter, I recommend going for a natural, creamy variety without added sugars or preservatives. This helps maintain the delicious flavor and texture of your Easter Peanut Butter Balls. If you prefer something different, almond or cashew butter can also work wonderfully!
How should I store my Easter Peanut Butter Balls?
You can store your Easter Peanut Butter Balls in an airtight container in the refrigerator for up to 1 week. This keeps them soft and chewy, perfect for snacking! If you prefer a firmer texture, feel free to freeze them as explained in the recipe.
Can I freeze Easter Peanut Butter Balls?
Yes, you can! To freeze, arrange the rolled balls in a single layer on a baking sheet. Once they are frozen solid (about 1-2 hours), transfer them to an airtight container, where they can last for up to 2 months. When you’re ready to enjoy them, let them sit at room temperature for about 5-10 minutes to soften slightly.
What do I do if my chocolate coating isn’t smooth?
If your chocolate coating is grainy or thick, it could be due to overheating. When melting, always do so in 30-second intervals, stirring in between until fully smooth. If you find it too thick to coat well, you can add a teaspoon of vegetable oil to thin it out, helping you achieve that perfect, glossy finish.
Can I make these peanut butter balls gluten-free?
Very! To ensure your Easter Peanut Butter Balls are gluten-free, simply use certified gluten-free crisped rice cereal. Always check the labels for any added ingredients that may contain gluten. Otherwise, the rest of the recipe is naturally gluten-free, keeping it safe for everyone!
Are there any allergy considerations for the ingredients?
Definitely! When making Easter Peanut Butter Balls, be mindful of allergies—especially to nuts, as peanut butter is the main ingredient. For a nut-free option, you can substitute with sun butter or soy nut butter, making these treats enjoyable for those with nut allergies. Always communicate with guests about the ingredients if you’re serving them at a gathering.
Delightful Easter Peanut Butter Balls You Can Make with Kids
Ingredients
Equipment
Method
- In a large mixing bowl, combine ½ cup of melted unsalted butter with 1 cup of creamy peanut butter. Stir until smooth.
- Gradually add 2 cups of powdered sugar, stirring continuously until thick and cohesive.
- Fold in 1 ½ cups of crisped rice cereal gently into the mixture.
- With clean hands, scoop out portions and roll them into 1-inch balls. Place on a wax paper-lined tray.
- Refrigerate for at least 30 minutes to allow them to firm up.
- Melt 1 ½ cups of colored candy melts according to package instructions.
- Dip each ball into the melted chocolate, ensuring they are fully coated.
- Sprinkle with decorations or drizzle extra melted chocolate before letting them set.
- Store in an airtight container in the refrigerator for up to 1 week.