
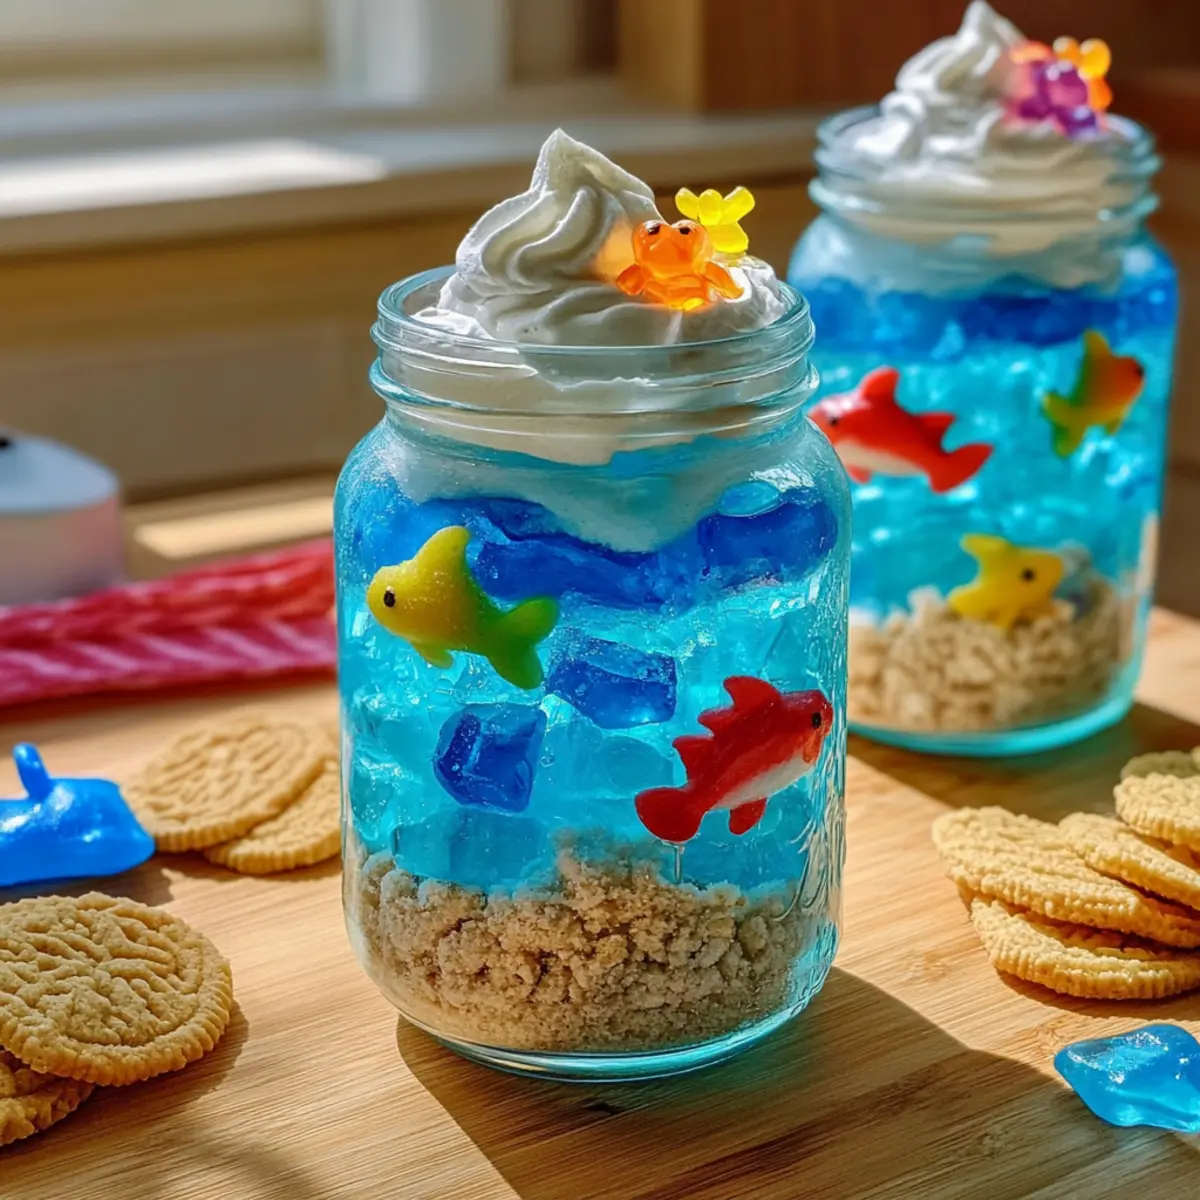
As I rummaged through my pantry, I stumbled upon a colorful collection of blue gelatin, cookies, and gummy sea creatures—all the makings for an adventure like no other. Enter the Edible Aquarium Terrariums, where creativity meets deliciousness in an engaging, no-bake dessert! This playful treat not only sparkles with oceanic charm but it’s also a fantastic way to involve kids in the kitchen, making it a hit for family gatherings or themed parties. Plus, it’s effortlessly customizable; you can swap out flavors or tweak the decorations to make each jar uniquely yours. Ready to dive into this sweet oceanic escapade? Let’s get started!
Why Make Edible Aquarium Terrariums?
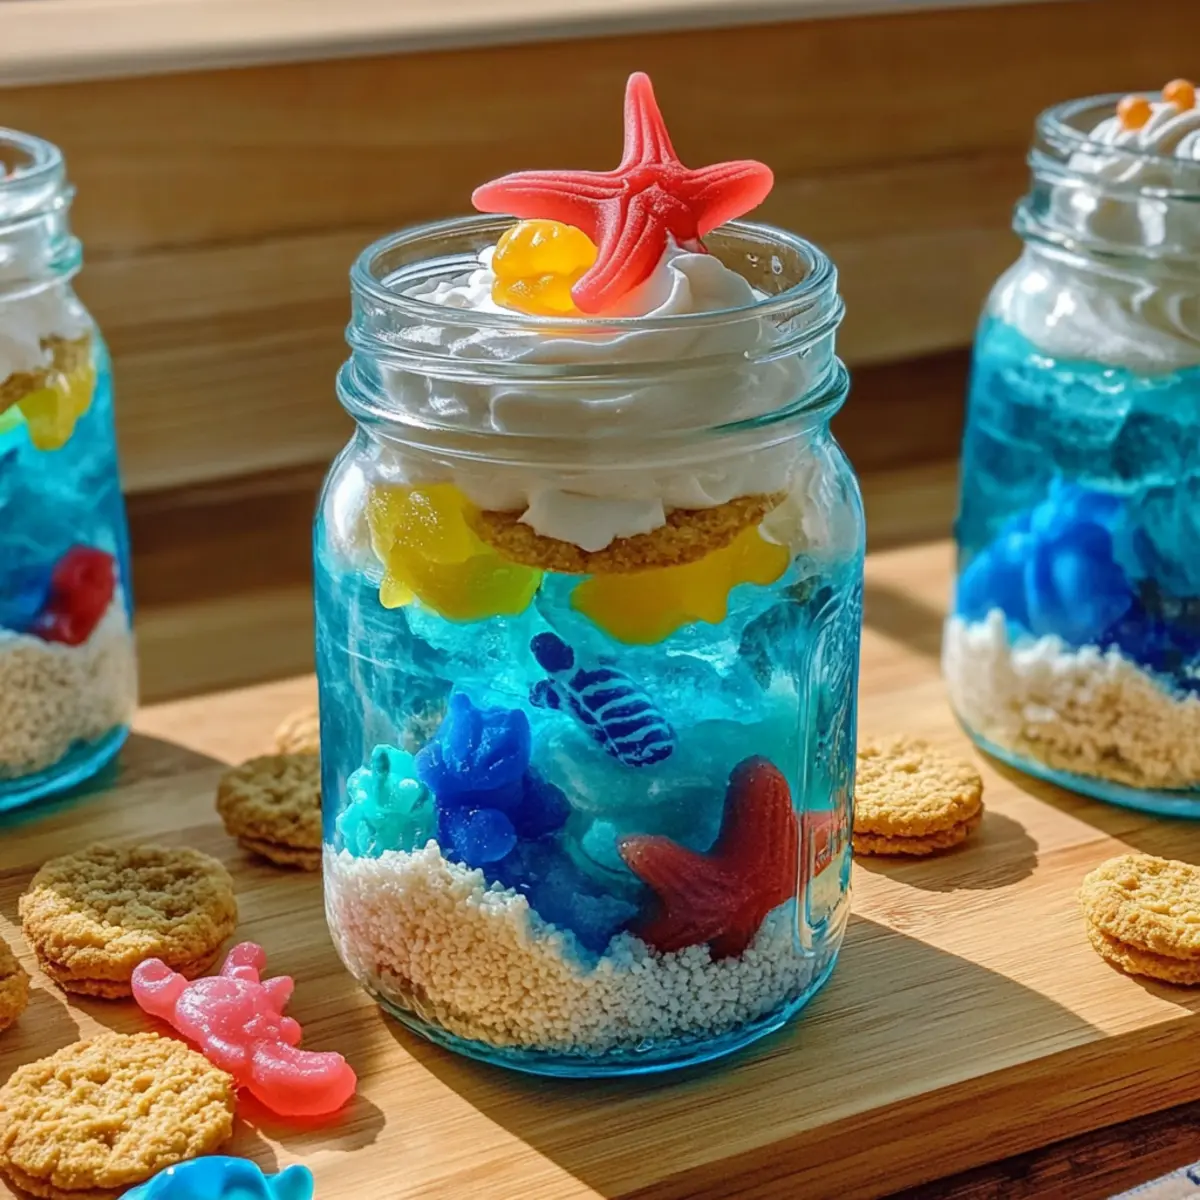
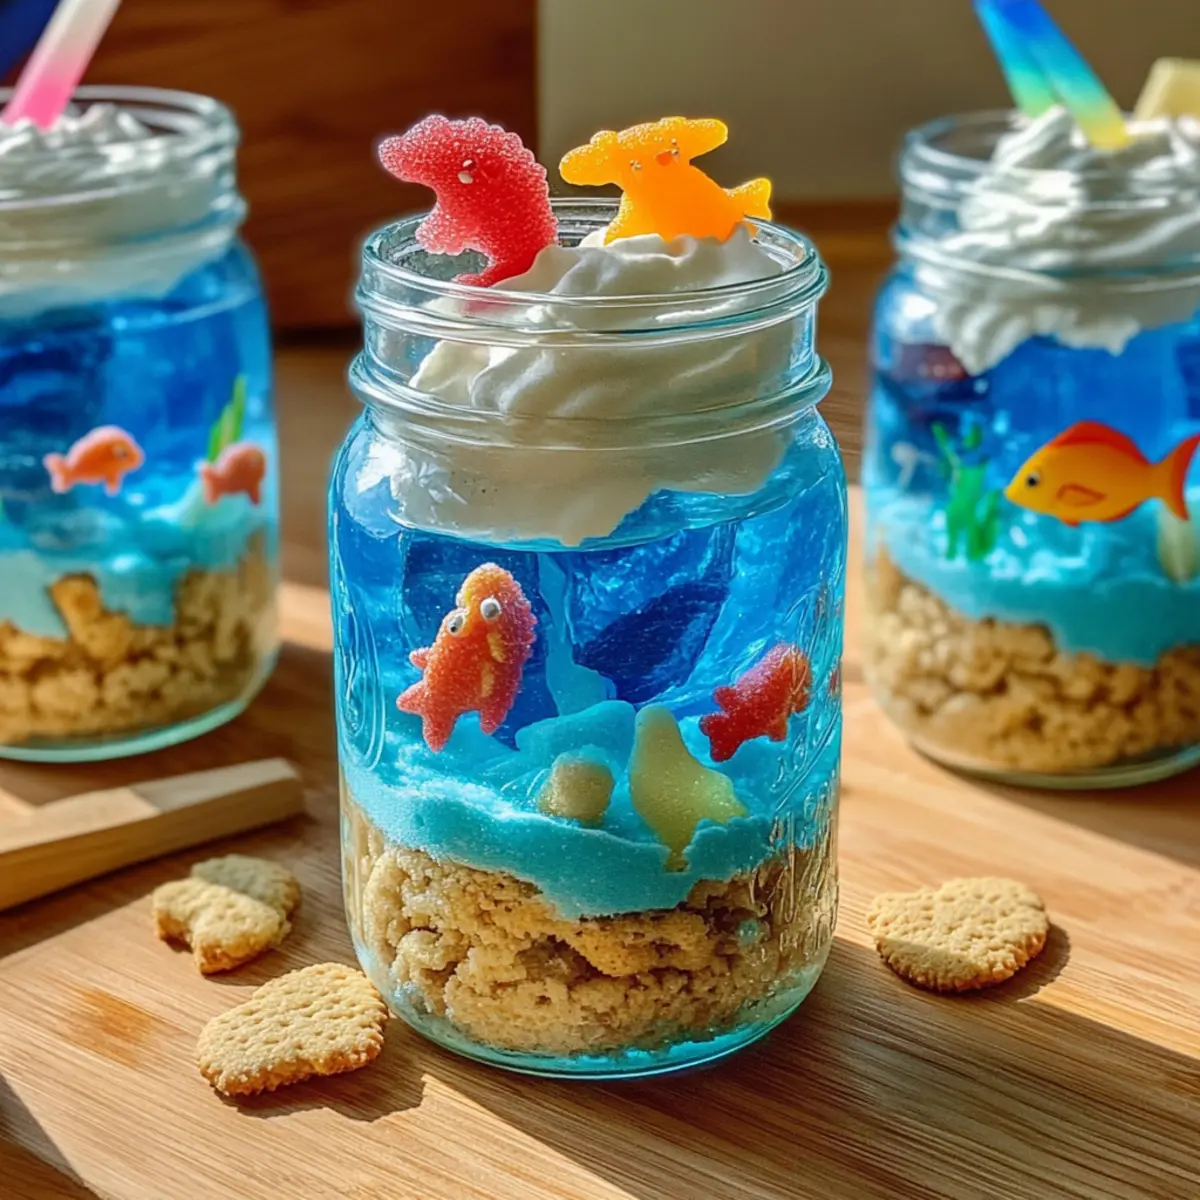
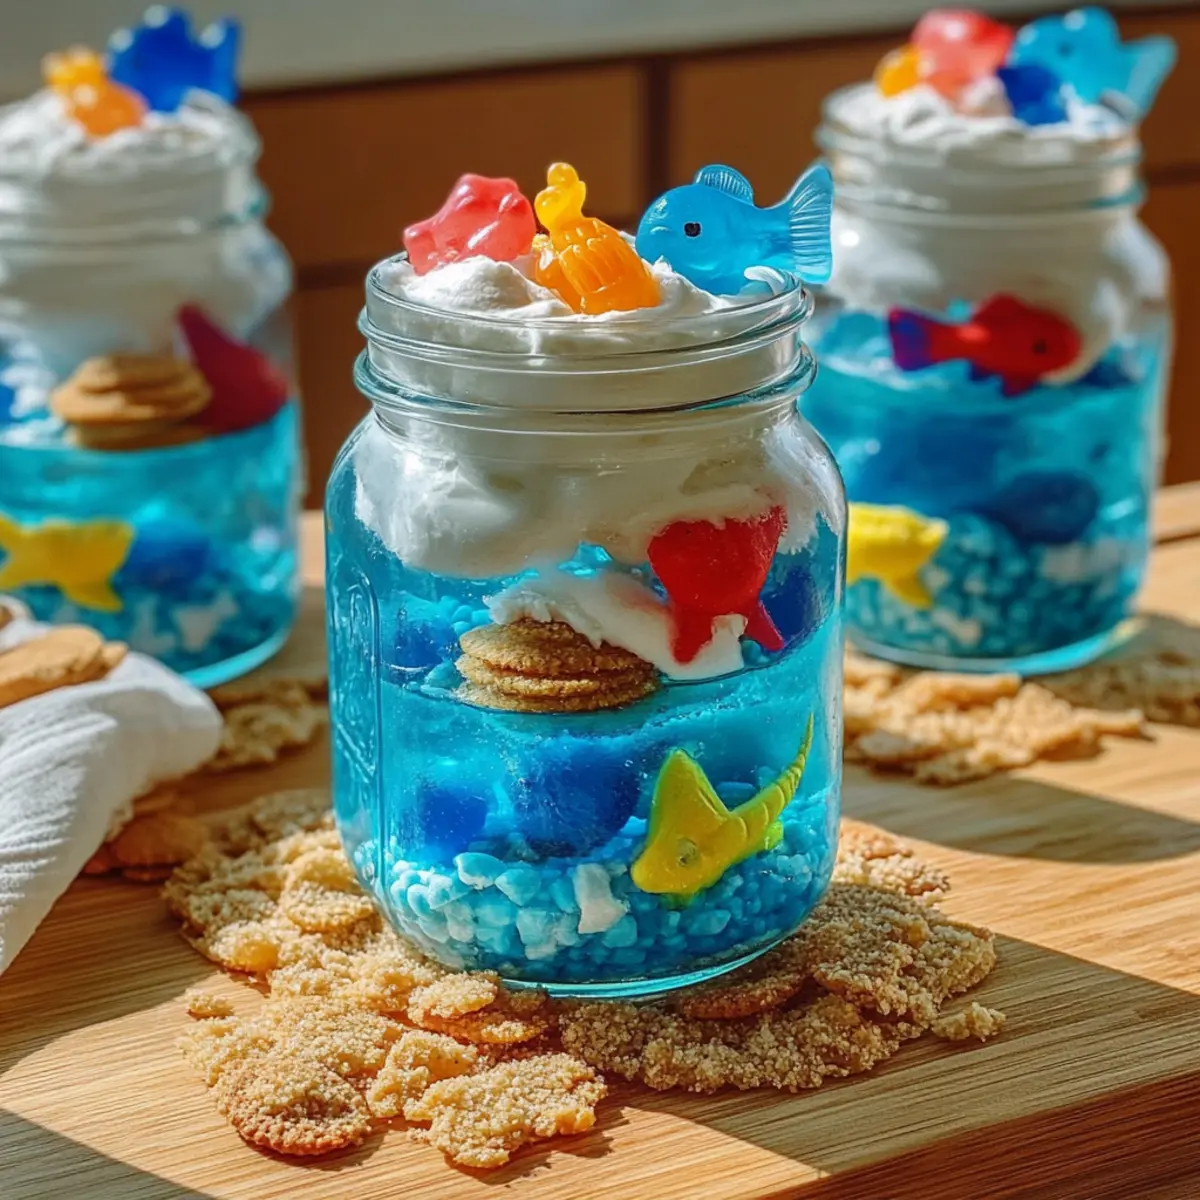
Visual Appeal: These stunning terrariums are eye-catching, resembling real aquariums filled with colorful ocean life.
No-Bake Delight: Perfect for those busy days, this simple recipe requires no baking, making it quick and easy!
Kid-Friendly Fun: Involve your little chefs with this engaging dessert that sparks creativity and imagination.
Customizable Options: Tailor each terrarium to your taste! Swap gelatin flavors or decorate with a variety of gummies to suit any occasion.
Interactive Experience: Guests will love digging into their personal edible aquariums, making this dessert a perfect conversation starter.
Edible Aquarium Terrariums Ingredients
For the Ocean Layer
- Blue Gelatin – Creates the ocean-like appearance and provides sweetness; consider using sugar-free gelatin for a lighter option.
For the Sand Base
- Vanilla Cookies – Acts as the “sand” at the bottom of the jar, giving texture and flavor; substitute with crushed graham crackers for a different taste.
For the Sea Creatures
- Gummy Sea Creatures – Adds fun and a playful element to the dessert; opt for fruit-shaped jellies or homemade fruit pieces for a healthier alternative.
For the Creamy Topping
- Whipped Cream – Serves as a topping for added creaminess; use dairy-free whipped topping if needed.
Step‑by‑Step Instructions for Edible Aquarium Terrariums
Step 1: Prepare the Gelatin
Begin by boiling 2 cups of water in a saucepan. Once boiling, remove from heat and add the blue gelatin powder, stirring until fully dissolved, about 2-3 minutes. Allow the mixture to cool for about 10-15 minutes, until it slightly thickens but is still pourable. This vibrant blue layer will be the shimmering “ocean” of your Edible Aquarium Terrariums.
Step 2: Create the Sand Layer
While the gelatin cools, crush the vanilla cookies in a zip-top bag until they resemble sand, using a rolling pin for even texture. After crushing, take your mason jars and evenly distribute about ½ inch of cookie crumbs at the bottom of each jar. This layer acts as the sandy seafloor, giving your terrariums a realistic beachy foundation.
Step 3: Layer the Gelatin
Carefully pour the cooled blue gelatin over the cookie layer in each jar, filling them about halfway. It’s important to pour gently to avoid disturbing the cookie “sand.” Allow the gelatin to set at room temperature for about 30 minutes, or until it begins to firm up but is not completely solid, ensuring the next steps can be added without sinking.
Step 4: Add the Gummies
Once the gelatin is partially set, push the gummy sea creatures into the gelatin layer of each mason jar, arranging them so they look lively and colorful. If desired, place some towards the top for visibility and a playful touch. After inserting the gummies, return the jars to the refrigerator for another 1-2 hours, until the gelatin is completely firm and the gummies are nestled in their ocean home.
Step 5: Finish with Whipped Cream
Right before serving, take the jars out of the refrigerator and add a generous dollop of whipped cream on top of the gelatin. This creamy layer resembles the frothy waves of the ocean and enhances the overall flavor of the Edible Aquarium Terrariums. Additionally, place a few more gummy sea creatures on top of the whipped cream for a fun and attractive finish.
Step 6: Serve and Enjoy
Present these delightful Edible Aquarium Terrariums to your guests while they are still chilled. Encourage everyone to dig in with spoons, allowing them to explore the ocean-themed layers. The combination of textures from the crunchy cookie, smooth gelatin, and airy whipped cream makes this dessert an exciting and interactive experience at any gathering!
Make Ahead Options
These Edible Aquarium Terrariums are perfect for meal prep enthusiasts! You can prepare the layers up to 24 hours in advance, guaranteeing you more time to enjoy with family or guests. Start by making the blue gelatin and allowing it to cool; then, create your cookie “sand” layer and assemble the jars until the gelatin is added. To ensure quality, refrigerate the assembled jars without the whipped cream; keep the gummies nestled in the gelatin to prevent them from sinking. When you’re ready to serve, simply add the whipped cream and a few extra gummy sea creatures for that delightful ocean effect. This way, you’ll have an eye-catching treat ready to impress, with minimal last-minute effort!
Expert Tips for Edible Aquarium Terrariums
-
Gelatin Setting Time: Allow the gelatin to partially set before inserting gummies to prevent them from sinking, ensuring a vibrant aquarium display.
-
Prep Ahead: Prepare the mason jars up to 24 hours in advance. Just remember to add whipped cream right before serving for the best texture.
-
Creative Customization: Feel free to experiment with different flavors and colors of gelatin or use fruit-shaped jellies to create unique Edible Aquarium Terrariums.
-
Sandy Texture: Precise crushing of cookies will yield a perfect “sand” texture. Avoid large chunks to maintain the illusion of sandy seafloors.
-
Chill for Quality: Store your terrariums in the refrigerator and enjoy them within 2-3 days for optimal freshness and flavor.
Edible Aquarium Terrariums Variations
Embrace your creativity and personalize your Edible Aquarium Terrariums with these delightful twists!
-
Gelatin Colors: Swap the blue gelatin for green or clear gelatin for a fun aquatic look. Each color brings a unique flair to your underwater scene!
-
Healthier Gummies: Choose fruit-shaped jellies or sugar-free options instead of traditional gummy candies for a lighter and healthier treat. These alternatives can satisfy your sweet tooth without guilt.
-
Flavor Layers: Experiment by layering different flavored gelatins for a rainbow effect in each jar. Think fruity combinations like strawberry, lime, and blue raspberry—your terrariums will not only look vibrant but also taste distinctively refreshing.
-
Texture Variations: Consider using crushed graham crackers instead of vanilla cookies for your sand base. This swap introduces a toasty crunch that complements the ocean layers.
-
Dairy-Free Delight: For a dairy-free version, opt for coconut whipped topping instead of traditional whipped cream. It adds a delightful tropical twist to your dessert!
-
Add Some Spice: Want to kick up the flavor? A sprinkle of sea salt on top of the whipped cream adds an unexpected but welcome contrast that mimics the ocean’s salty waves.
-
Ocean Filler: Enhance your aquarium with edible glitter or sprinkles to mimic sunlight dancing on the water’s surface. This finishing touch makes each terrarium shimmer with excitement!
-
Gummy Substitutes: Use homemade fruit pieces shaped like sea creatures to make your terrariums more wholesome. It’s a fun and healthy way to involve kids in making their own delightful treats.
As you explore these variations, think of them as opportunities to craft something uniquely yours. Whether you’re gearing up for a birthday celebration or simply want to brighten your week, customizing their flavor can elevate your dessert experience!
What to Serve with Edible Aquarium Terrariums?
Creating a delightful meal around these whimsical treats can elevate your gathering and make it even more memorable!
-
Tropical Fruit Salad: A refreshing mix of vibrant fruits adds a burst of freshness that beautifully complements the sweetness of the terrariums.
-
Ocean-Inspired Mocktails: Serve refreshing blue raspberry lemonade or sparkling water with a splash of blue curaçao syrup for a playful drink option.
-
Sandwiches or Sliders: Mini sandwiches or sliders with flavorful fillings provide a satisfying contrast to the sweet dessert while keeping the meal fun and casual.
-
Veggie Platter: Crunchy vegetables with a dip can offer a nice balance of textures, serving as a healthy contrast to the dessert’s creamy and gelatinous layers.
-
Chocolate Dipped Pretzels: The salty crunch of pretzels coated in chocolate makes for an irresistible snack to accompany the sweet ocean adventure.
-
Animal Crackers: Little ones will love visiting the imaginative ocean world along with animal crackers, bridging the dessert’s theme with a fun grazing option.
-
Ice Cream: A scoop of vanilla or coconut ice cream adds creaminess and a cold contrast that pairs perfectly with the textures of the terrariums.
Storage Tips for Edible Aquarium Terrariums
Fridge: Store your Edible Aquarium Terrariums in the refrigerator, covered with plastic wrap or a tight lid, to maintain freshness for up to 2-3 days.
Freezer: Freezing is not recommended as it can alter the texture of the gelatin and whipped cream.
Preparation Ahead: Feel free to prepare the terrariums up to 24 hours in advance to save time; just add the whipped cream shortly before serving.
Reheating: There’s no need to reheat; serve chilled to enjoy the refreshing flavors and textures of your ocean-inspired treat.
Edible Aquarium Terrariums Recipe FAQs
How do I know if my gelatin is ready to use?
You’ll want to ensure that all the gelatin crystals are dissolved in the hot water, which usually takes about 2-3 minutes of stirring. Once it’s cooled slightly but still pourable, it should have thickened just enough to create the perfect ocean layer without being fully set.
How should I store the Edible Aquarium Terrariums?
Store your terrariums in the refrigerator, covered with plastic wrap or a tight lid, to maintain their freshness for up to 2-3 days. Keeping them refrigerated helps preserve the textures of the whipped cream and gelatin.
Can I freeze Edible Aquarium Terrariums?
Absolutely not! Freezing these terrariums is not recommended, as it can negatively impact the texture of both the gelatin and whipped cream, turning your beautiful aquarium into a watery pudding mess. Instead, enjoy them fresh from the fridge!
What should I do if the gummy sea creatures sink in the gelatin?
To prevent sinking, allow the gelatin to partially set for about 30 minutes at room temperature before adding the gummies. This creates a firmer layer that supports them better. If some do sink, you can always add a few more on top of the whipped cream for a colorful finish!
Are there any dietary considerations for Edible Aquarium Terrariums?
Yes! If you’re preparing these for anyone with allergies, make sure to check the labels of your ingredients. Many gelatin brands offer vegetarian or sugar-free options, and for a dairy-free treat, you can use alternatives for whipped cream. Always choose gummies that fit within dietary restrictions, opting for fruit-shaped jellies or homemade fruit pieces as a healthier choice.
Can I prepare Edible Aquarium Terrariums in advance?
Absolutely! You can prepare the jars up to 24 hours in advance. Just make sure to add the whipped cream just before serving for the best texture. This can help save time and allow for stress-free entertaining!
Edible Aquarium Terrariums: Dive into No-Bake Fun!
Ingredients
Equipment
Method
- Boil 2 cups of water, remove from heat, add blue gelatin powder, and stir until dissolved. Cool for 10-15 minutes until slightly thickened.
- Crush vanilla cookies in a zip-top bag until sand-like and distribute about ½ inch in each jar.
- Pour cooled blue gelatin over the cookie layer in each jar, filling halfway. Allow it to set at room temperature for 30 minutes.
- Push gummy sea creatures into the partially set gelatin. Refrigerate for 1-2 hours until firm.
- Add a dollop of whipped cream on top and decorate with more gummies before serving.
- Serve chilled and enjoy the interaction of textures from the cookie, gelatin, and whipped cream.