
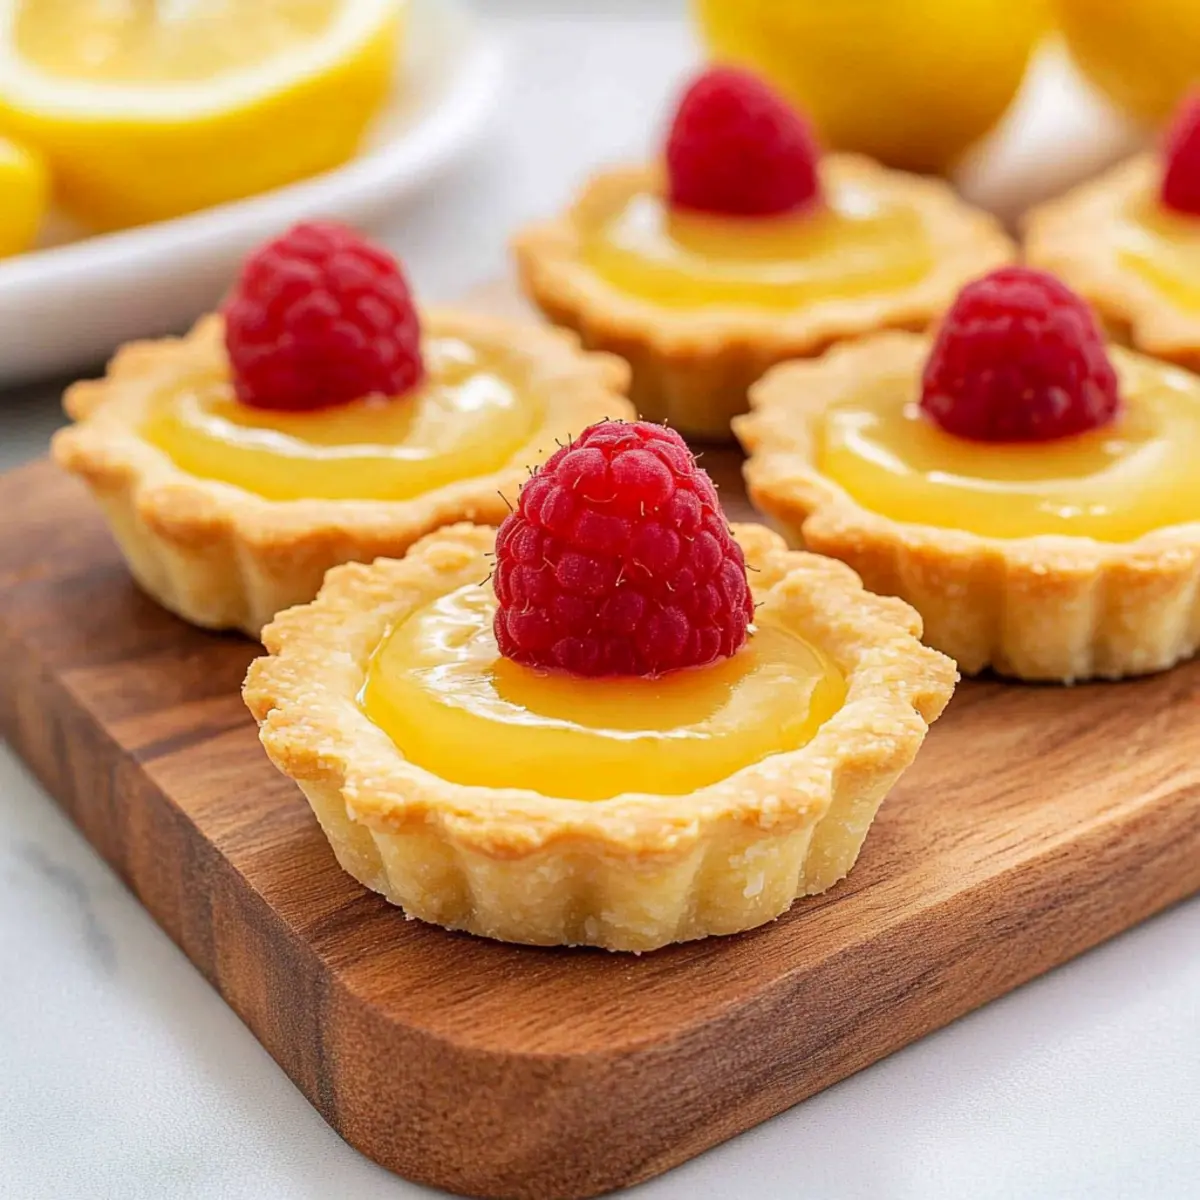
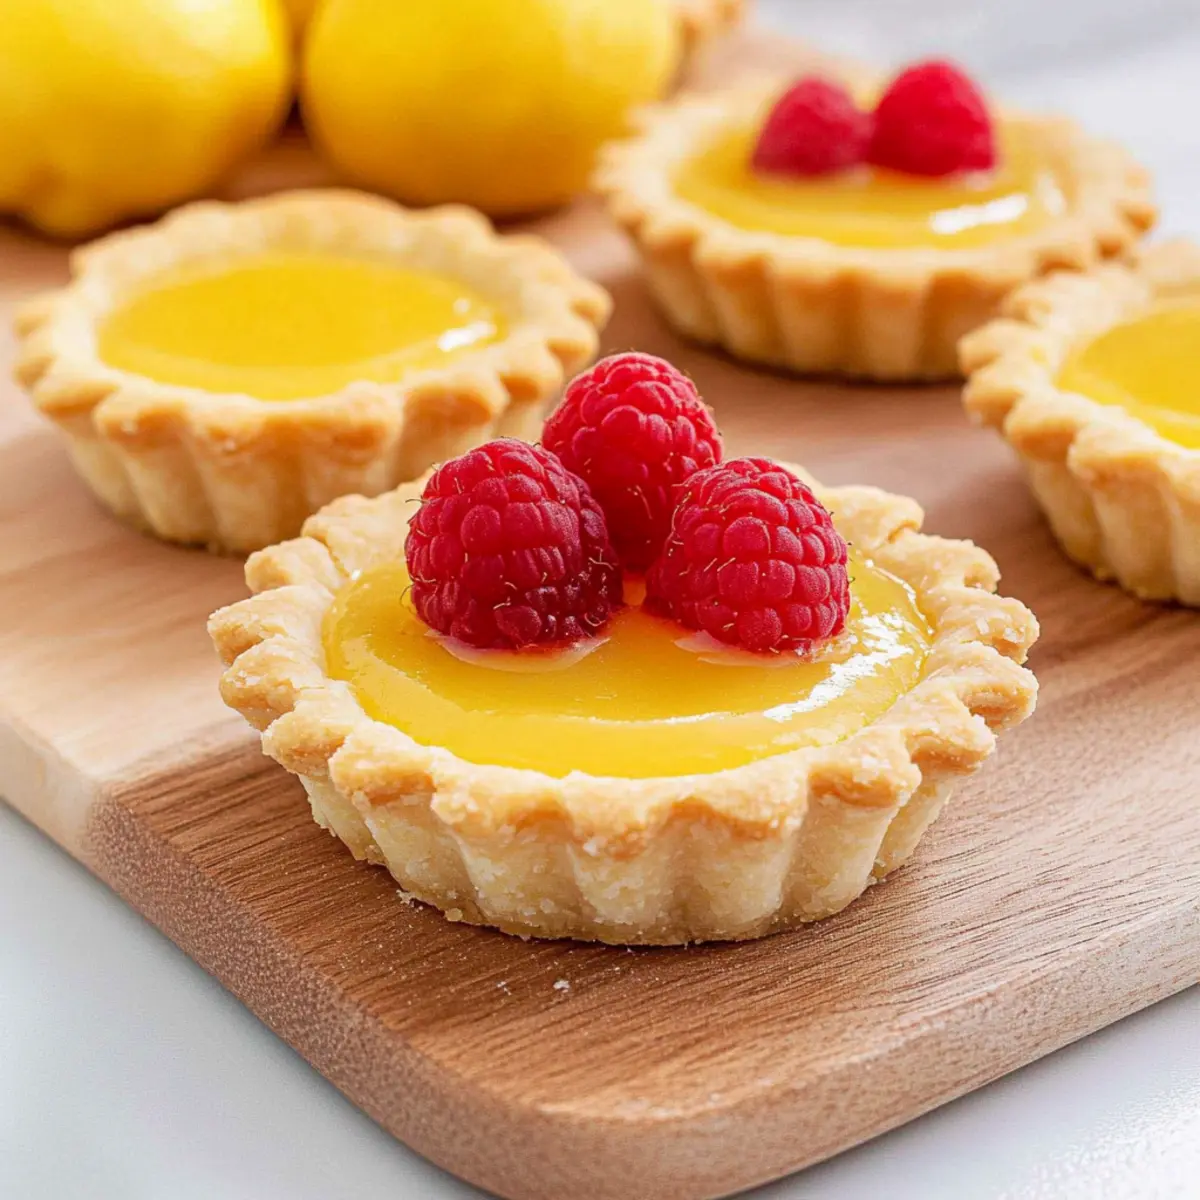
As I strolled through a sun-drenched farmer’s market, the scent of fresh lemons caught my attention, sparking a craving for something sweet. That’s when I knew I had to create these Tangy Gluten-Free Lemon Tartlets, a bite-sized dessert that whisks you away to a world of bright citrus joy. Perfect for gatherings like Mother’s Day or Easter, these little delights are not only a feast for the eyes but also a light and refreshing end to any meal. With their buttery crusts and velvety lemon curd, they offer the ideal balance of flavors without the guilt. Plus, they’re incredibly easy to whip up, making them a fantastic choice for both seasoned chefs and novice bakers. Are you ready to brighten your dessert table with these zesty gems?
Why Are Lemon Tartlets So Irresistible?
Bite-Sized Perfection: These mini delights are perfect for any occasion, easily enjoyed without the need for plates or utensils.
Bright, Tangy Flavor: The combination of fresh lemons and rich buttery crust creates a refreshing burst of taste that captivates the senses.
Two Delicious Options: With both traditional and gluten-free versions available, everyone can indulge in the joy of dessert.
Effortlessly Elegant: Impress your guests with their beautiful presentation that brings a touch of sophistication, perfect for events like Mother’s Day or Easter.
Make Ahead Convenience: Prepped a day in advance, these tartlets fit seamlessly into any gathering, so you can enjoy the fun rather than the fuss.
Let these delightful treats shine on your dessert table, and if you’re craving more lemon goodness, check out our Lemon Zucchini Heaven for a fresh twist!
Lemon Tartlets Ingredients
• Get ready for a zesty delight!
For the Crust
- Flour – Use all-purpose or King Arthur Flour Gluten-free Measure for Measure Flour for gluten-free options.
- Granulated Sugar – Adds sweetness; you can swap it with honey for a honey-sweetened lemon curd recipe.
- Salt – Enhances flavor, balancing the sweetness of the tartlets.
- Cold Unsalted Butter – Creates a flaky crust; make sure it’s cold to keep the texture perfect.
- Large Egg Yolk – Adds richness and color to the crust; don’t substitute with egg whites.
- Vanilla Extract – Imparts a lovely flavor to the crust; for a deeper taste, opt for vanilla bean.
- Milk – Helps bind the crust ingredients; add gradually to avoid a soggy crust.
For the Lemon Curd
- Fresh Lemon Juice – Essential for tangy flavor; always use freshly squeezed over bottled for the best taste.
- Large Eggs – Provide structure and stability; crucial for a creamy lemon curd.
- Large Egg Yolks – Add richness and work with whole eggs for optimal texture in the curd.
- Lemon Zest – Intensifies lemon flavor; use organic lemons when possible for safety.
- Pinch of Salt – Balances the sweetness of the curd beautifully.
- Cold Unsalted Butter (for curd) – Adds creaminess; ensure it’s softened for easy incorporation.
Optional Toppings
- Fresh Raspberries/Blackberries/Strawberries – Use these for a decorative and flavorful topping.
Whether it’s a special occasion or just a delightful treat, these lemon tartlets are sure to impress!
Step‑by‑Step Instructions for Tangy Gluten-Free Lemon Tartlets
Step 1: Make the Crust
In a mixing bowl, whisk together the flour, sugar, and salt until well combined. Cut in the cold unsalted butter using a pastry cutter until the mixture resembles coarse breadcrumbs. In a separate bowl, whisk the egg yolk, vanilla extract, and milk; then pour into the flour mixture. Mix until a dough forms, shape it into a disc, wrap, and chill for 1 hour.
Step 2: Prepare the Oven and Tart Pans
While the dough chills, preheat your oven to 375°F (190°C). Prepare your tartlet pans by greasing them lightly. Once the dough has chilled, roll it out on a floured surface to about 1/8 inch thickness. Carefully fit the rolled dough into the tart pans, pressing it into the edges. Freeze the crusts for 20-30 minutes to maintain their shape during baking.
Step 3: Bake the Crusts
After chilling, bake the tartlet crusts in the preheated oven for 14-17 minutes, or until they are golden brown and firm to the touch. Keep an eye on them to prevent over-baking; they should not darken too much. Once done, remove them from the oven and let them cool slightly while you prepare the lemon curd.
Step 4: Prepare the Lemon Curd
In a heatproof bowl over simmering water, whisk together the fresh lemon juice, whole eggs, egg yolks, lemon zest, sugar, and a pinch of salt. Stir continuously until the mixture thickens and reaches 175°F (79°C), about 10-12 minutes. Remove from heat and whisk in the cold unsalted butter until it’s completely melted and smooth. For a silkier curd, strain it through a fine sieve if desired.
Step 5: Fill the Tartlets
Preheat your oven again to 325°F (163°C). Carefully pour the prepared lemon curd into the baked tartlet shells, filling them just to the top. Bake for another 10 minutes, allowing the curd to set gently. After baking, let them cool in the pans for a few minutes before transferring to a wire rack.
Step 6: Chill and Serve
Once the tartlets have cooled to room temperature, chill them in the refrigerator for at least 1 hour to firm up the curd for easier slicing. Before serving, garnish with fresh berries or a sprinkle of powdered sugar for added flair. Enjoy your delightful lemon tartlets as a zesty end to any meal!

Storage Tips for Lemon Tartlets
Room Temperature: Keep baked lemon tartlets at room temperature for up to 2 hours, uncovered, to maintain their texture and flavor.
Fridge: Store any leftover lemon tartlets in an airtight container in the fridge for up to 3 days. This helps preserve their freshness.
Freezer: For longer storage, freeze the baked tartlets for up to 3 months. Wrap them tightly in plastic wrap and then place them in a freezer-safe bag.
Reheating: Thaw frozen lemon tartlets in the fridge overnight and serve chilled for the best flavor and texture.
Lemon Tartlets Variations & Substitutions
Feel free to let your creativity flow and personalize these lemon tartlets to suit your taste!
- Key Lime Twist: Swap out fresh lemon juice with key lime juice for a tropical, zesty alternative that brightens your taste buds.
- Nutty Crust: Use ground almond flour instead of regular flour for a gluten-free, nutty crust that adds extra flavor and texture.
- Honey-Sweetened Curds: Substitute granulated sugar with honey in the curd for a naturally sweetened version that brings a unique depth of flavor.
- Berry Surprise: Top the tartlets with a mix of fresh raspberries, blackberries, or strawberries for a burst of color and a delightful fruity contrast.
- Lemon-Lime Fusion: Mix fresh lemon and lime juice together for a vibrant citrus punch, perfect for those who crave a tangy twist.
- Ginger Infusion: Add a pinch of ground ginger to the lemon curd for a warm, spicy note that beautifully complements the tartness of the lemons.
- Coconut Flakes: Sprinkle toasted coconut flakes on top for an added crunch and flavor that transports you to a tropical paradise with each bite.
- Chili Zest: For those who like a kick, sprinkle a bit of chili powder when baking the curd for an unexpected heat that dances on your palate.
Whatever variation you choose, don’t forget to check out these tasty treats: Lemon Zucchini Heaven or our delightful Lemon Cheesecake Truffles for more lemony inspiration! Enjoy experimenting!
What to Serve with Tangy Gluten-Free Lemon Tartlets
Pairing a delightful selection of sides and beverages with these lemon tartlets will elevate your dessert experience to new heights.
-
Creamy Whipped Cream: A dollop of lightly sweetened whipped cream adds a rich contrast, making each bite of tartlet even more indulgent.
-
Fresh Berries: Plump strawberries, raspberries, or blueberries provide a burst of color and flavor, enhancing the tartness of the lemon while offering a fresh, juicy element. Their sweetness complements the tartlets beautifully.
-
Mint Sprigs: The vibrant aroma of fresh mint elevates the overall presentation and adds a refreshing hint, perfect for brightening up the tangy flavor profile of the dessert.
-
Decadent Vanilla Ice Cream: A scoop of creamy vanilla ice cream melts into the tartlet, harmonizing with the sweet and tangy lemon curd for a delightful creamy texture that all ages will enjoy.
-
Earl Grey Tea: Steeped in fragrant notes of bergamot, a cup of Earl Grey tea pairs beautifully with the citrus notes of the tartlets, enhancing the dessert’s sophisticated essence.
-
Lemonade or Citrus-Infused Sparkling Water: Refreshing and thirst-quenching, these drinks echo the tartlets’ citrus flavors, providing a lovely lightness that makes for a complete meal.
-
Chocolate Dipped Biscotti: For a touch of crunch, serve alongside these tartlets. Dipping the sweet, nutty biscotti in chocolate offers a satisfying contrast to the light lemon filling.
-
Meringue Cookies: Light, airy, and subtly sweet, meringue cookies provide a charming crunchy counterpart to the soft and creamy texture of the lemon tartlets, creating delightful contrast in every bite.
Expert Tips for Lemon Tartlets
• Room Temperature Eggs: Ensure egg yolks and whites are at room temperature for better incorporation into the curd, leading to a smoother texture.
• Avoid Over-Mixing: Mix the dough only until combined to prevent it from becoming tough. A gentle hand is crucial for tender crusts in your lemon tartlets.
• Let Crust Cool: Cool the crust slightly before adding the lemon curd to avoid sogginess. This ensures a crisp base for your delightful tartlets.
• Use Fresh Ingredients: Always opt for fresh lemon juice and zest for the best flavor; bottled versions lack the bright tartness your dessert deserves.
• Serve Promptly: Enjoy your lemon tartlets soon after serving for the best texture. They tend to soften if filled too far in advance.
• Presentation Matters: Garnish your tartlets with fresh berries or mint. An elegant touch elevates the visual appeal and flavor of your lemon tartlets!
Make Ahead Options
These Tangy Gluten-Free Lemon Tartlets are perfect for busy home cooks looking to save time! You can prepare the tartlet crusts and refrigerate them for up to 3 days in an airtight container. Additionally, the lemon curd can be made in advance and stored in the fridge for up to 3 days or even frozen for 3 months. To maintain their delightful texture, keep the crusts and lemon curd separate until you’re ready to serve. When you’re set to impress, simply fill the baked tart shells with the chilled curd and reheat in a preheated oven at 325°F (163°C) for about 10 minutes to ensure everything comes together beautifully, just as delicious as when freshly made!
Lemon Tartlets Recipe FAQs
How do I select the best lemons for this recipe?
Absolutely! When choosing lemons, look for ones that are bright yellow and feel heavy for their size, indicating juiciness. Avoid lemons with dark spots or wrinkles, as these may be overripe or dried out. Organic lemons can be an excellent choice, as they tend to have more flavor and fewer pesticides.
How should I store leftover lemon tartlets?
Very good question! You can store any leftover lemon tartlets in an airtight container in the fridge for up to 3 days to maintain their freshness. Make sure to keep them uncovered for the first 2 hours at room temperature for optimal texture, then securely cover them.
Can I freeze lemon tartlets?
Certainly! To freeze, wrap the baked lemon tartlets tightly in plastic wrap and then place them in a freezer-safe bag. They will keep well for up to 3 months. When ready to enjoy, simply thaw them overnight in the fridge, and serve chilled for the best taste and texture.
What if my lemon curd doesn’t thicken properly?
If your lemon curd isn’t thickening, don’t worry! Ensure you’re stirring continuously and checking the temperature; it should reach 175°F (79°C). If it’s not thickening after about 10-12 minutes, try whisking the curd a bit more vigorously. If all else fails, you can add a cornstarch slurry (1 tablespoon cornstarch mixed with 1 tablespoon of water) to the mixture while it’s still warm and continue stirring until thickened.
Are these tartlets safe for people with gluten allergies?
Absolutely! These lemon tartlets can easily be made gluten-free by using King Arthur Flour Gluten-free Measure for Measure Flour for the crust. Always double-check ingredient labels for any hidden gluten, and if you’re creating them for someone with severe allergies, make sure all surfaces and utensils are thoroughly cleaned to avoid cross-contamination.

Delightful Lemon Tartlets: A Zesty Dessert Adventure
Ingredients
Equipment
Method
- In a mixing bowl, whisk together the flour, sugar, and salt until well combined. Cut in the cold unsalted butter using a pastry cutter until the mixture resembles coarse breadcrumbs. In a separate bowl, whisk the egg yolk, vanilla extract, and milk; then pour into the flour mixture. Mix until a dough forms, shape it into a disc, wrap, and chill for 1 hour.
- While the dough chills, preheat your oven to 375°F (190°C). Prepare your tartlet pans by greasing them lightly. Once the dough has chilled, roll it out on a floured surface to about 1/8 inch thickness. Carefully fit the rolled dough into the tart pans, pressing it into the edges. Freeze the crusts for 20-30 minutes to maintain their shape during baking.
- After chilling, bake the tartlet crusts in the preheated oven for 14-17 minutes, or until golden brown and firm to the touch. Keep an eye on them to prevent over-baking; they should not darken too much. Once done, remove them from the oven and let them cool slightly while you prepare the lemon curd.
- In a heatproof bowl over simmering water, whisk together the fresh lemon juice, whole eggs, egg yolks, lemon zest, sugar, and a pinch of salt. Stir continuously until the mixture thickens and reaches 175°F (79°C), about 10-12 minutes. Remove from heat and whisk in the cold unsalted butter until completely melted and smooth.
- Preheat your oven again to 325°F (163°C). Carefully pour the prepared lemon curd into the baked tartlet shells, filling them just to the top. Bake for another 10 minutes, allowing the curd to set gently. After baking, let them cool in the pans for a few minutes before transferring to a wire rack.
- Once cooled to room temperature, chill them in the refrigerator for at least 1 hour to firm up the curd for easier slicing. Before serving, garnish with fresh berries or a sprinkle of powdered sugar.