
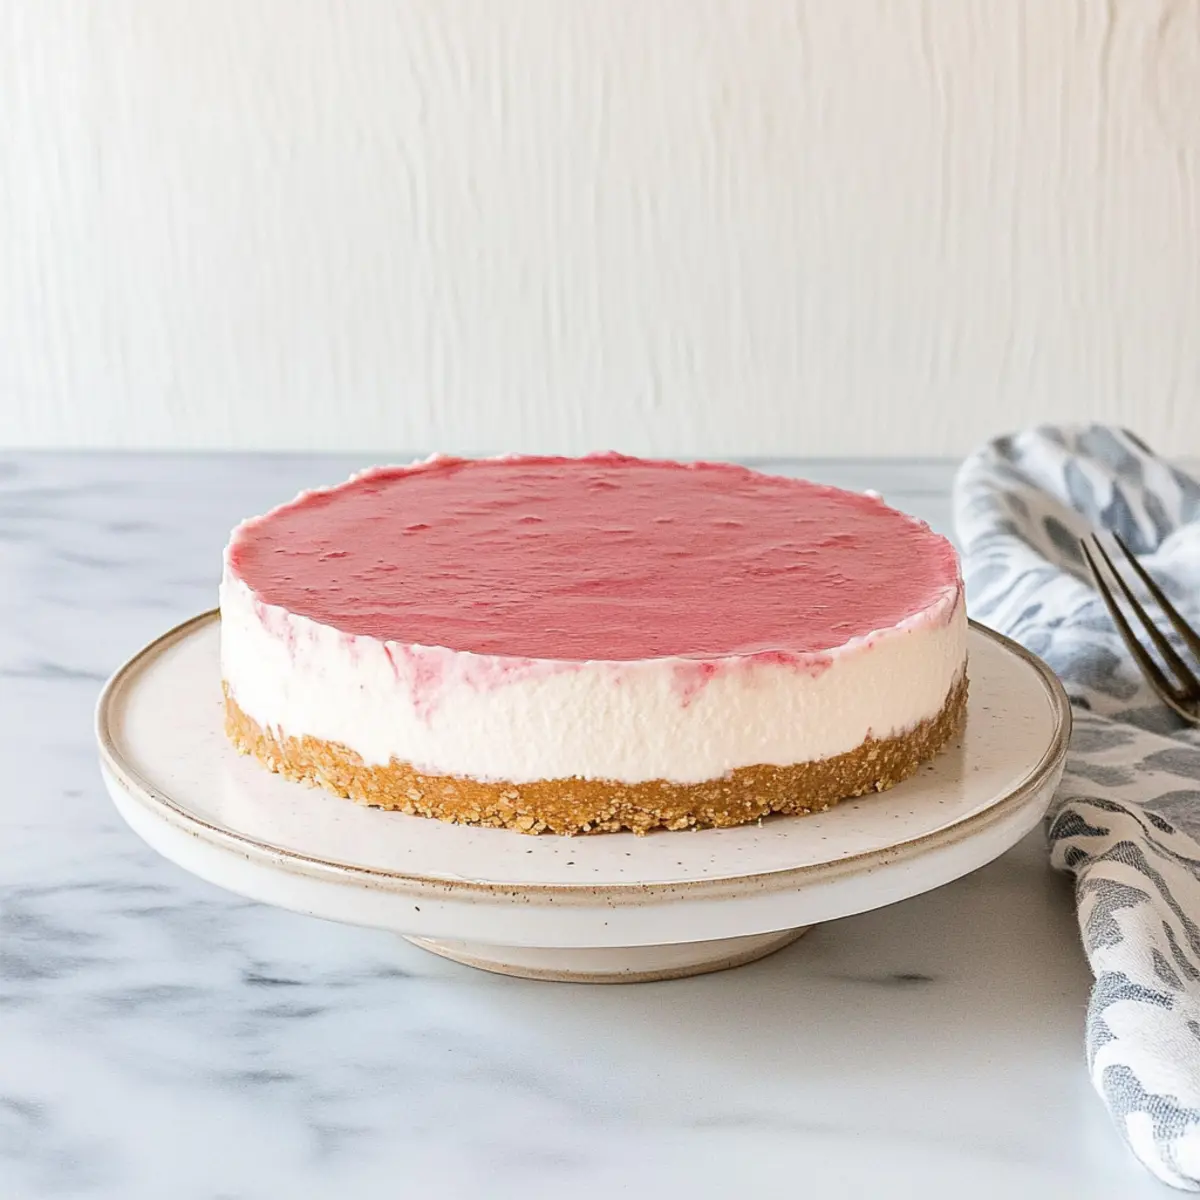
The sweet tang of rhubarb dusted with sugar is a springtime delight that takes me back to sunny afternoons at my grandmother’s kitchen table. One of my all-time favorite ways to celebrate this seasonal fruit is with a No Bake Rhubarb Cheesecake that’s not only a feast for the eyes but also a breeze to whip up. This easy dessert recipe offers a perfect balance of tart and sweet, making it an excellent low sugar dessert for those looking to indulge without the guilt. Plus, it’s an ideal crowd-pleaser that seamlessly pairs with a chilled glass of wine, perfect for your next gathering. Who wouldn’t want to dig into a creamy, velvety slice that captures the spirit of spring? Curious how to make this refreshing treat? Let’s dive in!
Why is This Rhubarb Cheesecake Special?
No Bake Ease: This recipe requires zero baking, making it accessible for everyone, from novice cooks to seasoned chefs.
Fresh Spring Flavor: The vibrant tartness of rhubarb paired with rich cream cheese creates a delightful balance that sings of spring.
Low Sugar Delight: With honey as a natural sweetener, you can enjoy this treat without the guilt, making it perfect for health-conscious dessert lovers!
Crowd-Pleasing Appeal: Impress your friends and family with this stunning, creamy cheesecake that is sure to be the star of any gathering—great with a glass of wine, just like my Butterfinger Cheesecake Bars.
Versatile Option: Don’t hesitate to swap rhubarb with strawberries or blueberries for a different palette of flavors, ensuring there’s something for everyone!
Dive into this easy recipe, and get ready to relish a dessert that’s both beautiful and delicious, perfect for those sunny afternoons!
No Bake Rhubarb Cheesecake Ingredients
For the Rhubarb Mixture
• Chopped Rhubarb – Provides a tangy taste; fresh or frozen both work well.
• Honey – Adds a natural sweetness; can be substituted with maple syrup or agave.
• Water – Necessary to cook the rhubarb until tender.
• Lemon Juice – Enhances flavor and adds acidity; fresh juice is preferred.
For the Cheesecake Base
• Graham Crackers – Forms a delicious crust; gluten-free options are great too.
• Unsalted Butter – Binds the crust together; coconut oil is a good dairy-free substitute.
For the Cheesecake Filling
• Cream Cheese – Provides a rich, creamy texture; always use block cream cheese.
• Whipping Cream – Adds lightness to the filling; ensure it’s at least 33% fat for best results.
• Icing (Powdered) Sugar – Sweetens the cheesecake; feel free to reduce for less sweetness.
• Lemon Zest – Offers a fresh citrus note; optional but highly recommended.
• Vanilla Extract – Deepens the flavor; clear vanilla adds a nice touch.
For the Topping
• Gelatin – Critical for setting the cheesecake; unflavored is best.
• Boiling Water – Used to dissolve the gelatin for the topping.
Enjoy creating this No Bake Rhubarb Cheesecake for a delightful dessert experience!
Step‑by‑Step Instructions for No Bake Rhubarb Cheesecake
Step 1: Prepare the Pan
Begin by lining a 9 or 10-inch springform pan with parchment paper, allowing some paper to hang over the edges for easy removal later. Next, spray the pan with non-stick spray to ensure the crust and cheesecake release effortlessly after chilling. This step is crucial for a perfect presentation of your No Bake Rhubarb Cheesecake.
Step 2: Make the Crust
In a food processor, pulse the graham crackers until fine crumbs form. Melt the unsalted butter in a microwave or stovetop, then combine it with the crumbs until well mixed. Press this mixture firmly into the base of your prepared springform pan, creating a compact crust. Refrigerate for 30 minutes to set up while you prepare the filling.
Step 3: Cook Rhubarb
In a medium saucepan, combine the chopped rhubarb, honey, and water. Cook over medium heat for 15-20 minutes, stirring occasionally, until the rhubarb is tender and has softened considerably. You’ll know it’s ready when the rhubarb breaks down and the mixture is bubbling gently. Remove from heat and let cool slightly.
Step 4: Blend Rhubarb
Once the rhubarb mixture is cool, add the fresh lemon juice and blend it until smooth using an immersion blender or standard blender. This bright rhubarb puree will be the delightful topping of your No Bake Rhubarb Cheesecake, so set it aside while you prepare the creamy filling.
Step 5: Cream Cheese Mixture
In a large mixing bowl, use a hand mixer to beat the cream cheese until it’s completely smooth and free of lumps. Slowly add the whipping cream and continue mixing until the cream reaches stiff peaks, which usually takes about 3-5 minutes. This light texture is key for a fluffy cheesecake filling.
Step 6: Combine Mixtures
To the whipped cream cheese mixture, gently fold in the icing sugar, lemon juice, lemon zest, and vanilla extract. Carefully mix until fully combined and smooth. Pour this luscious mixture over the chilled graham cracker crust, smoothing it out with a spatula to create an even layer for your No Bake Rhubarb Cheesecake.
Step 7: Prepare Rhubarb Topping
In a small bowl, dissolve the unflavored gelatin in boiling water, stirring until completely dissolved. Add this liquid to the smooth rhubarb puree and mix thoroughly. Spread this vibrant rhubarb topping evenly over the cheesecake filling, creating a beautiful layer that will set as it chills in the refrigerator.
Step 8: Chill
Finally, cover the cheesecake with plastic wrap and refrigerate for at least 3 hours, preferably overnight. This step allows the cheesecake to fully set and the flavors to meld beautifully. When you are ready to serve your No Bake Rhubarb Cheesecake, gently lift it from the springform pan using the parchment overhang for a flawless presentation.
Make Ahead Options
These No Bake Rhubarb Cheesecake preparations are perfect for busy cooks looking to save time! You can prepare the crust and filling up to 24 hours in advance; simply store them in the refrigerator to maintain freshness. Make sure the cream cheese is well softened for smooth blending when creating the filling. You can also cook and blend the rhubarb topping ahead, storing it in an airtight container in the fridge for up to 3 days. When you’re ready to serve, just pour the filling over the crust, spread the rhubarb topping, and allow it to set in the fridge — this will help meld the flavors perfectly while ensuring your cheesecake stays just as delicious!
What to Serve with No Bake Rhubarb Cheesecake
Elevate your dessert experience by pairing this delightful cheesecake with scrumptious sides and complementary flavors.
-
Fresh Berries: Mixed berries bring a burst of freshness that beautifully contrasts the creamy cheesecake, adding a vibrant touch to each bite.
-
Minted Green Salad: A light salad with baby greens, cucumber, and a mint vinaigrette provides a refreshing palate cleanser before dessert.
-
Flavorful Rosé: A chilled glass of rosé wine highlights the rhubarb’s tartness, creating a perfect harmony between flavors for your spring gathering.
-
Lemon Sorbet: This zesty sorbet cleanses the palate, echoing the cheesecake’s citrus notes while offering a fun, icy texture.
-
Graham Cracker Crumble Topping: Add this crunchy layer on top of the cheesecake for an extra bite that mirrors the crust and gives delightful texture.
-
Vanilla Ice Cream: A scoop of creamy vanilla ice cream pairs well, enhancing the cheesecake’s flavors with luxurious richness.
-
Sparkling Water with Citrus: Refreshing bubbles complemented by slices of lemon or lime provide a light, invigorating drink option that keeps things vibrant.
-
Coffee or Espresso: A warm cup of coffee or espresso delivers a comforting contrast to the cool cheesecake, rounding out a delicious finish to your meal.
Enjoy experimenting with these pairings to create a memorable feast that celebrates the delightful flavors of your No Bake Rhubarb Cheesecake!
Expert Tips for No Bake Rhubarb Cheesecake
-
Room Temperature Cheese: Use cream cheese at room temperature for a smoother filling. Cold cream cheese can lead to lumps, affecting the texture of your No Bake Rhubarb Cheesecake.
-
Stiff Peaks Matter: Whipping cream should reach stiff peaks for a light, airy texture. Avoid over-whipping, which can cause it to become grainy.
-
Gentle Folding: When combining the cream cheese mixture with other ingredients, fold gently to maintain airiness. This ensures your cheesecake remains light and fluffy.
-
Chill Time is Key: Allow the cheesecake to chill for at least 3 hours, or better yet, overnight. This helps it set properly, enhancing flavors and making slicing easier.
-
Flexible Garnish: Feel free to experiment with the rhubarb topping. Adding a hint of cinnamon or swapping for seasonal fruits can give your No Bake Rhubarb Cheesecake a personal touch!
No Bake Rhubarb Cheesecake Variations
Invite your taste buds on a delightful journey by customizing this recipe to match your unique preferences and desires.
-
Berry Bliss: Swap rhubarb with fresh strawberries or blueberries for a sweeter, fruitier flavor. Each bite will burst with seasonal goodness!
-
Tropical Twist: Replace honey with coconut nectar and adorn the cheesecake with toasted coconut flakes for an island-inspired treat. The tropical flavors will transport you to your dream vacation!
-
Nutty Delight: Stir in crushed pistachios to the graham cracker crust for a delightful crunch. This adds an unexpected texture that contrasts beautifully with the creamy filling.
-
Spicy Surprise: Add a pinch of cardamom or cinnamon to the rhubarb layer for an aromatic hint that elevates the dish. Your guests will be intrigued by the subtle warmth!
-
Chocolate Indulgence: Drizzle melted dark chocolate over the finished cheesecake for an elegant touch or mix cocoa powder into the crust. Chocolate lovers will be in heaven!
-
Vegan Version: Use coconut cream and a vegan gelatin substitute to make this cheesecake plant-based. Even non-vegans won’t be able to resist its rich flavor.
-
Citrus Zing: Increase the lemon zest for an extra punch of freshness or experiment with lime for a fun twist. Your cheesecake will come alive with vibrant citrus notes!
-
Creamy Coffee Boost: Fold in a tablespoon of instant coffee granules into the cream cheese mixture for a mocha-inspired cheesecake. Perfect for coffee aficionados looking to enjoy dessert!
Feeling inspired? Don’t forget to explore other delightful treats like Lemon Cheesecake Truffles or classic Red Velvet Cheesecake as you experiment with flavors in your kitchen!
How to Store and Freeze No Bake Rhubarb Cheesecake
-
Fridge: Store leftovers in an airtight container in the refrigerator for up to 3 days. This will keep the No Bake Rhubarb Cheesecake fresh and delicious.
-
Freezer: For longer storage, wrap individual slices in plastic wrap, then in aluminum foil, and freeze for up to 3 months. Thaw overnight in the refrigerator before serving.
-
Reheating: No need to reheat this cheesecake; it’s best enjoyed chilled! Just slice and serve straight from the fridge for maximum freshness.
-
Serving Tips: If you have frozen cheesecake, let it thaw completely in the fridge for a creamy texture that rivals the original creation.
No Bake Rhubarb Cheesecake Recipe FAQs
How do I select the best rhubarb for this cheesecake?
Absolutely! Look for rhubarb stalks that are firm and crisp, avoiding those with dark spots or wilting, which can indicate overripeness. Fresh rhubarb should have a vibrant pink to red color. If you can’t find fresh, frozen rhubarb works perfectly, just thaw and drain excess water before use.
What are the best storage methods for my No Bake Rhubarb Cheesecake?
For optimal freshness, store your cheesecake in an airtight container in the refrigerator for up to 3 days. If you have leftovers, I recommend covering them tightly with plastic wrap to keep out moisture and odors. If you want to keep it longer, wrap slices individually in plastic wrap, followed by aluminum foil, and you can freeze them for up to 3 months!
Can I freeze No Bake Rhubarb Cheesecake? How?
Yes! Freezing cheesecake is simple. First, slice it into individual servings. Wrap each slice tightly in plastic wrap, then cover with aluminum foil. This dual-wrapping prevents freezer burn. When you’re ready to enjoy, move the cheesecake to the refrigerator to defrost overnight before serving. It will taste just as delicious as when you first made it!
What should I do if my cheesecake is too soft?
If your cheesecake ends up too soft, it might be that the gelatin didn’t set fully. To troubleshoot, try adding more gelatin dissolved in boiling water to the topping layer. Mix well before spreading. You could also chill it longer in the refrigerator, allowing it more time to firm up. It’s always a good idea to ensure that your cream is whipped to stiff peaks and that everything is properly combined!
Is this cheesecake suitable for people with dietary restrictions?
The No Bake Rhubarb Cheesecake is quite versatile! For gluten-free needs, simply substitute the graham crackers with gluten-free options. If you’re looking for a dairy-free option, opt for coconut cream instead of whipping cream and use dairy-free cream cheese. Always check for allergies with your ingredients, especially with the gelatin, as some people may have dietary restrictions against animal-based products.
Can I make this cheesecake ahead of time?
Very! This cheesecake is perfect for making in advance. It actually tastes even better after sitting in the fridge for a day, allowing all the flavors to meld beautifully. Just cover it well and store it in the refrigerator. It will remain fresh for at least 3 days, making it an ideal dessert for gatherings or special occasions!
Deliciously Easy No Bake Rhubarb Cheesecake for Spring Bliss
Ingredients
Equipment
Method
- Prepare the pan by lining with parchment paper and spraying with non-stick spray.
- Make the crust by pulsing graham crackers, mixing with melted butter, and pressing into the pan. Refrigerate for 30 minutes.
- Cook rhubarb, honey, and water in a saucepan until tender (15-20 minutes).
- Blend cooled rhubarb mixture with lemon juice until smooth.
- In a bowl, beat cream cheese until smooth, then add whipping cream and mix until stiff peaks form.
- Fold in icing sugar, lemon juice, lemon zest, and vanilla into the cream cheese mixture.
- Pour the filling over the crust and smooth it out.
- Prepare the rhubarb topping by dissolving gelatin in boiling water and mixing with the rhubarb puree.
- Spread the rhubarb topping over the cheesecake and chill for at least 3 hours.