
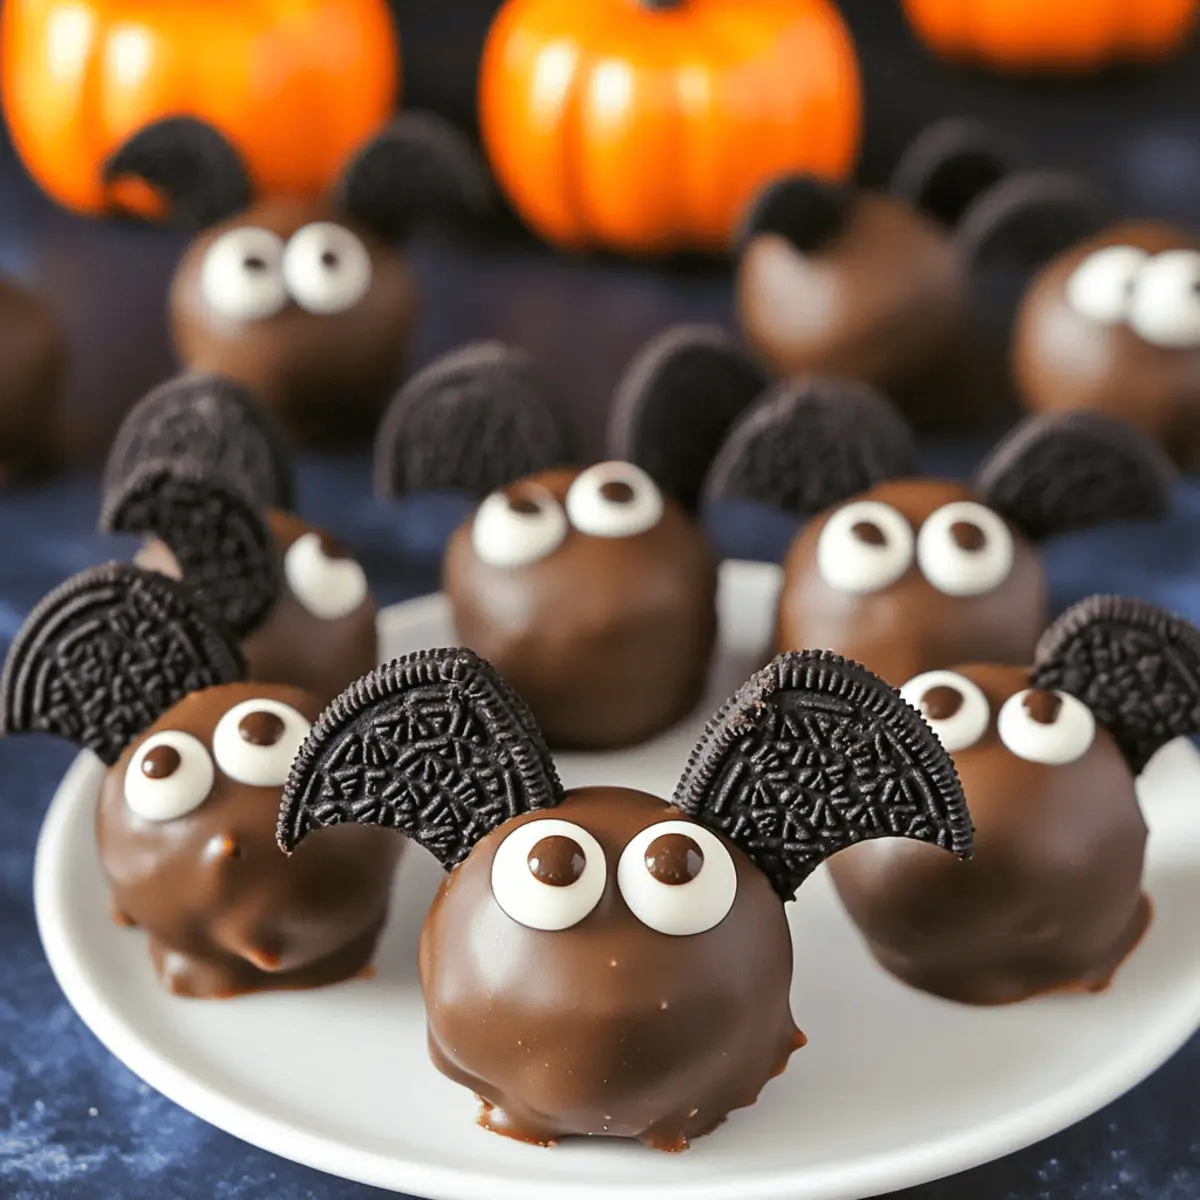
As I was rummaging through my pantry, the sweet scent of chocolate and cream cheese mingled in the air, and inspiration struck—I had to make these No-Bake Bat Oreo Cookie Balls for Halloween! These adorable treats capture all the nostalgia of childhood while offering a fun and festive twist that’s sure to impress. With just a handful of ingredients, whipping up these irresistible Bat Oreo Cookie Balls is a breeze, making them perfect for potlucks or spooky gatherings. Not only do they save time with their no-bake charm, but they also offer a delightful sweetness that pleases both kids and adults alike. Want to add some spooky flair to your Halloween festivities? Join me in discovering how simple it is to create these charming bat-shaped delights that are bound to become a party favorite!
Why Are Bat Oreo Cookie Balls Irresistible?
Delightful simplicity: These no-bake Bat Oreo Cookie Balls come together quickly, allowing you to focus on the fun of Halloween festivities!
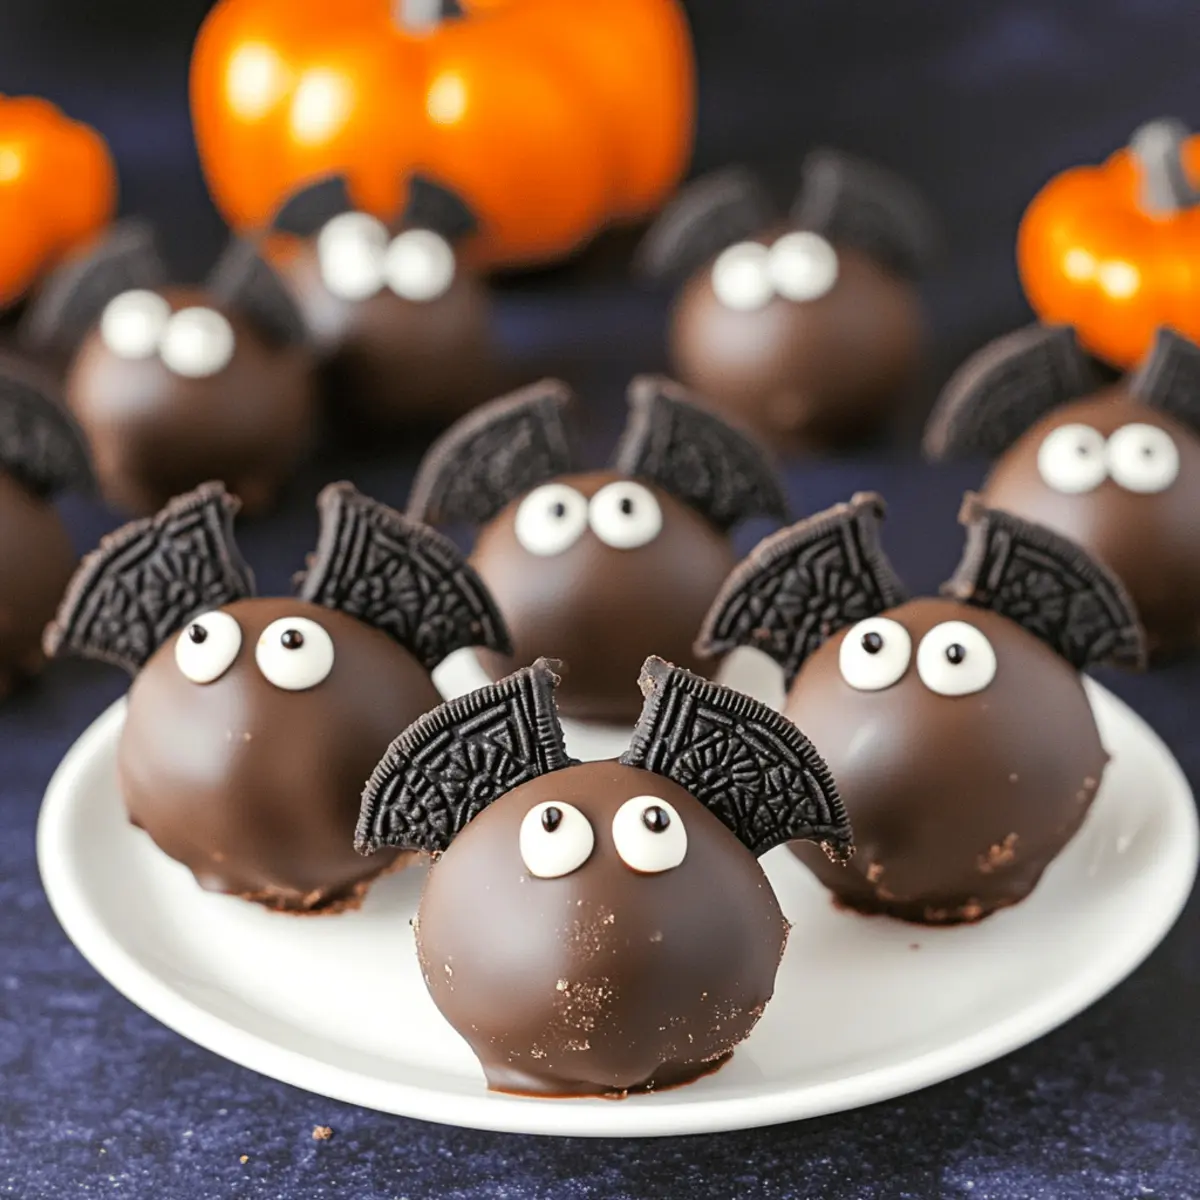
Charming presentation: Shaped like bats, they’re not just a treat; they’re a talking point that brings joy to your gatherings.
Versatile options: Whether you stick with classic Oreos or get adventurous with flavors like mint, the possibilities are endless!
Crowd-pleaser: They blend sweetness and creamy texture, ensuring everyone will love these adorable treats, as you’ve seen in recipes like Samoa Cookies Homemade.
Make-ahead bliss: Prepping these cookie balls in advance saves time while adding festive flair to your celebrations!
Irresistible Bat Oreo Cookie Balls Ingredients
For the Cookie Mixture
• Oreo Cookies – the perfect base for a rich, chocolatey flavor; substitute with Oreo Thins for a lighter texture.
• Cream Cheese – acts as a binder, adding creaminess; opt for full-fat cream cheese for the best taste and consistency.
For the Coating and Decoration
• Chocolate Candy Coating – used to dip and decorate the cookie balls; Ghirardelli melting wafers yield excellent results, but Wilton Candy Melts or Almond Bark are great alternatives.
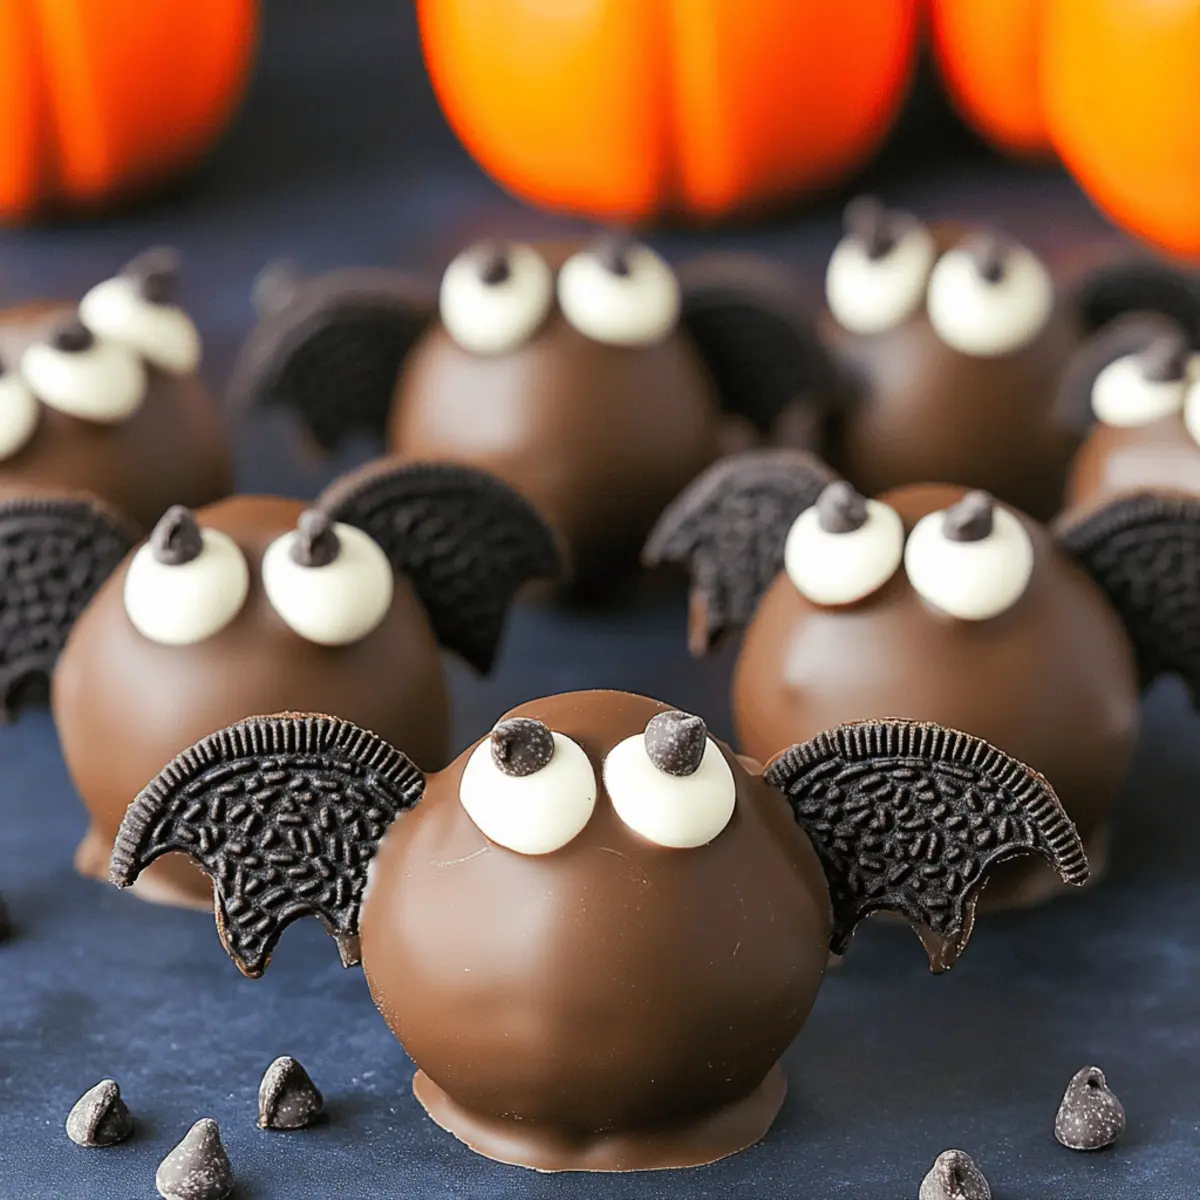
• Mini Chocolate Chips – perfect for creating bat ears; feel free to use any small candies for decoration to keep your treats festive.
These Irresistible Bat Oreo Cookie Balls are the ultimate easy Halloween treats, allowing you to whip up something delicious in no time!
Step‑by‑Step Instructions for Irresistible Bat Oreo Cookie Balls: Easy Halloween Treats
Step 1: Crush the Oreos
Begin by placing the Oreo cookies into a food processor. Pulse them until they turn into fine crumbs, achieving a sandy texture with no larger pieces. This should take about 30 seconds. If you don’t have a food processor, you can place the cookies in a plastic bag and crush them with a rolling pin.
Step 2: Mix with Cream Cheese
In a large mixing bowl, combine the crushed Oreos with softened cream cheese. Use a spatula or your hands to mix until the ingredients are well blended and form a sticky mixture that holds together easily. This may take about 2 to 3 minutes, and you should feel a cohesive texture forming that you can easily mold.
Step 3: Form the Balls
Take about a tablespoon of the mixture and roll it into a ball between your palms. Continue this process until all the mixture is used, placing each ball on a tray lined with parchment paper. Aim for about 30 cookie balls, ensuring they are uniform in size for even coating and presentation.
Step 4: Chill the Cookie Balls
Transfer the tray of cookie balls into the refrigerator and chill them for approximately 1 hour. This step is crucial as it firms up the cookie balls, making them easier to coat later. You’ll know they’re ready when they are slightly firm to the touch but still soft and delicious inside.
Step 5: Prepare the Bat Wings
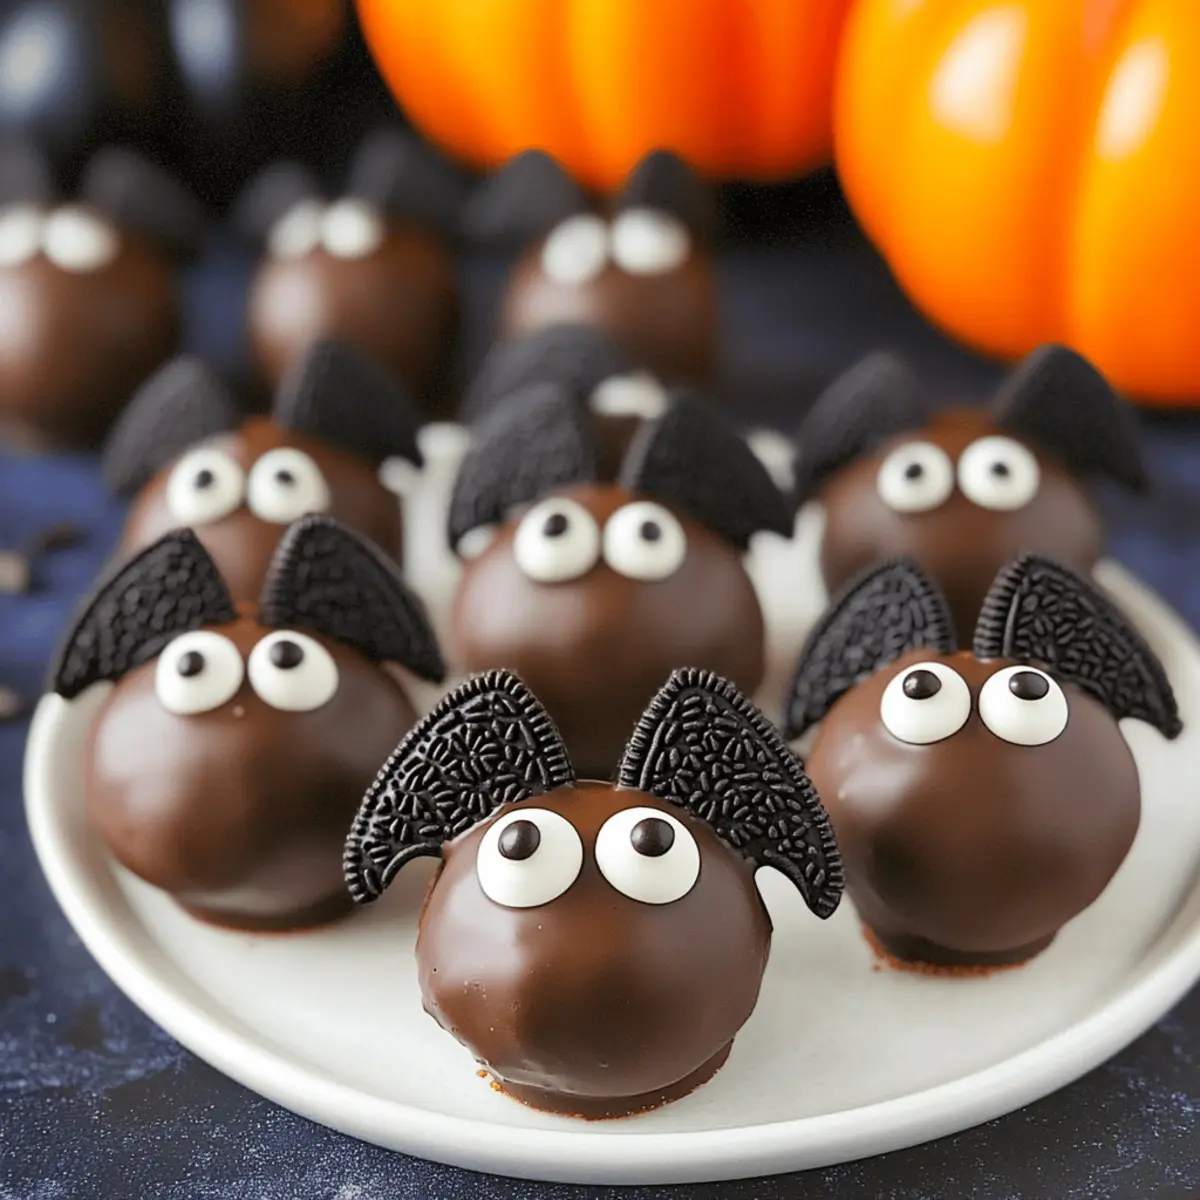
While the cookie balls are chilling, grab some Oreo cookies and carefully cut them in half to create wings. Aim for around 30 pairs of half cookies, which will serve as the bat wings for your treats. Set these aside on a plate, ready to be attached later in the decorating phase.
Step 6: Melt the Chocolate Coating
Using a microwave-safe bowl, melt the chocolate candy coating according to the package instructions. Heat in short increments of 20 seconds, stirring in between, until the chocolate is fully melted and smooth. Be cautious not to overheat, as burnt chocolate can ruin the coating.
Step 7: Dip Each Cookie Ball
Remove the chilled cookie balls from the fridge. Carefully dip each one into the melted chocolate, ensuring they are fully coated. Use a fork to lift them out, allowing excess chocolate to drip off. Place the coated balls back onto the parchment-lined tray for a neat finish.
Step 8: Attach the Bat Wings
While the chocolate is still warm and pliable, gently press the Oreo halves into the sides of each ball to create bat wings. Position them slightly behind the center to achieve a balanced look. This step is fun and brings your Irresistible Bat Oreo Cookie Balls to life with delightful character.
Step 9: Add the Eyes and Ears
Using any extra melted chocolate, attach mini chocolate chips to the front of each cookie ball as eyes, and attach additional mini chips at the top to represent ears. Be quick with this step, as the chocolate will set fast. The decorating finishes the spooky look of your bat-shaped treats!
Step 10: Let Them Set
Finally, let the decorated Bat Oreo Cookie Balls sit at room temperature until the chocolate hardens. This usually takes about 30 minutes. Once set, transfer them to an airtight container and store them in the refrigerator until you’re ready to share these fun treats at your Halloween gathering!
Expert Tips for Irresistible Bat Oreo Cookie Balls
-
Chill Time Matters: Ensure you chill the cookie balls for at least an hour before dipping; this keeps them firm and prevents the chocolate from cracking.
-
Smooth Melting: Microwave your chocolate in short bursts to avoid overheating; smooth, melted chocolate will make for a beautiful coating on your treats.
-
Wing Positioning: When attaching the bat wings, place them just behind the center of each cookie ball for a better visual balance and stability.
-
Decoration Fun: Get creative with the eyes and ears! Use festive candies like M&M’s or edible glitter for a unique twist on your Irresistible Bat Oreo Cookie Balls.
-
Make Extra: These treats keep well in the fridge for up to a week, and they also make excellent gifts for friends and family during the Halloween season!
Irresistible Bat Oreo Cookie Balls Variations
Get creative and customize your Bat Oreo Cookie Balls to suit your taste buds and event themes!
-
Minty Twist: Substitute classic Oreos with mint-flavored Oreos for a refreshing flavor that pairs well with the creaminess. Each bite will be an unexpected treat, bringing a cool surprise to your festivities!
-
Peanut Butter Delight: Use peanut butter Oreos instead for a nutty, rich flavor that’s out of this world. This twist will captivate peanut butter lovers and enhance the cookie balls’ indulgent nature.
-
White Chocolate Coating: Swap the chocolate candy coating for white chocolate for a lovely contrast in color and flavor. The sweet creaminess of white chocolate beautifully compliments the dark Oreo core.
-
Glittery Ghouls: Add a sprinkle of edible glitter on top of the chocolate coating for a magical touch that dazzles under festive lights. Not only do they taste good, but they’ll also steal the spotlight at your Halloween party!
-
Extra Crunch: Mix in a handful of chopped nuts or toffee bits into the cookie mixture for an added layer of texture when you bite in. This little surprise will make each cookie ball even more satisfying to enjoy!
-
Spicy Halloween: Add a pinch of cayenne pepper or cinnamon to the chocolate coating for a subtle kick. This unexpected spice will surprise your taste buds and create a uniquely festive flavor.
-
Miniature Fun: Instead of traditional-sized cookie balls, form bite-sized versions for a fun treat platter. This option is perfect for parties where guests can enjoy a variety of sweets, much like Chocolate Treats Delightful.
-
Gourmet Ganache: Top the finished cookie balls with a drizzle of homemade chocolate ganache for an elegant finish. This luxury twist elevates your treats to gourmet status, impressing all who indulge.
Feel free to experiment with these variations, and don’t forget to share your creations with friends and family while enjoying treats like Butterfinger Snow Cookies for a cohesive dessert table!
What to Serve with No-Bake Bat Oreo Cookie Balls?
As you prepare for Halloween festivities, consider some delightful pairings that elevate your sweet treat experience.
-
Spooky Fruit Platter: Fresh fruit like blackberries and oranges add a refreshing contrast to the rich cookie balls, bringing a burst of color to your table.
-
Ghoulish Green Punch: This fizzy limeade punch will be a hit with the kiddos, offering a sweet and tangy drink to balance the richness of the Oreo treats.
-
Halloween-Themed Cookies: Serve classic sugar cookies decorated with spooky designs to complement the fun theme while providing varied textures for your guests.
-
Crispy Rice Treats: Lightly flavored and chewy, these bites can add a whimsical touch, balancing the creamy vibe of the Bat Oreo Cookie Balls.
-
Chocolate Milk: A nostalgic pairing that kids adore; the sweetness mingles perfectly with the rich flavors of the Oreo balls.
-
Mini Cupcakes: Adorned with eerie frosting, these will add a festive touch that keeps the sweet-tooth satisfaction flowing throughout the gathering.
-
Caramel Popcorn: A crunchy and slightly salty treat; its buttery flavor creates a delightful contrast alongside the sweetness of your treats.
Enjoy these servings to create a complete and enchanting Halloween treat spread that everyone can savor!
How to Store and Freeze Bat Oreo Cookie Balls
Fridge: Store your Bat Oreo Cookie Balls in an airtight container in the fridge for up to 1 week, keeping them fresh and ready for snacking.
Freezer: For longer storage, freeze the cookie balls in a single layer on a baking sheet, then transfer to a freezer bag for up to 2 months. Thaw in the fridge before serving.
Reheating: These treats are best enjoyed cold or at room temperature. Avoid reheating, as it can affect the chocolate coating.
Make-Ahead Tips: You can prepare the Bat Oreo Cookie Balls a few days in advance of your Halloween festivities, making them an ideal treat to save time and spread joy!
Make Ahead Options
These Irresistible Bat Oreo Cookie Balls are perfect for meal prep, especially if you’re juggling busy schedules around Halloween! You can prepare the cookie mixture (crushed Oreos and cream cheese) up to 24 hours in advance and chill it in the fridge, covering it tightly to prevent drying out. Form the balls and chill them as directed; they can sit in the refrigerator for up to 3 days before coating. To finish, simply melt the chocolate coating, dip the chilled balls, and quickly attach the wings and eyes as they set. This makes your party planning a breeze while keeping the treats just as delicious as the day they were made!
Bat Oreo Cookie Balls Recipe FAQs
How do I choose ripe ingredients for my Bat Oreo Cookie Balls?
When it comes to making Bat Oreo Cookie Balls, the primary ingredients, especially Oreos and cream cheese, don’t require the same ripeness consideration as fresh fruits or vegetables. However, for the best flavor and texture, make sure your cream cheese is softened and at room temperature; this makes it easier to mix with the cookie crumbs.
How should I store my Bat Oreo Cookie Balls?
Absolutely! Store your Bat Oreo Cookie Balls in an airtight container in the fridge for up to 1 week. This will help maintain their freshness and creamy texture. To ensure they don’t stick together, you might want to layer them with parchment paper.
Can I freeze Bat Oreo Cookie Balls?
Yes! You can freeze your Bat Oreo Cookie Balls for longer storage. Start by placing them in a single layer on a baking sheet and freeze until solid. Then, transfer them to a freezer bag and store for up to 2 months. When you’re ready to enjoy them, just thaw them in the fridge overnight.
What should I do if my chocolate coating isn’t smooth?
If your chocolate coating isn’t smooth, it could be due to overheating. To fix this, ensure you melt the chocolate in short bursts of 20 seconds in the microwave, stirring between each increment. If it’s already overheated, you can try adding a teaspoon of vegetable oil to help smooth it out. Mixing helps create a glossy and easy-to-work-with coating!
Are Bat Oreo Cookie Balls safe for children with allergies?
It’s always essential to check for allergies! Bat Oreo Cookie Balls contain Oreos, which have wheat and may include traces of milk and nuts, so check the package for any specific allergy information. If you’re making these for kids or friends with allergies, consider using allergy-friendly cookies and non-dairy cream cheese to make them a safe treat for everyone.
Can I make Bat Oreo Cookie Balls in advance?
Definitely! You can prepare these adorable treats up to 5 days ahead of your Halloween event. Store them in the fridge in an airtight container, and they’ll still taste delicious! This makes them an ideal make-ahead option that saves time while ensuring you’re ready for festive fun.
Irresistible Bat Oreo Cookie Balls: Easy Halloween Treats Fun
Ingredients
Equipment
Method
- Begin by placing the Oreo cookies into a food processor. Pulse them until they turn into fine crumbs, achieving a sandy texture with no larger pieces. This should take about 30 seconds.
- In a large mixing bowl, combine the crushed Oreos with softened cream cheese. Use a spatula or your hands to mix until the ingredients are well blended and form a sticky mixture that holds together easily. This may take about 2 to 3 minutes.
- Take about a tablespoon of the mixture and roll it into a ball between your palms. Continue this process until all the mixture is used, placing each ball on a tray lined with parchment paper.
- Transfer the tray of cookie balls into the refrigerator and chill them for approximately 1 hour.
- While the cookie balls are chilling, grab some Oreo cookies and carefully cut them in half to create wings.
- Using a microwave-safe bowl, melt the chocolate candy coating according to the package instructions.
- Remove the chilled cookie balls from the fridge. Carefully dip each one into the melted chocolate, ensuring they are fully coated.
- While the chocolate is still warm and pliable, gently press the Oreo halves into the sides of each ball to create bat wings.
- Using any extra melted chocolate, attach mini chocolate chips to the front of each cookie ball as eyes, and attach additional mini chips at the top to represent ears.
- Finally, let the decorated Bat Oreo Cookie Balls sit at room temperature until the chocolate hardens.