
As I rummaged through my pantry, a peculiar idea bubbled up: what if I could take the classic comfort of mashed potatoes and add a spine-tingling twist? Enter Spooky Skull Potatoes—transforming ordinary spuds into delightful skull shapes just in time for Halloween. This recipe isn’t just a feast for the eyes; it’s a fun, interactive way to involve family and friends in the kitchen while whipping up a crowd-pleaser that brings smiles all around. Plus, you can easily customize the flavors to suit everyone’s tastes. Whether you’re hosting a Halloween gathering or simply want to add a dash of whimsy to your dinner table, these creamy, rich skull potatoes will surely become a beloved tradition. Ready to embrace the spooky season with your cooking? Let’s dive in!
Why are Spooky Skull Potatoes a must-try?
Whimsical Fun: These mashed potatoes aren’t just delicious; they bring a festive spirit to any Halloween gathering.
Endless Customization: You can easily switch up flavors or create different spooky shapes to keep things fresh and exciting.
Crowd-Pleasing Delight: Children and adults alike will love the playful presentation, making them the highlight of your Halloween spread.
Simple to Make: With just a few ingredients and easy steps, your kitchen adventure will be a breeze.
Perfectly Comforting: Rich, creamy potatoes in a fun shape create the ultimate comfort food experience for your guests.
For additional serving suggestions, consider garnishing your table with some creative Halloween-themed accents, like mini pumpkins or fake spider webs.
Spooky Skull Potatoes Ingredients
For the Skull Potatoes
• Large Russet Potatoes – These provide the ideal base for an impressive skull shape; Yukon Gold potatoes can be used for a buttery texture.
• Heavy Cream – This ingredient adds a rich creaminess, crucial for delectable mashed potatoes; swap it for milk or a dairy-free alternative if preferred.
• Unsalted Butter – It enhances the flavor and gives a smooth finish; olive oil works as a great dairy-free substitution.
• Salt and Pepper – Essential for seasoning; adjust according to your family’s taste preference for the best flavor.
For Decoration
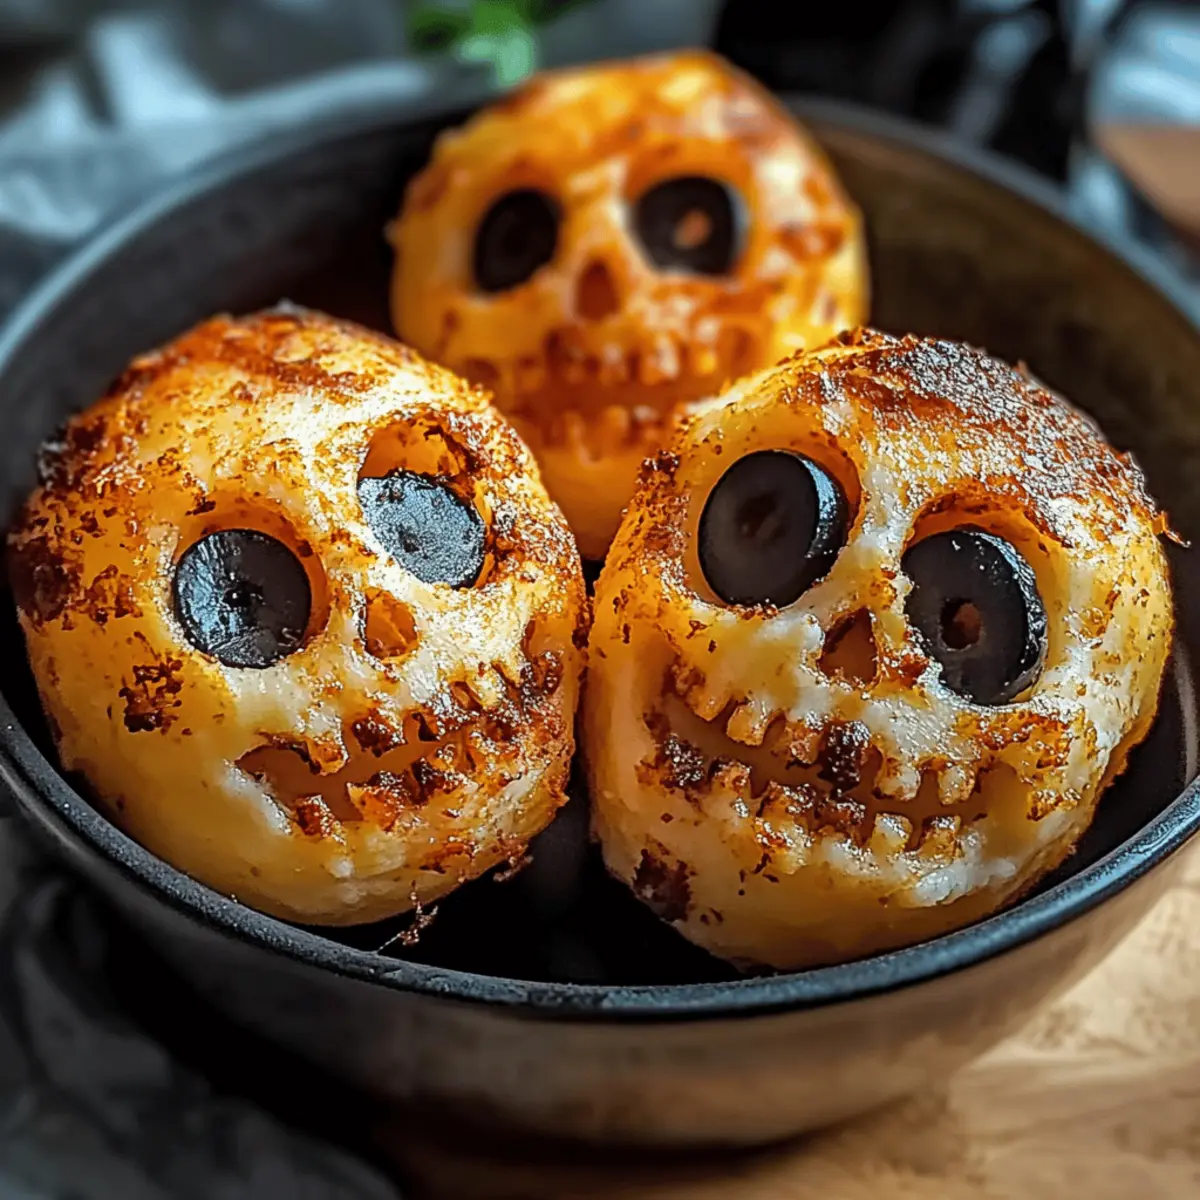
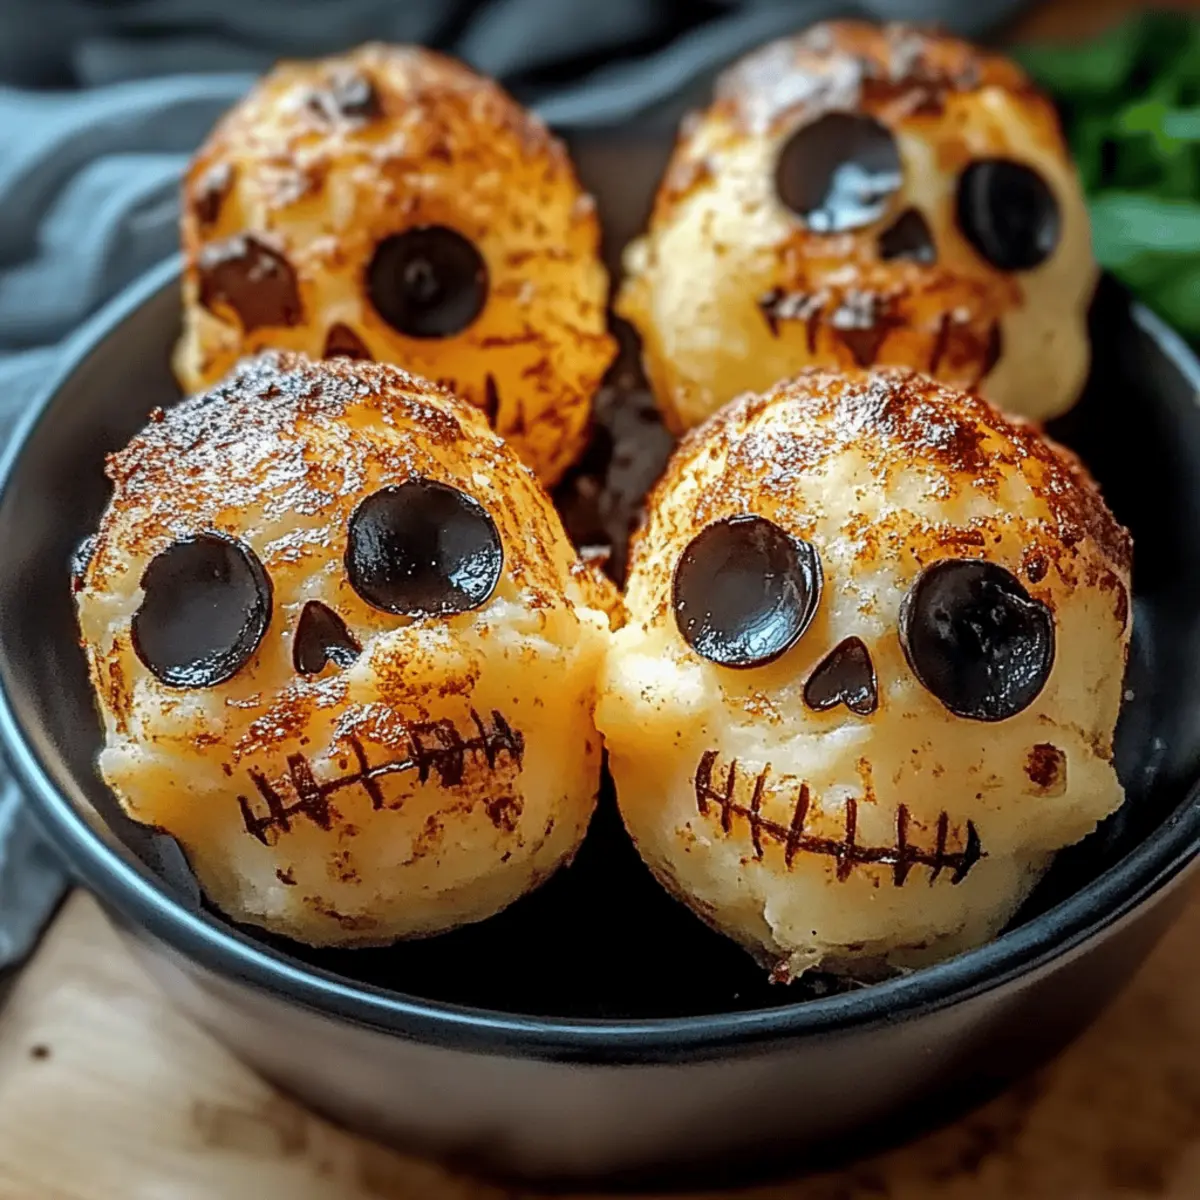
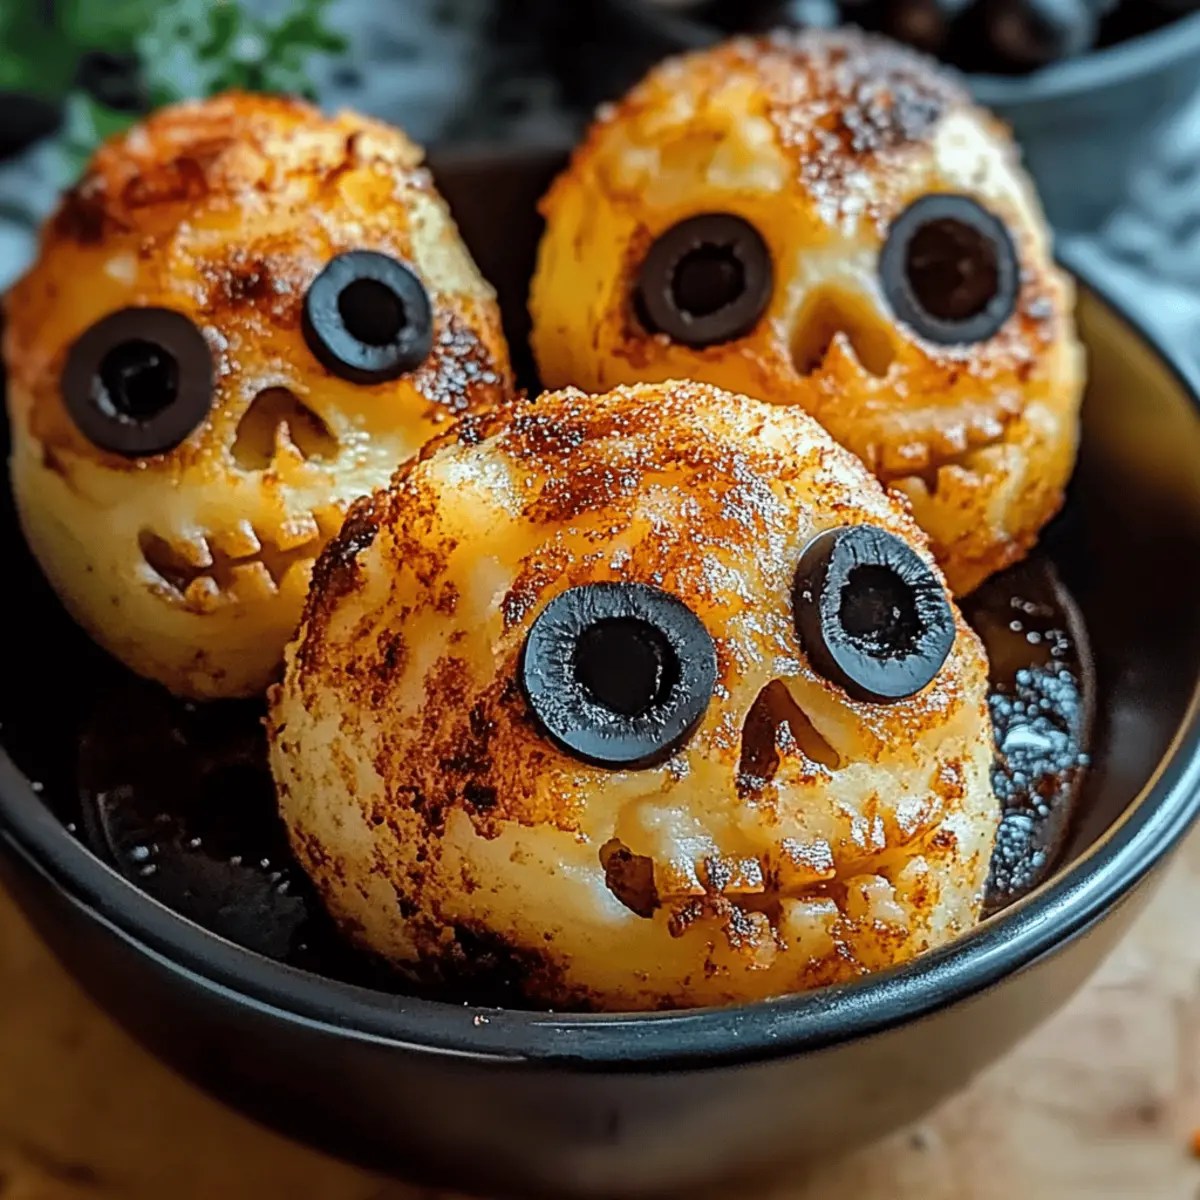
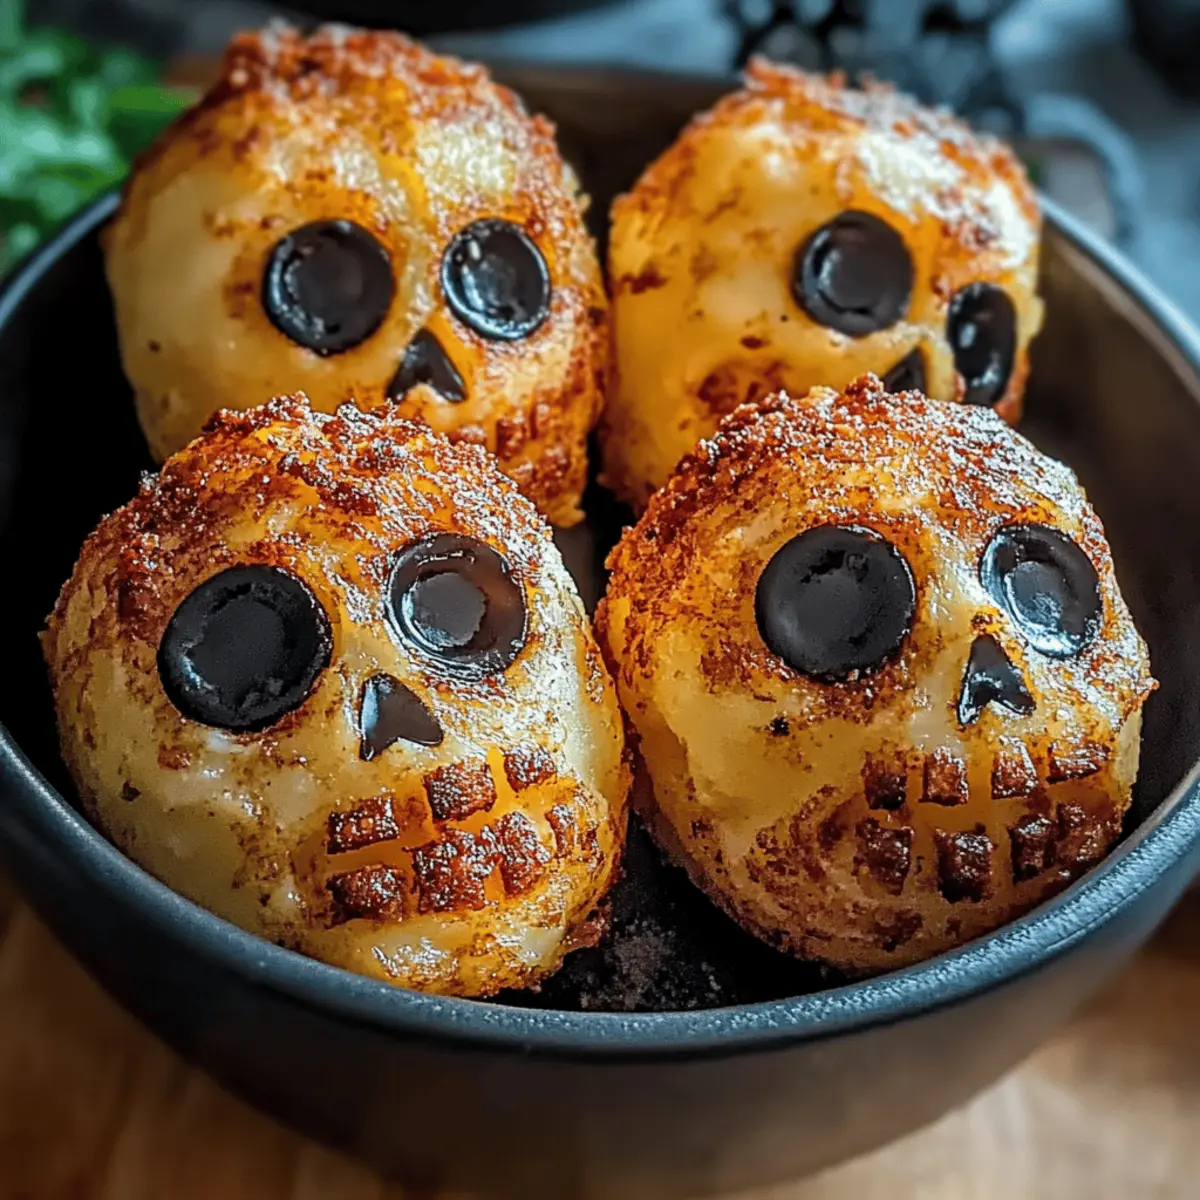
• Black Olives – Perfect for creating spooky eyes; you can also use green olives or fun edible decorations for variety.
• Fresh Chives or Green Onions (optional) – They provide a pop of color and slight sharpness for added flair.
Embrace the festive spirit with these Spooky Skull Potatoes that will surely steal the show at your Halloween gathering!
Step‑by‑Step Instructions for Spooky Skull Potatoes
Step 1: Prepare Potatoes
Peel the large Russet potatoes and chop them into 2-inch chunks. Place these chunks in a pot and cover with cold, salted water. Bring the water to a boil over high heat, then reduce to a gentle simmer. Cook for 15-20 minutes until the potatoes are fork-tender, making sure they are soft enough to mash.
Step 2: Mash Potatoes
Once the potatoes are cooked, drain them thoroughly and return them to the pot. Add heavy cream, melted unsalted butter, salt, and pepper to the potatoes. Mash everything together until the mixture is smooth and creamy with no lumps. The warm, fluffy Spooky Skull Potatoes will be ready for shaping at this point.
Step 3: Shape Into Skulls
Prepare a skull mold by lightly greasing it for easy removal of the potatoes. Scoop the mashed potato mixture into the mold, pressing it firmly to create a solid shape. If you don’t have a mold, you can form skull shapes by hand or use cookie cutters on a flat layer on a baking sheet to achieve the spooky design.
Step 4: Bake
Preheat your oven to 375°F (190°C) so it’s ready for the Spooky Skull Potatoes. Once the mold is filled, carefully place the shaped skull potatoes on a lined baking sheet. Bake them in the preheated oven for 15-20 minutes until the tops are golden and crispy, creating a delightful contrast to the creamy interior.
Step 5: Decorate
After baking, remove the potatoes from the oven and let them cool slightly. Use sliced black olives to create sinister eyes on each skull potato. For extra fun, creatively add more olives to make facial features. Optionally, garnish with fresh chives or green onions for a vibrant touch, enhancing the visual appeal of your Halloween feast.
Make Ahead Options
These Spooky Skull Potatoes are a fantastic option for busy home cooks looking to save time during the Halloween festivities! You can prepare the mashed potato mixture up to 24 hours in advance and store it in an airtight container in the refrigerator. To maintain the creamy texture, keep the mixture well-covered to prevent it from drying out. When you’re ready to serve, simply shape the potatoes into skulls and follow the baking instructions. Additionally, you can shape the skulls and refrigerate them until it’s time to bake—this way, they’re just as delicious and will take only about 20 minutes to bake, ensuring you have a whimsical side dish that delights without last-minute stress!
What to Serve with Spooky Halloween Skull Potatoes
For a memorable Halloween feast, pair these whimsical skull potatoes with delightful sides and drinks that enhance the festive spirit.
-
Crispy Brussels Sprouts: The crunchy texture contrasts beautifully with the creamy skulls while adding a touch of earthy flavor to your meal.
-
Garlic Bread: This warm, buttery bread is a classic comfort that perfectly complements the rich taste of the mashed potatoes, inviting everyone to dig in.
-
Pumpkin Soup: A cozy, velvety bowl of pumpkin soup offers the ultimate autumn vibe and pairs wonderfully with the playful skulls for a seasonal touch.
-
Roasted Carrots: Sweet roasted carrots bring a vibrant color and natural sweetness to the table, balancing the savory elements of your Halloween spread.
-
Spooky Punch: Whip up a festive Halloween punch—using cranberry juice and orange soda—for a refreshing drink that adds a fun splash of color.
-
Chocolate Pudding Cups: For dessert, serve chocolate pudding cups decorated with gummy worms to keep the spooky theme going, delighting both kids and adults alike.
-
Mixed Green Salad: A fresh salad with crunchy apples and tangy dressing provides a light, crisp contrast, making the meal feel more balanced and inviting.
-
Apple Cider: Warm or cold, spiced apple cider is a quintessential autumn beverage that enhances the cozy atmosphere, soothing the seasonal spirit.
Spooky Skull Potatoes Variations
Feel free to get creative and customize your spooky skull potatoes to cater to your taste and festivities!
-
Colorful Twist: Add a few drops of food coloring to the potato mix for a vibrant look that’s sure to shock. Let the kids help choose their favorite colors for a fun family activity.
-
Herb-Infused: Stir in fresh herbs like rosemary or thyme for an aromatic lift. These herbs don’t just enhance the flavor; they also create a deliciously fragrant kitchen while cooking.
-
Cheesy Delight: Mix in shredded cheese such as cheddar or mozzarella before shaping. The gooey goodness of melted cheese will take these potatoes to a whole new level of comfort food.
-
Bacon Bits: Fold in crispy bacon bits or pancetta for a savory crunch within the creamy potatoes. The salty smokiness of bacon enhances the overall flavor profile and adds texture.
-
Spicy Kick: Incorporate a dash of cayenne pepper or diced jalapeños for a bit of heat. This adventurous variation is perfect for those who enjoy a bit of zest in their food.
-
Sweet Potato Swap: For a nutritious twist, try using sweet potatoes instead of russet potatoes. Sweet potatoes add natural sweetness and vibrant color, plus they’re packed with vitamins.
-
Veggie Boost: Add finely chopped vegetables such as spinach or roasted garlic for extra nutrition and flavor. This is a sneaky way to include some greens while still appealing to everyone.
-
Halloween Shapes: Use different molds to create other spooky shapes like pumpkins or ghosts. Not only will they taste great, but they’ll also make your Halloween table even more festive.
These variations will not only keep your spooky skull potatoes interesting but also leave room to explore and share with friends and family—perfect for your Halloween celebrations! For more fun ideas, consider checking out my Halloween-themed recipes.
Expert Tips for Spooky Skull Potatoes
• Perfect Potato Texture: Ensure your potatoes are fork-tender but not overcooked to avoid a watery texture.
• Mold Mastery: Press the mashed potato mixture firmly into the skull mold to keep the shapes intact while baking.
• Flavor Boost: Enhance your Spooky Skull Potatoes with a sprinkle of garlic powder or shredded cheese for extra deliciousness.
• Smart Substitutions: Use Yukon Gold potatoes for added creaminess, or try dairy-free options like olive oil for a light twist.
• Creative Shapes: Mix it up by using cookie cutters to create different Halloween-themed shapes, like pumpkins or ghosts!
How to Store and Freeze Spooky Skull Potatoes
Fridge: Store any leftover Spooky Skull Potatoes in an airtight container in the refrigerator for up to 3 days to maintain their freshness and flavor.
Freezer: If you want to freeze them, shape the potatoes and flash freeze on a baking sheet. Once frozen, transfer to an airtight container or freezer bag for up to 2 months.
Reheating: To reheat, thaw in the fridge overnight, then bake at 375°F (190°C) for about 15-20 minutes until heated through and crispy.
Make-Ahead Tip: Prepare the skulls in advance, refrigerate them unbaked until you’re ready to pop them in the oven for a quick Halloween treat!
Spooky Halloween Skull Potatoes Recipe FAQs
Can I use different types of potatoes for Spooky Skull Potatoes?
Absolutely! While large Russet potatoes work great for their texture and shape, you can easily substitute them with Yukon Gold potatoes for a creamier flavor. Experimenting with different types can add a fun twist to your dish!
How should I store leftovers of Spooky Skull Potatoes?
Leftover Spooky Skull Potatoes can be stored in an airtight container in the refrigerator for up to 3 days. Make sure they’re completely cooled before packing them away to maximize freshness.
Can I freeze Spooky Skull Potatoes?
Yes, you can! To freeze, shape your skull potatoes as instructed, then flash freeze them on a baking sheet until solid. Once frozen, transfer them to an airtight container or freezer bag. They can be stored in the freezer for up to 2 months. For best results, let them thaw in the fridge overnight before reheating.
What should I do if my mashed potatoes are too watery?
If your mashed potatoes turn out too watery, it’s likely they were overcooked or had too much liquid added. To remedy this, drain excess moisture and return potatoes to low heat on the stovetop for a few minutes, stirring constantly. You can also add a bit more mashed potato to absorb the extra liquid or incorporate a touch of instant potato flakes for added texture.
Are Spooky Skull Potatoes suitable for dietary restrictions?
While Spooky Skull Potatoes contain dairy, you can make them suitable for various dietary needs. Swap heavy cream for a dairy-free milk alternative and use olive oil instead of butter for a vegan version. Always check for allergies related to specific ingredients, like olives, to cater to any guests’ dietary restrictions.
How can I make my Spooky Skull Potatoes more flavorful?
To boost flavor, try adding ingredients like garlic powder, shredded cheese, or even cooked bacon bits to the potato mixture before shaping. You can also mix fresh herbs like chives or parsley for a delightful twist!
Spooky Skull Potatoes for a Fun Halloween Feast
Ingredients
Equipment
Method
- Peel and chop the potatoes into 2-inch chunks. Cover with cold, salted water and boil, then simmer for 15-20 minutes until tender.
- Drain the potatoes, return to the pot, and add heavy cream, melted butter, salt, and pepper. Mash until smooth.
- Grease the skull mold and scoop the mashed potatoes into it, pressing firmly to shape.
- Preheat oven to 375°F (190°C). Place the shaped skull potatoes on a lined baking sheet and bake for 15-20 minutes until golden.
- Remove from oven, let cool slightly, then use black olives to create eyes on each skull potato. Optionally add garnish.