
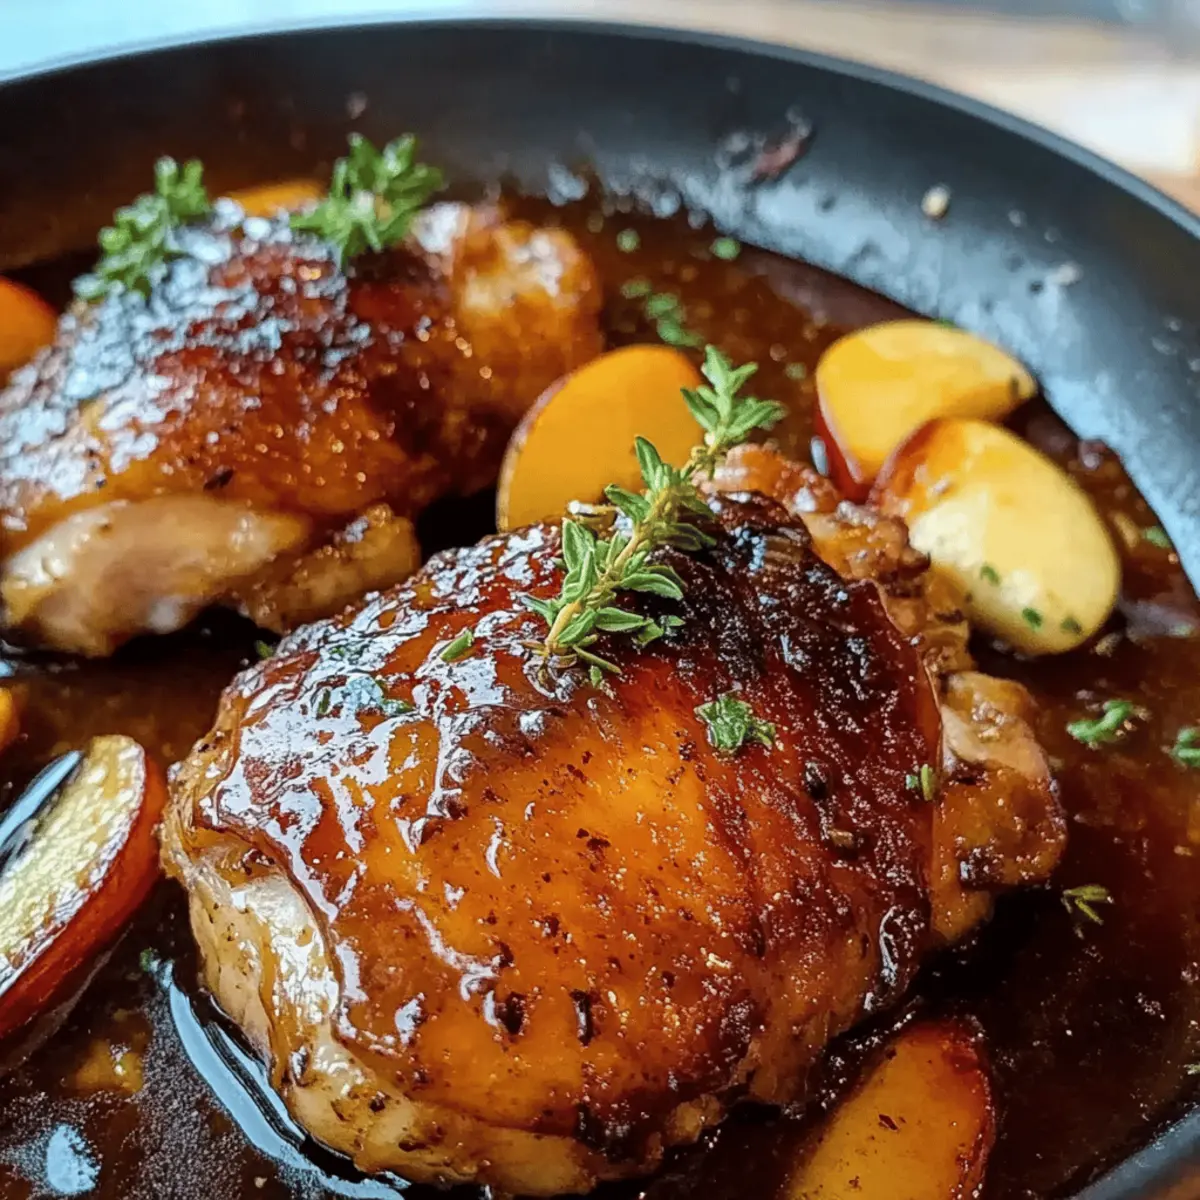
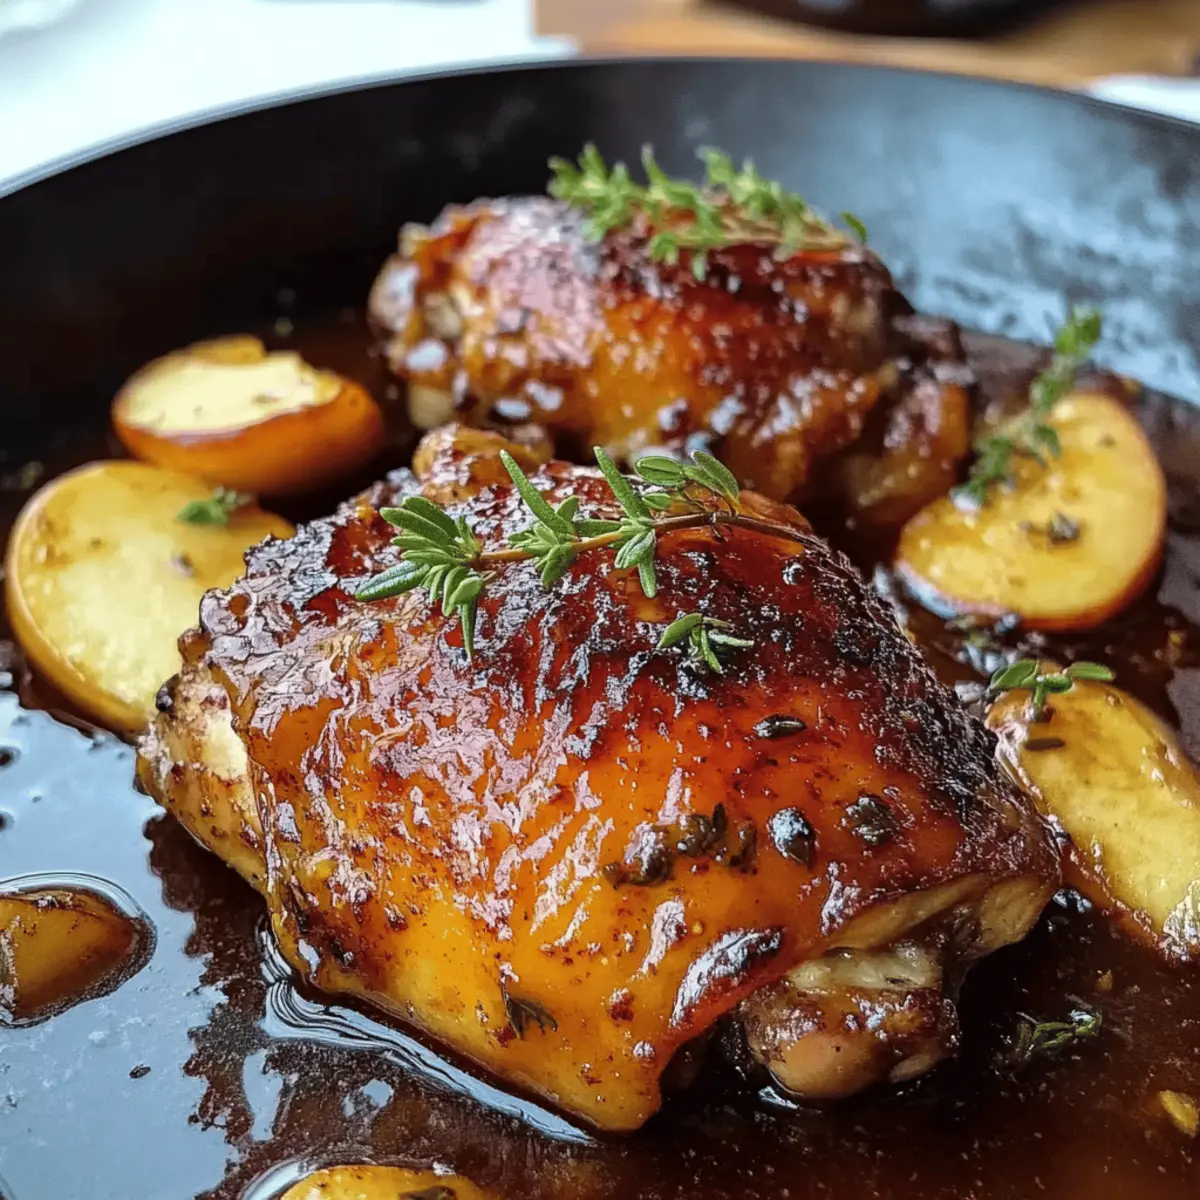
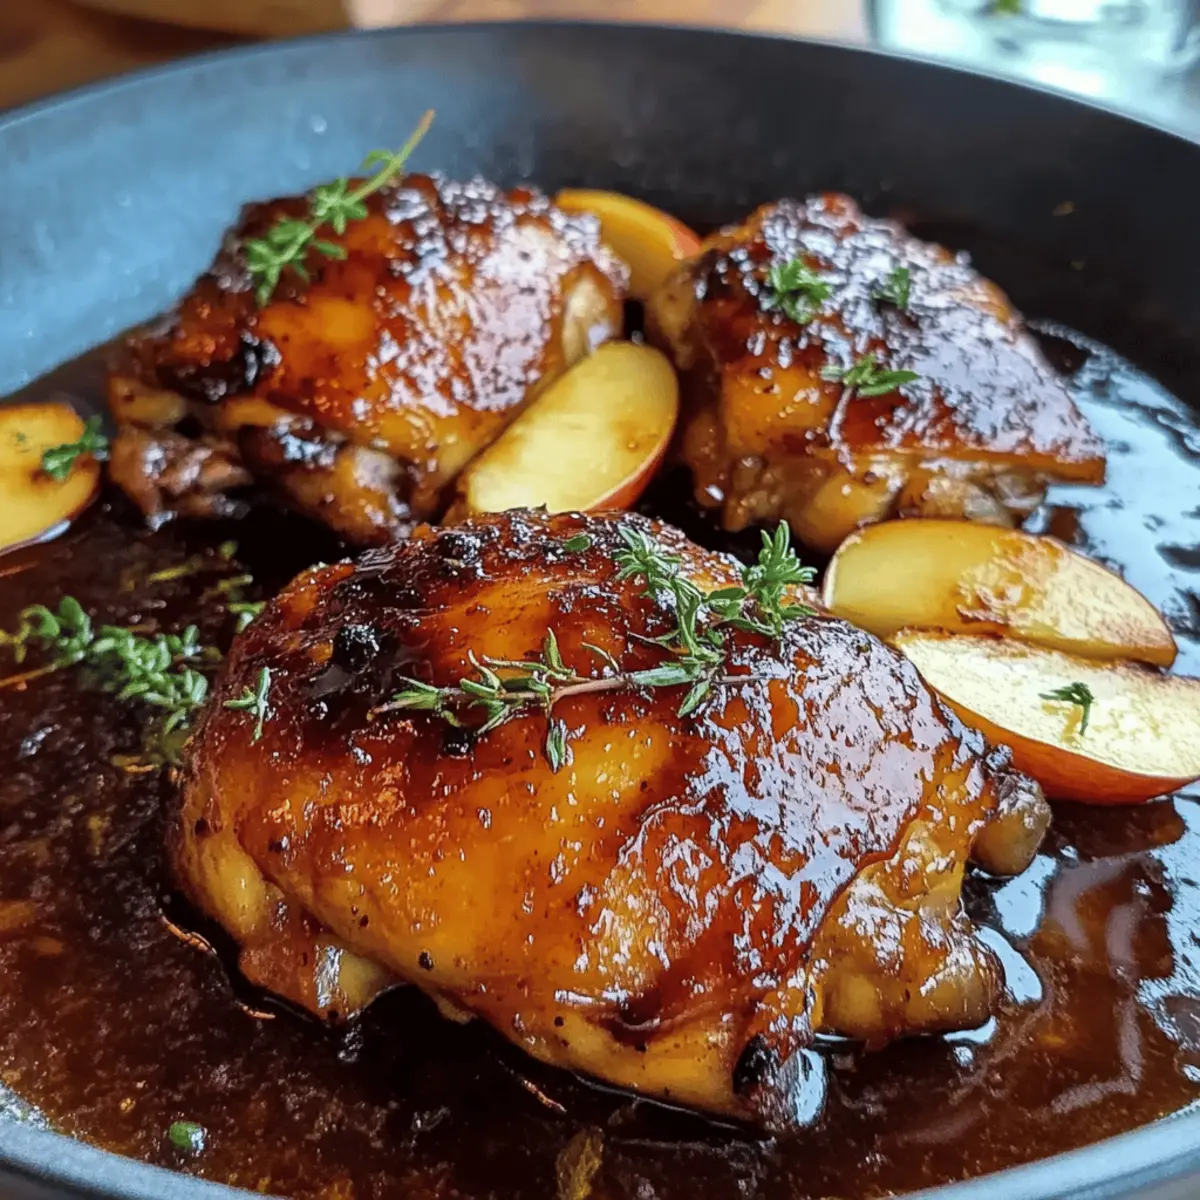
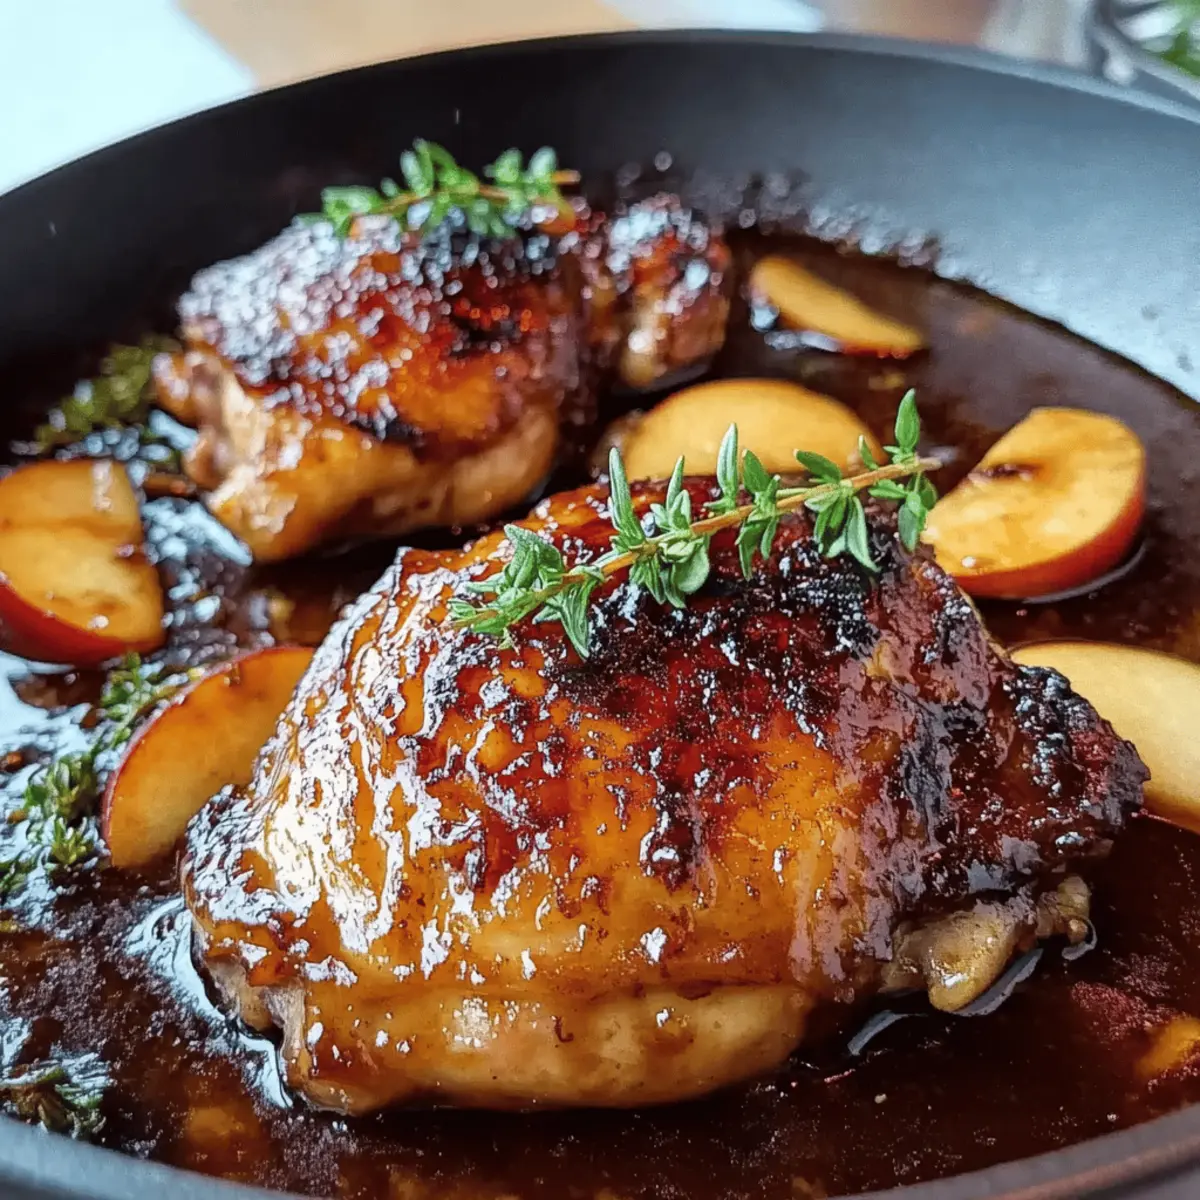
As the crisp autumn air sets in, I’ve found myself pulled back to those cozy gatherings filled with laughter and hearty meals. One dish that perfectly captures this spirit is Apple Cider Glazed Chicken. This simple one-pan recipe combines juicy chicken thighs with a harmonious blend of sweet and savory notes from a homemade apple cider glaze—it’s a nostalgic hug in meal form! Not only is this dish an effortless crowd-pleaser that makes cleanup a breeze, but it’s also an excellent way to celebrate the flavors of fall. Trust me, your family will be asking for seconds. Are you ready to transform your kitchen into an autumnal haven?
Why is this dish a fall favorite?
Simplicity at Its Best: This Apple Cider Glazed Chicken is a one-pan recipe that allows you to whip up a delicious meal without a lot of fuss.
Flavor Explosion: The unique combination of apple cider, soy sauce, and spices creates a sweet-and-savory glaze that will have everyone asking for the recipe.
Versatile Ingredients: Easily swap ingredients for your preferences—use tamari for a gluten-free version or try different apple varieties like Gala for a twist.
Crowd-Pleasing Appeal: Perfect for cozy family dinners or gatherings, this dish caters to all tastes, making it a reliable favorite.
Time-Saving: With minimal prep and just one pan to clean, you’ll have more time to relax or enjoy your meal—just like with Crockpot Chicken Nachos or Lazy Chicken Parmesan. You can savor the flavors without the hassle!
Apple Cider Glazed Chicken Ingredients
For the Glaze
- Apple Cider – Adds natural sweetness and depth of flavor; can substitute with apple juice for a milder taste.
- Soy Sauce – Provides a savory umami note; use tamari or coconut aminos for a gluten-free option.
- Worcestershire Sauce – Introduces tanginess and complexity to the glaze.
- Brown Sugar – Offers a rich sweetness that complements the cider; can replace with honey for a natural touch.
- Fresh Ginger – Introduces warmth and complexity; adjust according to your taste preference.
- Dijon Mustard – Adds subtle tanginess to balance the glaze’s sweetness.
- Nutmeg – Enhances the autumn profile with its warm, aromatic flavor.
For the Chicken
- Chicken Thighs (Skin-On) – Ideal for juiciness and flavor; choose skinless breasts for a leaner but potentially drier option.
- Seasoning Mix – A blend of salt, black pepper, garlic powder, onion powder, and smoked paprika elevates the chicken’s flavor.
- Avocado Oil – Recommended for searing due to its high smoke point and neutral flavor.
For the Vegetables
- Yellow Onion – Contributes mild sweetness to the overall dish.
- Garlic – Freshly grated for a bolder, aromatic flavor.
- Fresh Rosemary & Thyme – Essential herbs that add aromatic depth to the meal.
- Honeycrisp Apple – Provides sweetness and texture, harmonizing beautifully with the cider glaze.
This Apple Cider Glazed Chicken is a beautiful blend of flavors, perfect for embracing the fall season!
Step‑by‑Step Instructions for Apple Cider Glazed Chicken
Step 1: Prepare the Chicken
Begin by patting the chicken thighs dry with paper towels to ensure a crispy skin. Season both sides liberally with salt, black pepper, garlic powder, onion powder, and smoked paprika. This blend will elevate the flavor of your Apple Cider Glazed Chicken, infusing it with warmth and depth.
Step 2: Sear the Chicken
In a large skillet, heat 2 tablespoons of avocado oil over medium-high heat. Once the oil shimmers, carefully add the seasoned chicken thighs skin-side down. Sear for about 5-7 minutes until the skin is golden and crispy. This crucial step locks in juicy flavors while giving your dish a beautiful appearance.
Step 3: Flip and Finish Searing
After the skin has developed a lovely golden color, flip the chicken thighs using tongs and sear the other side for an additional 5 minutes. The goal here is to create a golden crust that enhances the overall texture of your Apple Cider Glazed Chicken while retaining moisture within the meat.
Step 4: Remove Chicken and Set Aside
Once both sides of the chicken are well-seared, carefully remove the thighs from the skillet and set them aside on a plate. This resting time allows the chicken to relax, keeping it juicy. Make sure not to wash the skillet, as those flavorful bits will enrich the glaze.
Step 5: Sauté the Aromatics
In the same skillet, add one chopped yellow onion and 3 cloves of freshly grated garlic, sautéing until the onions become translucent, about 3-5 minutes. This step will create a fragrant base for the glaze, as the onion’s sweetness complements the savory elements of the dish.
Step 6: Make the Glaze
Pour in 1 cup of apple cider, 2 tablespoons of soy sauce, 1 tablespoon of Worcestershire sauce, and ¼ cup of brown sugar. Add in 1 tablespoon of freshly grated ginger, 1 tablespoon of Dijon mustard, and a pinch of nutmeg. Let this mixture simmer for about 5-7 minutes until it slightly thickens, creating a sticky, flavorful glaze.
Step 7: Return Chicken to the Skillet
Reduce the heat to low and return the seared chicken thighs to the skillet. Spoon the luscious glaze over each piece, ensuring they are well coated. This step allows the chicken to absorb the sweet and savory notes from the glaze while continuing to cook through.
Step 8: Bake the Chicken
Once coated, cover the skillet and transfer it to a preheated oven set at 375°F (190°C). Bake the Apple Cider Glazed Chicken for approximately 20 minutes or until the internal temperature reaches 165°F (74°C). The chicken should be cooked through and will carry an irresistible aroma.
Step 9: Rest and Serve
After baking, carefully remove the skillet from the oven and let the chicken rest for about 5 minutes. This resting period allows the juices to redistribute within the chicken, ensuring maximum tenderness. Serve your Apple Cider Glazed Chicken warm, garnished with fresh herbs if desired, alongside your favorite sides.
Expert Tips for Apple Cider Glazed Chicken
Pat it Dry: Ensure chicken thighs are patted dry before seasoning; this helps achieve crispy skin while cooking.
Don’t Overcrowd: Sear chicken in batches if necessary. Overcrowding the pan can lead to steaming rather than browning.
Simmer Well: Allow the glaze to simmer until thickened; this enhances the flavor and consistency of your Apple Cider Glazed Chicken.
Rest for Tenderness: Let the chicken rest post-baking. This step redistributes the juices, yielding a juicy, tender result.
Thickening Option: If you prefer a thicker glaze, mix a cornstarch slurry (1 tablespoon cornstarch with 2 tablespoons water) and stir into the simmering glaze.
How to Store and Freeze Apple Cider Glazed Chicken
Fridge: Store cooked Apple Cider Glazed Chicken in an airtight container for up to 3 days. Be sure to let it cool completely before sealing to avoid moisture buildup.
Freezer: For longer storage, freeze the glazed chicken in an airtight container or freezer bag for up to 3 months. Portion it out for convenient meal prep!
Reheating: To reheat, thaw overnight in the fridge. Then, warm in the oven at 350°F (175°C) for about 20 minutes or until heated through, keeping it covered to retain moisture.
Preparation Ahead: Prepare your Apple Cider Glazed Chicken in advance and refrigerate it for up to 1 day before finishing the cooking process for added convenience.
Make Ahead Options
These Apple Cider Glazed Chicken thighs are perfect for meal prep enthusiasts! You can season the chicken and prepare the glaze up to 24 hours in advance, simply refrigerate them in separate airtight containers. To maintain quality, pat the chicken dry before seasoning to ensure a crispy skin when seared. When you’re ready to cook, just sear the chicken as instructed, add the glaze, and bake. If you’re feeling particularly busy, you can also bake the chicken and then reheat it gently in the oven or microwave before serving. This meal prep option not only saves time but guarantees your Apple Cider Glazed Chicken remains just as delicious!
What to Serve with Apple Cider Glazed Chicken
When it comes to creating a memorable meal, the right sides can elevate your Apple Cider Glazed Chicken experience to another level.
-
Creamy Mashed Potatoes: These fluffy potatoes soak up the sweet and savory glaze, creating a perfect harmony of flavors with every bite. The creamy texture pairs beautifully with the crispy chicken skin, making this duo comfort food at its finest.
-
Roasted Brussels Sprouts: Caramelized to perfection, these sprouts bring a crispy, nutty element to the table. The slight bitterness of the Brussels sprouts complements the sweetness of the apple cider glaze, balancing the meal beautifully.
-
Sautéed Greens: A mix of kale or spinach lightly sautéed with garlic adds a pop of color and freshness. Their earthy flavors enhance the rich notes of the dish, while providing a nutritious counterpoint.
-
Apple Salad with Walnuts and Feta: A crisp salad featuring tart apples, crunchy walnuts, and creamy feta offers a refreshing contrast to the warm chicken. Drizzled with a light vinaigrette, it brings a bright burst of flavor that ties in perfectly with the apple theme.
-
Pumpkin Soup: As an elegant starter, this smooth and velvety soup adds a warm and comforting touch to your meal. The spices in the soup harmonize with the autumn flavors of the chicken, making it an ideal companion.
-
Sparkling Cider: To drink, consider serving chilled sparkling cider. Its refreshing effervescence and hints of apple enhance the warm flavors of the glazed chicken while fostering a festive atmosphere.
Each of these accompaniments, whether cozy or fresh, helps create a well-rounded dining experience that your loved ones will cherish!
Apple Cider Glazed Chicken Variations
Feel free to explore these delightful twists and substitutions for your Apple Cider Glazed Chicken recipe that will tantalize your taste buds!
- Gluten-Free: Swap soy sauce for tamari or coconut aminos for a flavorful, gluten-free option.
- Sugar-Free: Substitute brown sugar with your favorite sugar alternative, like monk fruit sweetener, to enjoy the same sweetness without the calories.
- Herb Swap: Experiment using fresh sage or oregano instead of rosemary and thyme for a unique aromatic profile.
- Fruit Boost: Add sliced pears alongside the Honeycrisp apples to elevate flavor and create a wonderful fruity medley that complements the glaze.
- Spice it Up: Add a pinch of red pepper flakes to the glaze for a subtle heat that enhances the sweetness beautifully.
- Vegetable Addition: Toss in chopped carrots or sweet potatoes into the pan for an all-in-one meal that adds color and nutrition.
- Lemon Zest: Brighten the glaze with a teaspoon of lemon zest to add a refreshing tang that balances the sweetness.
- Vegan Option: Substitute the chicken for hearty chickpeas or plant-based meats, adjusting cooking times accordingly for a deliciously vegan alternative.
Don’t miss out on amazing variations like this when you explore the cozy flavors of Korean Fire Chicken or discover tips in the Ultimate Guide to Making Sesame Chicken. Enjoy the endless possibilities!
Apple Cider Glazed Chicken Recipe FAQs
What type of apple cider should I use for the glaze?
Absolutely! Look for a high-quality, 100% pure apple cider to enhance the flavor of your glaze. If cider isn’t available, you can use apple juice, but be aware that it lacks the same depth and complexity.
How long can I store cooked Apple Cider Glazed Chicken in the fridge?
You can store your delightful Apple Cider Glazed Chicken in an airtight container for up to 3 days. Make sure it’s completely cooled before sealing to prevent any moisture buildup, which can affect texture.
Can I freeze Apple Cider Glazed Chicken?
Very! To freeze, place the glazed chicken in an airtight container or zip-top freezer bag, ensuring as much air is removed as possible. It will keep well in the freezer for up to 3 months. To reheat, thaw in the refrigerator overnight, then warm it in the oven at 350°F (175°C) for about 20 minutes.
What if my glaze is too runny?
No worries! If your glaze doesn’t thicken as desired, mix 1 tablespoon of cornstarch with 2 tablespoons of cold water to create a slurry. Stir this into your simmering glaze and cook for an additional 1-2 minutes until thickened to your liking. This tip ensures your Apple Cider Glazed Chicken is beautifully coated!
Is this recipe gluten-free?
Absolutely! To make your Apple Cider Glazed Chicken gluten-free, simply substitute regular soy sauce with tamari or coconut aminos, and enjoy the same rich flavors without worry.
Can I use frozen chicken thighs for this recipe?
Yes, you can! Just make sure to thaw them completely in the refrigerator before cooking. This ensures even seasoning and cooking, creating a juicy and flavorful Apple Cider Glazed Chicken.
Apple Cider Glazed Chicken: A Cozy Fall Favorite
Ingredients
Equipment
Method
- Begin by patting the chicken thighs dry with paper towels to ensure a crispy skin. Season both sides liberally with salt, black pepper, garlic powder, onion powder, and smoked paprika.
- In a large skillet, heat 2 tablespoons of avocado oil over medium-high heat. Once the oil shimmers, carefully add the seasoned chicken thighs skin-side down. Sear for about 5-7 minutes until the skin is golden and crispy.
- After the skin is golden, flip the chicken thighs using tongs and sear the other side for an additional 5 minutes.
- Once both sides are well-seared, carefully remove the thighs from the skillet and set aside.
- In the same skillet, add one chopped yellow onion and 3 cloves of freshly grated garlic, sautéing until the onions become translucent, about 3-5 minutes.
- Pour in the apple cider, soy sauce, Worcestershire sauce, and brown sugar. Add in ginger, Dijon mustard, and nutmeg. Let this mixture simmer for about 5-7 minutes until it slightly thickens.
- Reduce the heat to low and return the seared chicken thighs to the skillet. Spoon the glaze over each piece to ensure they are well coated.
- Cover the skillet and transfer it to a preheated oven set at 375°F (190°C). Bake the chicken for approximately 20 minutes or until the internal temperature reaches 165°F (74°C).
- After baking, remove the skillet from the oven and let the chicken rest for about 5 minutes before serving.