
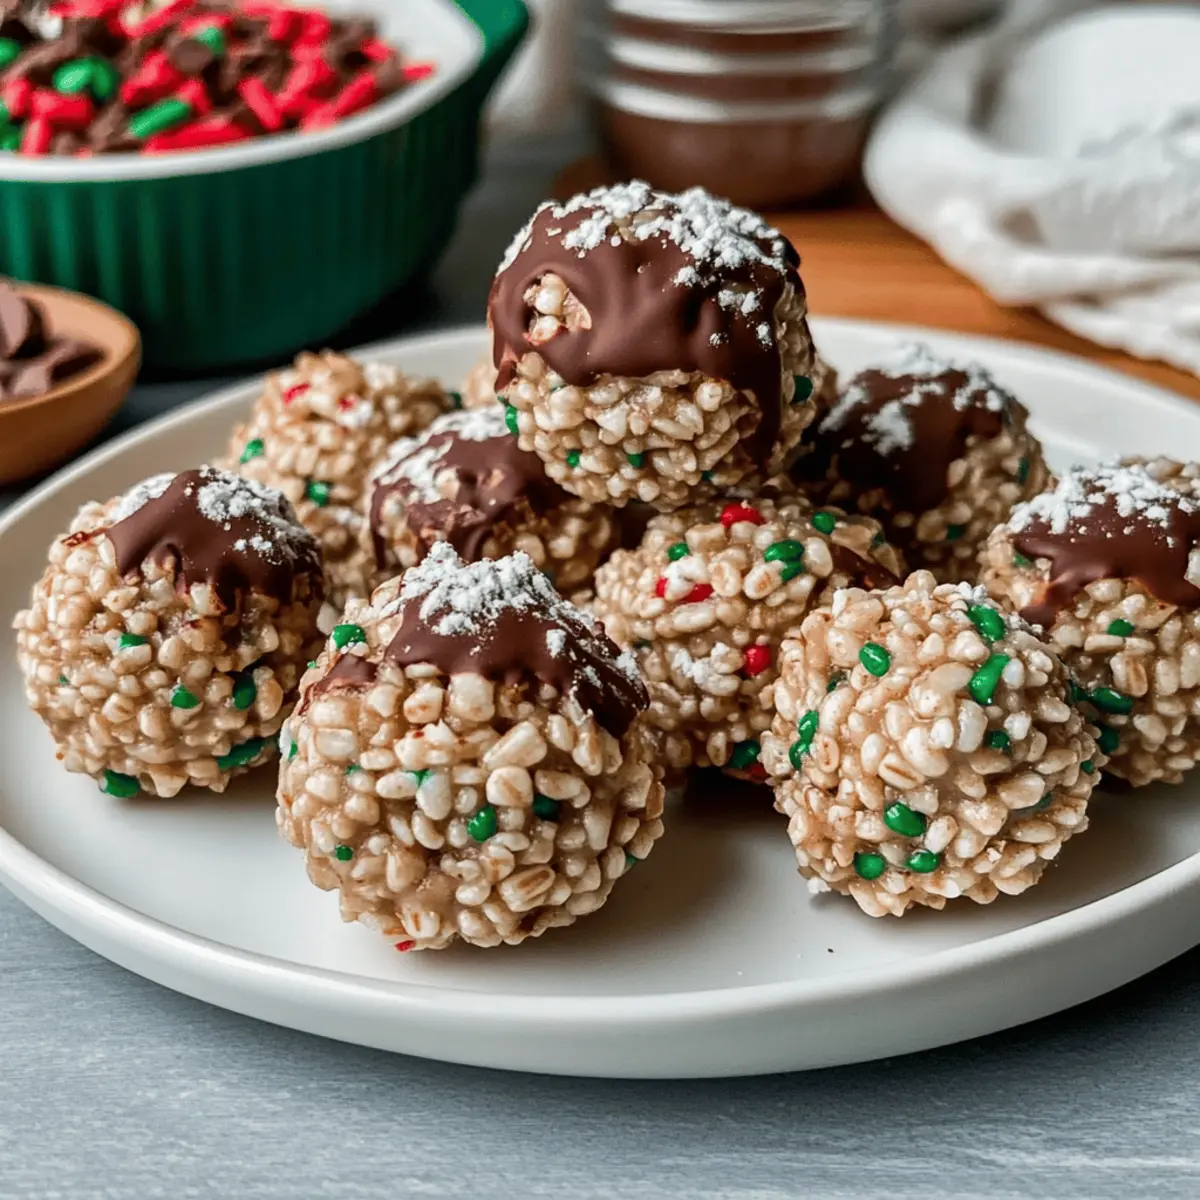
In the whirlwind of holiday preparations, there’s nothing quite like the comfort of whipping up a batch of no-bake treats. These Easy No-Bake Chocolate Rice Krispie Balls offer the perfect blend of velvety peanut butter and luscious chocolate, all while adding a satisfying crunch with every bite. Not only do these Chocolate Rice Krispie Balls come together in a matter of minutes, but they are also effortlessly customizable to suit any palate—perfect for festive gatherings or simply indulging in a well-deserved treat. Imagine bringing these delectable bites to a party, where they are sure to become a crowd favorite! Ready to discover how these little delights can elevate your holiday festivities? Let’s dive in!
Why Are Chocolate Rice Krispie Balls So Loved?
Quick and Easy: These Chocolate Rice Krispie Balls come together faster than you can say “no-bake.” Perfect for busy schedules!
Endless Customization: Feeling adventurous? Swap peanut butter for almond or sunflower butter to cater to dietary needs.
Crowd-Pleasing Treat: Their irresistible sweetness and crunch make them a hit at parties, ensuring all guests leave with a smile.
Celebrate Every Occasion: Whether it’s a holiday or a simple get-together, these treats fit right in and add a festive touch.
Perfect for Gifting: Package them in cute containers for delightful homemade gifts that everyone will appreciate—much better than any store-bought alternative!
Elevate your dessert game and explore variations like Matcha White Chocolate for a fun twist!
Chocolate Rice Krispie Balls Ingredients
For the Base
- Creamy Peanut Butter – Adds nutty flavor and creamy texture; substitute with almond or sunflower butter for nut-free options.
- Unsalted Butter – Binds everything together and enriches the flavor; use vegan butter for a dairy-free alternative.
- Powdered Sugar – Sweetens the mix while keeping it smooth; can be reduced for less sweetness or switched for a sugar substitute like Stevia.
- Vanilla Extract – Elevates the overall flavor; for the best taste, choose pure vanilla.
For the Crunch
- Crispy Rice Cereal – Provides the essential crunchiness; feel free to substitute with cornflakes for a unique twist.
For the Coating
- Semi-Sweet or Dark Chocolate Chips – The delightful shell for your balls; vary by using milk or white chocolate for different flavor profiles.
These Chocolate Rice Krispie Balls are easy to make and endlessly customizable, making them a festive delight for any occasion!
Step‑by‑Step Instructions for Chocolate Rice Krispie Balls
Step 1: Mix the Base
In a large mixing bowl, combine 1 cup of creamy peanut butter and 2 tablespoons of unsalted butter. Using a spatula, stir vigorously for about 2-3 minutes until the mixture is smooth and creamy, with no lumps. This is the base for your Chocolate Rice Krispie Balls, adding rich flavor and a delightful texture.
Step 2: Sweeten the Mixture
Add 1 tablespoon of vanilla extract to your peanut butter and butter blend, mixing well. Gradually sprinkle in 1/2 cup of powdered sugar while stirring continuously; let the sweetener fully integrate for about 1-2 minutes. You want a thick and smooth consistency—this will ensure your balls have the perfect balance of sweetness.
Step 3: Fold in the Crunch
Gently fold in 3 to 4 cups of crispy rice cereal into your creamy mixture. Use a spatula to combine, ensuring that all the cereal is uniformly coated. Take your time here, as this step is crucial for achieving that satisfying crunch in your Chocolate Rice Krispie Balls.
Step 4: Shape the Balls
Using a small cookie scoop or your hands, shape chunks of the mixture into 1-inch balls. Place them onto a parchment-lined baking sheet, making sure they are spaced apart. The fun of making Chocolate Rice Krispie Balls is in the shaping, so enjoy this hands-on step for about 10 minutes until fully formed.
Step 5: Chill to Firm
Once shaped, transfer the baking sheet with the balls to the freezer. Chill for at least 20-30 minutes to allow the mixture to firm up. This is essential for your balls to hold their shape during the chocolate coating process and gives you a chance to clean up!
Step 6: Melt the Chocolate
In the meantime, melt 9 ounces of chocolate chips in a double boiler or microwave-safe bowl. If using the microwave, heat in 20-second intervals, stirring frequently until silky and smooth. Optionally, add 1-2 teaspoons of vegetable oil for a more fluid consistency that will coat your Chocolate Rice Krispie Balls perfectly.
Step 7: Coat the Balls
Remove the chilled balls from the freezer and dip each one into the melted chocolate using a fork or toothpick. Allow excess chocolate to drip off back into the bowl, ensuring an even coating. This step brings your Chocolate Rice Krispie Balls to life, making them irresistible to anyone who sees them!
Step 8: Set the Coating
Place the coated Chocolate Rice Krispie Balls back onto the parchment paper. Let them sit at room temperature for about 15-20 minutes, or pop them back into the fridge to speed up the setting process. Watch as the chocolate hardens to create that beautiful shell that seals in all the crunchy goodness!
Chocolate Rice Krispie Balls Variations
Feel free to personalize your Chocolate Rice Krispie Balls with these delightful twists and substitutions that cater to every craving!
- Nut-Free: Substitute peanut butter with sunflower butter for a similar creamy texture, perfect for those with nut allergies.
- Dairy-Free: Use vegan butter and dairy-free chocolate chips to cater to plant-based diets without sacrificing flavor.
- Lower Sugar: Reduce the powdered sugar or swap it with a sugar substitute like Stevia for a healthier version that still tastes sweet.
- Flavor Boosts: Mix in a teaspoon of espresso powder for a bold chocolate kick or a dash of cinnamon for warmth in every bite.
- Texture Twists: Experiment with cornflakes instead of crispy rice cereal for added crunch and a unique flavor.
- Chocolate Coatings: Try white chocolate or milk chocolate for a different flavor profile; each variation opens a new taste experience!
- Add-ins: Incorporate mini marshmallows or shredded coconut into the mixture for an extra chewy surprise.
- Spicy Kick: Add a pinch of cayenne pepper or chili powder for a surprising heat that contrasts beautifully with the sweetness of chocolate.
These variations not only add flair but also inspire creativity in the kitchen. You can also draw inspiration from delectable treats like White Chocolate Raspberry for a fruity twist or try the yummy Chocolate Marshmallow Swirl combo for even more fun!
Make Ahead Options
These Chocolate Rice Krispie Balls are perfect for meal prep and can save you precious time during busy weeks! You can mix the peanut butter base and shape the balls up to 24 hours in advance, storing them in an airtight container in the refrigerator to maintain their freshness. If you want an even longer option, they can be frozen for up to 3 months before coating. Just remember to chill the balls after shaping to ensure they hold their form. When you’re ready to enjoy, simply dip them in the melted chocolate and let them set at room temperature or in the fridge. This way, you can whip up delicious treats with minimal effort!
What to Serve with Easy No-Bake Chocolate Rice Krispie Balls
These delightful treats are perfect for creating a delightful spread that excites the senses and warms the heart.
-
Fresh Fruit Platter:
Bright, juicy fruits like strawberries and pineapple add a refreshing contrast to the rich chocolate and peanut butter. -
Vanilla Ice Cream:
A scoop of silky vanilla ice cream elevates the experience, offering a creamy complement to the crunch of the rice balls. -
Hot Chocolate Bar:
Create a cozy signature drink station featuring hot chocolate complemented with whipped cream and candy cane stirrers for a festive touch. -
Nuts and Dried Fruits:
A mix of roasted nuts and chewy dried fruits brings an earthy, nutritional element to your dessert table, balancing sweetness beautifully. -
Chocolate-Covered Strawberries:
Pair them for a double-chocolate delight, allowing the fresh fruit to enhance the chocolatey experience. -
Homemade Whipped Cream:
This fluffy topping adds an airy, luxurious finish, making each bite of the rice krispie balls even more indulgent. -
Milkshake or Float:
Featuring malted flavors or a fruit twist, these icy drinks provide a refreshing sip that complements the sweet treat. -
Coffee or Espresso:
A strong cup of coffee brings out the rich chocolate flavors, creating a perfect match for those who enjoy dessert with their caffeine. -
Festive Cookie Platter:
Mix in an assortment of seasonal cookies for variety, making your dessert display more tantalizing and inviting!
How to Store and Freeze Chocolate Rice Krispie Balls
Room Temperature: Store Chocolate Rice Krispie Balls in an airtight container for up to 2 weeks. Keep them in a cool, dry place to maintain their crunchy texture.
Fridge: If you prefer a firmer ball, refrigerate them for up to 3 weeks. Make sure they are covered to prevent them from absorbing any odors.
Freezer: For longer storage, wrap the balls tightly in plastic wrap and place them in a freezer-safe container. These treats can be frozen for up to 3 months.
Thawing: To enjoy frozen Chocolate Rice Krispie Balls, simply thaw them at room temperature for about 30 minutes before serving.
Expert Tips for Making Chocolate Rice Krispie Balls
- Mix Thoroughly: Ensure all ingredients are well-combined to prevent clumping, which can result in uneven textures in your Chocolate Rice Krispie Balls.
- Be Chocolate Savvy: Avoid overheating the chocolate; melted chocolate should be smooth but not too thick. Use intervals in the microwave to control temperature.
- Chill Firmly: Don’t skip the chilling step! It’s vital for the balls to hold their shape while coating. If they’re too soft, the coating won’t adhere properly.
- Customize Wisely: Remember, you can easily modify these treats. For a nut-free version, swap out the peanut butter for sunflower butter without sacrificing flavor.
- Setting Time Matters: Allow adequate time for chocolate to set at room temperature or in the fridge. Rushing this step may cause the chocolate to melt when bitten into!

Chocolate Rice Krispie Balls Recipe FAQs
How do I know if my ingredients are ripe or suitable?
Absolutely! For the best flavor, choose creamy peanut butter with a smooth texture and no added sugars. If you’re opting for nut-free alternatives, sunflower butter should be fresh without any dark spots. Check your unsalted butter for a creamy color and avoid any that show signs of discoloration or smell off.
What are the best storage methods for Chocolate Rice Krispie Balls?
You can store Chocolate Rice Krispie Balls in an airtight container at room temperature for up to 2 weeks. Keep them in a cool, dry spot, away from direct sunlight. If you prefer a firmer texture, you can refrigerate them for up to 3 weeks in the same airtight container. Just make sure they’re covered to ward off any potential fridge odors!
Can I freeze Chocolate Rice Krispie Balls?
Yes, for sure! To freeze, wrap each Chocolate Rice Krispie Ball tightly in plastic wrap, then place them in a freezer-safe container. They will stay fresh for up to 3 months. When you’re ready to enjoy them, just thaw them at room temperature for about 30 minutes. This will bring back their delightful texture!
What should I do if my chocolate coating is too thick?
Very common! If your melted chocolate becomes too thick, don’t worry! Just add 1-2 teaspoons of vegetable oil or coconut oil to the bowl and stir until it reaches a smoother consistency. This helps the chocolate glide over the balls easily, ensuring an even and shiny coating.
Are Chocolate Rice Krispie Balls safe for pets or those with specific allergies?
Be cautious! These treats include peanut butter, which is generally safe for dogs in moderation, but make sure your pet doesn’t have allergies. If any of your guests have nut allergies, you can easily substitute the peanut butter with sunflower butter to ensure everyone enjoys this treat without worry. Always double-check about any other potential allergens like dairy or gluten depending on your ingredient choices!
Can I make substitutions for dietary restrictions?
Absolutely! For a nut-free option, sunflower butter works beautifully in place of peanut butter. Additionally, you can opt for vegan butter to make them dairy-free, and use sugar substitutes like Stevia if you’re watching your sugar intake. These Chocolate Rice Krispie Balls are incredibly versatile, so feel free to experiment with your preferences!
Chocolate Rice Krispie Balls: Irresistibly Easy No-Bake Treats
Ingredients
Equipment
Method
- In a large mixing bowl, combine 1 cup of creamy peanut butter and 2 tablespoons of unsalted butter. Stir until smooth and creamy.
- Add 1 tablespoon of vanilla extract and mix well. Gradually sprinkle in 1/2 cup of powdered sugar while stirring continuously until thick and smooth.
- Gently fold in 3 to 4 cups of crispy rice cereal until uniformly coated.
- Shape the mixture into 1-inch balls and place them on a parchment-lined baking sheet.
- Chill the shaped balls in the freezer for at least 20-30 minutes to firm up.
- Melt 9 ounces of chocolate chips in a double boiler or microwave until smooth, optionally adding 1-2 teaspoons of vegetable oil.
- Remove the chilled balls and dip each into the melted chocolate, allowing excess to drip off.
- Place the coated balls back onto parchment paper and let them set at room temperature for 15-20 minutes or refrigerate to speed up the process.