
The first bite of a warm, gooey chocolate chip cookie has a way of transporting me back to childhood, with sweet memories of baking sessions in the kitchen. If you’re seeking an easy, homemade delight that encapsulates comfort and nostalgia, my Ultimate Chewy Chocolate Chip Cookies are just what you need. This classic recipe strikes the perfect balance between a soft, chewy interior and a slight crispness on the outside, making them the ultimate crowd-pleaser. Plus, they come together in a snap, so you can whip up a batch any time the cookie craving hits. Are you ready to fill your home with the warm aroma of freshly baked cookies? Let’s dive in!
Why Are These Cookies So Irresistible?
Decadent Richness: The balance of buttery flavor and chocolate chunks ensures each bite is a little piece of heaven.
Quick & Easy: With just a few simple steps, you can have a batch ready in under 30 minutes—perfect for busy bakers!
Versatile Options: Not a fan of regular chocolate chips? Try swapping in white chocolate or adding nuts for a delightful twist!
Crowd-Pleasing Appeal: Whether it’s a family gathering or a cookie jar treat, these cookies will have everyone coming back for more.
Feel free to elevate your cookie game with a comforting pairing—try them with a glass of milk or coffee for an indulgent experience! If you love easy homemade recipes, check out my Crockpot Chicken Nachos for another delicious option.
Chocolate Chip Cookie Ingredients
For the Cookie Dough
• All-Purpose Flour – Provides structure; opt for a gluten-free blend when needed.
• Butter – Ensures richness and chewiness; can substitute with vegan butter for a dairy-free treat.
• Brown Sugar – Adds moisture and depth; coconut sugar can be used for a lower GI option.
• Granulated Sugar – Sweetens and contributes to crispness; adjust according to your taste preferences.
• Eggs – Binds ingredients; replace with flax eggs for a vegan alternative (1 tbsp ground flaxseed + 2.5 tbsp water = 1 egg).
• Baking Soda – A leavening agent for rising; always check it’s fresh for the best results.
• Salt – Enhances flavor; sea salt provides a more complex taste experience.
• Chocolate Chips – The star of the show, providing rich chocolate flavor; dark or semi-sweet options work well.
For Optional Mix-ins
• Nuts – Add for crunchy texture; walnuts or pecans are delicious choices!
• White Chocolate Chips – Swap in for a sweeter twist alongside or instead of regular chocolate chips.
• Espresso Powder – Infuse for a delightful depth of flavor that enhances the chocolate.
These ingredients come together to create the ultimate chewy chocolate chip cookies—trust me, you won’t be able to resist!
Step-by-Step Instructions for Ultimate Chewy Chocolate Chip Cookies
Step 1: Preheat the Oven
Begin your baking adventure by preheating your oven to 350°F (175°C). This ensures that the Ultimate Chewy Chocolate Chip Cookies have the perfect baking environment right from the start. Gather your baking sheets and line them with parchment paper, so they’re ready for the cookie dough once it’s mixed.
Step 2: Cream the Butter and Sugars
In a large mixing bowl, combine the softened butter, brown sugar, and granulated sugar. Using a hand mixer or stand mixer, beat the mixture on medium speed until it becomes light and fluffy, about 3-4 minutes. The creamy texture will provide the foundation for your cookies’ rich flavor, so be sure to achieve that airy consistency.
Step 3: Incorporate the Eggs
One by one, add the eggs to your creamed mixture, beating well after each addition. This will help bind all the ingredients together seamlessly. Ensure that each egg is fully incorporated before adding the next, aiming for a smooth batter that showcases the warmth of the Ultimate Chewy Chocolate Chip Cookies.
Step 4: Mix Dry Ingredients
In a separate bowl, whisk together the all-purpose flour, baking soda, and salt. This step is crucial for evenly distributing the leavening agent and enhancing the cookie flavor. Gradually add the dry mixture to the creamed mixture, mixing on low until just combined. This prevents overmixing, ensuring your cookies maintain that delightful chewiness.
Step 5: Fold in the Chocolate Chips
Now it’s time to make these cookies the star of the show! Gently fold in the chocolate chips using a rubber spatula, ensuring even distribution throughout the dough. Feel free to add any optional mix-ins like nuts at this stage for added texture. The rich chocolate chunks will create pockets of gooeyness when baked.
Step 6: Scoop the Dough
Using a cookie scoop or tablespoon, portion out the dough onto the prepared baking sheets, leaving about 2 inches of space between each scoop. The cookies will spread as they bake, so give them plenty of room for that perfect golden edge. Aim for uniform sizes to ensure even baking, enhancing the overall appeal of your Ultimate Chewy Chocolate Chip Cookies.
Step 7: Bake to Perfection
Place the baking sheet in your preheated oven and bake for 10-12 minutes. Keep an eye on your cookies; they’re done when the edges are golden brown and the centers look set but still soft. The visual cues will ensure that your cookies achieve that delightful balance of crispness and gooeyness that everyone loves.
Step 8: Cool Down and Enjoy
Once out of the oven, allow your cookies to cool on the baking sheet for about 5 minutes. This helps them firm up slightly, making them easier to transfer. Afterward, move them to a wire rack to cool completely. The aroma of your fresh-baked Ultimate Chewy Chocolate Chip Cookies will fill your kitchen, inviting everyone to indulge!
Expert Tips for Ultimate Chewy Chocolate Chip Cookies
Butter Temperature: Ensure your butter is at room temperature before mixing. This creates a light, fluffy texture and integrates the ingredients evenly.
Avoid Overmixing: Stop mixing as soon as the flour is incorporated. Overmixing can lead to dense cookies instead of the desired chewy texture.
Perfect Bake Time: Keep a close eye during baking; cookies may look slightly underbaked in the center. They will continue to firm up while cooling.
Uniform Sizing: Use a cookie scoop to ensure each cookie is the same size. This allows for even baking and a consistent texture throughout your Ultimate Chewy Chocolate Chip Cookies.
Experiment with Mix-ins: Feel free to get creative! Try adding nuts, white chocolate chips, or even a sprinkle of sea salt on top to elevate your cookie experience.
Storage Tips: After cooling, store your cookies in an airtight container to keep them fresh. They also freeze well—great for those late-night cravings!
What to Serve with Ultimate Chewy Chocolate Chip Cookies
Indulging in the sweet embrace of warm, gooey cookies is a treat on its own, but pairing them with delightful accompaniments creates a comforting experience.
-
Cold Glass of Milk: Nothing beats a classic pairing! The creamy texture of milk complements the chocolate beautifully, enhancing every bite.
-
Rich Coffee: A cup of freshly brewed coffee balances the sweetness of the cookies, making each bite a moment of blissful contrast.
-
Ice Cream Sandwich: Layer your cookie with a scoop of your favorite ice cream for a delightful treat. The melty ice cream adds an extra layer of decadence.
-
Fresh Berries: Juicy strawberries or blueberries bring a refreshing burst of flavor. Their acidity cuts through the sweetness, adding balance to your dessert experience.
-
Chocolate Sauce Drizzle: For the true chocolate lovers, drizzling warm chocolate sauce over these cookies can amplify the rich chocolate experience.
-
Homemade Whipped Cream: Light and airy whipped cream can enhance the cookie’s texture, making each bite feel luxurious and indulgent.
Elevate your cookie experience with the perfect accompaniments, whether you opt for a cozy drink or a refreshing snack!
Make Ahead Options
These Ultimate Chewy Chocolate Chip Cookies are perfect for meal prep, allowing you to enjoy fresh cookies without the last-minute hassle! You can prepare the dough up to 24 hours in advance. Simply mix the ingredients as directed, then cover the bowl with plastic wrap and refrigerate. If you’re planning to make them further ahead, you can scoop the dough into individual portions and freeze them for up to 3 months—just place them in a freezer-safe container or bag. When you’re ready to indulge, bake from frozen by adding an extra minute or two to the baking time. This method preserves their delicious flavor and chewy texture, ensuring every batch tastes just as fresh!
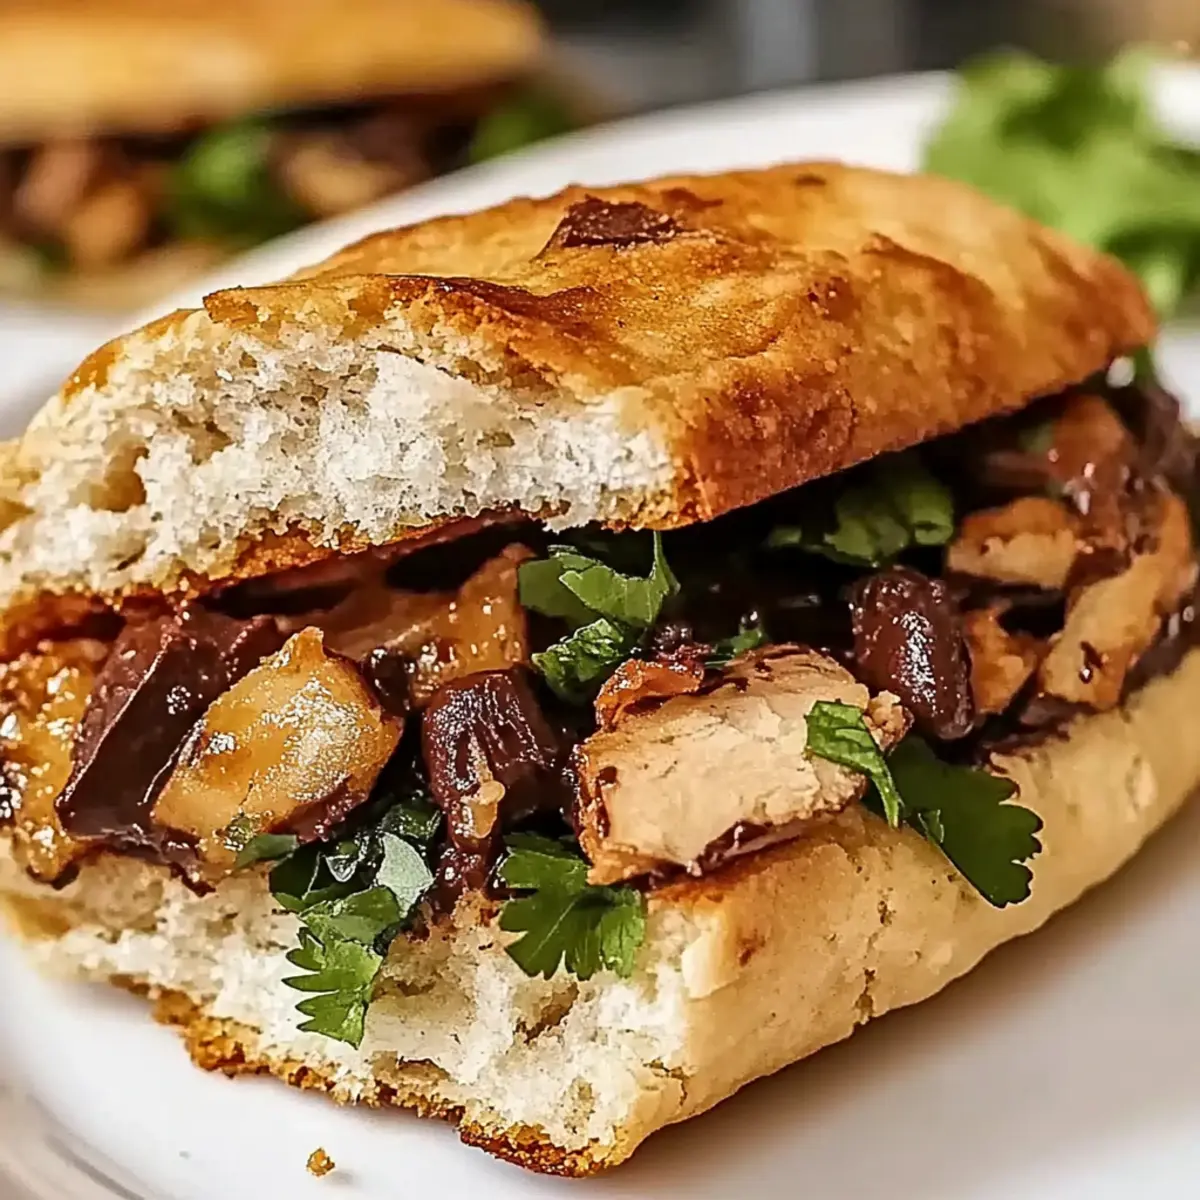
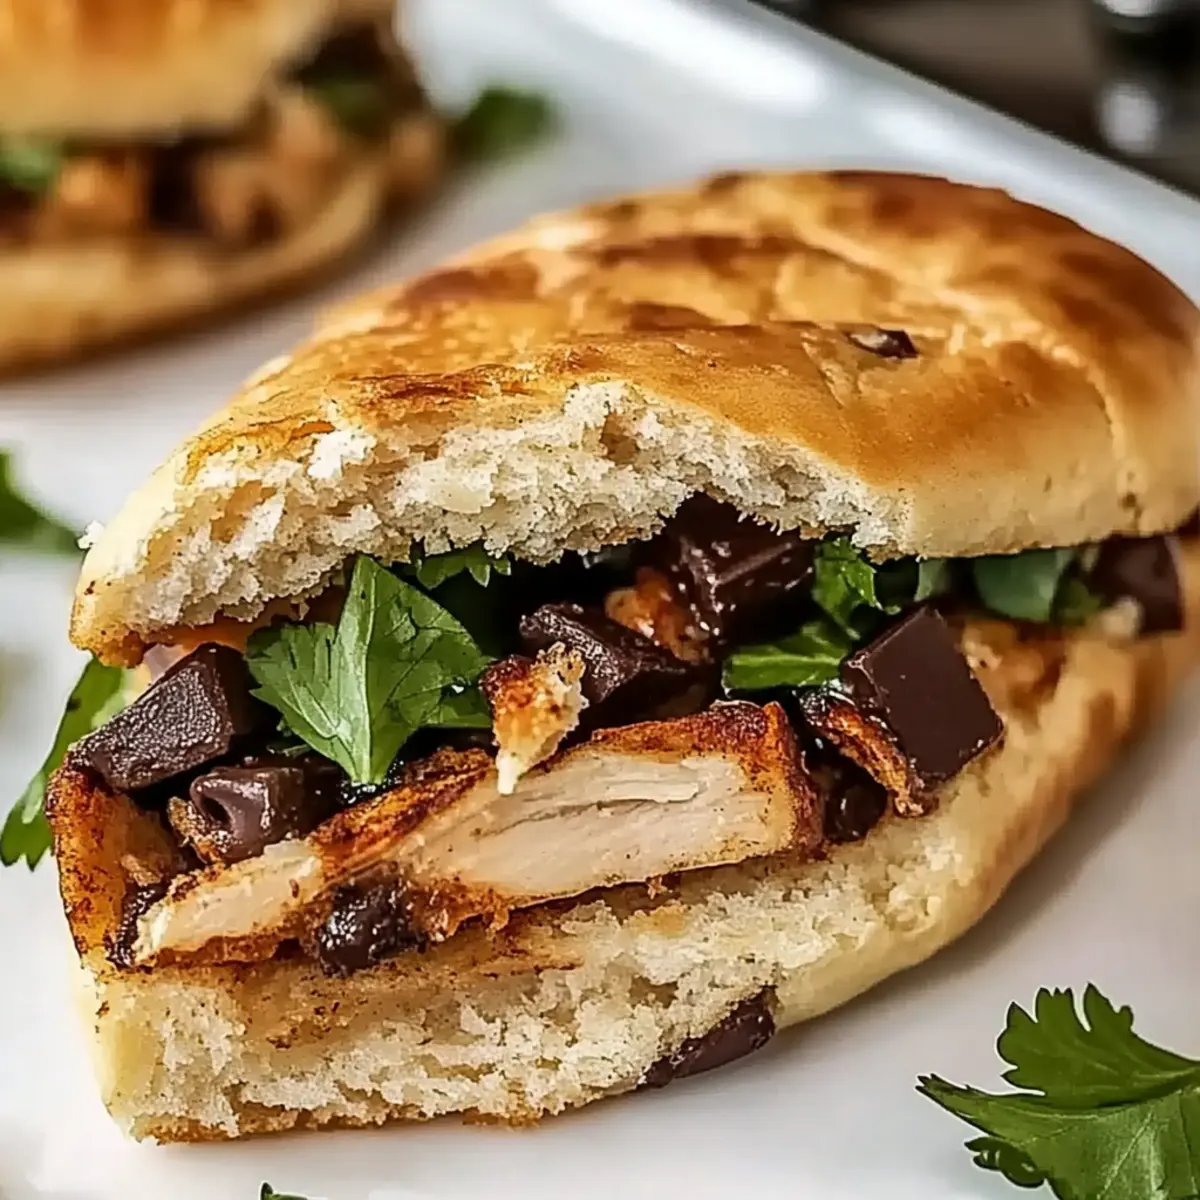
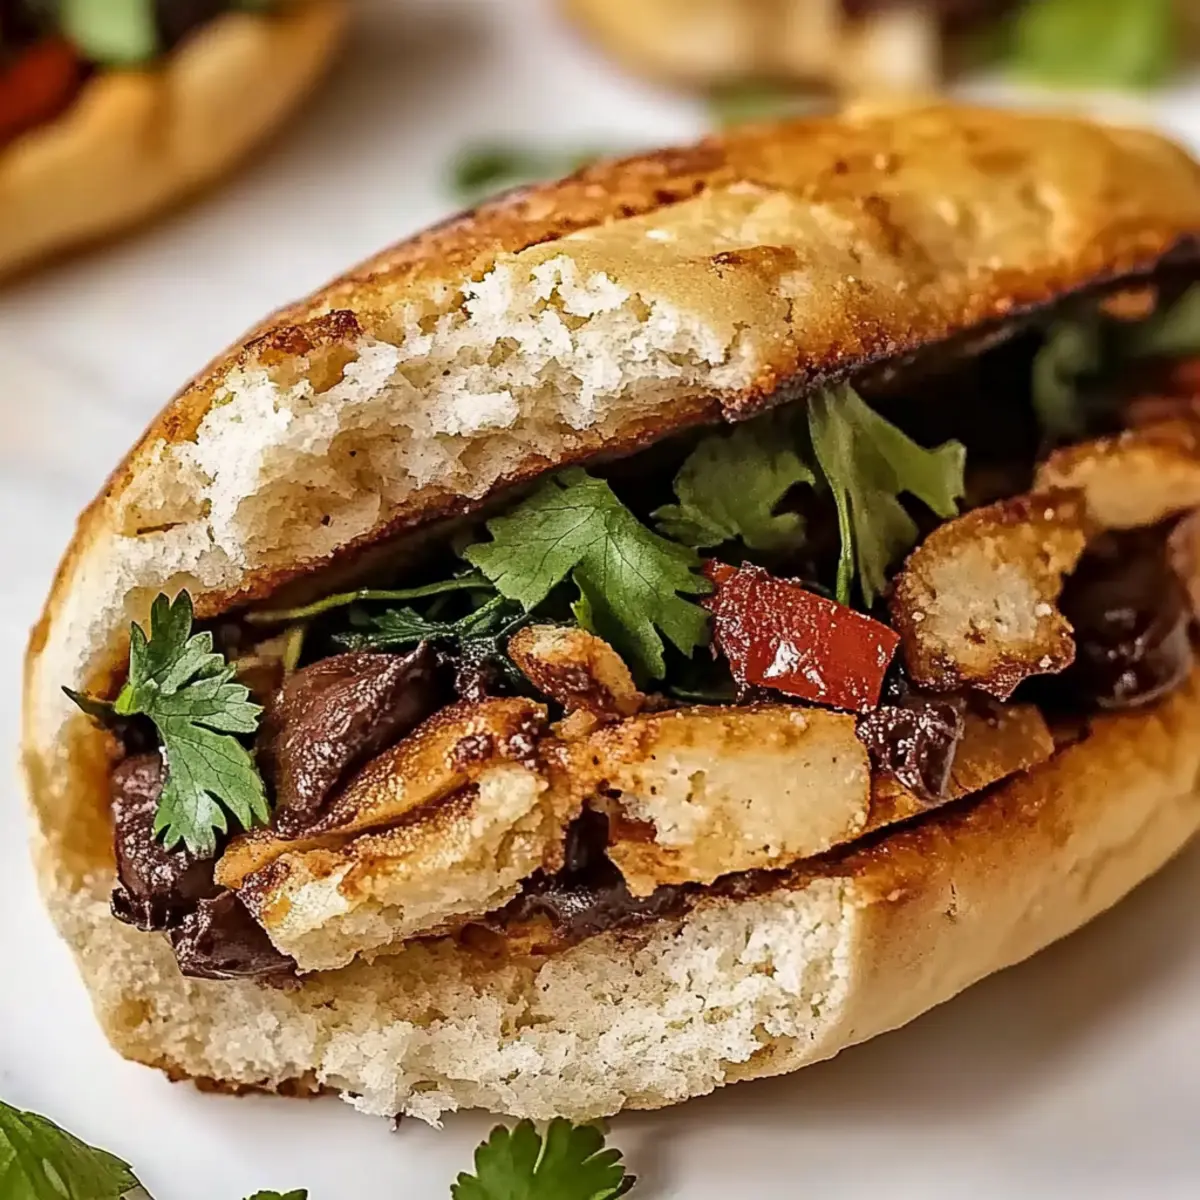
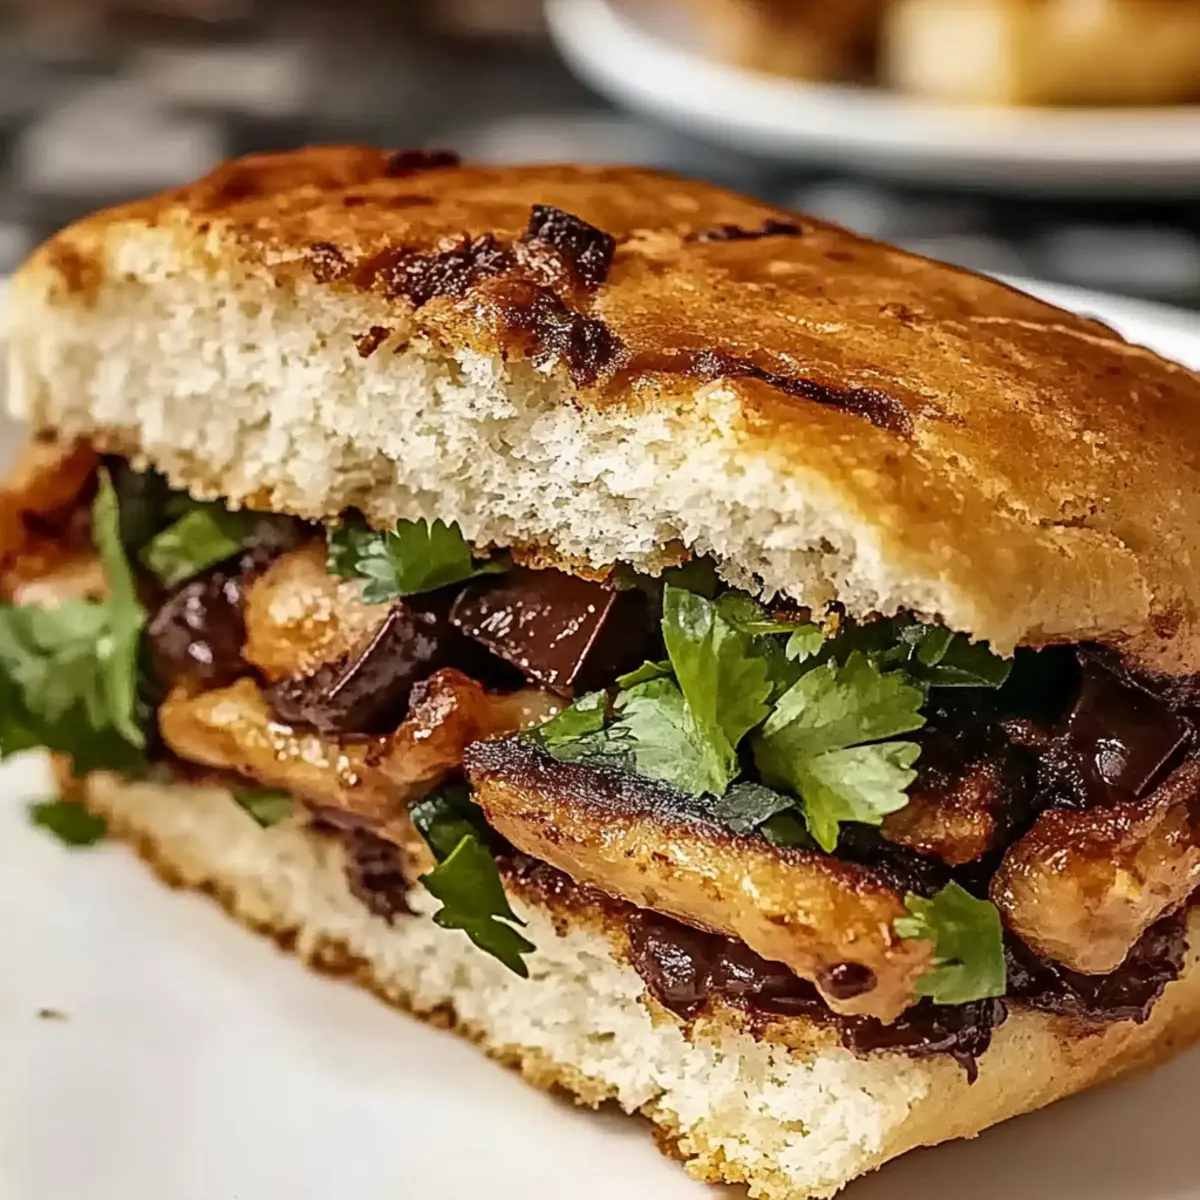
Flavor-Packed Chicken Torta Sandwich Variations
Feel free to explore these delightful twists and substitutions to make your chicken torta truly your own!
- Gluten-Free: Use gluten-free bread or a lettuce wrap for a light, healthy alternative that maintains great flavor.
- Spicy Kick: Add jalapeños or a drizzle of hot sauce to amp up the heat and enhance the flavor profile of your sandwich.
- Vegetarian Option: Swap out the chicken for grilled portobello mushrooms or roasted vegetables to create a satisfying meatless version.
- Creamy Addition: Spread avocado or chipotle mayo on the bread for an extra layer of creaminess deeply enhancing the overall taste.
- Herb-Infused: Mix chopped fresh cilantro or parsley into your chicken filling for a burst of freshness that will elevate each bite.
- Cheesy Goodness: Incorporate slices of pepper jack cheese before grilling for a deliciously melty experience that is hard to resist!
- Flavor Inspirations: Try using different marinades like teriyaki or lemon garlic to create unique flavor profiles; each variant can take you on a culinary adventure.
- Crunch Factor: Add crisp lettuce and sliced cucumbers to bring in a refreshing crunch that beautifully contrasts with the savory filling.
These variations will surely delight your taste buds, paving the way for a flavor-packed journey with every bite. If you crave more culinary excitement, consider trying my Korean Fire Chicken or enjoy a comforting dish like Lazy Chicken Parmesan!
How to Store and Freeze Chocolate Chip Cookies
Room Temperature: Store your cookies in an airtight container at room temperature for up to 1 week. This keeps them soft and chewy.
Fridge: If you prefer chilled cookies, you can refrigerate them for up to 2 weeks, but be sure to wrap them well to prevent drying out.
Freezer: Freeze the cookies in a single layer on a baking sheet first, then transfer to a zip-top bag for up to 3 months. Thaw at room temperature before enjoying.
Reheating: To restore the gooey texture, microwave the cookies for about 10-15 seconds, or warm them in the oven at 350°F (175°C) for a few minutes. Enjoy a fresh-baked experience!
Chocolate Chip Cookies Recipe FAQs
What type of chocolate chips should I use for the best flavor?
The best chocolate chips for chocolate chip cookies depend on your taste! Semi-sweet chocolate chips are a classic choice, offering a lovely balance of sweetness. If you prefer a sweeter cookie, you can use milk chocolate chips. For a richer flavor, dark chocolate chips are fantastic. If you’re feeling adventurous, try mixing both for variety!
How do I know when my cookies are done baking?
Absolutely! The key to perfectly baked cookies is watching for visual cues. Ideally, the edges should be golden brown, while the centers will look set but still soft. It’s best to remove them from the oven when they seem slightly underbaked, as they will continue to firm up while cooling on the baking sheet.
How should I store my cookies to keep them fresh?
To keep your cookies fresh and chewy, store them in an airtight container at room temperature for up to 1 week. Make sure to separate layers with parchment paper to prevent sticking. For longer storage, consider freezing; they can last up to 3 months! Just thaw them at room temperature or microwave them for a few seconds to restore gooeyness.
Can I use gluten-free flour for this recipe?
Very! If you’d like to make gluten-free chocolate chip cookies, you can substitute all-purpose flour with a gluten-free flour blend. Just make sure the blend contains xanthan gum for proper texture and rise. The flavor and texture might vary slightly, but you’ll still get those delicious, chewy cookies!
What if my dough is too sticky?
If you find your cookie dough is too sticky, don’t worry! You can add a little more flour, about a tablespoon at a time, until it reaches a more manageable consistency. It’s also great to chill the dough in the refrigerator for about 30 minutes. Chilling helps firm up the butter, making it easier to scoop and shape!
Can I freeze the cookie dough instead of baked cookies?
Absolutely! Freezing cookie dough is a fantastic way to have fresh cookies on demand. Scoop the dough into balls and place them on a parchment-lined baking sheet. Freeze until solid, then transfer them to a zip-top bag. They can be stored for up to 3 months. Bake from frozen, adding a couple of extra minutes to the baking time. Enjoy that fresh-baked goodness anytime!
Flavor-Packed Chicken Torta Sandwich for a Taste Adventure
Ingredients
Equipment
Method
- Preheat your oven to 350°F (175°C) and line baking sheets with parchment paper.
- Cream together butter, brown sugar, and granulated sugar until light and fluffy.
- Add eggs one at a time, beating well after each addition.
- Whisk together flour, baking soda, and salt in a separate bowl.
- Gradually mix the dry ingredients into the creamed mixture until just combined.
- Fold in chocolate chips and any optional mix-ins.
- Scoop dough onto baking sheets, spacing them 2 inches apart.
- Bake for 10-12 minutes until edges are golden brown.
- Cool on the baking sheet for 5 minutes before transferring to a wire rack to cool completely.