
A Childhood Tradition Turned Easter Classic
Easter has always been one of my favorite holidays, not just because of the chocolate eggs or the pastel-colored decorations, but because of the memories tied to baking with my family. As a child, I would spend the entire weekend leading up to Easter in the kitchen with my mom, carefully rolling out cookie dough, sneaking bites of chocolate, and watching as trays of golden cookies filled the house with their sweet aroma.
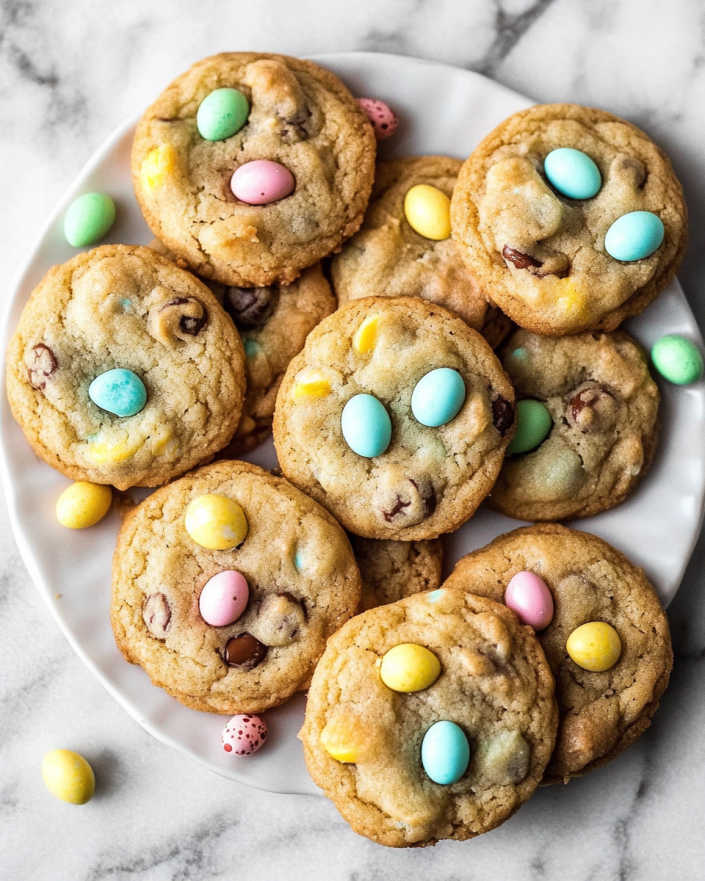
One of the highlights of those baking sessions was making Mini Egg Easter Cookies—a tradition that started on a whim when my mom let me toss some leftover chocolate eggs into a batch of chocolate chip cookies. The result? A cookie that was perfectly crispy on the outside, soft and chewy on the inside, and filled with pockets of melted chocolate and crunchy candy shells. It was love at first bite.
Now, every year as Easter approaches, I find myself returning to this recipe. It’s more than just a cookie; it’s a symbol of joy, nostalgia, and the simple pleasures of baking with loved ones. Whether you’re making these for an Easter brunch, gifting them to friends, or just enjoying them with a warm cup of tea, these Mini Egg Easter Cookies will bring a little extra sweetness to your holiday.
Why You’ll Love These Easter Cookies
1. The Perfect Texture
These cookies strike the perfect balance between crispy edges and a soft, chewy center. The combination of butter, sugar, and just the right amount of flour creates a dough that bakes into golden perfection.
2. A Festive Twist on a Classic
Chocolate chip cookies are always a crowd favorite, but adding mini chocolate eggs makes them extra special. The candy-coated shells provide a slight crunch, while the chocolate inside melts beautifully, creating little pockets of gooey deliciousness.
3. Quick and Easy to Make
You don’t need any special baking skills to whip up a batch of these cookies. The dough comes together in minutes, and with a baking time of just 8-10 minutes, they’re ready to enjoy in no time.
4. Perfect for Sharing
Whether you’re making these for an Easter party, a family gathering, or packaging them up as gifts, these cookies are a delightful treat that everyone will love. Plus, they store well, so you can bake them ahead of time and enjoy them throughout the week.
Ingredients: The Perfect Blend of Sweet and Crunch
For the Cookie Dough:
- ½ cup unsalted butter (softened to room temperature)
- ½ cup light brown sugar (packed)
- ½ cup granulated sugar
- 1 large egg
- 1 teaspoon vanilla extract
- 1 ½ cups all-purpose flour
- ½ teaspoon baking soda
- ½ teaspoon salt
For the Chocolate Mix-Ins:
- ½ cup mini chocolate eggs (halved)
- ½ cup semi-sweet chocolate chips
- ¼ cup mini chocolate eggs (whole, for topping)
Directions: Baking the Ultimate Easter Cookies
Step 1: Preheat and Prepare
- Preheat your oven to 350°F (175°C).
- Line a large baking sheet with a silicone baking mat or parchment paper.
Step 2: Cream the Butter and Sugars
- In a large mixing bowl, use a hand mixer or stand mixer to cream together the butter, brown sugar, and granulated sugar.
- Beat on medium speed until the mixture is light and fluffy (about 2 minutes).
Step 3: Add Wet Ingredients
- Mix in the egg and vanilla extract, beating on low speed until fully combined.
Step 4: Combine Dry Ingredients
- Gradually add in flour, baking soda, and salt, stirring gently until just combined.
- Fold in halved mini chocolate eggs and chocolate chips using a large spatula.
Step 5: Shape and Arrange
- Scoop 1.5 tablespoons of dough and roll it into a ball.
- Place dough balls on the prepared baking sheet, spacing them 2 inches apart.
- Gently press whole mini eggs on top of each cookie.
Step 6: Bake to Perfection
- Bake for 8-10 minutes, or until the edges just begin to brown.
- The centers may look slightly underbaked—this is normal! The cookies will continue to set as they cool.
Step 7: Cool and Enjoy
- Allow cookies to cool on the baking sheet for 5 minutes before transferring them to a wire rack to cool completely.
- Serve and enjoy these crispy-on-the-outside, chewy-on-the-inside Easter treats!
Nutritional Breakdown: Indulgence in Every Bite
- Serving Size: 1 cookie
- Calories: 180 kcal
- Total Fat: 8g
- Saturated Fat: 5g
- Carbohydrates: 25g
- Sugar: 15g
- Protein: 2g
- Sodium: 80mg
How to Customize Your Mini Egg Cookies
One of the best things about this recipe is how easy it is to customize. Here are some fun variations to try:
1. Switch Up the Chocolate
- Milk Chocolate or Dark Chocolate Chips: If you prefer a sweeter or richer flavor, swap out the semi-sweet chocolate chips for your favorite variety.
- White Chocolate Chips: For an extra creamy taste, try using white chocolate instead of semi-sweet.
2. Try Different Easter Candies
- Instead of Mini Eggs, you can use chopped Creme Eggs, Galaxy Eggs, or even Reese’s Peanut Butter Eggs for a different flavor combination.
3. Make Them Extra Gooey
- If you love super soft and gooey cookies, slightly underbake them by about a minute and let them finish setting on the baking tray.
4. Add a Crunchy Element
- Mix in chopped nuts like pecans or walnuts for a bit of crunch.
5. Turn Them into Cookie Bars
- Instead of scooping the dough into cookies, press it into a baking dish and bake for 20-25 minutes for a delicious Easter cookie bar.
Expert Tips for the Best Cookies
1. Use Room Temperature Ingredients
Allowing the butter and egg to come to room temperature ensures that the dough mixes evenly, resulting in a better texture.
2. Don’t Overmix the Dough
Once you add the flour, mix just until combined. Overmixing can lead to dense, tough cookies instead of the soft, chewy ones we want.
3. Chill the Dough for Thicker Cookies
If you prefer thicker cookies, chill the dough for 30 minutes before baking. This helps control spreading and enhances the flavor.
4. Press Mini Eggs on Top Before Baking
For that beautiful bakery-style look, press a few whole mini eggs on top of each dough ball before placing them in the oven.
5. Let the Cookies Cool Properly
Even if they look slightly underbaked when you take them out, leave them on the baking sheet for a few minutes before transferring them to a wire rack. This allows them to set properly while staying soft inside.
Frequently Asked Questions (FAQs)
1. Can I Make the Dough Ahead of Time?
Yes! The cookie dough can be made up to 2 days in advance and stored in the refrigerator. When ready to bake, let the dough sit at room temperature for about 10 minutes before scooping and baking.
2. Can I Freeze the Cookies?
Absolutely! You can freeze the baked cookies for up to 3 months. Just store them in an airtight container, and when you’re ready to enjoy, let them thaw at room temperature or warm them slightly in the microwave.
3. Can I Freeze the Cookie Dough?
Yes! Scoop the cookie dough into balls and place them on a baking sheet. Freeze until firm, then transfer them to a freezer bag. Bake from frozen, adding 1-2 extra minutes to the baking time.
4. My Cookies Spread Too Much. What Happened?
If your cookies spread too much, try these fixes:
- Chill the dough for 30 minutes before baking.
- Make sure your butter isn’t too melted when mixing.
- Use the correct amount of flour—too little flour can cause excess spreading.
5. How Long Do These Cookies Stay Fresh?
Stored in an airtight container, these cookies stay fresh for up to 5 days at room temperature.
6. Can I Make These Gluten-Free?
Yes! Simply swap the all-purpose flour for a 1:1 gluten-free flour blend, and they should turn out just as delicious.
Conclusion: The Ultimate Easter Cookie
Mini Egg Easter Cookies are more than just a delicious holiday treat—they’re a way to bring people together, spark joy, and create lasting memories. Whether you’re baking these with your family, surprising a friend with a batch, or simply treating yourself, these cookies are a little taste of Easter magic in every bite.
Their crispy edges, soft centers, and delightful mix of chocolate and crunch make them an irresistible dessert that you’ll find yourself making year after year. Plus, with so many ways to customize them, they’ll never get boring!
So this Easter, gather your ingredients, preheat your oven, and get ready to bake up some happiness. One bite of these cookies, and you’ll understand why they’ve become a holiday tradition in so many homes—including mine.
Happy Easter and happy baking!
Print
Mini Egg Easter Cookies: A Sweet Celebration of Spring
- Total Time: 20 minutes
- Yield: 18-20 cookies
Description
These Mini Egg Easter Cookies are the perfect festive treat! With crispy edges, a soft, chewy center, and pockets of melted chocolate from mini eggs and chocolate chips, they’re a delicious way to celebrate Easter. Quick, easy, and absolutely irresistible!
Ingredients
For the Cookie Dough:
- 1/2 cup unsalted butter (softened to room temperature)
- 1/2 cup light brown sugar (packed)
- 1/2 cup granulated sugar
- 1 large egg
- 1 teaspoon vanilla extract
- 1 1/2 cups all-purpose flour
- 1/2 teaspoon baking soda
- 1/2 teaspoon salt
For the Chocolate Mix-Ins:
- 1/2 cup mini chocolate eggs (halved)
- 1/2 cup semi-sweet chocolate chips
- 1/4 cup mini chocolate eggs (whole, for topping)
Instructions
- Preheat and Prepare:
- Preheat oven to 350°F (175°C).
- Line a large baking sheet with parchment paper or a silicone baking mat.
- Cream the Butter and Sugars:
- In a large mixing bowl, use a hand mixer or stand mixer to cream together the butter, brown sugar, and granulated sugar.
- Beat on medium speed until the mixture is light and fluffy (about 2 minutes).
- Add Wet Ingredients:
- Mix in the egg and vanilla extract, beating on low speed until fully combined.
- Combine Dry Ingredients:
- Gradually add in flour, baking soda, and salt, stirring gently until just combined.
- Fold in halved mini chocolate eggs and chocolate chips using a spatula.
- Shape and Arrange:
- Scoop 1.5 tablespoons of dough and roll into balls.
- Place dough balls on the prepared baking sheet, spacing them 2 inches apart.
- Gently press whole mini eggs on top of each cookie.
- Bake to Perfection:
- Bake for 8-10 minutes, or until edges just begin to brown.
- The centers may look slightly underbaked—this is normal as they will continue setting as they cool.
- Cool and Enjoy:
- Allow cookies to cool on the baking sheet for 5 minutes before transferring to a wire rack.
- Serve and enjoy!
Notes
- For thicker cookies: Chill the dough for 30 minutes before baking.
- For extra gooey cookies: Slightly underbake them by about a minute.
- Storage: Store in an airtight container for up to 5 days.
- Freezing Instructions: Freeze baked cookies for up to 3 months or freeze cookie dough balls and bake as needed.
- Prep Time: 10 minutes
- Cook Time: 10 minutes
- Category: Dessert
- Method: Baking
- Cuisine: Holiday Treat