
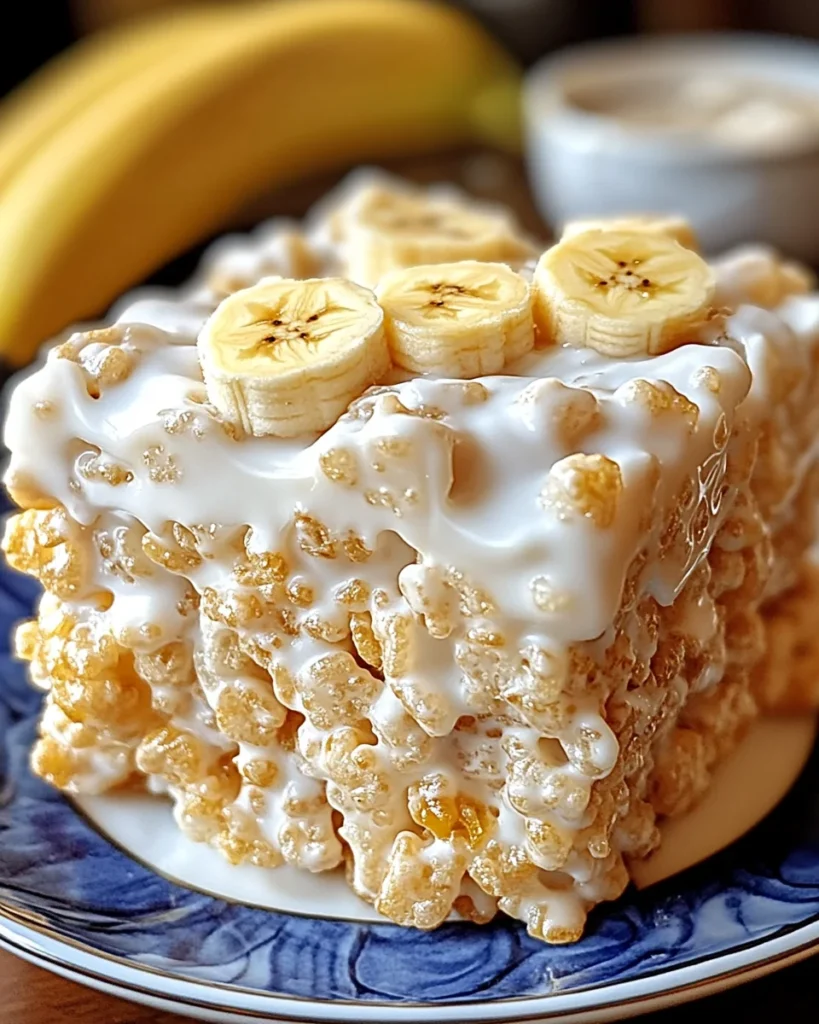
Banana pudding is a timeless dessert known for its creamy vanilla custard, fresh banana slices, and layers of vanilla wafers. Now, imagine taking all of those flavors and textures and combining them with the crunchy, chewy goodness of Rice Krispie treats. That’s exactly what you get with Banana Pudding Rice Krispie Treats—a dessert that delivers nostalgic flavors with a fun, crispy twist.
These treats are quick to make, packed with banana flavor, and perfect for any occasion. Whether you’re looking for a unique dessert for a party, a fun treat for kids, or just want to satisfy a banana pudding craving in a whole new way, this recipe is a must-try.
Why These Treats Are So Irresistible
Rice Krispie treats are already a fan-favorite thanks to their simple yet addictive combination of buttery, gooey marshmallows and crispy cereal. But adding banana pudding mix and vanilla wafers elevates them to a whole new level. Here’s why this recipe stands out:
1. The Best of Two Classic Desserts
By blending the flavors of banana pudding with the texture of Rice Krispie treats, this recipe creates a dessert that’s both comforting and exciting. The result is a crispy, chewy, and slightly creamy bite that tastes just like banana pudding, but with a fun, handheld twist.
2. Packed with Authentic Banana Flavor
Many banana-flavored desserts rely on artificial extracts, but these treats use instant banana pudding mix, which gives them a rich, authentic banana flavor without overpowering the other ingredients.
3. Vanilla Wafers for That Classic Banana Pudding Touch
Banana pudding wouldn’t be complete without vanilla wafers, and these treats stay true to the original by incorporating crushed vanilla wafer cookies for added crunch and a hint of buttery sweetness.
4. A Fun and Easy No-Bake Dessert
Unlike traditional banana pudding, which requires layering and chilling, these Rice Krispie treats come together in minutes—no baking, no waiting.
5. Perfect for Any Occasion
Whether you’re bringing a dessert to a potluck, a birthday party, or just making a special after-school snack, these treats are easy to transport, serve, and enjoy.
Crunchy & Creamy Ingredients:
- Rice Krispies cereal
- Vanilla wafer cookies
- Salted butter
- Marshmallows
- Instant banana pudding mix
- Powdered sugar
- Heavy whipping cream or milk
- Vanilla extract
The Ultimate Banana Pudding Crunch:
- Prepare the Base: Break vanilla wafers into small pieces and mix with Rice Krispies cereal in a buttered mixing bowl.
- Melt the Marshmallows: In a saucepan over low heat, melt butter, then add marshmallows and banana pudding mix. Stir until smooth.
- Combine the Ingredients: Pour the melted mixture over the cereal and cookies, mixing until fully coated.
- Press and Set: Spread into a greased 8-inch pan, gently pressing to even out the mixture. Top with extra vanilla wafer pieces.
- Cool and Slice: Let the treats cool for 30 minutes, then cut into squares or rectangles.
- Add a Sweet Drizzle: Prepare a simple glaze using powdered sugar, vanilla, and cream. Drizzle over the cooled treats and let the glaze set before serving.
Sweet & Crispy Nutrients (Per Serving Estimate):
- Calories: ~218
- Carbohydrates: ~39g
- Protein: ~2g
- Fat: ~7g
- Sugar: ~24g
How to Serve Banana Pudding Rice Krispie Treats
These treats are delicious on their own, but if you want to enhance the experience, here are a few fun ways to serve them:
1. Drizzled with White Chocolate
For an extra layer of sweetness, drizzle melted white chocolate over the treats. This not only makes them look elegant but also complements the banana and vanilla flavors beautifully.
2. Topped with Fresh Banana Slices
Before serving, place thin slices of fresh banana on top for a refreshing burst of natural banana flavor. Just be sure to add them right before serving to prevent browning.
3. Served with a Scoop of Ice Cream
Pairing these treats with a scoop of vanilla or banana-flavored ice cream makes for a truly decadent dessert.
4. Dipped in Caramel or Chocolate
For an indulgent touch, dip half of each Rice Krispie treat into melted caramel or chocolate, then let them set before serving.
5. Crumbled Over Pudding or Yogurt
For a unique twist, crumble a few treats over a bowl of vanilla pudding or Greek yogurt for a delicious dessert parfait.
Creative Variations to Try
One of the best things about this recipe is how easy it is to customize. Here are some fun variations to experiment with:
1. Peanut Butter Banana Krispie Treats
If you love the combination of banana and peanut butter, try adding a swirl of peanut butter to the melted marshmallow mixture before mixing everything together.
2. Chocolate Banana Krispie Treats
For a chocolatey version, add mini chocolate chips to the mixture or drizzle melted dark chocolate on top.
3. Coconut Banana Krispie Treats
Add toasted coconut flakes to the mixture for a tropical twist that pairs beautifully with the banana flavor.
4. Extra Crunchy Version
For added texture, mix in chopped pecans or walnuts along with the vanilla wafers.
5. Gluten-Free Alternative
To make a gluten-free version, use gluten-free vanilla wafers and certified gluten-free crispy rice cereal.
Frequently Asked Questions (FAQs)
1. Can I Use Fresh Bananas Instead of Pudding Mix?
Unfortunately, fresh bananas don’t work well in this recipe because they add too much moisture, which can make the treats soggy. The banana pudding mix provides flavor without affecting texture.
2. How Do I Keep These Treats from Getting Hard?
The key to keeping your treats soft and chewy is to not overheat the marshmallows. Removing the marshmallow mixture from the heat when it’s 75% melted and stirring until smooth prevents them from becoming too stiff.
3. Can I Make These Treats Ahead of Time?
Yes! These treats can be made up to five days in advance and stored in an airtight container at room temperature.
4. Can I Freeze Banana Pudding Rice Krispie Treats?
Yes! To freeze them:
- Wrap individual treats in plastic wrap.
- Store in an airtight container or freezer bag for up to three months.
- Let them thaw at room temperature before serving.
5. Can I Make These in a Larger Batch?
Absolutely! If making for a crowd, simply double the ingredients and use a 9×13-inch pan instead of an 8-inch square pan.
6. What’s the Best Way to Cut These Treats?
To get clean, even slices, use a sharp knife greased with a little butter or cooking spray. This helps prevent sticking and makes cutting much easier.
7. Can I Make These Treats Without Marshmallows?
If you’re looking for a marshmallow-free version, try using melted peanut butter and honey as the binding ingredient instead.
Final Thoughts: A Must-Try Dessert for Banana Lovers
Banana Pudding Rice Krispie Treats are a game-changer for anyone who loves the classic flavors of banana pudding but wants something fun, easy, and portable.
By combining the creamy, nostalgic flavors of banana pudding with the chewy, crunchy texture of Rice Krispie treats, this dessert delivers the best of both worlds in every bite.
Whether you’re making them for a party, a bake sale, or just because you’re craving something delicious, these treats are sure to impress. And with so many variations and serving options, you can make them uniquely your own every time.
So, grab your ingredients, whip up a batch, and get ready to fall in love with this creative twist on a classic dessert!
Print
Banana Pudding Rice Krispie Treats: A Crunchy, Creamy Twist on a Classic Dessert
- Total Time: 15 minutes
- Yield: 12 squares
Description
Take your favorite childhood desserts—banana pudding and Rice Krispie treats—and combine them into one irresistible snack! These Banana Pudding Rice Krispie Treats are loaded with creamy banana flavor, crunchy vanilla wafers, and gooey marshmallows for the perfect balance of chewy, crispy, and sweet. They’re an easy no-bake dessert, great for parties, potlucks, or just satisfying a banana pudding craving in a whole new way!
Ingredients
For the Rice Krispie Treats
- 5 cups Rice Krispies cereal
- 1 cup vanilla wafer cookies, crushed
- 6 tablespoons salted butter
- 10 ounces mini marshmallows (about 5 ½ cups)
- 1 (3.4-ounce) package instant banana pudding mix
- 1 teaspoon vanilla extract
For the Vanilla Glaze (Optional)
- ½ cup powdered sugar
- 1 tablespoon heavy cream or milk
- ½ teaspoon vanilla extract
Instructions
1. Prepare the Cereal Mixture
- Grease an 8×8-inch or 9×9-inch pan with butter or non-stick spray.
- In a large mixing bowl, combine the Rice Krispies cereal and crushed vanilla wafer cookies. Set aside.
2. Melt the Marshmallow Mixture
- In a large saucepan over low heat, melt the butter.
- Add mini marshmallows and stir continuously until about 75% melted.
- Sprinkle in the banana pudding mix and vanilla extract, then stir until fully melted and smooth.
3. Combine Everything
- Pour the marshmallow mixture over the cereal and crushed wafers.
- Stir quickly until everything is evenly coated.
4. Press & Set
- Transfer the mixture to the greased pan and press it down gently with a buttered spatula or parchment paper.
- Let cool at room temperature for 30 minutes before cutting into squares.
5. Add the Vanilla Glaze (Optional)
- In a small bowl, whisk together powdered sugar, milk, and vanilla until smooth.
- Drizzle over the cooled treats and let set before serving.
Notes
- For Extra Banana Flavor: Mix ½ teaspoon banana extract into the marshmallow mixture.
- For a Crunchier Bite: Add extra crushed vanilla wafers on top before the treats set.
- For a Healthier Alternative: Use honey and peanut butter instead of marshmallows.
- Prep Time: 10 minutes
- Cook Time: 5 minutes
- Category: Dessert, No-Bake Treats
- Method: No-Bake
- Cuisine: American