
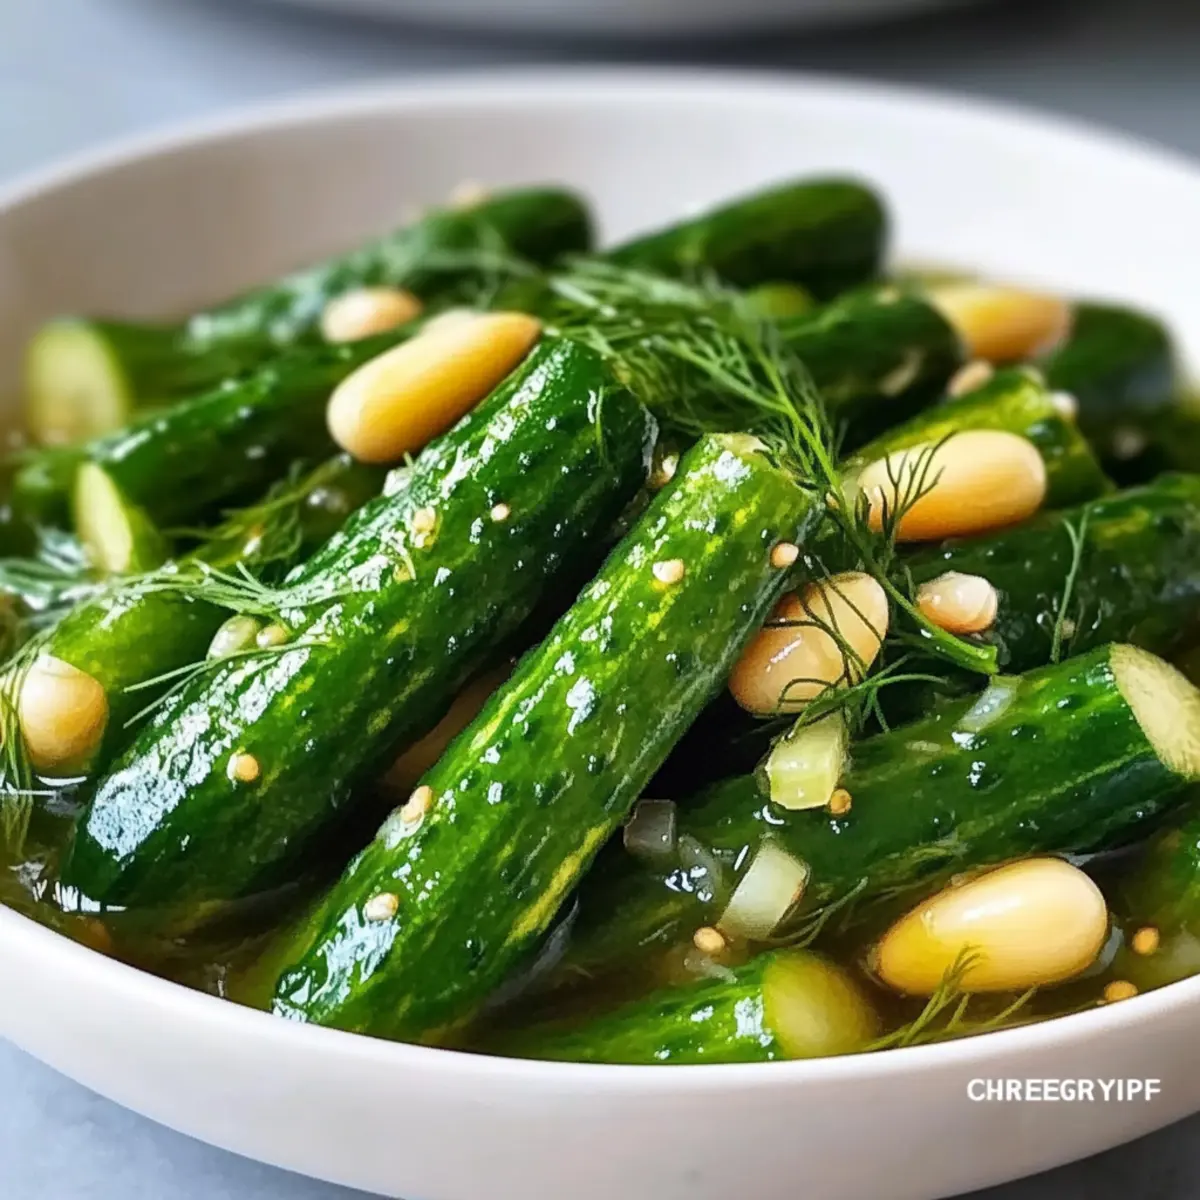
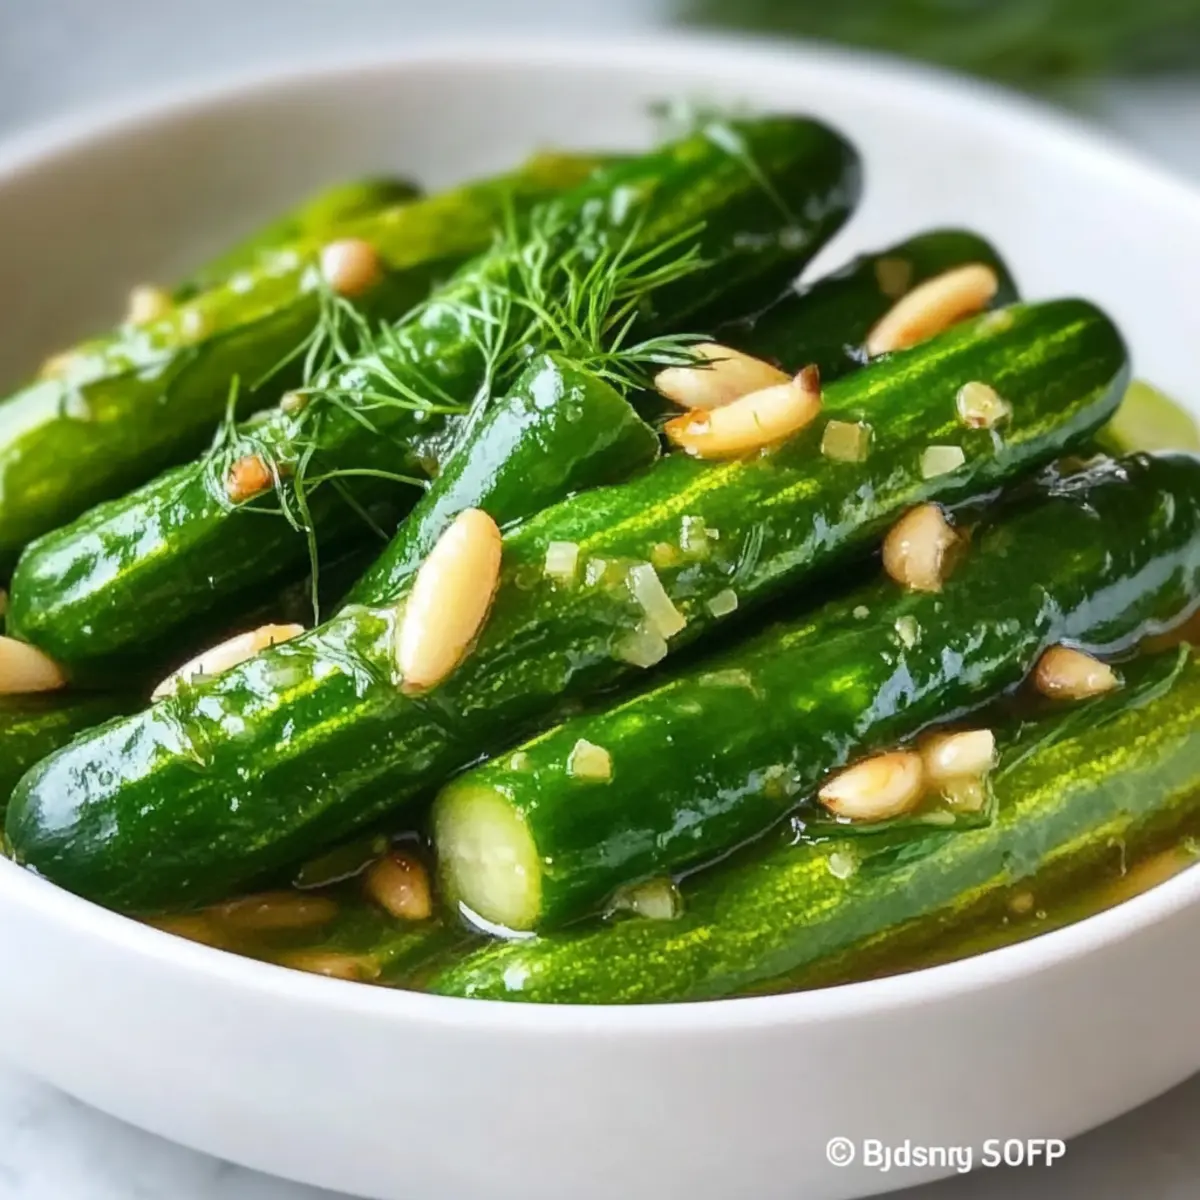
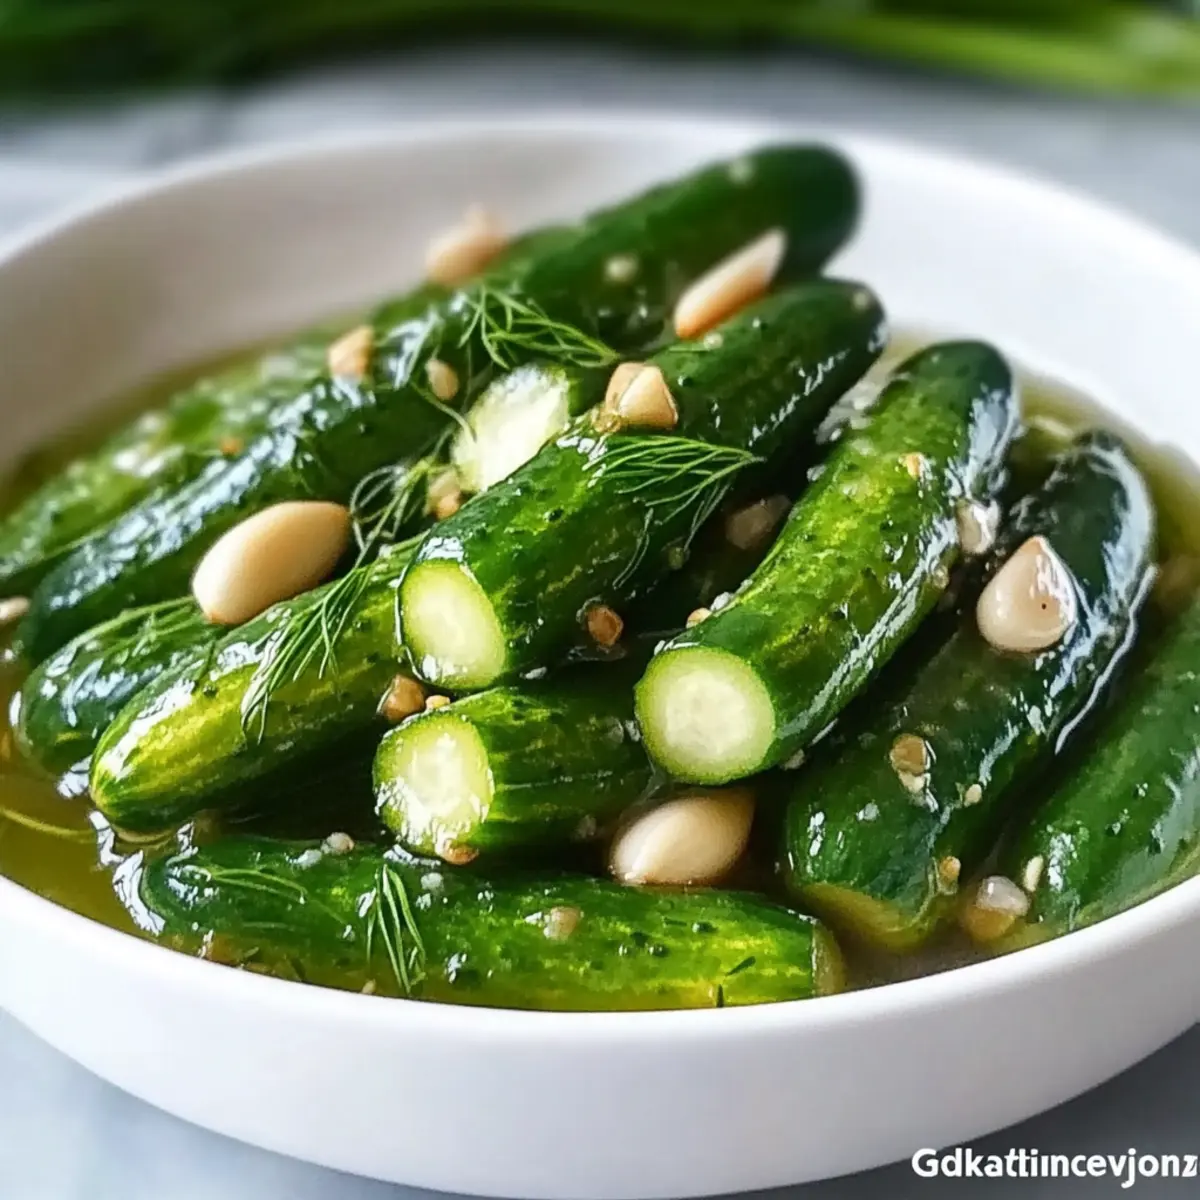
As I stood in my kitchen, the fragrant aroma of fresh garlic mingled with dill wafted through the air, instantly transporting me to summertime picnics of my childhood. Today, I’m excited to share my recipe for Classic Garlic Dill Spears—quick refrigerator pickles that are perfect for elevating your meals. With just a dash of vinegar and a bit of crunch, these homemade pickles come together in a flash, making them an ideal low-calorie snack or the perfect condiment for your next gathering. In a mere 15 minutes, you’ll have a jar full of tangy deliciousness, ready to develop even more flavor overnight. Curious about how to bring this crispy delight into your kitchen? Let’s dive into making these delectable garlic dill spears together!
Why Are These Pickles a Must-Try?
Simplicity at its finest: You can whip up these Classic Garlic Dill Spears in just 15 minutes! No need for complicated canning processes; this quick pickle recipe is straightforward and easy to follow.
Incredible flavor payoff: The combination of fresh garlic, zesty dill, and vinegar creates a bold taste that elevates any dish. Imagine them alongside your favorite sandwiches!
Versatile usage: These crispy pickles are perfect for cheeseboards, burgers, and wraps or even as a low-calorie snack on their own. Their versatility knows no bounds.
Zero waste goodness: Use leftover brine for salad dressings or marinades, maximizing your ingredients! Don’t miss out on the delicious possibilities of this sustainable approach.
Total crowd-pleaser: Whether you’re hosting a BBQ or just craving a snack, these pickles will impress your guests and satisfy your cravings. Try pairing them with homemade dishes like Hawaiian Banana Bread for a complete meal!
Classic Garlic Dill Spears Ingredients
• Perfect for quick pickles!
For the Pickles
• Cucumbers – 1 lb (450g) of Persian or Kirby cucumbers ensures a crunchy texture that’s essential for great pickles.
• Garlic – 6 cloves (18g) smashed releases rich flavor, enhancing the overall taste of the brine.
• Fresh Dill – 1/2 cup (15g) adds a fragrant herbaceous note; substitute with dill seeds if fresh isn’t on hand.
For the Brine
• White Distilled Vinegar – 1 cup (240ml) creates the tangy signature taste that preserves the cucumbers perfectly.
• Filtered Water – 1 cup (240ml) balances the acidity of the vinegar for a harmonious flavor.
• Sea Salt – 1 tbsp (18g) vital for flavor enhancement; avoid iodized salts that can alter the pickling process.
• Granulated Sugar – 1 tsp (4g) helps balance the brine’s acidity; feel free to skip for a sugar-free version.
• Black Peppercorns – 1 tsp (2g) introduces subtle spice and depth to the pickle brine.
• Yellow Mustard Seeds – 1 tsp (3g) enhances the overall flavor; interchange with celery seeds for a twist.
• Red Pepper Flakes – 1/2 tsp (1g) adds a gentle heat; totally optional for those who enjoy a spicy kick.
Step‑by‑Step Instructions for Classic Garlic Dill Spears
Step 1: Prepare the Cucumbers
Begin by washing 1 pound of Persian or Kirby cucumbers thoroughly under cool water. Trim off 1/8 inch from both ends to prevent softness during pickling. Next, slice each cucumber lengthwise into quarters, then cut into uniform spear shapes. Aim for a consistent thickness to ensure even pickling, making your classic garlic dill spears appealing and enjoyable.
Step 2: Pack the Jars
Take two pint-sized glass jars and pack the cucumber spears tightly into each, leaving no gaps. This ensures that the pickles develop maximum flavor. As you fill the jars, pay attention to packing them snugly, but not so tightly that they break. This step is crucial in creating authentic classic garlic dill spears.
Step 3: Add Flavorful Ingredients
Divide the smashed garlic, fresh dill, black peppercorns, yellow mustard seeds, and red pepper flakes equally between the two jars. As you layer these tasty ingredients over the cucumbers, the enticing aroma will fill the air, giving you a hint of the delightful pickles that await. Ensure even distribution for balanced flavors in your classic garlic dill spears.
Step 4: Make the Brine
In a medium saucepan, combine 1 cup of white distilled vinegar, 1 cup of filtered water, 1 tablespoon of sea salt, and 1 teaspoon of granulated sugar. Heat the mixture over medium heat, stirring gently until the salt and sugar dissolve, which should take about 2-3 minutes. Be mindful not to boil the brine; you want to keep it warm while maintaining that crispness in your classic garlic dill spears.
Step 5: Cool and Pour the Brine
Once dissolved, remove the saucepan from the heat and let the brine cool for about 5 minutes. This cooling step is important to avoid cooking the cucumbers. After it cools, carefully pour the brine over the packed cucumber spears in the jars, ensuring that they are fully submerged. The vibrant mixture should cover the cucumbers completely for the best infusion of flavor in your classic garlic dill spears.
Step 6: Seal and Refrigerate
After pouring the brine, gently tap the jars on the counter to release any air bubbles trapped within. Seal the jars tightly with their lids and place them in the refrigerator. For optimal flavor, let your classic garlic dill spears marinate for at least 24 hours, although waiting 48 hours will yield an even bolder taste. The anticipation will be worth it!
Step 7: Enjoy and Store
Once the waiting period is over, your classic garlic dill spears will be ready to enjoy! These pickles can be stored in the fridge for up to 4 weeks, ensuring you have a deliciously tangy snack on hand. Don’t forget to use any leftover brine for salad dressings or marinades—maximizing flavor and minimizing waste in your kitchen.

Make Ahead Options
These Classic Garlic Dill Spears are a fantastic choice for meal prep! You can slice the cucumbers and pack them into jars up to 24 hours ahead, ensuring you have a healthy, zesty snack ready when you need it. Alternatively, prepare the flavorful brine in advance and store it separately in the refrigerator for about 3 days. Just combine the brine with the packed cucumbers at the time of serving. To maintain that delightful crunch, ensure the brine is cool before pouring it over the cucumbers. When you’re ready to enjoy, simply let them marinate in the fridge for a minimum of 24 hours to develop the full flavor, spicing up your meals effortlessly!
Classic Garlic Dill Spears Makeover
Feel free to let your creativity shine with these delightful variations on the classic pickle recipe!
- Spicy Twist: Add fresh jalapeños or sliced habaneros for a fiery kick that pairs perfectly with creamy dips.
- Herbal Delight: Substitute fresh dill with thyme or oregano to explore different flavors while keeping the essence of pickling.
- Sweet Heat: Incorporate honey or agave syrup for a unique sweet-and-spicy twist; just a small drizzle changes everything!
- Zesty Kick: Add slices of ginger for an unexpected zing, highlighting a sweet yet savory profile in your pickles.
- Crunchy Add-ins: Toss in sliced carrots or radishes for added crunch and vibrant color; they make this snack even more exciting.
- Smoky Flavor: Try smoky paprika or liquid smoke in the brine for a deeper flavor that will surprise your taste buds.
- Citrusy Zing: Add some lemon or lime zest to brighten up the brine, enhancing both aroma and flavor in every bite.
- Garlic Variation: For more garlic goodness, roast the cloves before adding them to achieve a mellower, caramelized flavor profile.
By exploring these variations, you can enjoy a personal touch with every batch! For more creative ideas to elevate your meals, check out my recipes for Hawaiian Banana Bread or indulgent Snickerdoodle Bundt Twist.
What to Serve with Classic Garlic Dill Spears
Elevate your meal experience with vibrant flavors that complement the sharp, tangy crunch of your homemade pickles.
- Creamy Potato Salad: Perfectly seasoned with herbs, this dish balances the tangy punch of the pickles, making it a picnic favorite.
- Grilled Hamburgers: Juicy, smoky burgers are wonderfully enhanced by these pickles, adding a refreshing crunch to every bite.
- Classic Reuben Sandwich: The garlic dill spears provide an irresistible contrast to the richness of the corned beef and melted cheese.
- Charcuterie Board: Place your pickles among cured meats, cheeses, and olives for a visually stunning and delicious presentation.
- Tangy Coleslaw: The crisp texture and tang of the coleslaw harmonize beautifully with the pickles for a satisfying crunch in every mouthful.
- Homemade Tacos: Whether made with chicken, beef, or beans, the pickles add a refreshing zing that cuts through savory flavors deliciously.
- Cold Beverages: Pair with a light beer or a refreshing lemonade to cleanse your palate and enhance the overall dining experience.
- Chocolate Chip Cookies: Surprisingly, the sweetness of fresh-baked cookies contrasts delightfully with the sharpness of the pickles for a unique dessert combo.
- Deviled Eggs: Topped with a slice of pickle, these appetizers elevate the classic dish, bringing a delightful contrast to the creamy filling.
How to Store and Freeze Classic Garlic Dill Spears
Fridge: Store your classic garlic dill spears in airtight jars in the refrigerator for up to 4 weeks. This keeps them crisp and flavorful while preventing spoilage.
Freezer: Avoid freezing these pickles, as the texture will compromise when thawed, resulting in mushy spears rather than the desired crunch.
Reheating: There’s no need to reheat your classic garlic dill spears. Simply enjoy them straight from the fridge as a tangy snack or condiment!
Leftover Brine: Don’t toss out the brine! It can be used for salad dressings or marinades, ensuring you maximize your ingredients and flavor.
Expert Tips for Classic Garlic Dill Spears
- Cucumber Choice: Use fresh, firm cucumbers like Persian or Kirby for the best crunch; softer cucumbers lead to mushy pickles.
- Garlic Technique: Smash the garlic rather than slicing it to release maximum flavor into your brine, enhancing the overall taste.
- Brine Temperature: Allow the brine to cool before pouring; hot brine can cook the cucumbers and compromise their crispness.
- Packing Smartly: Don’t over-pack the jars; snugly fit the cucumber spears without forcing them, which can cause breakage.
- Flavor Development: For deeper flavor, let your pickles marinate for 48 hours instead of the minimum 24 hours—worth the wait for your classic garlic dill spears!
Classic Garlic Dill Spears Recipe FAQs
How do I choose the best cucumbers for this recipe?
Absolutely! For the best results, I recommend using fresh, firm cucumbers like Persian or Kirby. Look for ones that are free of dark spots or soft areas—these are signs of ripeness and freshness. The better the quality of your cucumbers, the crunchier and tastier your pickles will be.
How should I store my Classic Garlic Dill Spears?
For optimal freshness, store your classic garlic dill spears in airtight jars in the refrigerator. They’ll stay deliciously crisp for up to 4 weeks. Just make sure the lids are sealed tight to prevent any air from compromising their flavor.
Can I freeze Classic Garlic Dill Spears for later?
No, I do not recommend freezing these pickles. Freezing alters the texture of the cucumbers, resulting in mushy spears when thawed. It’s best to enjoy them fresh from the fridge for that perfect crunch!
What if my pickles turn out too soggy?
Very! If you find that your classic garlic dill spears are too soft, next time ensure you’re using firm cucumbers and properly preparing them by trimming only the blossom end. It’s important to pack them snugly in the jars without overcrowding, and let the brine cool before it touches the cucumbers.
Is there a sugar-free option for the brine?
Absolutely! If you prefer a sugar-free version, simply omit the granulated sugar in the brine. The pickles will still achieve a fantastic taste from the vinegar and garlic, and you won’t miss that extra sweetness!
Can my pets consume these pickles?
It’s best to keep these pickles away from pets. The high sodium content in the brine can be harmful to them. If you’re looking for pet-friendly snacks, consider treating them with plain cucumber slices instead!
Classic Garlic Dill Spears: Crunchy Homemade Pickles Delight
Ingredients
Equipment
Method
- Wash 1 pound of cucumbers thoroughly under cool water. Trim off 1/8 inch from both ends and slice each cucumber lengthwise into quarters.
- Pack cucumber spears tightly into two pint-sized glass jars, leaving no gaps.
- Divide smashed garlic, fresh dill, black peppercorns, yellow mustard seeds, and red pepper flakes between the two jars.
- Combine the vinegar, water, sea salt, and sugar in a saucepan. Heat over medium until dissolved.
- Remove from heat and let the brine cool for about 5 minutes before pouring it over the cucumbers in the jars.
- Seal the jars with lids and refrigerate for at least 24 hours for optimal flavor.
- Your classic garlic dill spears are now ready to enjoy. They can be stored in the fridge for up to 4 weeks.