
Introduction to Crispy Chilli Chicken
There’s something magical about the aroma of fried chicken wafting through the kitchen. It takes me back to family gatherings, where laughter and good food filled the air. Crispy Chilli Chicken is not just a dish; it’s a celebration of flavors that can turn any ordinary day into something special. Whether you’re looking for a quick solution after a long day or a dish to impress your friends at game night, this recipe has you covered. With its spicy kick and crunchy texture, it’s bound to become a favorite in your home!
Why You’ll Love This Crispy Chilli Chicken
This Crispy Chilli Chicken is a game-changer for busy weeknights. It’s quick to whip up, taking just 40 minutes from start to finish. The combination of tender chicken and a zesty sauce creates a flavor explosion that will have everyone asking for seconds. Plus, it’s versatile enough to serve as a main dish or a crowd-pleasing appetizer. Trust me, once you try it, you’ll be hooked!
Ingredients for Crispy Chilli Chicken
Gathering the right ingredients is the first step to culinary success. For this Crispy Chilli Chicken, you’ll need a mix of pantry staples and a few flavorful additions. Here’s what you’ll need:
- Boneless, skinless chicken thighs: Tender and juicy, these are perfect for frying and soak up flavors beautifully.
- All-purpose flour: This forms the crispy coating that gives the chicken its crunch.
- Garlic powder: Adds a savory depth that elevates the dish.
- Onion powder: Complements the garlic and enhances the overall flavor profile.
- Smoked paprika: Brings a subtle smokiness and vibrant color to the batter.
- Sea salt: Essential for seasoning and enhancing the natural flavors of the chicken.
- Freshly ground black pepper: Adds a touch of heat and complexity.
- Baking soda: Helps the coating become extra crispy when fried.
- Egg: Binds the flour to the chicken, creating a delicious crust.
- Buttermilk: Tenderizes the chicken and adds a tangy flavor that balances the spices.
- Canola oil: Ideal for frying due to its high smoke point, ensuring a crispy finish.
- Teriyaki sauce: Provides a sweet and savory base for the zesty sauce.
- Maple syrup: Adds a hint of sweetness that complements the spice.
- Apple cider vinegar: Brings acidity to balance the flavors and enhance the sauce.
- Sriracha: For those who love heat, adjust this to your taste for a spicy kick.
- Toasted sesame oil: Adds a nutty aroma and richness to the dish.
- Green onions: Finely chopped for garnish, they add freshness and a pop of color.
- Chili flakes: A finishing touch for those who crave extra spice.
For exact measurements, check the bottom of the article where you can find everything listed for easy printing. Happy cooking!
How to Make Crispy Chilli Chicken
Now that you have all your ingredients ready, let’s dive into the fun part—making this Crispy Chilli Chicken! Follow these simple steps, and you’ll be on your way to a delicious meal that’s sure to impress.
Step 1: Prepare the Coating
Start by grabbing a mixing bowl. In it, whisk together the all-purpose flour, garlic powder, onion powder, smoked paprika, sea salt, black pepper, and baking soda. This seasoned flour is the secret to that irresistible crunch. Make sure it’s well combined; every piece of chicken deserves a flavorful coat!
Step 2: Mix the Buttermilk and Egg
In a separate bowl, crack the egg and pour in the buttermilk. Whisk them together until smooth. This mixture will help the flour stick to the chicken, creating that perfect crispy layer. Plus, the buttermilk adds a tangy flavor that balances the spices beautifully.
Step 3: Coat the Chicken
Now, it’s time to get your hands a little messy! Dip each piece of chicken into the buttermilk mixture, ensuring it’s fully coated. Then, roll it in the seasoned flour, pressing gently to make sure it sticks. This double-dipping technique is key for achieving that crunchy texture we all love in crispy chicken bites.
Step 4: Fry the Chicken
Heat the canola oil in a large frying pan over medium-high heat. You’ll know it’s ready when the oil shimmers. Carefully add the breaded chicken pieces in small batches. Fry them for about 4-5 minutes on each side until they turn golden brown and crispy. Don’t overcrowd the pan; this ensures even cooking and that perfect crunch!
Step 5: Make the Sauce
While the chicken is frying, let’s whip up that zesty sauce. In a bowl, mix together the teriyaki sauce, maple syrup, apple cider vinegar, sriracha, and toasted sesame oil. Adjust the sriracha to your heat preference. This sauce is what takes your crispy chicken to the next level, adding a sweet and spicy kick!
Step 6: Combine and Serve
Once the chicken is cooked, transfer it to a plate lined with paper towels to absorb any excess oil. Then, drizzle the spicy sauce over the fried chicken and toss gently to coat. Finish with a sprinkle of chopped green onions and chili flakes for that extra flair. Serve it hot, and watch everyone dig in!
Tips for Success
- For extra crunch, try double frying the chicken. Fry once, let it rest, then fry again for a few minutes.
- Ensure the oil is hot enough before adding the chicken to avoid sogginess.
- Use a thermometer to check the oil temperature; it should be around 350°F for perfect frying.
- Let the chicken rest on paper towels to absorb excess oil for a crispier finish.
- Feel free to adjust the spice level in the sauce to suit your taste!
Equipment Needed
- Large frying pan: A cast-iron skillet works great for even heat distribution.
- Mixing bowls: Use any size, but a medium bowl is perfect for the buttermilk mixture.
- Whisk: Essential for mixing the batter and sauce smoothly.
- Slotted spoon: Ideal for removing the chicken from the oil.
- Paper towels: Handy for draining excess oil from the fried chicken.
Variations
- Spicy Garlic Crispy Chilli Chicken: Add minced garlic to the buttermilk mixture for an extra punch of flavor.
- Honey Soy Glaze: Substitute teriyaki sauce with a mix of honey and soy sauce for a sweeter twist.
- Gluten-Free Option: Use gluten-free flour instead of all-purpose flour for a gluten-free crispy coating.
- Vegetarian Version: Replace chicken with cauliflower florets for a delicious plant-based alternative.
- Herb-Infused Chicken: Mix dried herbs like oregano or thyme into the seasoned flour for added aroma and taste.
Serving Suggestions
- Serve with steamed rice: The fluffy rice soaks up the zesty sauce beautifully.
- Pair with a crisp salad: A fresh green salad balances the richness of the chicken.
- Enjoy with cold beverages: A chilled beer or iced tea complements the spice perfectly.
- Garnish with lime wedges: A squeeze of lime adds a refreshing zing.
FAQs about Crispy Chilli Chicken
Can I make Crispy Chilli Chicken ahead of time?
Absolutely! You can prepare the chicken and coat it in the flour mixture ahead of time. Just store it in the fridge until you’re ready to fry. This way, you can enjoy fresh, crispy chicken without the last-minute rush.
What can I serve with Crispy Chilli Chicken?
This dish pairs wonderfully with steamed rice, a fresh salad, or even some crispy fries. The zesty sauce complements a variety of sides, making it a versatile choice for any meal.
How can I adjust the spice level?
If you prefer a milder flavor, reduce the amount of sriracha in the sauce. You can also omit the chili flakes for garnish. For those who love heat, feel free to add more sriracha or even some chopped fresh chilies!
Can I bake Crispy Chilli Chicken instead of frying?
Yes! For a lighter option, you can bake the coated chicken at 425°F for 20-25 minutes. Just turn them halfway through to ensure they get crispy on all sides. It’s a great way to enjoy the flavors without the extra oil.
What’s the best way to store leftovers?
Store any leftover Crispy Chilli Chicken in an airtight container in the fridge for up to 3 days. To reheat, pop them in the oven for a few minutes to regain that crispy texture. Enjoy your delicious leftovers!
Final Thoughts
Cooking Crispy Chilli Chicken is more than just preparing a meal; it’s about creating moments. The joy of biting into that crunchy, spicy chicken, paired with the laughter of friends and family, is truly special. This dish brings warmth to the table, making it perfect for gatherings or cozy nights in. Plus, the satisfaction of mastering a recipe that impresses everyone is unbeatable. So, roll up your sleeves, embrace the flavors, and let this Crispy Chilli Chicken become a staple in your kitchen. Trust me, it’s a culinary adventure you won’t want to miss!
PrintCrispy Chilli Chicken: Unleash Flavor with This Recipe!
- Total Time: 40 minutes
- Yield: 4 servings
- Diet: Gluten Free
Description
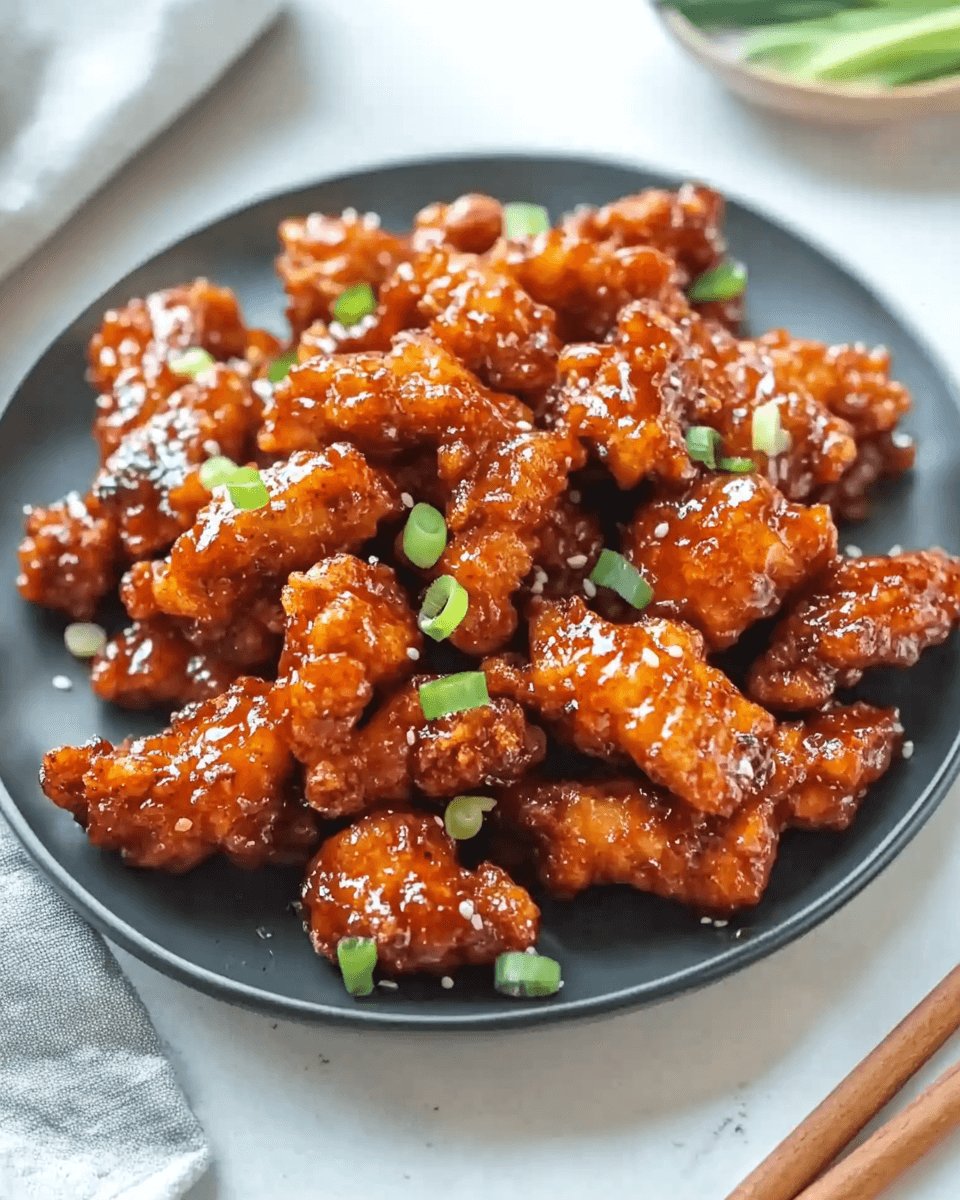
Crispy Chilli Chicken is a deliciously spicy and crunchy dish made with tender chicken bites coated in a flavorful batter and tossed in a zesty sauce.
Ingredients
- 1 pound boneless, skinless chicken thighs, chopped into small chunks
- 1 cup all-purpose flour
- 1 teaspoon garlic powder
- 1 teaspoon onion powder
- 1 teaspoon smoked paprika
- 1/2 teaspoon sea salt
- 1/2 teaspoon freshly ground black pepper
- 1/2 teaspoon baking soda
- 1 large egg
- 1/2 cup buttermilk
- 1/4 cup canola oil (for frying)
- 1/4 cup teriyaki sauce
- 2 tablespoons maple syrup
- 2 tablespoons apple cider vinegar
- 1 tablespoon sriracha (adjust to taste)
- 1 tablespoon toasted sesame oil
- 2 green onions, finely chopped (for garnish)
- Chili flakes (for garnish)
Instructions
- In a mixing bowl, whisk together the flour, garlic powder, onion powder, smoked paprika, sea salt, black pepper, and baking soda.
- In a separate bowl, combine the egg and buttermilk, mixing well.
- Dip each chicken piece into the buttermilk mixture, then roll it in the seasoned flour, ensuring an even coating.
- In a large frying pan, heat the canola oil over medium-high heat.
- Once the oil is shimmering, add the breaded chicken pieces in small batches, frying for about 4-5 minutes on each side until golden brown and crispy.
- Transfer the cooked chicken to a plate lined with paper towels to absorb excess oil.
- In another bowl, mix together the teriyaki sauce, maple syrup, apple cider vinegar, sriracha, and toasted sesame oil.
- Drizzle the spicy sauce over the fried chicken and toss gently to coat.
- Finish by sprinkling chopped green onions and chili flakes on top before serving.
Notes
- For added crunch, consider a double frying technique: fry once, let rest, and fry again for a few minutes.
- For a lighter option, bake the coated chicken at 425°F for 20-25 minutes, turning halfway, until crispy and fully cooked.
- Prep Time: 20 minutes
- Cook Time: 20 minutes
- Category: Main Course
- Method: Frying
- Cuisine: Asian
Nutrition
- Serving Size: 1 serving
- Calories: 360
- Sugar: 10g
- Sodium: 600mg
- Fat: 19g
- Saturated Fat: 3g
- Unsaturated Fat: 16g
- Trans Fat: 0g
- Carbohydrates: 22g
- Fiber: 1g
- Protein: 26g
- Cholesterol: 100mg