
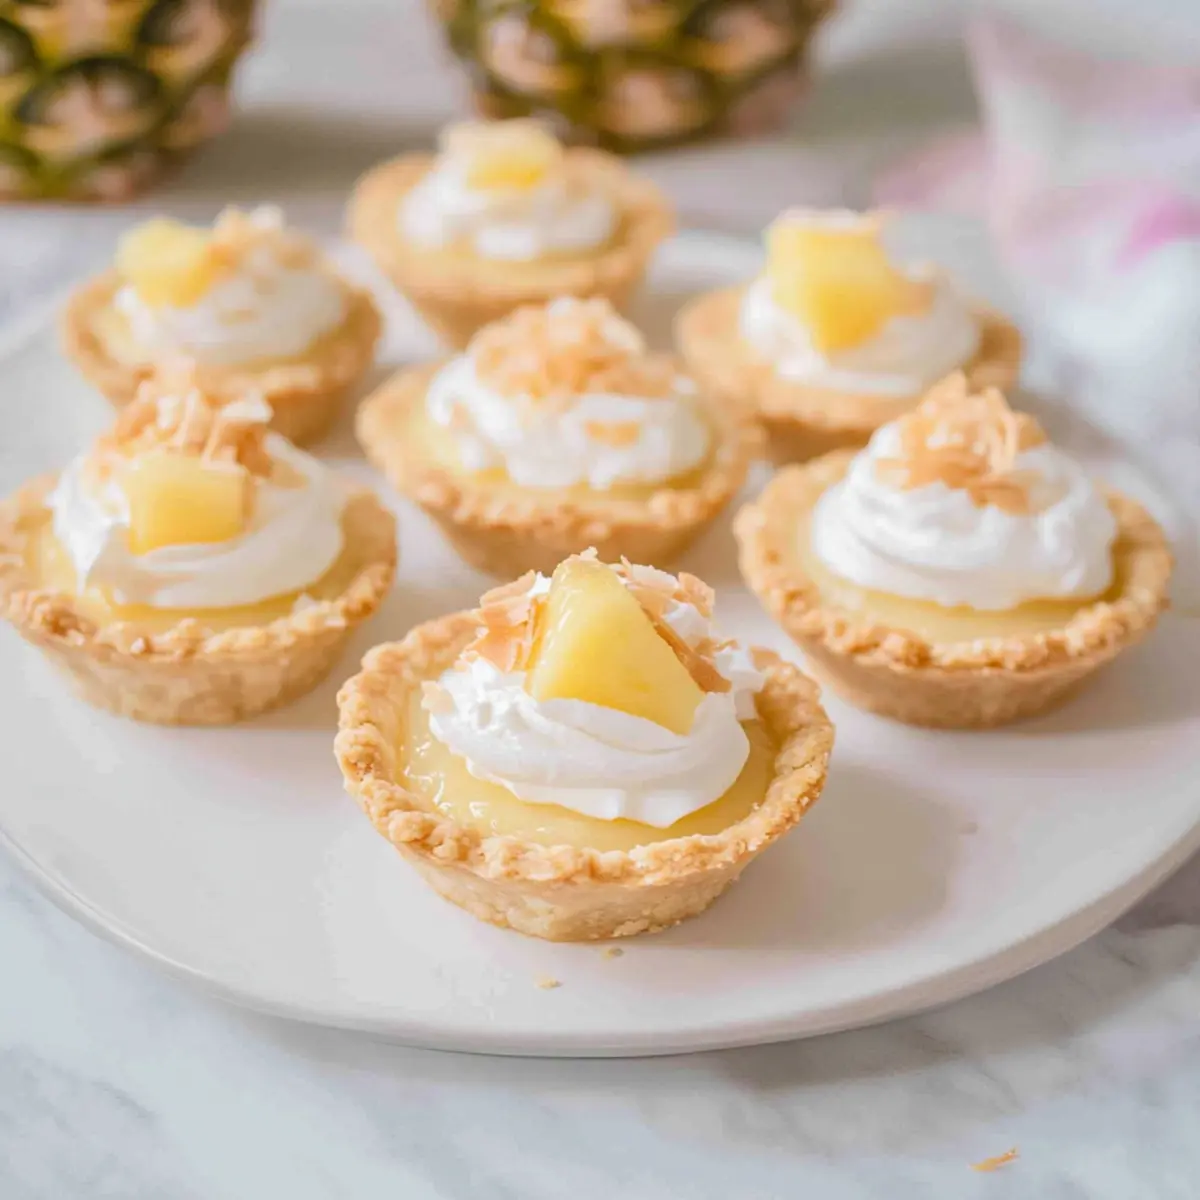
Caught in the whirlwind of summer barbecues and poolside gatherings, I found myself craving a taste of the islands. That’s when I stumbled upon the delights of Hawaiian Pineapple Tarts—a dreamy little bite that’s as fun to make as it is to share. These mini desserts are not only easy to prepare, but they also pack a tropical punch that will transport you straight to sandy beaches. Perfect for any potluck or casual get-together, these tarts feature a delightful combination of sweet, creamy filling and a flaky crust that’s simply irresistible. And the best part? They’re a breeze to whip up, making them an ideal treat to impress your friends without spending a whole day in the kitchen. Curious to dive into this refreshing recipe? Let’s bake some sunshine!

Why Are Hawaiian Pineapple Tarts Unforgettable?
Tropical Flavors: With a luscious creamy filling and sweet bursts of pineapple, these tarts capture the essence of summer.
Quick to Prepare: Perfect for those busy days—these treats come together in no time, making them ideal for last-minute potluck contributions.
Crowd-Pleasing: Their bite-sized nature makes sharing easy, ensuring everyone at your BBQ will be delighted!
Versatile Options: Feel free to swap in coconut cream or gluten-free shells for tailored dietary needs. Make each tart your own!
Fun and Festive: Not just a dessert; these tarts bring cheerful Hawaiian vibes to your gathering, making every bite a celebration.
Once you’ve enjoyed these delightful tarts, don’t forget to try my other tropical favorites like Hawaiian Banana Bread and Pineapple Upside Down Cheesecakes.
Hawaiian Pineapple Tarts Ingredients
For the Tart Shells
- Mini Tart Shells – Using pre-made shells makes this recipe a cinch, saving you valuable prep time!
For the Creamy Filling
- Condensed Milk – This ingredient lends a rich sweetness; for a lighter touch, try substituting with evaporated milk.
- Sour Cream – Adds a delightful tang; Greek yogurt is a perfect alternative if you’re looking for a twist.
- Pineapple Juice (7 tbsp) – Enhances the tropical flavor and moisture; fresh juice can elevate the taste beyond canned options.
- Diced Pineapple (8-10 pieces) – A burst of natural sweetness in every bite; use fresh pineapple for the best flavor.
For the Topping
- Shredded Coconut – Toasting this before topping adds an irresistible crunch; watch closely to avoid burning!
- Whipped Cream – A light and creamy garnish; coconut cream can be a delightful dairy-free substitution.
Now that you have the ingredients, get ready to embark on a tropical baking adventure with these Hawaiian Pineapple Tarts!
Step‑by‑Step Instructions for Hawaiian Pineapple Tarts
Step 1: Preheat the Oven
Begin by preheating your oven to 375°F (190°C). This ensures that your environment is ready when you place the mini tart shells in, creating the perfect crisp texture. Meanwhile, gather your baking sheet, as you’ll be baking the tart shells once the oven reaches the desired temperature.
Step 2: Bake the Tart Shells
Place the pre-made mini tart shells evenly on the baking sheet and slide them into the preheated oven. Bake for about 10 minutes or until they are lightly golden and fragrant. Keep an eye on them to avoid over-baking— you want a firm base to hold your Hawaiian Pineapple Tarts.
Step 3: Cool the Shells
Once baked, carefully remove the tart shells from the oven and let them cool on a wire rack. This cooling step is essential, as it prevents moisture from making the crust soggy when filled. While waiting, take a moment to prepare the filling ingredients.
Step 4: Prepare the Filling
In a large mixing bowl, combine the condensed milk, sour cream, and pineapple juice. Using a whisk, blend these ingredients together until they form a smooth, creamy mixture. This flavorful filling is the heart of your Hawaiian Pineapple Tarts, so mix until fully incorporated.
Step 5: Add Diced Pineapple
Gently fold in the diced pineapple pieces to the creamy mixture. This adds delightful bursts of sweetness and texture to your filling. Be careful not to over-mix; you want those pineapple pieces to maintain their shape, bringing extra juiciness to each tart.
Step 6: Fill the Tart Shells
With the tart shells cooled, it’s time to fill them! Spoon the pineapple mixture into each tart shell, filling them generously but avoiding overflow. The creamy filling will bake beautifully, creating a delicious balance with the flaky shell while ensuring each Hawaiian Pineapple Tart is packed with flavor.
Step 7: Bake Again
Return the filled tarts to the oven and bake for an additional 7 minutes. Keep an eye on them during this time; they should puff up slightly and turn a lovely golden color. This step allows the filling to set and enhances the combined flavors.
Step 8: Cool and Chill
After baking, remove the tarts from the oven and let them cool at room temperature. Then, transfer the cooled tarts to the refrigerator and chill for at least 1 hour. This chilling step helps the flavors meld and gives you that refreshing dessert experience when serving.
Step 9: Toast the Coconut Topping
While the tarts chill, prepare the topping by toasting the shredded coconut. In a skillet over medium heat, spread the coconut evenly and toast for 2-3 minutes, stirring frequently until golden brown. This adds a crunchy, aromatic layer to your Hawaiian Pineapple Tarts.
Step 10: Garnish the Tarts
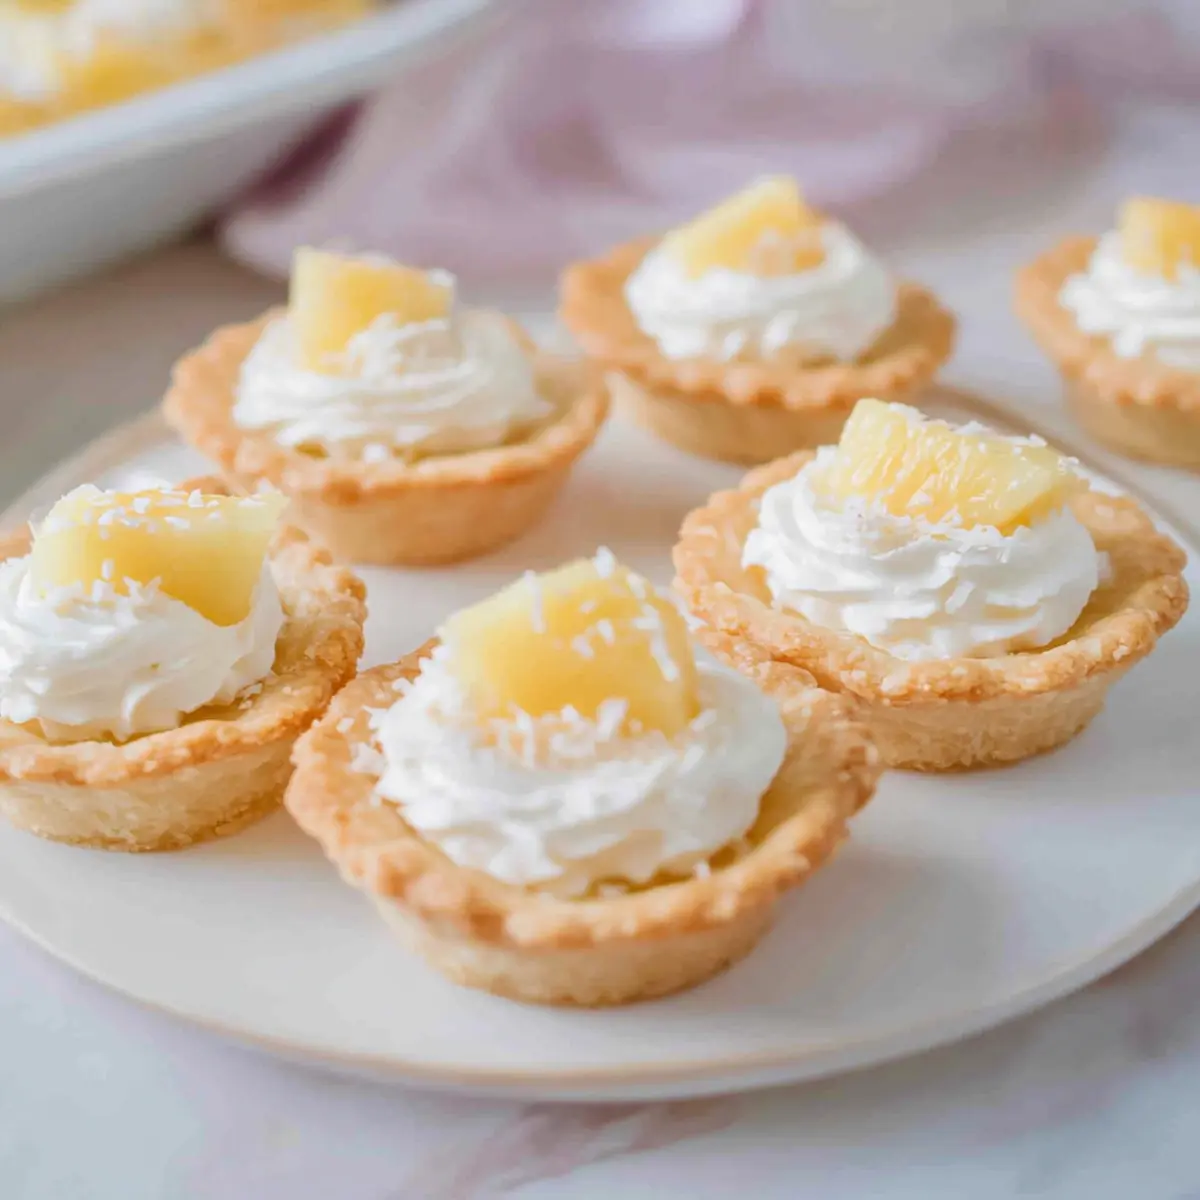
Just before serving, top each chilled tart with a dollop of whipped cream, a sprinkle of toasted coconut, and a tiny piece of pineapple for a delightful finishing touch. This not only enhances the flavor but also creates an eye-catching presentation for your guests.
How to Store and Freeze Hawaiian Pineapple Tarts
Refrigerator: Store Hawaiian Pineapple Tarts in a sealed container in the refrigerator for up to 3 days to maintain their freshness and flavor.
Freezer: For longer storage, freeze the tarts in an airtight container for up to 2 months. To enjoy later, simply thaw overnight in the fridge.
Room Temperature: Avoid leaving tarts out at room temperature for more than 2 hours, as the creamy filling can spoil.
Reheating: If you prefer warm tarts, reheat in the oven at 350°F for about 5-7 minutes, ensuring the filling stays creamy.
What to Serve with Hawaiian Pineapple Tarts?
Delight your guests by creating a vibrant meal experience that pairs beautifully with these tropical treats.
- Fruit Salad: A refreshing mix of summer fruits like watermelon and mango enhances the tropical vibe and offers a light complement to the tarts.
- Grilled Chicken Skewers: Juicy, marinated chicken skewers add a savory balance and are perfect for those summer BBQs where flavors collide blissfully.
- Coconut Rice: This subtly sweet and fragrant side mirrors the coconut topping of the tarts, creating a cohesive tropical theme for your gathering.
- Hibiscus Iced Tea: The floral notes of this tea are refreshing and match the tartness of the pineapple, making it a delightful drink for hot days.
- Pineapple-Orange Smoothie: Serve this thick and creamy smoothie as a fun drink that echoes the flavors of the dessert, perfect for a kids’ table or as an adult refresher.
- Key Lime Pie: An alternative dessert, its zesty flavor provides a tart contrast to the sweet pineapple, ensuring a well-rounded dessert table.
- Grilled Vegetables: Marinated zucchini, bell peppers, and eggplant bring a colorful and healthy component to your meal, pairing deliciously with the tarts.
- Chilled Coconut Soup: Creamy and cooling, this light soup is an unexpected but fantastic partner next to the sweet, rich Hawaiian Pineapple Tarts.
Hawaiian Pineapple Tarts: Endless Variations
Feel free to play with this recipe and let your creativity shine through! With just a few tweaks, you can elevate these tropical treats to match your taste buds.
- Mango Twist: Substitute diced mango for the pineapple to experience a different tropical explosion of flavor.
- Gluten-Free Option: Use gluten-free mini tart shells to ensure everyone can enjoy this delightful treat.
- Vegan Delight: Replace condensed milk with coconut milk and use coconut whipped cream for a scrumptiously dairy-free alternative.
- Coconut Cream Swirl: Add a dollop of coconut cream to the filling for an extra layer of tropical richness.
- Extra Zing: Mix in some lime zest into the filling to enhance the tropical vibe with a refreshing citrus note.
- Spicy Kick: Incorporate a pinch of cayenne pepper into the filling for a surprising and delightful heat that balances the sweetness.
- Nutty Crunch: Add finely chopped macadamia nuts to the topping for an inviting crunch that mirrors the Hawaiian landscape.
- Berry Blend: Swap in diced strawberries or blueberries for an unexpected yet delicious fruity combination that maintains the spirit of summer.
Once you’ve enjoyed these delightful tarts, don’t forget to try my other tropical favorites like Fried Pineapple Coconut and Pineapple Strawberry Swirled.
Make Ahead Options
These Hawaiian Pineapple Tarts are a fantastic option for those who love to prepare meals in advance! You can make the tart shells up to 24 hours ahead of time; simply bake and cool them before storing in an airtight container at room temperature. The filling can also be made up to 3 days in advance; just combine the ingredients and refrigerate it (this actually enhances the flavors!). When you’re ready to serve, fill the tart shells with the chilled mixture and bake for an additional 7 minutes to get that delightful puff. This ensures you have tasty, crowd-pleasing desserts with minimal last-minute effort!
Tips for the Best Hawaiian Pineapple Tarts
-
Cool Shells First: Allow the tart shells to cool completely before filling them. This prevents a soggy bottom and keeps the tarts crisp.
-
Choose Ripe Pineapple: Use fresh, ripe pineapple for the sweetest flavor. Avoid canned pineapple, as it can be less flavorful than fresh fruit.
-
Toast Coconut Carefully: Monitor the shredded coconut while toasting; it can go from golden to burnt quickly. Perfectly toasted coconut adds great texture to your Hawaiian Pineapple Tarts.
-
Mix Ingredients Gently: When combining the filling ingredients, mix gently after adding diced pineapple to keep those juicy chunks intact.
-
Chill for Flavor: Don’t skip the chilling step! Chilling the tarts allows the flavors to meld beautifully, enhancing the overall taste experience.
Hawaiian Pineapple Tarts Recipe FAQs
What kind of pineapple should I use for the tarts?
I recommend using fresh, ripe pineapple for the best flavor. Look for pineapples with a sweet smell and firm skin, avoiding those with dark spots or softness. This will ensure your Hawaiian Pineapple Tarts are bursting with natural sweetness!
How should I store Hawaiian Pineapple Tarts?
Store your Hawaiian Pineapple Tarts in a sealed container in the refrigerator for up to 3 days. This keeps them fresh and tasty! If enjoying after a few days, just take them out and let them cool to room temperature for a bit before serving.
Can I freeze Hawaiian Pineapple Tarts?
Absolutely! For longer storage, you can freeze the tarts in an airtight container for up to 2 months. To thaw, simply move them to the fridge overnight before serving. This way, you can enjoy that tropical goodness whenever you want!
How can I avoid the tart shells becoming soggy?
To prevent sogginess, make sure the tart shells are completely cooled before filling them. It’s crucial because warm shells filled with the creamy mixture can lead to a mushy base. Additionally, stick to the baking times to ensure that the shells stay crisp.
Are there any dietary considerations for these tarts?
Yes! If you have dietary restrictions, you can easily modify this recipe. Use gluten-free tart shells to accommodate gluten sensitivities. For a dairy-free option, substitute the whipped cream with coconut cream or almond cream. Enjoy those tropical flavors guilt-free!
How do I know when the shredded coconut is toasted just right?
For perfectly toasted coconut, spread it evenly in a skillet over medium heat and keep a close eye on it! Stir frequently for about 2-3 minutes until golden brown. Coconut can go from lovely to burnt in seconds, so stay attentive during this step for that delightful crunch!

Delicious Hawaiian Pineapple Tarts Perfect for Summer Gatherings
Ingredients
Equipment
Method
- Preheat your oven to 375°F (190°C).
- Place the pre-made mini tart shells on a baking sheet and bake for about 10 minutes or until lightly golden.
- Allow the tart shells to cool on a wire rack.
- In a large bowl, combine the condensed milk, sour cream, and pineapple juice, whisking until smooth.
- Gently fold in the diced pineapple pieces to the creamy mixture.
- Spoon the pineapple mixture into each cooled tart shell, filling generously.
- Return the filled tarts to the oven and bake for an additional 7 minutes.
- Let the tarts cool at room temperature, then chill in the refrigerator for at least 1 hour.
- Toast the shredded coconut in a skillet over medium heat for 2-3 minutes until golden brown.
- Top each chilled tart with a dollop of whipped cream, toasted coconut, and a piece of pineapple just before serving.