
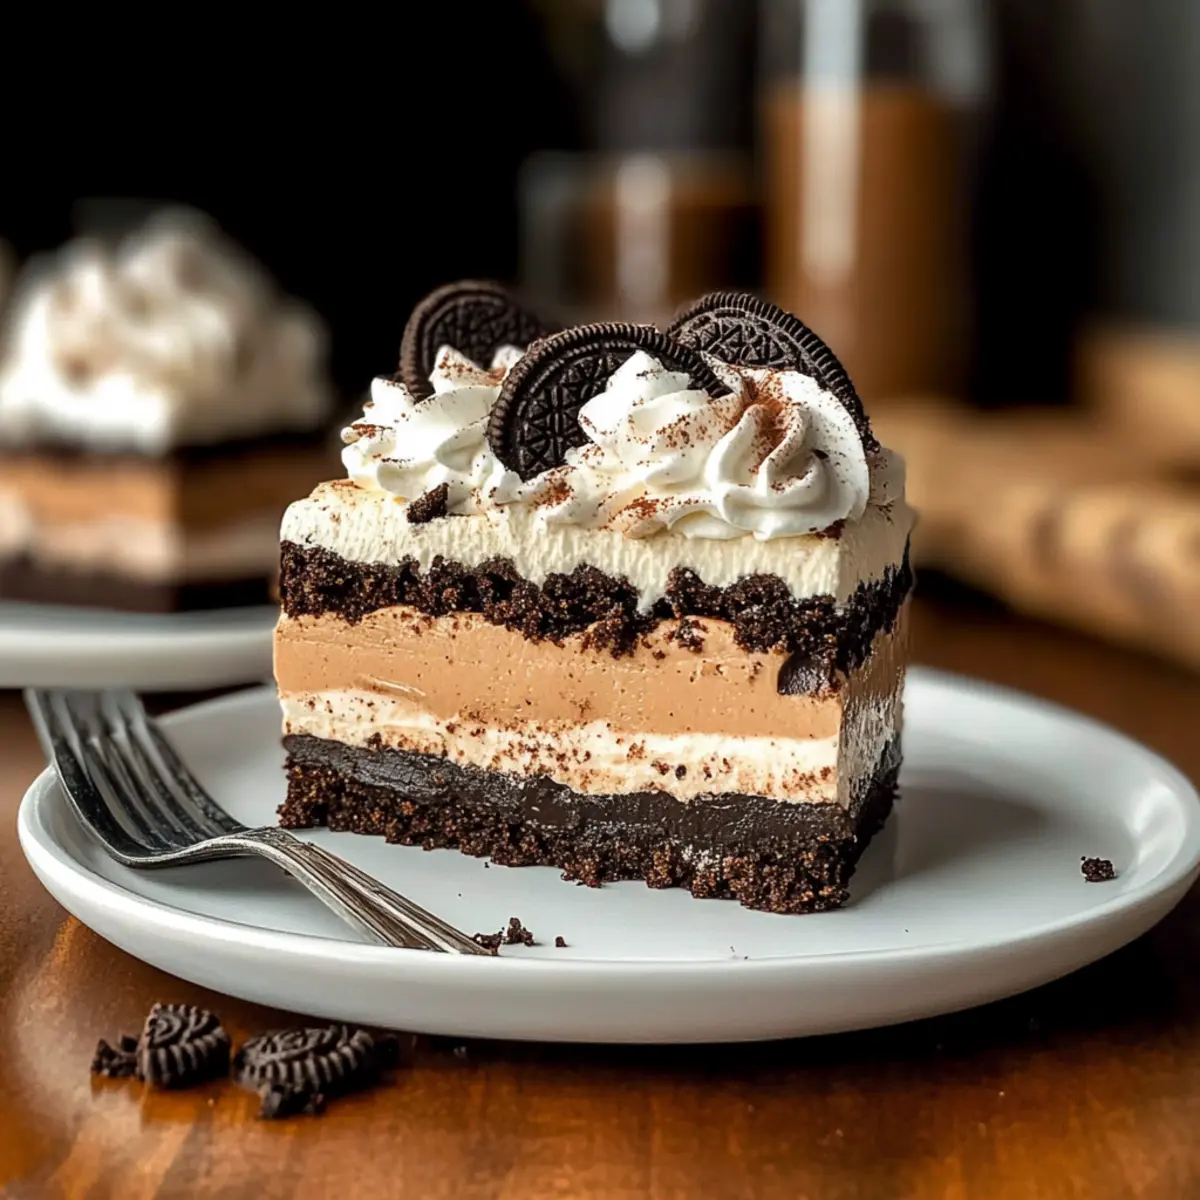
The first time I whipped up a No Bake Chocolate Peanut Butter Oreo Dessert, I was taken completely by surprise. Who knew something so indulgent could come together without even turning on the oven? This easy-peasy recipe features luscious layers of creamy peanut butter and decadent chocolate, all resting on a crunchy Oreo crust. With minimal prep time and zero baking involved, it’s a lifesaver for busy weeknights or impromptu gatherings. As I dug in, I realized this dessert isn’t just a treat; it’s a full-on party for your taste buds! Whether you’re a chocolate fanatic or a peanut butter lover, each layer promises an irresistible blend of flavors and textures. Are you ready to impress your friends and family with a dessert that’ll have them coming back for seconds?
Why is This Dessert a Must-Try?
Simplicity at its finest: With no baking required, you can whip up this delightful dessert in no time, making it perfect for those busy evenings or unexpected guests.
Decadent layers: The harmony of creamy peanut butter and rich chocolate creates an explosion of flavor that will leave your taste buds yearning for more.
Crowd-pleaser: Whether it’s a family gathering or a potluck, this dessert’s indulgent nature ensures it will be a hit with everyone.
Versatile ingredients: Feel free to switch up ingredients, like using almond butter or flavored Oreos, to tailor the dessert to your preferences or dietary needs!
Easy storage: Made for convenience, this dessert can be prepared ahead of time and stored in the fridge, making entertaining a breeze.
If you’re craving more chocolate peanut butter delights, check out my Peanut Butter Chocolate and Peanut Butter Brownie recipes for even more tasty inspiration!
No Bake Chocolate Peanut Butter Oreo Ingredients
For the Crust
• Oreos (14.3 oz package) – Essential for a crunchy base; feel free to use any chocolate sandwich cookies as a substitute.
• Butter (½ cup, melted) – Binds the crushed Oreos together for a cohesive crust.
For the Peanut Butter Layer
• Cream Cheese (16 oz) – Provides creamy richness; low-fat cream cheese can be an excellent lighter option.
• Instant Vanilla Pudding (3.4 oz box) – Thickens the peanut butter layer perfectly; consider homemade vanilla pudding for a fresh twist.
• Creamy Peanut Butter (1 cup) – Adds that delicious peanut flavor; almond butter can be a great allergen-friendly substitute.
• Milk (1¾ cups) – Hydrates the mixture; whole milk is best, but almond milk works well for a dairy-free option.
For the Chocolate Layer
• Instant Chocolate Pudding (3.4 oz box) – Thicker chocolate flavor that sets perfectly; make sure it’s the instant variety for best results.
• Milk (1½ cups) – Required for mixing with the chocolate pudding; again, almond milk can substitute here.
• Milk Chocolate Chips (1 cup) – Melts to provide rich chocolate flavor; semi-sweet or dark chocolate is a delightful alternative.
For the Topping
• Whipped Topping (12 oz) – Makes for a light and airy finish; feel free to whip up your own fresh cream for an even more delightful touch.
Dive into this no bake chocolate peanut butter Oreo dessert, and enjoy each luscious layer that promises to make your taste buds dance!
Step‑by‑Step Instructions for No Bake Chocolate Peanut Butter Oreo
Step 1: Prepare the Crust
Begin by crushing the Oreos in a food processor until they resemble fine crumbs. Melt half a cup of butter and mix it with the crushed Oreos until combined. Press this mixture firmly into the bottom of a 9×13 inch pan to form a sturdy crust, ensuring it is even and well-packed.
Step 2: Make the Peanut Butter Layer
In a large mixing bowl, beat 8 oz of cream cheese at room temperature until it’s perfectly smooth. Gradually add the instant vanilla pudding mix and 1 cup of creamy peanut butter, blending until incorporated. Slowly pour in 1 ¾ cups of milk while continuing to mix until you achieve a smooth and fluffy consistency, then spread this luscious mixture over the prepared crust.
Step 3: Add the Second Crust Layer
Take one-third of the remaining Oreo crumbs and sprinkle them over the peanut butter layer evenly, creating another delicious layer of texture. Ensure the crumbs are distributed evenly for maximum flavor in every bite of the No Bake Chocolate Peanut Butter Oreo dessert.
Step 4: Make the Chocolate Layer
In a separate bowl, beat the remaining 8 oz of cream cheese until smooth and creamy. Add the instant chocolate pudding mix along with a bowl of melted milk chocolate chips that have cooled slightly. Gradually mix in 1 ½ cups of milk until the mixture is smooth and thick. Spread this decadent chocolate layer over the Oreo crumb layer, smoothing it out evenly.
Step 5: Finish Layers
Sprinkle the final one-third of Oreo crumbs over the chocolate layer, creating a beautiful contrast. This last layer adds a delightful crunch that complements the creaminess of the other layers in your No Bake Chocolate Peanut Butter Oreo delight.
Step 6: Add Topping
Spread 12 oz of whipped topping evenly over the Oreo crumbs, creating a light and airy finish. For an extra touch, you can garnish it with chocolate chips, shaved chocolate, or crushed nuts to enhance the appearance and flavor of this scrumptious dessert.
Step 7: Chill
Transfer the dessert to the refrigerator and allow it to chill for 4-6 hours. This essential step lets the layers set properly, ensuring that each slice holds its shape while you indulge in the deliciousness of the No Bake Chocolate Peanut Butter Oreo dessert.
No Bake Chocolate Peanut Butter Oreo Variations
Customize your No Bake Chocolate Peanut Butter Oreo dessert to delight your taste buds even more with these fun ideas!
-
Nut Butter Swap: Replace creamy peanut butter with almond or cashew butter for a unique nutty flavor. Each nut butter offers its own delightful twist!
-
Dairy-Free Option: Use almond milk instead of regular milk and coconut whipped cream for a completely dairy-free dessert. You’re still in for a rich treat!
-
Flavored Oreos: Experiment with different flavored Oreos, like mint or birthday cake, to give your dessert an exciting spin and new flavor sensations. Enjoy the surprise with every bite!
-
Crunchy Texture: Add crushed nuts, like walnuts or pecans, between layers for an extra crunch. They bring a wonderful contrast that enriches the dessert experience.
-
Chocolate Drizzle: Drizzle melted chocolate or caramel sauce over the top for a decadent finishing touch. It adds a beautifully decadent layer that is always a crowd favorite!
-
Fruit Surprise: Toss in some chopped strawberries or bananas within the layers for a fruity burst. This addition adds freshness that balances the richness perfectly.
-
Caramel Swirl: Incorporate a caramel swirl within the peanut butter layer to elevate the flavors and create a luscious, gooey texture.
-
Sugar-Free Version: Opt for sugar-free pudding and a sugar-free whipped topping to create a lighter yet still delicious iteration of this beloved dessert. You won’t sacrifice flavor with this choice!
Dive into your culinary creativity and watch your loved ones rave about your custom creations! If you’re curious for more sweet recipes, don’t forget to check out my Peanut Butter Jelly and Crafting Decadent Cakes guides for even more inspiration!
Storage Tips for No Bake Chocolate Peanut Butter Oreo
Fridge: Keep this delectable No Bake Chocolate Peanut Butter Oreo dessert in an airtight container in the fridge for up to 4 days to maintain its creamy layers and freshness.
Freezer: While freezing is not recommended due to potential texture changes, you can freeze individual slices for up to 2 months; thaw in the fridge before serving.
Reheating: This dessert is best enjoyed chilled, so no reheating is necessary—just serve straight from the fridge for a refreshing treat!
Covering: If you need to cover it, use plastic wrap or foil directly on the surface to prevent any dryness or absorbtion of fridge odors.
Make Ahead Options
These No Bake Chocolate Peanut Butter Oreo dessert layers are perfect for meal prep enthusiasts! You can prepare the crust and the peanut butter layer up to 24 hours in advance, refrigerating them in the pan covered with plastic wrap to maintain freshness. The chocolate layer can also be prepped ahead, but it’s best to add the whipped topping and final Oreo crumbs just before serving to keep that delightful crunch intact. When ready to enjoy, layer the chocolate mixture over the peanut butter layer, refrigerate for an additional 4-6 hours, and you’ll have a stunning dessert ready for any gathering, making your life that much easier!
What to Serve with No Bake Chocolate Peanut Butter Oreo Dessert?
This indulgent dessert not only delights on its own but can also shine brighter with the perfect pairings to create a memorable meal experience.
-
Fresh Berries: The tartness of strawberries or raspberries balances the rich layers, adding a refreshing burst of flavor. Their natural sweetness enhances the overall taste without overpowering the dessert.
-
Chocolate Drizzle: A warm drizzle of chocolate sauce elevates each slice, drawing out the dessert’s chocolatey goodness. It’s an easy way to add a touch of elegance and wow factor to your presentation.
-
Vanilla Ice Cream: A scoop of creamy vanilla ice cream provides a luscious contrast to the crunchy and creamy layers of the dessert. The cold creaminess harmonizes perfectly, making every spoonful a delightful experience.
-
Coffee: A warm cup of coffee complements the rich flavors, offering a comforting, aromatic counterpoint to the sweet, layered dessert. The bitterness of the coffee perfectly balances the sweetness, making it an ideal pairing.
-
Milkshakes: Chocolate or peanut butter milkshakes paired with this dessert create a fun dessert duo, turning the treat into a decadent celebration. Their creamy texture enhances the overall indulgence.
-
Whipped Cream Topping: An extra dollop of whipped cream adds a light, airy element that plays beautifully with the denser layers. Consider flavoring the cream with a hint of vanilla or cocoa to deepen the experience.
Expert Tips for No Bake Chocolate Peanut Butter Oreo
-
Room Temperature Cream Cheese: Ensure your cream cheese is at room temperature for smooth blending, preventing lumps in your No Bake Chocolate Peanut Butter Oreo layers.
-
Instant Pudding Only: Always use instant pudding for both chocolate and vanilla layers; it provides the right texture and thickness that this dessert requires.
-
Even Layering: When pressing the layers, use a fork to evenly distribute the mixture to avoid gaps. A well-pressed layer is key to enjoying each flavor in the No Bake Chocolate Peanut Butter Oreo.
-
Adequate Chilling: Don’t rush the chilling process! Allow the dessert to set for a full 4-6 hours for best results. This step is essential for achieving the perfect texture.
-
Customizable Options: Feel free to switch up the crust with different chocolate sandwich cookies or use alternative nut butters based on your dietary needs.
No Bake Chocolate Peanut Butter Oreo Dessert Recipe FAQs
How do I choose the best Oreos for this dessert?
I recommend using regular Oreos, as they provide the perfect balance of sweetness and crunch. If you want a fun twist, feel free to try flavored Oreos, like mint or birthday cake, for an extra layer of flavor that’ll surprise your taste buds!
What’s the best way to store this dessert?
Store your No Bake Chocolate Peanut Butter Oreo dessert in an airtight container in the refrigerator for up to 4 days. Make sure to cover it tightly with plastic wrap or foil to keep the layers fresh and prevent any fridge odors from seeping in.
Can I freeze the No Bake Chocolate Peanut Butter Oreo dessert?
While I don’t recommend freezing the entire dessert as it may affect the creamy texture, you can freeze individual slices for up to 2 months. Just wrap them securely in plastic wrap and place them in an airtight container. To serve, simply thaw in the fridge overnight for the best texture.
What if my layers are not setting properly?
If your layers are not setting as expected, check to ensure you used instant pudding, which is essential for thickening. Make sure your cream cheese is at room temperature for seamless mixing. If the mixture seems too loose, you can always add a bit more pudding mix to help firm it up.
Is this dessert suitable for people with allergies?
Absolutely! You can customize the recipe to accommodate dietary needs. For a nut-free version, simply swap out the creamy peanut butter with sunflower seed butter. Additionally, ensure that you use gluten-free Oreo cookies if you are avoiding gluten. Always check ingredient labels to ensure they meet your dietary restrictions.
How can I tell if my cream cheese is blended well?
For a perfectly smooth mixture, beat the cream cheese until it’s completely free of lumps and has a creamy texture. This usually takes about 2-3 minutes with a hand mixer or stand mixer. Remember, room temperature cream cheese makes blending so much easier and prevents clumps.
Indulge in No Bake Chocolate Peanut Butter Oreo Bliss
Ingredients
Equipment
Method
- Begin by crushing the Oreos in a food processor until they resemble fine crumbs.
- Melt half a cup of butter and mix it with the crushed Oreos until combined.
- Press this mixture firmly into the bottom of a 9x13 inch pan to form a sturdy crust, ensuring it is even and well-packed.
- In a large mixing bowl, beat 8 oz of cream cheese until it's perfectly smooth.
- Gradually add the instant vanilla pudding mix and 1 cup of creamy peanut butter, blending until incorporated.
- Slowly pour in 1 ¾ cups of milk while continuing to mix until you achieve a smooth and fluffy consistency, then spread this mixture over the prepared crust.
- Take one-third of the remaining Oreo crumbs and sprinkle them over the peanut butter layer evenly.
- In a separate bowl, beat the remaining 8 oz of cream cheese until smooth and creamy.
- Add the instant chocolate pudding mix along with a bowl of melted milk chocolate chips that have cooled slightly.
- Gradually mix in 1 ½ cups of milk until the mixture is smooth and thick.
- Spread this chocolate layer over the Oreo crumb layer, smoothing it out evenly.
- Sprinkle the final one-third of Oreo crumbs over the chocolate layer.
- Spread 12 oz of whipped topping evenly over the Oreo crumbs, creating a light and airy finish.
- Transfer the dessert to the refrigerator and allow it to chill for 4-6 hours.