
The aroma of sizzling chicken mingled with the tangy brightness of fresh herbs can transform an ordinary weeknight into a moment of culinary magic. My Crispy Pita with Chicken & Feta recipe is not just a meal; it’s an experience that takes less than 30 minutes to prepare, making it perfect for those busy evenings when fast food often tempts us. With its high protein content and customizable filling, this Mediterranean delight invites you to get creative—swap out ingredients as you wish! Whether you’re a seasoned home chef or just starting your culinary journey, these arayes promise a guilt-free indulgence that’s both delicious and satisfying. Ready to dive into a flavor-packed adventure that celebrates wholesome ingredients? Let’s get cooking!
Why is this recipe a must-try?
Quick and Easy: With a prep time of less than 30 minutes, you’ll have a delicious homemade meal ready when you need it most.
Healthful Indulgence: Packed with high-protein chicken and feta, this dish satisfies cravings while keeping your nutrition on track.
Customizable Delight: Switch out ingredients for personal flair—try roasted mushrooms instead of chicken for a fantastic vegetarian option.
Deliciously Savory: The flavorful combination of fresh herbs and zesty lemon brings a taste of the Mediterranean right to your kitchen.
If you’re craving more Mediterranean adventures, don’t miss out on other favorites like Lazy Chicken Parmesan or Thai Basil Chicken!
Pita with Chicken & Feta Ingredients
For the Filling
• Lean Chicken Mince – The primary protein source that keeps the meal hearty; substitute with ground turkey for a lighter option.
• Feta Cheese – Adds a creamy tang that beautifully complements the chicken; try goat cheese for a distinct flavor twist.
• Red Onion – Introduces a touch of sweetness and crunch; choose firm onions for best results in cooking.
• Garlic – Boosts the flavor profile; freshly minced garlic works wonders for depth.
• Lemon Juice – Brightens the dish with its zesty freshness; opt for fresh lemon for optimal taste.
• Lemon Zest – Brings an extra pop of brightness; don’t skip this for a vibrant flavor.
• Fresh Mint – Offers a refreshing herbaceous note; substitute with basil if you prefer a sweeter flavor.
• Fresh Parsley – Adds mild peppery notes that pair well with the filling; can be omitted or replaced with cilantro.
• Olive Oil – Essential for frying; ensure it’s hot enough for proper cooking. You can use avocado oil as a substitute.
For the Pita
• Pita Bread – Provides structure to hold all the delicious ingredients; whole wheat options increase fiber content for a healthier bite.
Let these fresh ingredients come together in a burst of flavor you won’t be able to resist!
Step‑by‑Step Instructions for Pita with Chicken & Feta
Step 1: Prep the Filling
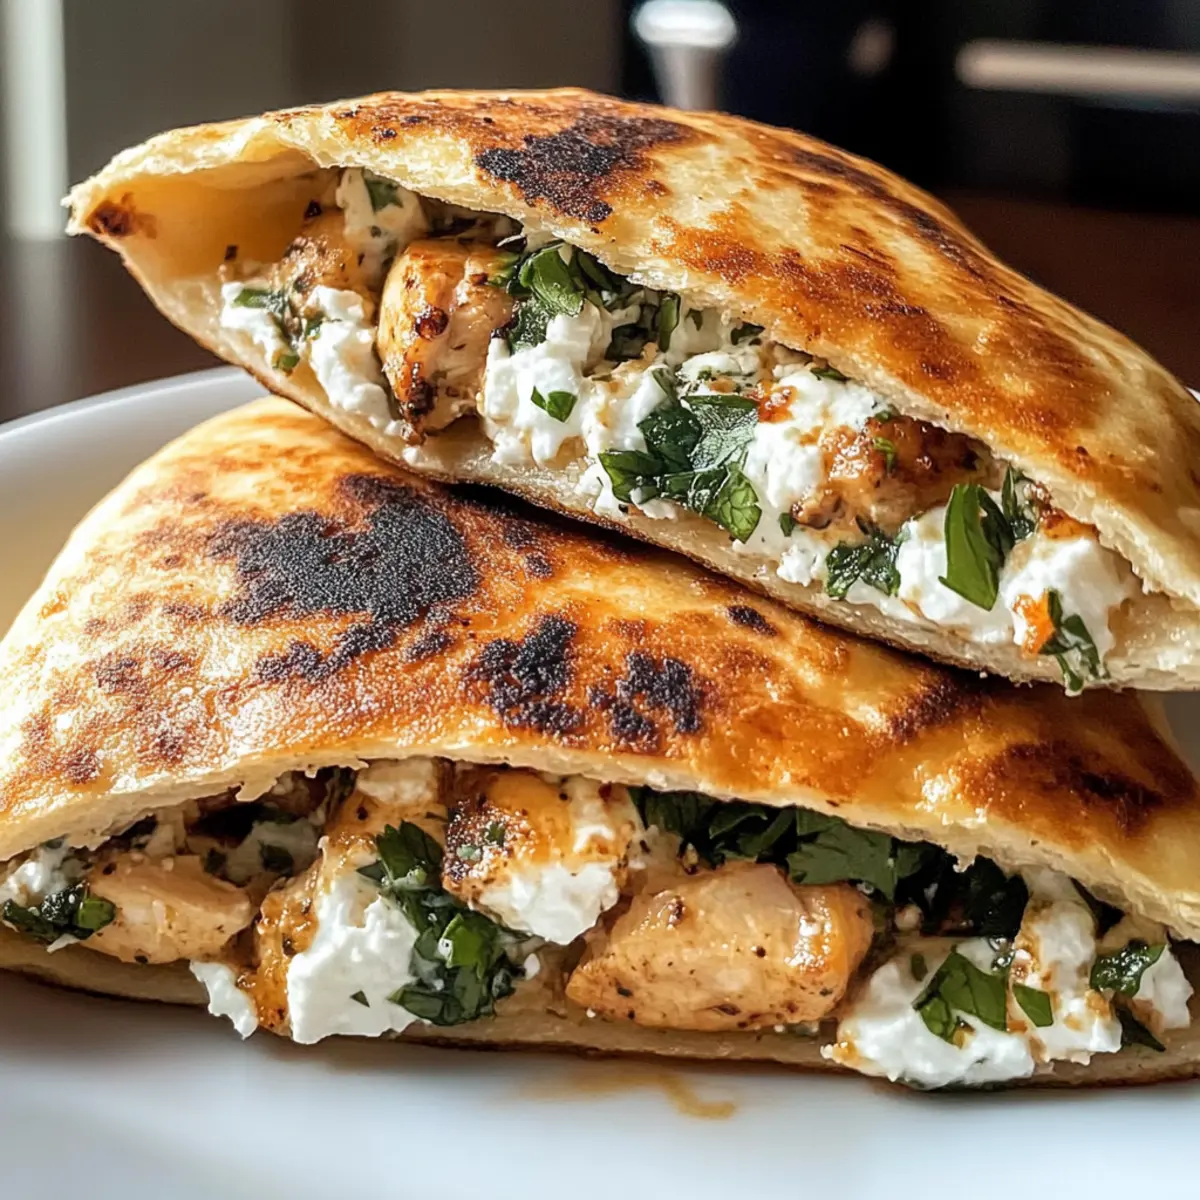
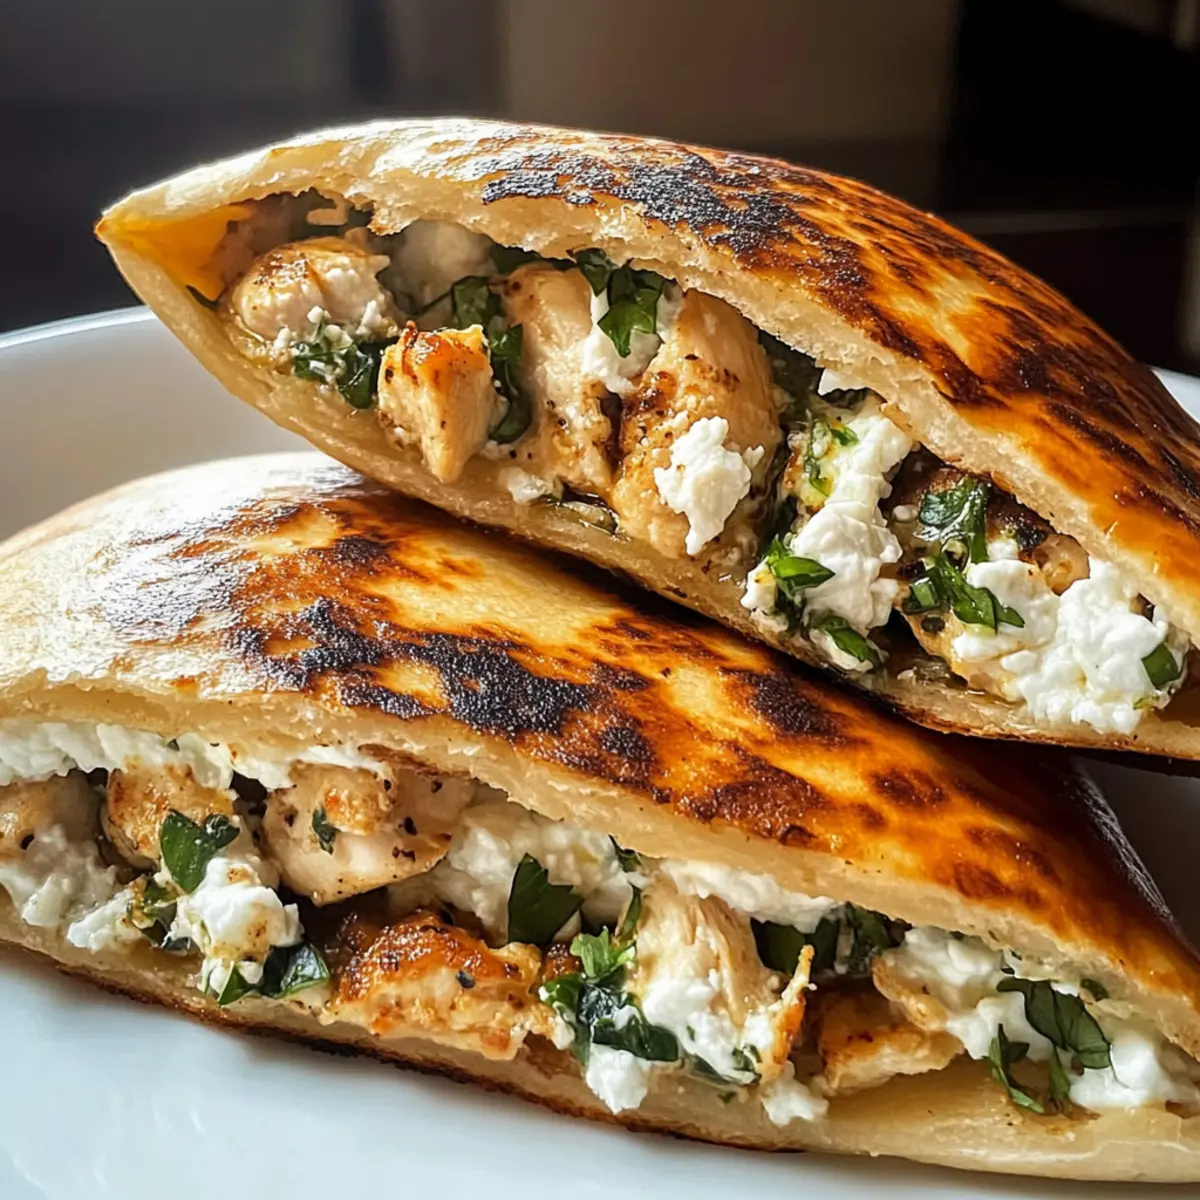
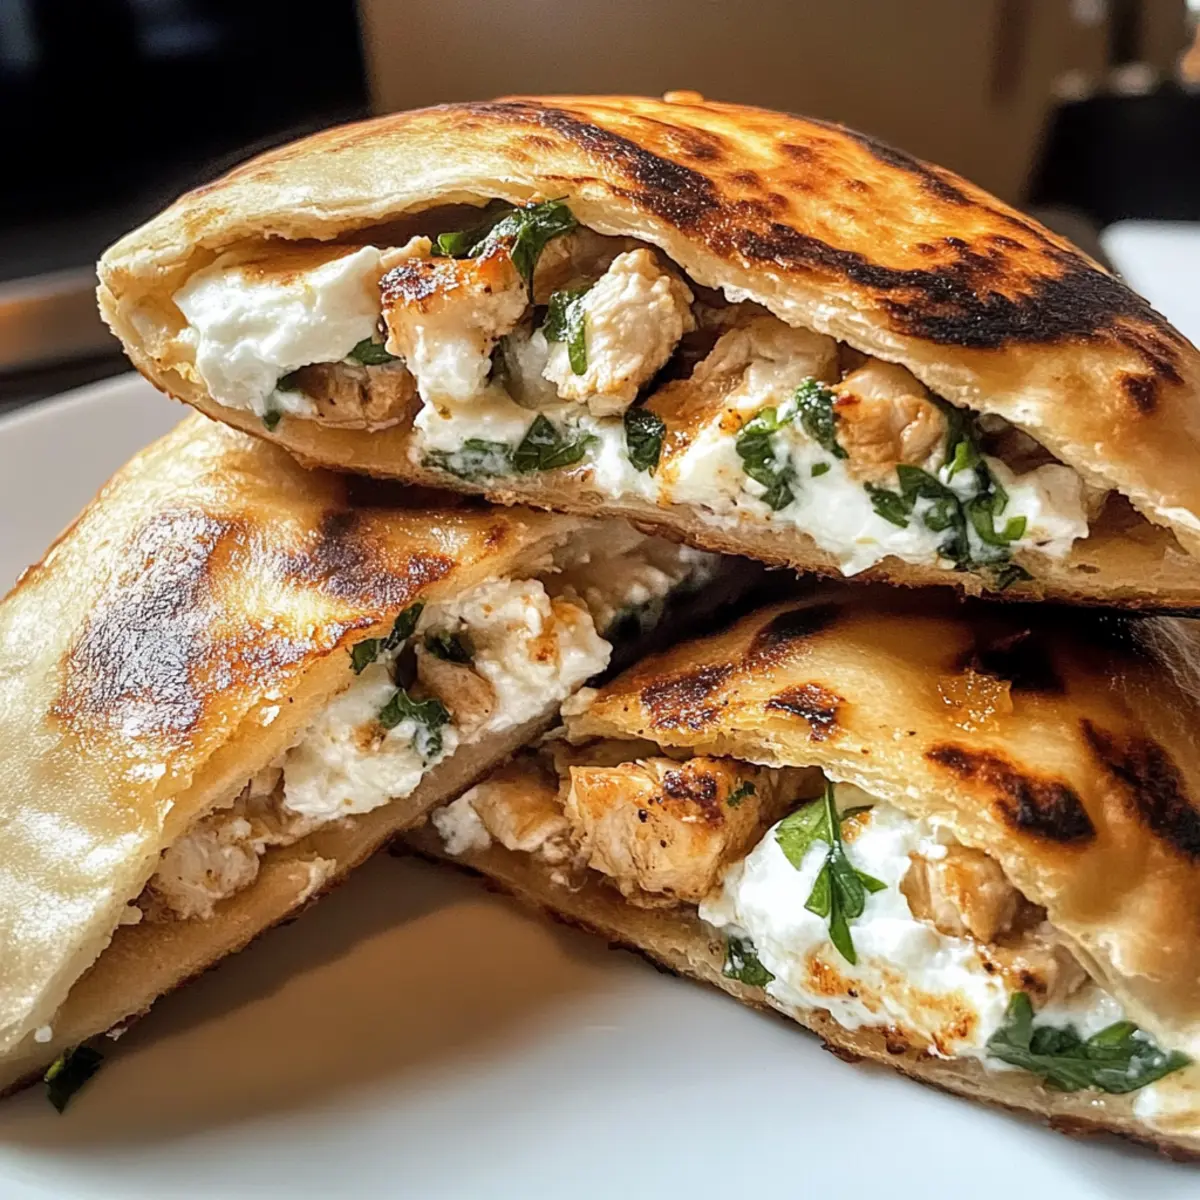
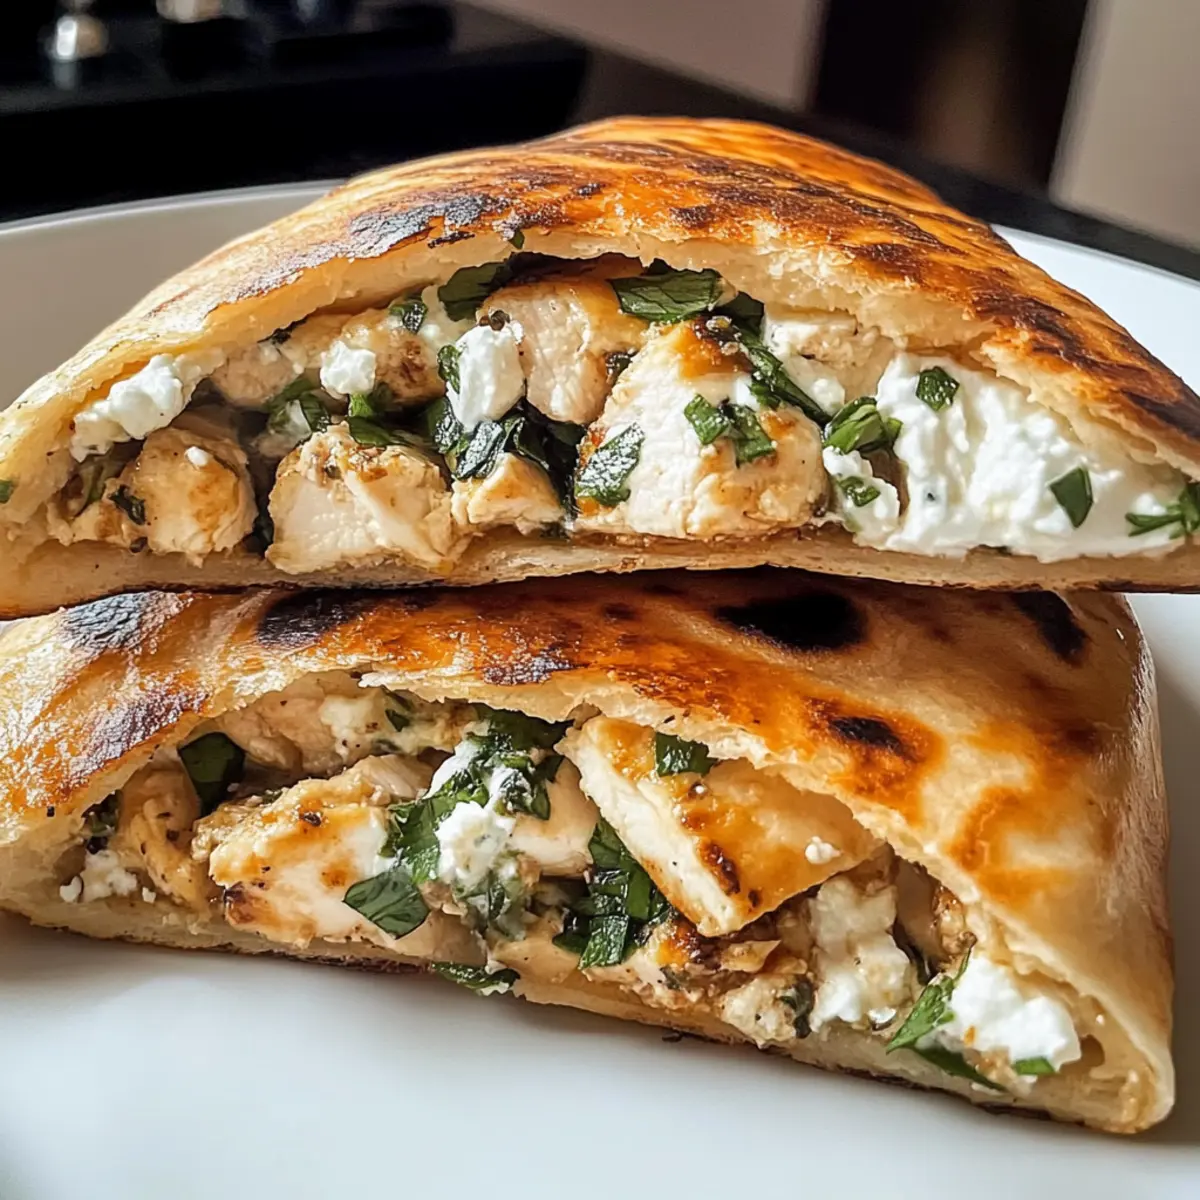
In a large mixing bowl, combine lean chicken mince, crumbled feta cheese, finely chopped red onion, minced garlic, lemon juice, lemon zest, chopped fresh mint, parsley, and a pinch of salt. Use your hands or a spatula to mix thoroughly until all ingredients are well combined, creating a fragrant filling bursting with flavors. This step sets the stage for the delicious flavor explosion found in your Crispy Pita with Chicken & Feta.
Step 2: Stuff the Pita
Carefully cut each piece of pita bread in half to form pockets, creating a little envelope for your stuffing. Gently squeeze some filling into each pocket, ensuring not to overstuff, as this can cause them to burst during cooking. Use your fingers to seal the open edges by pressing them together lightly, creating a snug fit for the filling. This technique is crucial for keeping your Chicken & Feta mixture intact while cooking.
Step 3: Pan-Fry the Pita
Heat a generous amount of olive oil in a non-stick skillet over medium heat until shimmering. Once the oil is hot, carefully place the stuffed pitas into the skillet without crowding them too much. Cook for 3-4 minutes on each side until they turn golden brown and crispy, creating an enticing aroma that fills your kitchen. This crispy exterior is what makes the Pita with Chicken & Feta so delectably inviting.
Step 4: Bake for Extra Crispiness (Optional)
For an extra crunch, preheat your oven to 180°C (350°F). After pan-frying, transfer the crispy stuffed pitas to a baking sheet lined with parchment paper. Bake in the preheated oven for 10-15 minutes, allowing the heat to further crisp the outer layer while ensuring the filling remains juicy. This optional step elevates your Crispy Pita with Chicken & Feta, creating a delightful texture.
Step 5: Serve & Enjoy
Once they’ve cooled slightly, remove the pitas from the skillet or oven and let them rest for a moment. Then, slice them in half or leave them whole and serve warm with a side of tzatziki sauce. This adds a refreshing contrast to the savory filling and makes your Pita with Chicken & Feta the perfect meal or snack option that satisfies every craving.
Pita with Chicken & Feta Variations
Feel free to dive into your creativity and personalize this recipe to tickle your taste buds!
-
Vegetarian Delight: Swap chicken for roasted mushrooms or lentils for a hearty vegetarian alternative that’s still brimming with flavor.
-
Spicy Kick: Add chopped jalapeños or a drizzle of harissa in the filling for those who crave a little heat in every bite.
-
Baked Goodness: Prefer a lighter dish? Skip the frying altogether and bake your stuffed pitas until golden for less oil and a crisp finish.
-
Cheese Switch Up: If feta isn’t your favorite, consider goat cheese for a richer taste or even a sprinkle of mozzarella for a melty twist.
-
Herb Variation: Use fresh basil instead of mint for a sweeter flavor profile that complements the chicken nicely.
-
Fiber Boost: Choose whole wheat pita bread for added fiber that benefits your health while treating your palate.
-
Zesty Twist: For an even brighter flavor, add a splash of lime juice to the filling, enhancing the freshness alongside the lemon.
-
Crunch Factor: Toss in some chopped spinach or kale for an extra layer of texture and nutritional goodness—health never tasted so good!
Experimenting with these variations can elevate your meal just like those flavors found in the tempting Lazy Chicken Parmesan or delightfully zesty Korean Fire Chicken options!
What to Serve with Crispy Pita with Chicken & Feta
Transform your meal into a vibrant feast by pairing these golden pitas with delightful sides and sauces that enhance every bite.
-
Tzatziki Sauce: A cool and creamy dip that perfectly balances the savory flavors of the crispy pitas.
-
Greek Salad: Fresh tomatoes, cucumbers, and olives tossed in a tangy vinaigrette offer a crunchy contrast that complements the dish wonderfully. The crisp veggies boost both flavor and freshness.
-
Hummus: This rich, creamy spread adds a nutty flavor and pairs beautifully with the warm pitas for a delightful fusion of textures.
-
Roasted Vegetables: Caramelized carrots, zucchini, and bell peppers provide a sweet, roasted element that enriches each meal component, adding both color and nutrition.
-
Lemon Quinoa: Fluffy quinoa tossed with bright lemon juice and herbs brings a healthy grain option that harmonizes with the Mediterranean theme, enhancing the meal’s wholesome essence.
-
Pineapple Mint Smoothie: A refreshing drink that combines sweet pineapple and mint, offering a tropical vibe that contrasts with the savory chicken and feta filling.
-
Baklava: For a sweet finish, this honey-soaked pastry provides a sticky, crispy texture and a hint of warmth, wrapping up your dining experience on a deliciously sweet note.
Make Ahead Options
These Crispy Pita with Chicken & Feta are perfect for meal prep enthusiasts! You can prepare the filling (chicken, feta, onion, garlic, lemon juice, lemon zest, mint, parsley, and salt) up to 24 hours in advance. Simply store it in an airtight container in the refrigerator to maintain its freshness. The stuffed pitas can also be assembled and refrigerated for up to 3 days; just make sure to keep them tightly sealed to prevent them from drying out. When you’re ready to enjoy, pan-fry them from the fridge straight away; they’re just as delicious, crispy, and convenient, transforming your busy weeknight dinners into a flavorful culinary adventure!
Expert Tips for Crispy Pita with Chicken & Feta
• Don’t Overstuff: Keep an eye on how much filling you add to each pita pocket. Overstuffing can lead to bursting during cooking.
• Preheat Your Oil: Ensure that the olive oil is hot before adding the pitas to the skillet. This creates that signature crispy exterior and prevents sogginess.
• Use Fresh Ingredients: Fresh herbs and lemon zest make a significant difference in flavor. Don’t skip these for the best results in your Pita with Chicken & Feta.
• Consider Baking: For a lighter option, you can bake the stuffed pitas instead of frying. Just make sure to adjust cooking times accordingly for perfect crispiness.
• Repurpose Filling: If a pita bursts, don’t fret! Use it as a delicious salad topping instead of throwing away the filling.
Storage Tips for Pita with Chicken & Feta
Fridge: Store any leftovers in an airtight container for up to 3 days. This keeps your flavorful Pita with Chicken & Feta fresh and ready for quick snacking!
Freezer: Freeze unstuffed pita pockets for up to 2 months. When you’re ready to enjoy, simply thaw and warm them in the oven for the best taste and texture.
Reheating: To reheat, place the cooked pitas in a skillet over medium heat for a few minutes on each side until crispy again, or pop them in the oven at 180°C (350°F) for about 10 minutes.
Crispy Pita with Chicken & Feta Recipe FAQs
How do I choose ripe ingredients for this recipe?
Absolutely! When selecting your ingredients, look for lean chicken mince that is pink and moist, avoiding any discoloration. For feta cheese, opt for blocks rather than crumbled for the freshest taste. Choose firm red onions free from dark spots, and ensure your garlic bulbs are plump and intact. Fresh herbs should be vibrant and fragrant—go for mint and parsley with no wilting or browning.
What is the best way to store leftovers?
Very! Once your Crispy Pita with Chicken & Feta has been made, store any leftovers in an airtight container in the fridge for up to 3 days. To keep them as crispy as possible, I suggest reheating them in a skillet rather than the microwave for a few minutes on each side, or in the oven at 180°C (350°F) for about 10 minutes.
Can I freeze the pitas for later use?
Yes! You can freeze unstuffed pita pockets for up to 2 months. Just wrap them individually in plastic wrap and then place them in a freezer bag. When you’re ready to enjoy, thaw them overnight in the fridge, then warm in the oven for the best results. If you’ve already cooked the pitas, freeze them flat between layers of parchment paper to prevent sticking, and reheat directly from frozen in a skillet or oven.
What should I do if my pitas burst while cooking?
Don’t worry! If your Crispy Pita with Chicken & Feta bursts, you can simply repurpose the filling. Serve it over a fresh salad or mix it into grains for a delicious deconstructed meal. This way, nothing goes to waste, and you still get to enjoy that amazing filling!
Are there dietary considerations for this recipe?
Certainly! For those with allergies, make sure to check feta’s ingredients, as some brands may contain traces of nuts or gluten. If cooking for pets, avoid serving any seasoned food as spices can be harmful. For gluten-free options, you can use gluten-free pita bread or even leaf wraps like romaine lettuce for a fresh, low-carb alternative.
Can I customize this recipe to fit my taste?
Yes! This recipe is highly customizable. Feel free to swap out the chicken for roasted vegetables like mushrooms or make it spicier by adding jalapeños or spices like harissa to the filling. The versatility of this dish lets you create a Pita with Chicken & Feta that is uniquely yours!
Crispy Pita with Chicken & Feta for a Flavorful Feast
Ingredients
Equipment
Method
- In a large mixing bowl, combine lean chicken mince, crumbled feta, finely chopped red onion, minced garlic, lemon juice, lemon zest, chopped mint, parsley, and a pinch of salt. Mix thoroughly until well combined.
- Carefully cut each piece of pita bread in half to form pockets. Gently squeeze some filling into each pocket, ensuring not to overstuff.
- Heat olive oil in a non-stick skillet over medium heat. Once hot, place the stuffed pitas into the skillet without crowding. Cook until golden brown and crispy.
- For extra crunch, preheat your oven to 180°C (350°F). Transfer the crispy stuffed pitas to a baking sheet and bake for 10-15 minutes.
- Once slightly cooled, remove pitas and serve warm with tzatziki sauce.