
The aroma of freshly baked goodies can transport you straight to a cozy kitchen, and today, I’m excited to share my take on a family favorite: Cheesy Zucchini Breadsticks. These little delights boast that wonderful crispy texture we crave, but with a low-carb twist that fits perfectly into keto and gluten-free lifestyles. You’ll love how the zesty grated zucchini pairs wonderfully with gooey mozzarella and sharp parmesan, making them an irresistible snack or appetizer option. Plus, they come together in no time—perfect for those busy days when you want to keep the fast food at bay. Are you ready to elevate your snacking game with these scrumptious breadsticks? Let’s dive in!
Why are These Breadsticks a Must-Try?
Crispy, Cheesy Perfection: These Cheesy Zucchini Breadsticks offer the satisfying crunch you crave, making them a great alternative to traditional snacks.
Keto-Friendly Delight: Perfect for low-carb, gluten-free diets, they’re a guilt-free treat that doesn’t compromise on flavor.
Easy to Customize: Experiment with different cheeses or spices to cater to your taste buds; every batch can be uniquely yours!
Quick to Make: With simple prep and just a few ingredients, you can whip up these fabulous breadsticks in no time.
Crowd-Pleaser: Serve them at your next gathering or as an after-school snack, and watch them disappear—you might want to make a double batch!
Elevate your appetizer game with these scrumptious treats, and if you’re also looking for something sweet, check out my Lemon Zucchini Heaven for a delightful twist on zucchini!
Cheesy Zucchini Breadsticks Ingredients
For the Dough
- Grated Zucchini – This veggie base provides moisture; don’t forget to squeeze out excess liquid to keep the breadsticks from getting soggy.
- Mozzarella Cheese – Melts beautifully and creates that gooey texture; feel free to substitute with any similar melting cheese.
- Parmesan Cheese – Adds a sharp, salty kick; you can swap this for Pecorino Romano or nutritional yeast for a non-dairy option.
- Egg – Acts as a binder for the mixture; an egg substitute such as a chia egg works well for egg-free variations.
- Garlic Parsley Salt – Elevates flavor with a delicious seasoning blend; consider using garlic powder and salt or your favorite herbs.
For Topping
- Grated Cheese for Topping – Choose your favorite cheese for a savory finish; options like cheddar or a Mexican blend work wonderfully for these Cheesy Zucchini Breadsticks.
Step‑by‑Step Instructions for Cheesy Zucchini Breadsticks
Step 1: Preheat the Oven
Begin by preheating your oven to 425°F (220°C). This temperature is crucial for achieving that perfect crispiness on your Cheesy Zucchini Breadsticks. While the oven warms up, gather your baking sheet and line it with parchment paper to prevent sticking, ensuring an easy cleanup after baking.
Step 2: Prepare the Zucchini
Grate the zucchini using a box grater or food processor, then place it in a clean kitchen towel. Squeeze tightly to extract as much moisture as possible, which will help your breadsticks stay crispy. After draining, measure the zucchini and set it aside for mixing; this step is key for deliciously textured Cheesy Zucchini Breadsticks.
Step 3: Mix the Ingredients
In a large mixing bowl, combine the grated zucchini, mozzarella cheese, parmesan cheese, egg, and garlic parsley salt. Mix thoroughly until you have a uniform and sticky mixture that holds together well. This blend forms the flavorful base of your breadsticks. Make sure every ingredient is well incorporated for the best taste.
Step 4: Shape the Breadsticks
Transfer the zucchini mixture onto the prepared baking sheet, spreading it evenly into a rectangle about half an inch thick. Use a spatula to smooth the surface and create nice edges. This thickness will facilitate even cooking and allow your Cheesy Zucchini Breadsticks to crisp beautifully, so take your time with this step.
Step 5: First Bake
Place the shaped mixture in the preheated oven and bake for 15 minutes. Keep an eye on them; you’re looking for a slight golden-brown color and a firm texture. This first bake helps establish a solid base for your breadsticks, ensuring they hold up when topped with cheese.
Step 6: Add Toppings
After 15 minutes, remove the baking sheet from the oven and sprinkle a layer of your favorite grated cheese over the top. Feel free to get creative with a blend for extra flavor! Return the baking sheet to the oven and bake for an additional 2-5 minutes, or until the cheese is melted and bubbly, creating a delicious topping for your Cheesy Zucchini Breadsticks.
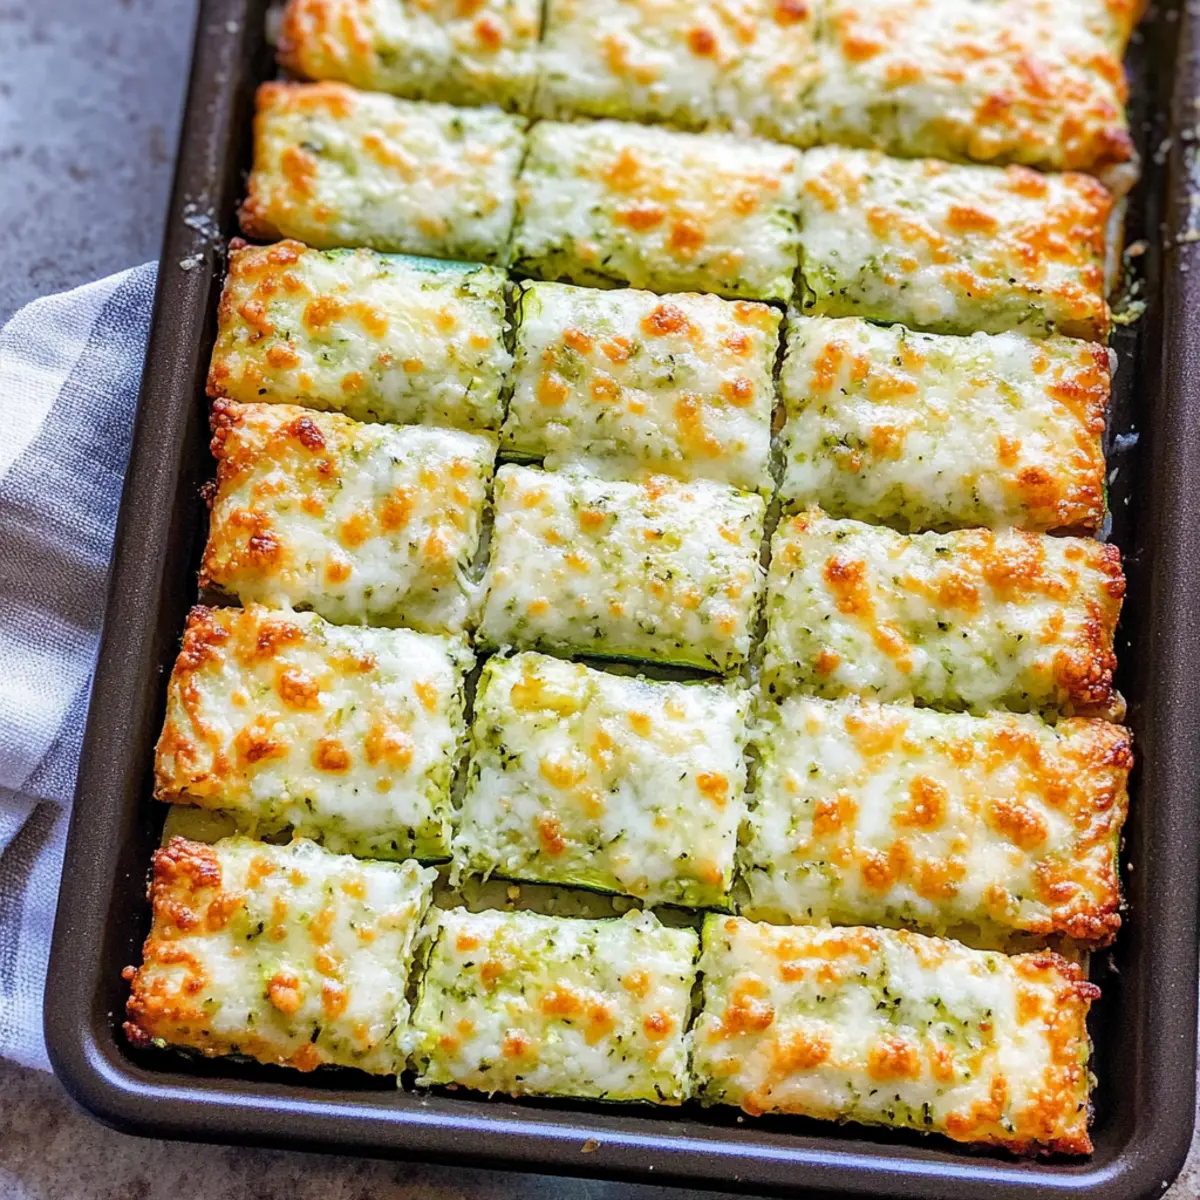
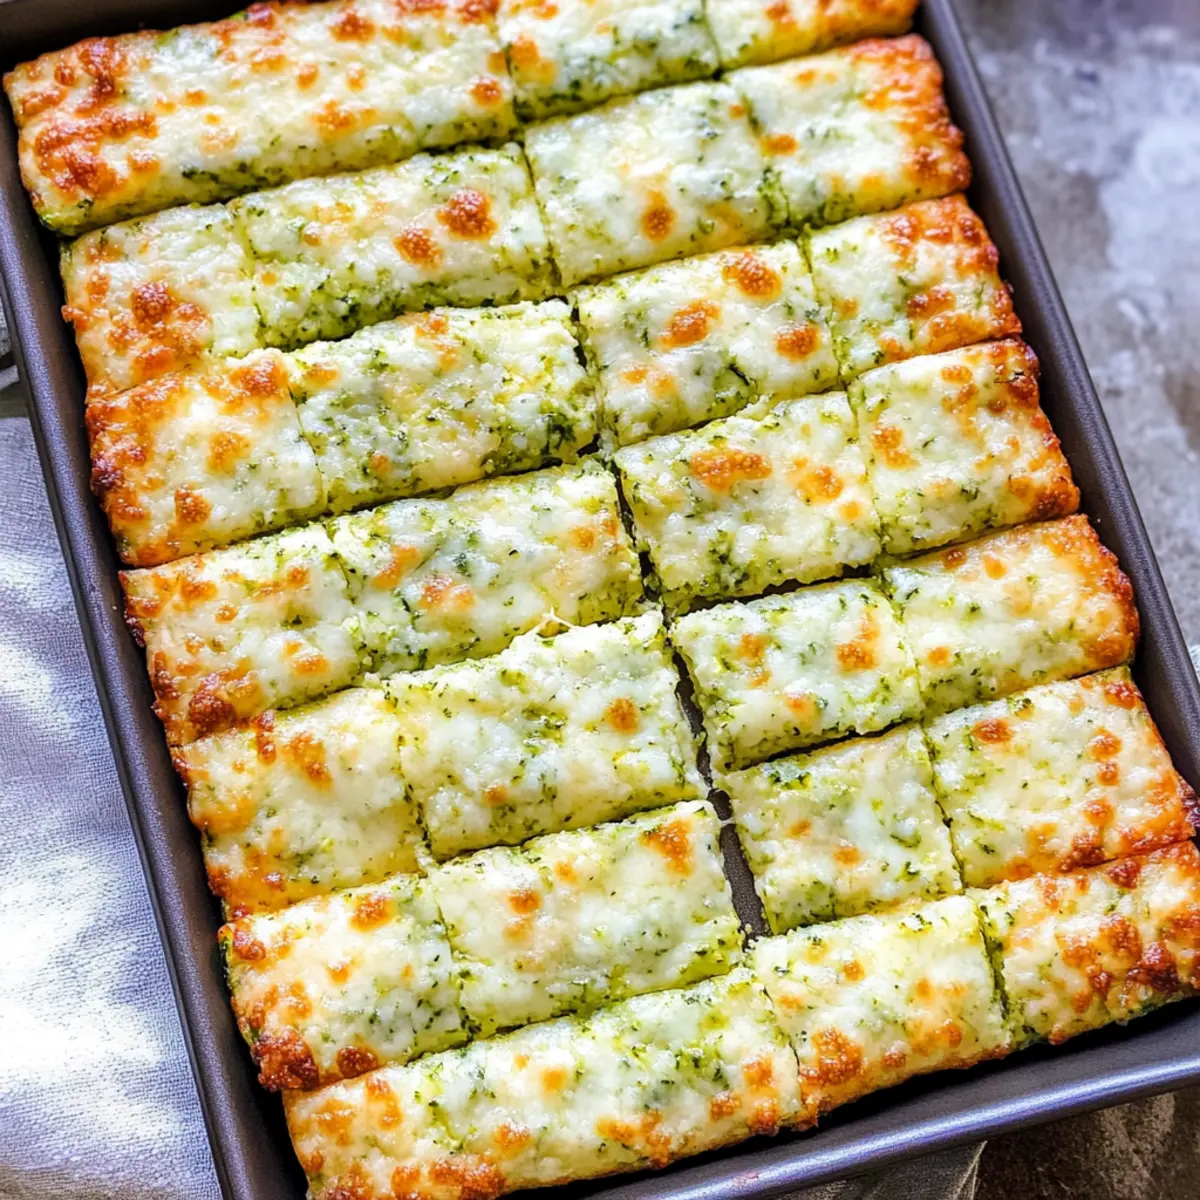
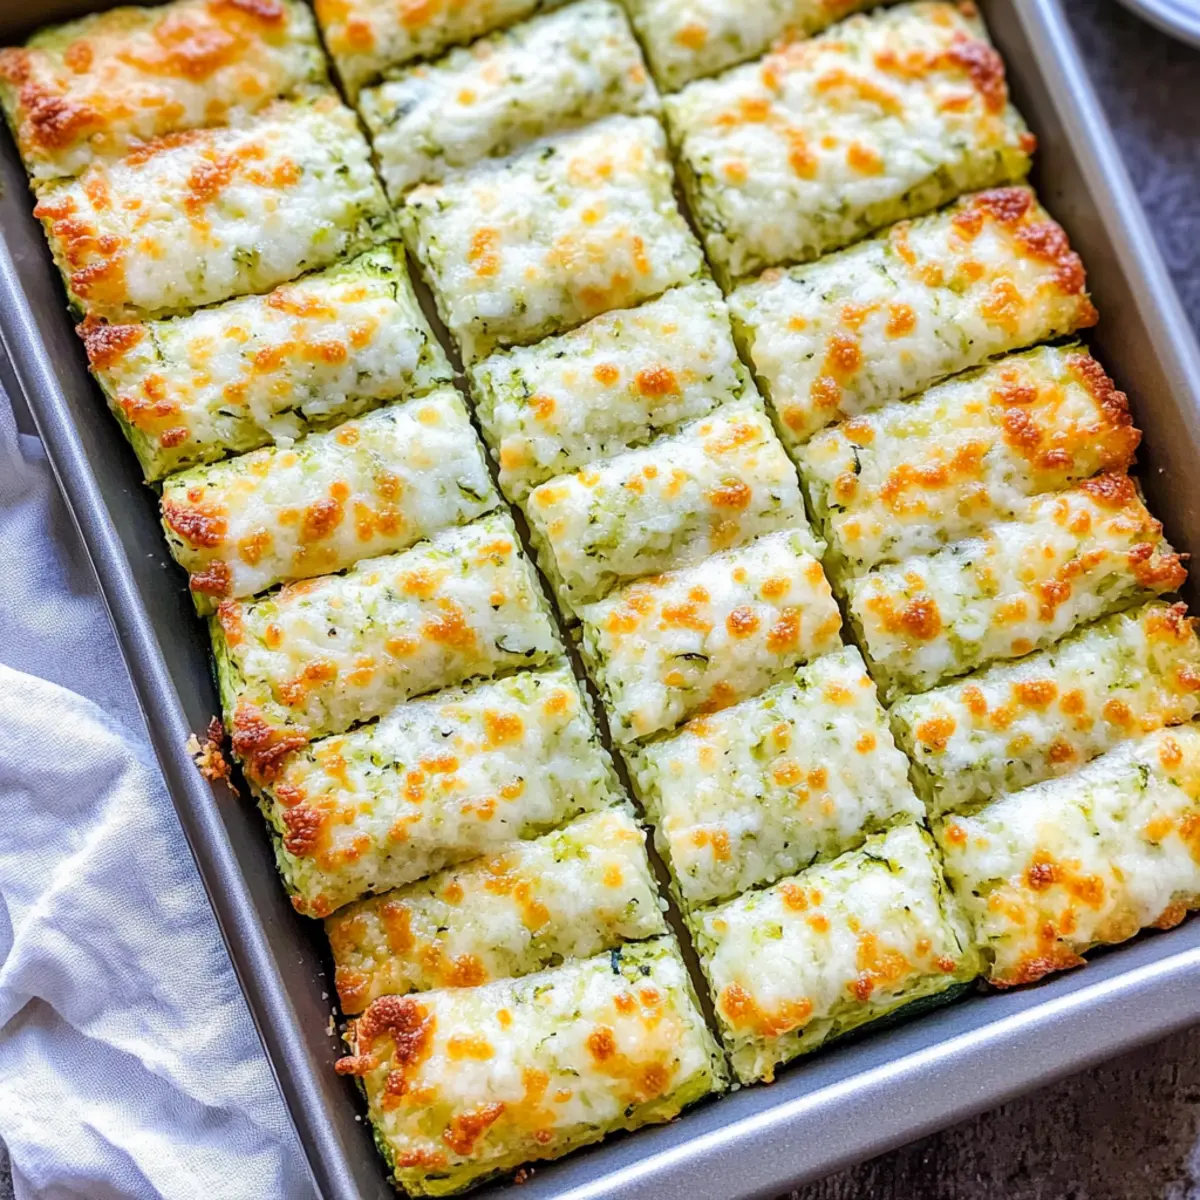
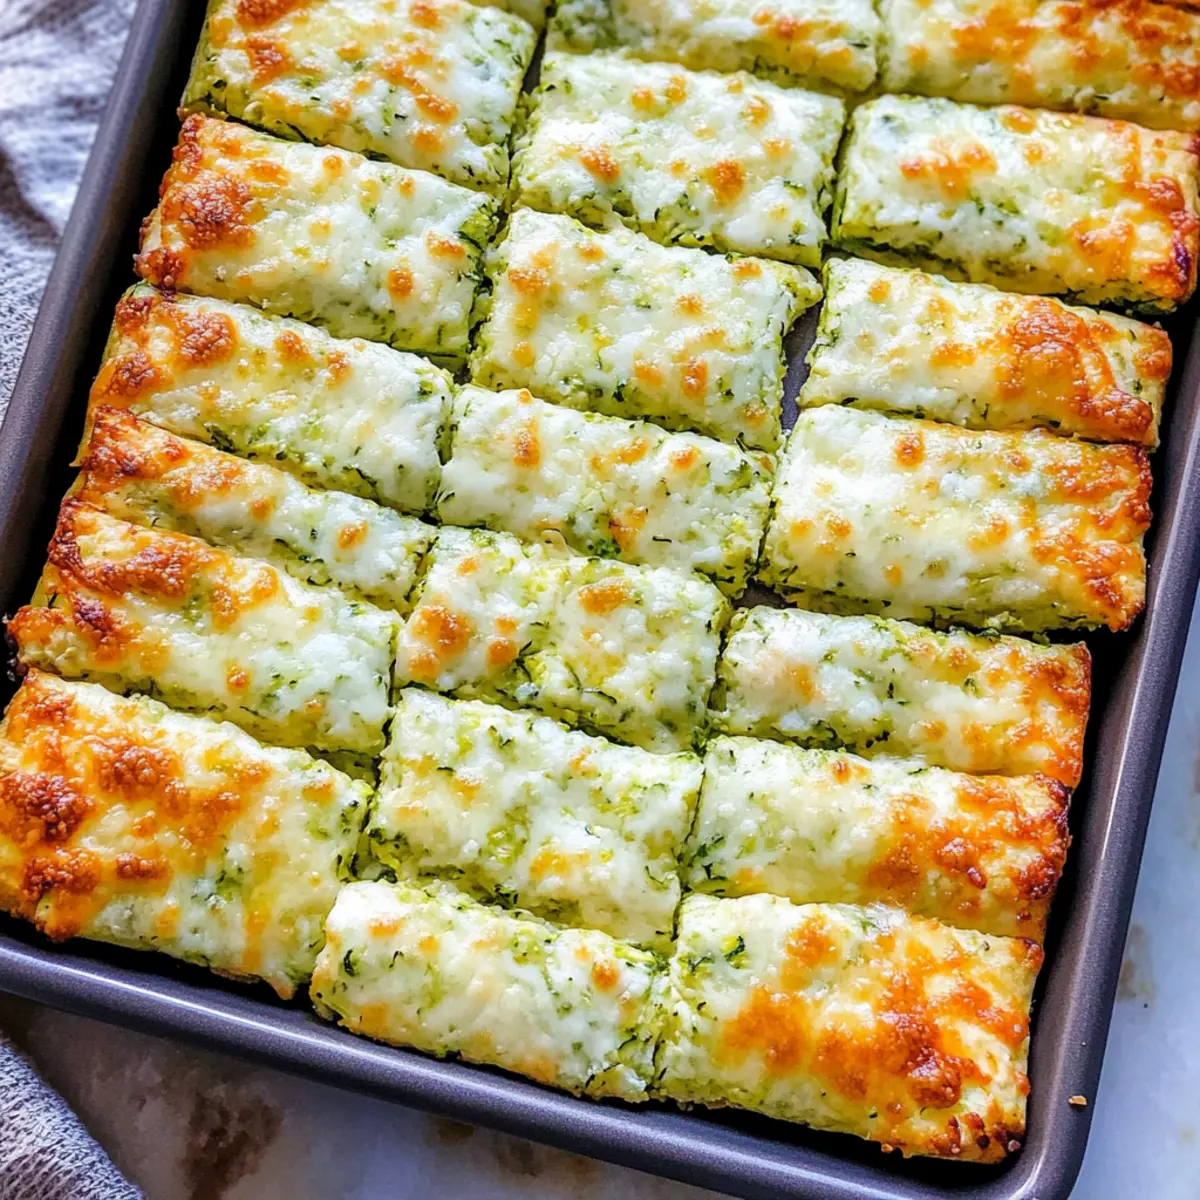
Step 7: Cut and Serve
Once the cheese is perfectly melted, take the baking sheet out of the oven and let the breadsticks cool for a couple of minutes. Use a pizza cutter or sharp knife to slice them into sticks. Serving them hot ensures you capture that wonderful cheesy pull and delightful crust that everyone will love!
Make Ahead Options
These Cheesy Zucchini Breadsticks are fantastic for meal prep enthusiasts looking to save time on busy weeknights! You can prepare the zucchini mixture (step 3) up to 24 hours in advance. Simply mix all the ingredients and store the mixture in an airtight container in the refrigerator. When you’re ready to bake, spread it on a lined baking sheet and follow steps 5 through 7 to finish cooking. If you prefer to enjoy them later, you can bake the breadsticks fully and store leftovers in the refrigerator for up to 3 days; simply reheat in the oven to restore their crispy texture. With these make-ahead options, you’ll enjoy delicious, guilt-free snacks with minimal effort!
What to Serve with Cheesy Zucchini Breadsticks?
The savory allure of these Cheesy Zucchini Breadsticks invites you to explore delightful pairings that enhance their cheesy greatness.
-
Marinara Sauce: A classic accompaniment, this tangy sauce pairs beautifully, creating a delightful contrast to the cheesy goodness.
-
Garlic Dipping Sauce: Creamy and rich, garlic dipping sauce elevates flavor with a garlicky punch, making each bite even more enticing.
-
Avocado Dip: Silky in texture, avocado dip adds a fresh, creamy element that complements the zucchini perfectly; a splash of lime brightens it further.
-
Caesar Salad: Crisp romaine, creamy dressing, and crunchy croutons provide a satisfying crunch and balance the breadsticks’ softness, enhancing your meal.
-
Roasted Veggies: A medley of roasted vegetables brings earthiness to the table while keeping the meal light and colorful, adding both taste and nutrition.
-
Sparkling Water with Lemon: Refreshing and zesty, this drink cleanses the palate, allowing each cheesy bite to shine without overpowering the flavors.
Feel free to mix and match these pairings to create your ideal spread for snacking or entertaining, ensuring a memorable dining experience.
Expert Tips for Cheesy Zucchini Breadsticks
-
Squeeze Well: Make sure to squeeze out as much moisture from the grated zucchini as possible; this prevents soggy Cheesy Zucchini Breadsticks.
-
Thick Layering: Spread the mixture to about half an inch thickness on the baking sheet for even crispness. Thicker layers may require longer baking times.
-
First Bake Importance: Always bake the crust first before adding cheese; this helps achieve that golden texture you crave.
-
Cheese Choices: Feel free to experiment with different cheeses for toppings; gouda or feta can add unique flavors to your Cheesy Zucchini Breadsticks.
-
Storage Savvy: Store leftovers in an airtight container in the refrigerator for up to 3 days; reheat in the oven or air fryer to retain crispness.
Cheesy Zucchini Breadsticks Variations
Feel free to explore these delightful twists that let you adapt these breadsticks to your taste and dietary needs!
-
Cheese Mix: Swap mozzarella for gouda or feta for an exciting flavor profile. The creamy texture of gouda or tangy feta can elevate your breadsticks to new heights.
-
Herb Infusion: Add Italian seasoning, fresh basil, or oregano to the mixture for a burst of aromatic goodness. These fragrant herbs will enhance the overall flavor and make your kitchen smell divine!
-
Spice It Up: Incorporate red pepper flakes for a lovely kick of heat. Just a pinch can transform these cheesy delights into a spicy bite that’s sure to please!
-
Veggie Swap: Replace zucchini with shredded carrots or cauliflower rice for a different base. This can be a fun way to experiment and even sneak in some extra veggies for the family.
-
Nut-Free Option: Use nutritional yeast instead of parmesan for a dairy-free, nut-free alternative. This will still give you that cheesy flavor without compromising on dietary preferences.
-
Savory Dips: Serve with a garlic aioli or marinara sauce for dipping. The right dip can take snacking to a whole new level, complementing the cheesy goodness with extra flavor.
-
Baking Methods: Try air-frying for a quicker, crispy finish. If you’re pressed for time, this method can help achieve that satisfying crunch without sacrificing taste.
Looking for more ways to use zucchini? I highly recommend my Lemon Zucchini Heaven recipe for a refreshing dessert twist. Happy cooking!
Storage Tips for Cheesy Zucchini Breadsticks
Fridge: Store leftover Cheesy Zucchini Breadsticks in an airtight container for up to 3 days; this helps maintain their flavor and texture.
Freezer: For longer storage, freeze the breadsticks by wrapping them tightly in plastic wrap and placing them in a freezer bag. They should last up to 3 months.
Reheating: To restore crispness, reheat in the oven or air fryer at 350°F (175°C) for about 10 minutes. Avoid the microwave, as it can make them soggy.
Preparation for Freezing: If you’re making a larger batch, consider freezing individual slices so you can enjoy a quick snack any time without the need to thaw the whole batch.
Cheesy Zucchini Breadsticks Recipe FAQs
How do I choose the right zucchini for this recipe?
Absolutely! When selecting zucchini, look for firm, shiny ones without dark spots or soft spots. Smaller zucchinis tend to have a sweeter flavor and higher moisture content, making them perfect for this recipe.
How should I store leftover Cheesy Zucchini Breadsticks?
You can keep leftover Cheesy Zucchini Breadsticks in an airtight container in the refrigerator for up to 3 days. This will help preserve their texture and flavor. Just remember to let them cool completely before sealing them up to avoid condensation.
Can I freeze Cheesy Zucchini Breadsticks?
Very! To freeze, wrap the cooled breadsticks tightly in plastic wrap and place them in a freezer-safe bag. They will keep for up to 3 months. When you’re ready to enjoy them, simply reheat in the oven at 350°F (175°C) for about 10 minutes to restore their crispiness.
What should I do if my breadsticks are soggy?
If your Cheesy Zucchini Breadsticks turn out soggy, it’s usually due to excess moisture from the zucchini. Make sure to squeeze as much water out of the grated zucchini as possible before mixing. If they still don’t crisp up, try baking them a bit longer while keeping an eye on them to avoid burning.
Are these breadsticks suitable for people with allergies or dietary restrictions?
Yes! This recipe can be adapted for various dietary needs. For a dairy-free option, use nutritional yeast instead of parmesan and a non-dairy cheese for melting. Additionally, you can substitute the egg with a chia egg (1 tablespoon chia seeds mixed with 3 tablespoons water, let sit for 15 minutes) to make it egg-free.
Can pets eat these Cheesy Zucchini Breadsticks?
While zucchini is safe for most pets, it’s best to avoid feeding them any breadsticks that contain cheese or seasoning, as these may upset their stomach or cause digestion issues. Always consult your veterinarian before introducing new foods to your pet’s diet.
Cheesy Zucchini Breadsticks: Guilt-Free Comfort Snack
Ingredients
Equipment
Method
- Preheat the Oven to 425°F (220°C) and line a baking sheet with parchment paper.
- Grate the zucchini, squeeze out moisture using a towel, and set aside.
- In a mixing bowl, combine zucchini, mozzarella, parmesan, egg, and garlic parsley salt. Mix well.
- Spread the mixture onto the baking sheet into a half-inch thick rectangle.
- Bake in the oven for 15 minutes until golden-brown.
- Remove from oven, add grated cheese on top, and bake for an additional 2-5 minutes.
- Let cool briefly, then slice into breadsticks and serve hot.